
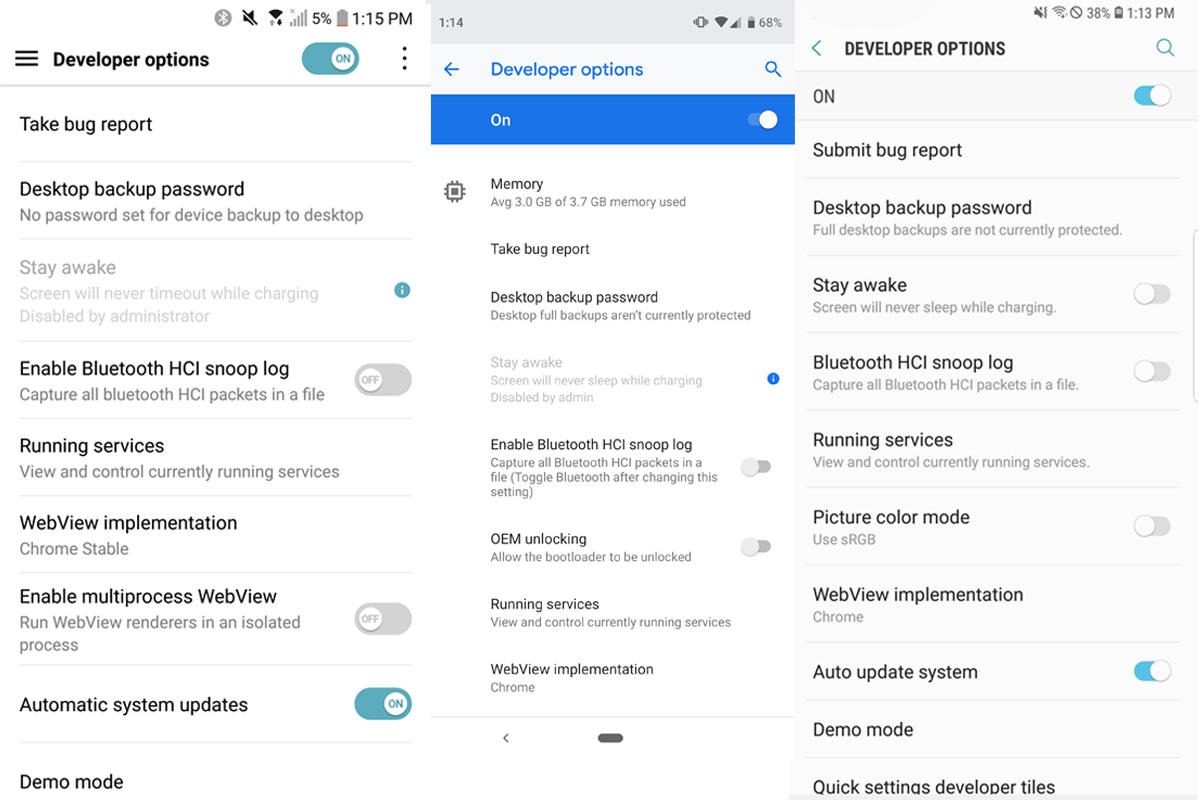
What is Developer Mode?
Developer Mode, also known as “USB Debugging”, is a hidden feature in the Android operating system that provides advanced tools and options for developers. By enabling Developer Mode, users gain access to various settings and features that are not available in the standard user interface.
Developer Mode is primarily designed to assist app developers in testing and debugging their applications. It allows them to connect their Android devices to a computer and use debugging tools, such as Android Studio, to analyze and troubleshoot their apps.
However, Developer Mode is not limited to developers. Enabling this mode can also provide additional flexibility and customization options for regular users who are tech-savvy. It allows them to tweak various settings, optimize performance, and even install custom ROMs or mods to enhance the overall Android experience.
It is worth noting that Developer Mode requires caution and knowledge of the settings to avoid making any unintended changes that may cause issues with the device. Therefore, it is recommended to enable Developer Mode only if you have a specific reason and understand the implications.
Now that we have a basic understanding of what Developer Mode is, let’s explore why you might want to enable this feature on your Android device.
Why Enable Developer Mode?
Enabling Developer Mode on your Android device can offer several benefits and advantages. While primarily aimed at app developers, there are reasons why regular users might want to enable this mode as well:
- Debugging and troubleshooting: Developer Mode allows you to connect your Android device to a computer and use debugging tools to diagnose and fix issues with apps. This is especially helpful if you encounter crashes, freezes, or other problems with specific applications.
- Enhanced customization: Developer Mode unlocks additional customization options beyond what is available in the standard user interface. You can adjust animation speeds, enable or disable USB debugging, customize the Quick Settings menu, and much more. This level of control can help you tailor your device to your personal preferences.
- Performance optimization: With Developer Mode, you can tweak various settings to optimize the performance of your Android device. For example, you can limit background processes, force GPU rendering, or enable hardware acceleration, potentially improving overall speed and responsiveness.
- Installing custom ROMs and mods: If you’re an advanced user and want to take your Android experience to the next level, Developer Mode enables you to install custom ROMs or mods. These modified versions of the Android operating system can offer additional features, improved performance, and even a completely different look and feel for your device.
- Testing apps and services: For app developers and testers, Developer Mode is essential for debugging and testing applications. By enabling this mode, you can simulate various scenarios, test app behavior on different devices, and ensure proper functionality before releasing your app to the public.
It’s important to note that enabling Developer Mode should be done with caution. Making changes to the settings without proper knowledge can result in undesired consequences or even damage your device. Therefore, it’s recommended to research specific options and consult reliable sources before making any adjustments.
Now that we understand the advantages of enabling Developer Mode on Android, let’s explore how to activate it on different devices.
Enabling Developer Mode on Stock Android
Enabling Developer Mode on stock Android devices is a straightforward process. Here’s how you can do it:
- Go to the “Settings” app on your Android device. You can usually find it in the app drawer or by swiping down from the top of the screen and tapping the gear icon.
- Scroll down and locate the “About phone” or “About device” option. This may vary slightly depending on the manufacturer and Android version.
- Look for the “Build number” or “Build version” entry in the “About phone” section. It is usually towards the bottom of the page.
- Tap on the “Build number” several times, typically seven times in quick succession. You will see a message confirming that you are now a developer.
- Go back to the main settings menu, and you should now see a new option called “Developer options” or “Developer settings.”
- Tap on “Developer options” and toggle the switch at the top of the page to enable it.
- Open the “Settings” app on your Samsung device. You can find it in the app drawer or by swiping down from the top of the screen and tapping the gear icon.
- Scroll down and select the “About phone” or “About device” option.
- Look for the “Software information” or “Software” option and tap on it.
- Locate the “Build number” entry and tap on it seven times quickly. You will see a pop-up message indicating that you are now a developer.
- Go back to the main settings menu, and you will find the newly enabled “Developer options” or “Developer settings” option.
- Tap on “Developer options” and toggle the switch at the top of the page to enable it.
- Open the “Settings” app on your LG device. You can usually find it in the app drawer or by swiping down from the top of the screen and tapping the gear icon.
- Scroll down and select the “About phone” or “About device” option.
- Look for the “Software information” or “Software info” option and tap on it.
- Locate the “Build number” entry and tap on it seven times quickly. A message will appear, indicating that you are now a developer.
- Go back to the main settings menu, and you should now see a new option called “Developer options” or “Developer settings.”
- Tap on “Developer options” and toggle the switch at the top of the page to enable it.
- Open the “Settings” app on your Huawei device. You can usually find it in the app drawer or by swiping down from the top of the screen and tapping the gear icon.
- Scroll down and select the “About phone” or “About device” option.
- Look for “Build number” or “Build version” and tap on it seven times quickly. You will see a message confirming that you are now a developer.
- Go back to the main settings menu and you should now see a new option called “Developer options” or “Developer settings”.
- Tap on “Developer options” and toggle the switch at the top of the page to enable it.
- Open the “Settings” app on your Xiaomi device. You can usually find it in the app drawer or by swiping down from the top of the screen and tapping the gear icon.
- Scroll down and select the “About phone” or “About device” option.
- Look for the “MIUI version” or “MIUI version number” entry in the “About phone” section.
- Tap on the “MIUI version” entry seven times quickly. You will see a message indicating that you are now a developer.
- Go back to the main settings menu, and you should now see a new option called “Additional settings” or “Additional settings > Developer options”.
- Tap on “Additional settings” and locate the “Developer options” or “Developer settings” option.
- Tap on “Developer options” and toggle the switch at the top of the page to enable it.
- Open the “Settings” app on your OnePlus device. You can find it in the app drawer or by swiping down from the top of the screen and tapping the gear icon.
- Scroll down and select the “About phone” or “About device” option.
- Look for the “Build number” or “Build version” entry in the “About phone” section.
- Tap on the “Build number” entry seven times quickly. A message will appear, indicating that you are now a developer.
- Go back to the main settings menu, and you will find the newly enabled “Developer options” or “Developer settings” option.
- Tap on “Developer options” and toggle the switch at the top of the page to enable it.
- Open the “Settings” app on your Sony device. You can usually find it in the app drawer or by swiping down from the top of the screen and tapping the gear icon.
- Scroll down and select the “About phone” or “About device” option.
- Locate the “Build number” or “Build version” entry in the “About phone” section.
- Tap on the “Build number” entry seven times quickly. You will see a message congratulating you for becoming a developer.
- Go back to the main settings menu, and you will find the newly enabled “Developer options” or “Developer settings” option.
- Tap on “Developer options” and toggle the switch at the top of the page to enable it.
- Open the “Settings” app on your HTC device. You can usually find it in the app drawer or by swiping down from the top of the screen and tapping the gear icon.
- Scroll down and select the “About” or “About phone” option.
- Look for the “Software information” or “Software” option and tap on it.
- Locate the “Build number” entry and tap on it seven times quickly. A message will appear, indicating that you have become a developer.
- Go back to the main settings menu, and you will find the newly enabled “Developer options” or “Developer settings” option.
- Tap on “Developer options” and toggle the switch at the top of the page to enable it.
- Open the “Settings” app on your Google Pixel device. You can usually find it in the app drawer or by swiping down from the top of the screen and tapping the gear icon.
- Scroll down and select the “About phone” or “About” option.
- Locate the “Build number” or “Build version” entry in the “About phone” section.
- Tap on the “Build number” entry seven times quickly. A message will appear, indicating that you are now a developer.
- Go back to the main settings menu, and you will find the newly enabled “Developer options” or “Developer settings” option.
- Tap on “Developer options” and toggle the switch at the top of the page to enable it.
- Open the “Settings” app on your Motorola device. You can usually find it in the app drawer or by swiping down from the top of the screen and tapping the gear icon.
- Scroll down and select the “About phone” or “About device” option.
- Look for the “Build number” or “Build version” entry in the “About phone” section.
- Tap on the “Build number” entry seven times quickly. You will see a message confirming that you are now a developer.
- Go back to the main settings menu, and you will find the newly enabled “Developer options” or “Developer settings” option.
- Tap on “Developer options” and toggle the switch at the top of the page to enable it.
- USB Debugging: This option allows you to connect your device to a computer and use debugging tools to analyze and troubleshoot apps. It is essential for developers and advanced users who want to test and debug their applications.
- Developer options toggle: By enabling this toggle, you can easily turn on or off all the settings within the Developer options menu, making it convenient to switch between regular mode and developer mode.
- Animator duration scale: This option allows you to adjust the speed of animations on your device. Reducing animation duration can make your device feel snappier, while increasing it can provide a smoother visual experience.
- Force GPU rendering: By enabling this option, you can force apps to use the device’s GPU (Graphics Processing Unit) for rendering graphics, which can potentially improve the performance of some applications.
- Show touches: Enabling this option displays visual indicators on the screen whenever you touch it, making it useful for demonstrations, tutorials, or screen recordings.
- Stay awake: By keeping the screen awake while charging, this feature ensures that the device does not go into sleep mode when connected to a power source. This is useful when debugging or performing tasks that require the screen to be constantly on.
- OEM unlocking: This option allows you to unlock the bootloader of your device, which is necessary for installing custom ROMs or making system-level changes. However, be cautious as unlocking the bootloader may void your device’s warranty and could potentially lead to security risks.
- Mock locations: Enabling mock locations allows you to simulate GPS location data for testing purposes or using location-based apps that require you to spoof your location.
- Make informed changes: Before modifying any settings in Developer Mode, make sure you understand what each option does. Changing settings without knowledge may lead to undesirable consequences, including device performance issues or stability problems.
- Backup your data: It’s always wise to back up your important data before making any significant changes in Developer Mode. This ensures that you have a copy of your data in case anything goes wrong or you need to revert to a previous state.
- Stick to reliable sources: When seeking information or instructions related to Developer Mode, rely on trusted sources such as device manuals, official documentation, or reputable online forums. This helps ensure the accuracy and reliability of the information you receive.
- Enable only necessary options: While it may be tempting to explore and enable all Developer Mode options, it’s best to enable only the settings you truly understand and require. Enabling unnecessary options can create confusion and potentially disrupt your device’s normal operation.
- Consider security risks: Enabling certain options in Developer Mode, such as USB debugging or OEM unlocking, may introduce security risks to your device. Be aware of the potential risks and only enable these features when necessary, keeping in mind the potential implications.
- Monitor app behavior: If you have developer options like “Don’t keep activities” or “Show CPU usage” enabled, keep an eye on how these options affect app behavior. Some settings may force apps to behave in unexpected ways, so be prepared to troubleshoot and adjust as needed.
- Stay up to date: As new versions of Android are released, the options and features within Developer Mode may change. Stay informed about updates and changes so that you can adapt your settings and take advantage of new features or improvements.
That’s it! You have successfully enabled Developer Mode on your stock Android device. You can now access the various advanced settings and customization options available in Developer Mode.
Keep in mind that some manufacturers may slightly modify the settings menu on their devices. If you cannot find the “Build number” or “Developer options” option, consult your device’s user manual or look for specific instructions for your device model online.
In the next sections, we will explore how to enable Developer Mode on popular Android devices from manufacturers like Samsung, LG, Huawei, Xiaomi, and more.
Enabling Developer Mode on Samsung Devices
Enabling Developer Mode on Samsung devices follows a similar process to stock Android devices, with a few slight differences. Here’s how you can do it:
That’s it! You have successfully enabled Developer Mode on your Samsung device. Now you can access the advanced settings and features provided by Developer Mode.
It’s important to note that the “Developer options” menu offers various settings that may impact the performance and functionality of your device. Be cautious while making changes and only modify settings that you understand and require.
In the next sections, we will explore how to enable Developer Mode on popular Android devices from other manufacturers like LG, Huawei, Xiaomi, and more.
Enabling Developer Mode on LG Devices
Enabling Developer Mode on LG devices is slightly different from other Android devices. Here’s how you can do it:
Congratulations! You have successfully enabled Developer Mode on your LG device. Now you can access the advanced settings and features provided by Developer Mode.
Remember that the “Developer options” menu offers various settings that may impact the performance and functionality of your device. Be cautious while making changes and only modify settings that you understand and require.
In the following sections, we will explore how to enable Developer Mode on popular Android devices from manufacturers like Huawei, Xiaomi, OnePlus, Sony, and more.
Enabling Developer Mode on Huawei Devices
Enabling Developer Mode on Huawei devices is slightly different from other Android devices. Here’s how you can do it:
Congratulations! You have successfully enabled Developer Mode on your Huawei device. Now you can access the advanced settings and features provided by Developer Mode.
Keep in mind that the “Developer options” menu offers various settings that may impact the performance and functionality of your device. Be cautious while making changes and only modify settings that you understand and require.
In the following sections, we will explore how to enable Developer Mode on popular Android devices from manufacturers like Xiaomi, OnePlus, Sony, HTC, and Google Pixel.
Enabling Developer Mode on Xiaomi Devices
Enabling Developer Mode on Xiaomi devices, like devices from other Android manufacturers, is a simple process. Follow these steps to enable it:
You have successfully enabled Developer Mode on your Xiaomi device. By doing so, you can now access the advanced settings and features provided by Developer Mode.
It’s important to note that the “Developer options” menu contains various settings that may affect the performance and functionality of your device. Exercise caution when making changes and only modify settings that you understand and require.
Next, let’s explore how to enable Developer Mode on devices from OnePlus, Sony, HTC, Google Pixel, and Motorola.
Enabling Developer Mode on OnePlus Devices
Enabling Developer Mode on OnePlus devices is a similar process to other Android devices. Here’s how to do it:
Congratulations! You have successfully enabled Developer Mode on your OnePlus device. Now you can access the advanced settings and features provided by Developer Mode.
Keep in mind that the “Developer options” menu offers various settings that may impact the performance and functionality of your device. Exercise caution while making changes and only modify settings that you understand and require.
In the next sections, we will explore how to enable Developer Mode on popular Android devices from manufacturers like Sony, HTC, Google Pixel, and Motorola.
Enabling Developer Mode on Sony Devices
Enabling Developer Mode on Sony devices, similar to other Android devices, involves a simple process. Follow these steps to enable it:
Congratulations! You have successfully enabled Developer Mode on your Sony device. Now you can access the advanced settings and features provided by Developer Mode.
Remember that the “Developer options” menu offers various settings that may impact the performance and functionality of your device. Be cautious while making changes and only modify settings that you understand and require.
In the next sections, we will explore how to enable Developer Mode on popular Android devices from manufacturers like HTC, Google Pixel, and Motorola.
Enabling Developer Mode on HTC Devices
Enabling Developer Mode on HTC devices follows a similar process to other Android devices. Here’s how to do it:
Congratulations! You have successfully enabled Developer Mode on your HTC device. Now you can access the advanced settings and features provided by Developer Mode.
Keep in mind that the “Developer options” menu contains various settings that may impact the performance and functionality of your device. Exercise caution when making changes and only modify settings that you understand and require.
In the next sections, we will explore how to enable Developer Mode on popular Android devices from manufacturers like Google Pixel and Motorola.
Enabling Developer Mode on Google Pixel Devices
Enabling Developer Mode on Google Pixel devices follows a similar process to other Android devices. Here’s how to do it:
Congratulations! You have successfully enabled Developer Mode on your Google Pixel device. Now you can access the advanced settings and features provided by Developer Mode.
Remember that the “Developer options” menu offers various settings that may impact the performance and functionality of your device. Be cautious while making changes and only modify settings that you understand and require.
In the next section, we will explore how to enable Developer Mode on popular Android devices from the manufacturer Motorola.
Enabling Developer Mode on Motorola Devices
Enabling Developer Mode on Motorola devices is a straightforward process. Here’s how you can do it:
That’s it! You have successfully enabled Developer Mode on your Motorola device. Now you can access the advanced settings and features provided by Developer Mode.
Remember to use caution when modifying any settings in the “Developer options” menu. Some settings can potentially affect the performance and functionality of your device if not configured correctly. It’s recommended to only adjust settings that you understand and require.
In the previous sections, we explored how to enable Developer Mode on popular Android devices from manufacturers like Samsung, LG, Huawei, Xiaomi, OnePlus, Sony, HTC, Google Pixel, and Motorola. Now let’s dive into some common options and features you’ll find in Developer Mode.
Common Developer Mode Options and Features
Once you have enabled Developer Mode on your Android device, you gain access to a range of advanced options and features. While the specific options may vary depending on the device and Android version, there are several common options you can expect to find:
These are just a few examples of the common options and features you may find in Developer Mode. It is important to explore the available settings to understand what each option does and how it can be leveraged to meet your specific needs.
Lastly, it’s worth mentioning that enabling Developer Mode is not recommended for general users who have no knowledge or need for its advanced features. Making incorrect modifications in Developer Mode can lead to unintended consequences or even cause instability on your Android device.
Now that you are familiar with the common Developer Mode options and features, let’s discuss some precautions and considerations to keep in mind while using Developer Mode on your Android device.
Precautions and Considerations
While Developer Mode can provide access to powerful tools and customization options, it’s important to exercise caution and consider the following precautions:
By following these precautions and considerations, you can maximize the benefits of Developer Mode while minimizing the risks associated with making changes to your Android device.
Now that you are familiar with the precautions and considerations, you are ready to unlock the full potential of your Android device by utilizing the advanced settings and features available in Developer Mode.