
Check if you need to dispose of the hard drive
Before diving into the process of disposing of your desktop computer’s hard drive, it’s important to assess whether or not you actually need to dispose of it in the first place. Hard drives typically store sensitive information, so it’s essential to take the necessary steps to protect your personal data and ensure it doesn’t fall into the wrong hands.
Ask yourself the following questions to determine if disposing of the hard drive is necessary:
- Is the hard drive no longer functional or beyond repair?
- Are you planning to replace the computer and no longer need the hard drive?
- Is the hard drive too small or outdated for your current needs?
If you answered “yes” to any of these questions, it’s likely a good idea to dispose of the hard drive. However, if the hard drive is still functional and contains important data that you wish to keep, it may be worth exploring other options, such as upgrading the computer or backing up the data and transferring it to a new device.
Remember, it’s always better to err on the side of caution when it comes to data security. Even if the hard drive seems to be of no use to you, it’s important to properly dispose of it to prevent any potential data breaches.
Once you’ve determined that you need to dispose of the hard drive, follow the steps outlined in the subsequent sections to ensure that your data is securely wiped and that the hard drive is disposed of in an environmentally friendly manner.
Back up your data
Before proceeding with any action that involves disposing of your desktop computer’s hard drive, it is crucial to back up your data. This step ensures that you have a secure copy of all your important files and documents before wiping or removing the hard drive.
There are several methods you can use to back up your data:
- External Hard Drive: Connect an external hard drive to your computer and manually copy and paste your important files and folders onto the external drive. This method is simple and cost-effective.
- Cloud Storage: Utilize cloud storage services like Google Drive, Dropbox, or Microsoft OneDrive. These platforms allow you to store and access your files securely from any device with an internet connection.
- Network Attached Storage (NAS): If you have multiple devices on the same network, you can set up a NAS device to create a centralized storage location for your files. This method provides convenience and accessibility.
- Online Backup Services: Explore online backup services like Carbonite, Backblaze, or IDrive. These services automatically and continuously back up your data to secure servers, providing an extra layer of protection against data loss.
It’s important to choose a backup method that suits your needs and preferences. Consider the size of your data, the level of security you require, and your budget when selecting a backup solution.
Remember to verify the integrity of your backups by testing the restoration process. This ensures that you can retrieve your files successfully in case of any unforeseen mishaps.
Once you have verified that your data is safely backed up, you can proceed confidently with the next steps, knowing that your important files are protected.
Wipe the hard drive
When disposing of a desktop computer’s hard drive, it is crucial to properly wipe the drive to ensure that your personal data is securely erased. Simply deleting files or formatting the drive is not sufficient, as the data can still be recovered using specialized software.
There are a few methods you can use to effectively wipe your hard drive:
- Data Wiping Software: Utilize specialized data wiping software that overwrites the entire hard drive with random data multiple times. This ensures that the original data is completely irretrievable. Examples of popular data wiping software include DBAN (Darik’s Boot and Nuke), CCleaner, and Eraser.
- Built-in Operating System Tools: Many operating systems, such as Windows and macOS, provide built-in tools for securely wiping hard drives. These tools typically offer options to overwrite the entire drive with random data or perform a secure erase. Consult the documentation or online resources specific to your operating system to find and use these tools.
- Physical Destruction: For an extra layer of security, physically destroying the hard drive is an option. This can be done by dismantling the drive and destroying the platters using heavy-duty tools like a hammer or drilling holes through them. This method ensures that the data is practically impossible to recover.
Ensure that you carefully follow the instructions provided by the chosen data wiping method to effectively erase your hard drive. It is important to note that the process of wiping a hard drive can take a significant amount of time, depending on the size of the drive and the method used.
After successfully wiping the hard drive, you can proceed with confidence, knowing that your personal data has been securely erased. However, remember to double-check and verify the wiping process to ensure that no remnants of sensitive information remain on the drive.
Once you have completed the data wiping process, you can move on to the next steps in the disposal process, ensuring that your old hard drive is prepared for proper disposal or reuse.
Use disk encryption software
In addition to wiping your hard drive, using disk encryption software is an additional layer of security that can protect your data from unauthorized access, even if the hard drive is lost or stolen. Disk encryption ensures that the information on your hard drive is encrypted and can only be accessed with a unique decryption key.
Here are a few popular disk encryption software options:
- BitLocker (Windows): BitLocker is a built-in encryption tool available in certain versions of Windows. It encrypts the entire hard drive, including the operating system and all files and folders. BitLocker requires a password or a USB key for decryption.
- FileVault (macOS): FileVault is a built-in disk encryption feature available in macOS. Similar to BitLocker, FileVault encrypts the entire hard drive and requires a password or recovery key for decryption. It provides strong protection for your data on Apple devices.
- VeraCrypt: VeraCrypt is a free and open-source disk encryption software that works on Windows, macOS, and Linux. It allows you to create encrypted containers or encrypt entire partitions or hard drives. VeraCrypt supports various encryption algorithms and offers additional features like hidden volumes.
When using disk encryption software, it is important to choose a strong and unique password or passphrase that is difficult to guess. Remember to store your decryption key or password in a secure location separate from your computer to prevent unauthorized access.
By encrypting your hard drive, you add an extra layer of protection, ensuring that even if someone gains physical access to your hard drive, they won’t be able to access the encrypted data without the decryption key.
It is important to note that data encryption does not substitute the need to wipe the hard drive before disposal. While encryption protects your data while the drive is still in use, wiping the drive ensures that the data is completely erased in a manner that makes it unrecoverable.
Once your hard drive is encrypted, and you have taken the necessary precautions to protect your decryption key or password, you can move forward with confidence knowing that your data is securely protected.
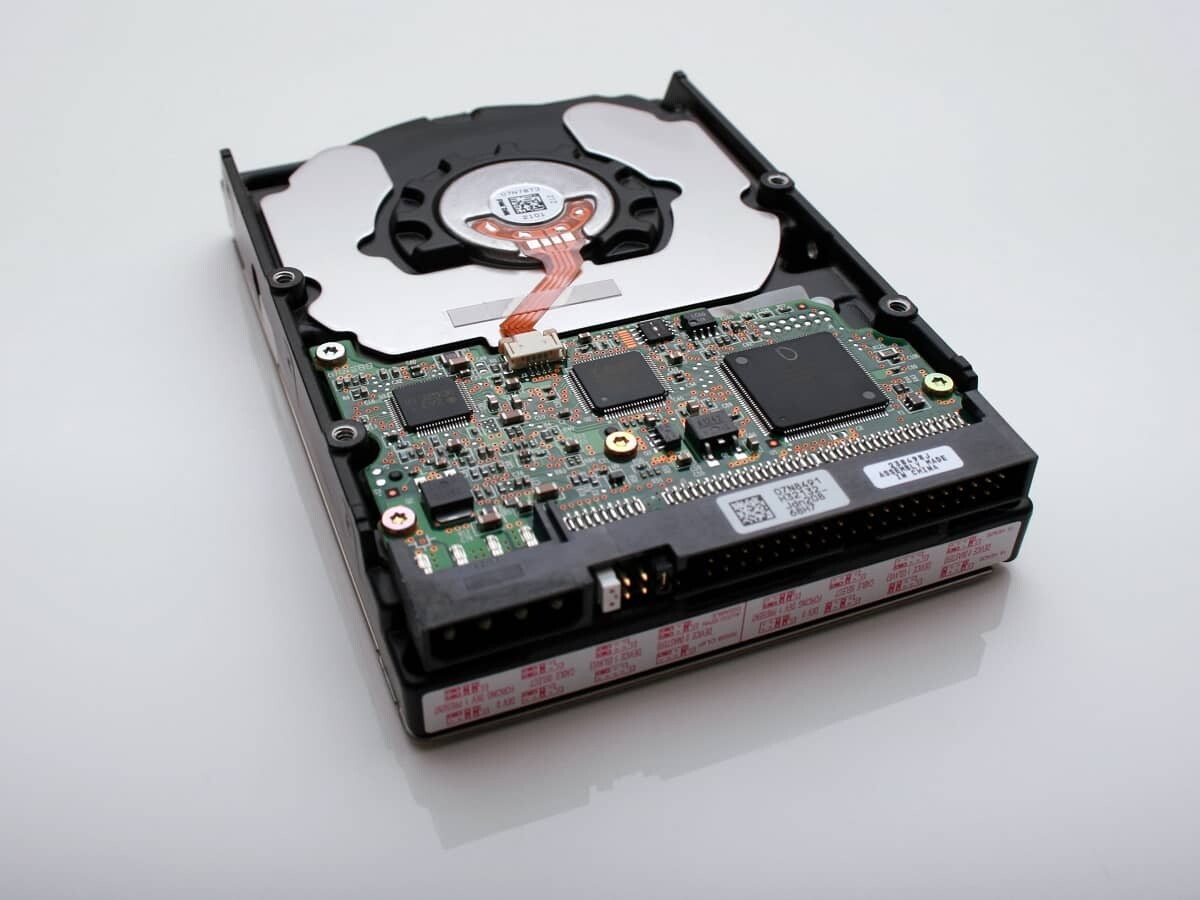
Remove the hard drive from the computer
Before disposing of your desktop computer or repurposing it without the hard drive, you will need to physically remove the hard drive from the computer’s casing. Removing the hard drive ensures that your data is completely removed from the device, and it also allows you to either repurpose or dispose of the remaining computer components separately.
To remove the hard drive, follow these general steps:
- Power down the computer: Shut down the computer and unplug it from the power source. This ensures that you can safely work on the device without any electrical hazards.
- Open the computer case: Depending on the computer model, you may need to remove screws or release latches to open the case. Refer to your computer’s user manual or search online for specific instructions on how to open the case.
- Locate the hard drive: Once the case is open, locate the hard drive. It is typically a rectangular metal or plastic box connected to the motherboard with cables.
- Disconnect the cables: Carefully disconnect the cables connected to the hard drive. The cables may include the SATA or IDE cables for data transfer and the power cable. Take note of how the cables were connected so you can reconnect them correctly in the future if needed.
- Remove the hard drive: After the cables are disconnected, gently remove the hard drive from its slot or mounting bracket. Be cautious not to apply excessive force or damage any other components in the process.
Once you have successfully removed the hard drive from the computer, consider storing it in a safe and secure location if you plan to reuse it in the future. Keep in mind that if the hard drive is no longer functional or outdated, it may be best to dispose of it properly.
Remember to handle the hard drive with care, avoiding any physical shocks or impacts that could potentially damage the disk or any sensitive components. Properly removing the hard drive ensures that your data is under your control and eliminates the risk of data compromise.
With the hard drive safely removed, you can proceed to the next steps in the disposal or reuse process, knowing that your data is no longer accessible on the computer.
Keep the hard drive for future use
Instead of immediately disposing of your desktop computer’s hard drive, you may consider keeping it for future use. There are several reasons why you might want to hold onto the hard drive:
- Data Recovery: If you have files or data on the hard drive that you were unable to back up or retrieve before disposing of the computer, keeping the hard drive allows you to explore data recovery options in the future. Professional data recovery services may be able to retrieve lost or inaccessible data from the drive.
- Backup or External Storage: In certain cases, your old hard drive can be repurposed as a backup or external storage device. Connect the hard drive to a compatible enclosure or docking station, and you can use it to store additional files, photos, or documents. This can be especially useful if you need extra storage space or want a physical backup of your data.
- Testing or Experimentation: Keeping the hard drive can provide you with a spare drive for testing purposes or experimentation. You can use it to install and experiment with different operating systems or software without impacting your primary drive. Additionally, if you enjoy tinkering with hardware or building computers, having spare components like hard drives can be convenient.
If you decide to keep the hard drive, it is important to store it properly to ensure it remains protected and in good condition. Store it in an anti-static bag, away from moisture, dust, and extreme temperatures. Label the bag with the drive’s specifications or any relevant information, so you can easily identify it in the future.
Remember that even if you choose to keep the hard drive, it is still advisable to wipe it or erase any sensitive data if you have not done so already. By wiping the drive using specialized software or securely deleting any personal information, you can ensure that your data remains private and cannot be accessed by unauthorized individuals.
Whether you keep the hard drive for future use, repurpose it, or eventually dispose of it, be sure to handle it carefully and responsibly to minimize any potential data breaches or environmental impacts.
Donate the hard drive to a nonprofit organization
If your desktop computer’s hard drive is still in good working condition and you no longer have a need for it, consider donating it to a nonprofit organization. Nonprofits often have limited resources and can benefit from receiving technology donations to support their operations.
Here are a few reasons why donating your hard drive to a nonprofit organization is a great option:
- Extended Lifespan: By donating your hard drive, you give it a chance for a second life, extending its usability and reducing electronic waste. This promotes sustainability and helps reduce the environmental impact of discarded electronics.
- Support to Nonprofits: Nonprofit organizations often operate on limited budgets and may not have the resources to purchase new equipment. Your donation can provide them with the necessary technology to continue their important work.
- Enhanced Digital Access: Your donated hard drive can contribute to bridging the digital divide by providing access to technology for underserved communities and individuals who may not have the means to purchase new devices.
Before donating your hard drive, ensure that you have properly wiped or erased all personal data. This step is crucial to protect your privacy and ensure that no sensitive information is accessible to others. Use reliable data wiping techniques or software to securely erase all files and folders from the drive.
Contact local nonprofit organizations or educational institutions to inquire if they accept technology donations, including hard drives. Explain the specifications and condition of the hard drive to determine if it aligns with their needs.
When donating the hard drive, it’s a good idea to provide any necessary documentation, such as the drive’s specifications or any relevant warranty information, to maximize its usefulness to the organization. You may also consider including any necessary adapter cables or connectors to facilitate the organization’s use of the hard drive.
Donating your hard drive gives it a new purpose, while supporting nonprofit organizations in their mission to make a positive impact. Your contribution can go a long way in advancing their work and providing access to technology for those in need.
Recycle the hard drive at an electronics recycling facility
If your desktop computer’s hard drive is old, damaged, or no longer functional, it is important to dispose of it responsibly to minimize the environmental impact. Recycling the hard drive at an electronics recycling facility is the most environmentally friendly option for proper disposal.
Here’s why recycling your hard drive at an electronics recycling facility is the right choice:
- Environmental Protection: Electronics contain hazardous materials such as lead, cadmium, mercury, and other toxic substances. Recycling ensures that these components are safely disposed of or recovered for reuse, preventing them from ending up in landfills and potentially contaminating the environment.
- Resource Conservation: Electronics recycling facilities have processes in place to extract valuable materials like copper, aluminum, and precious metals from electronic devices. Recycling your hard drive allows these materials to be recovered and reused in the manufacturing of new products, reducing the need for extracting and refining virgin resources.
- Compliance with Regulations: In many regions, including the European Union and certain states in the U.S., there are legal requirements for the proper disposal of electronic waste. By recycling your hard drive at an authorized facility, you ensure compliance with applicable regulations and help support a sustainable waste management system.
Check your local area or community for electronics recycling programs or facilities. Many municipalities provide dedicated drop-off locations or scheduled collection events for electronic waste. Research and choose reputable and certified recycling facilities that adhere to proper environmental standards and processes, ensuring responsible disposal and recycling of electronic devices.
Before recycling the hard drive, take the necessary steps to protect your personal data by wiping or erasing all files and folders using reliable data wiping techniques or software. Though recycling facilities typically have policies and procedures in place to protect sensitive information, taking this extra step adds an additional layer of security.
When preparing your hard drive for recycling, remember to remove any adapters or cables that may be attached and return the drive to its original state. Follow any instructions provided by the recycling facility regarding packaging or drop-off procedures.
By choosing to recycle your hard drive, you are actively contributing to the conservation of resources, reduction of electronic waste, and protection of the environment. Take the responsible approach and recycle your hard drive at an authorized electronics recycling facility.
Dispose of the hard drive in a landfill as a last resort
As a last resort, if your desktop computer’s hard drive is completely non-functional or damaged beyond repair, disposing of it in a landfill may be the only option. However, it is important to note that landfill disposal should be considered the least preferred method due to potential environmental and security concerns.
Here are a few things to consider if you have to dispose of your hard drive in a landfill:
- Environmental Impact: Electronics contain hazardous materials that can leach into the soil and water if not properly managed. The toxic components of hard drives, including metals and chemicals, can pose a risk to the environment and human health if they enter landfill systems.
- Data Security: Disposing of the hard drive in a landfill poses a potential risk of data breaches. Even though the drive may be non-functional, it is still possible for skilled individuals to extract sensitive information if proper disposal measures are not taken.
- Local Regulations: Before disposing of the hard drive in a landfill, it is important to check local regulations and ensure that it is permitted. Some regions or municipalities may have specific guidelines or restrictions regarding electronic waste disposal.
Before resorting to landfill disposal, explore other alternatives such as recycling or donating the hard drive. Recycling at an authorized electronics recycling facility remains the most environmentally responsible option that ensures proper management of the materials.
If landfill disposal is the only option, take precautionary measures to protect your personal data by securely wiping the hard drive or physically damaging it to prevent data recovery. It is highly recommended to follow best practices for secure data destruction, such as degaussing or shredding the hard drive, to ensure that any sensitive information is irrecoverably destroyed.
Contact your local waste management or sanitation department to understand the proper procedures for disposing of electronic waste in landfills. They may have specific guidelines or requirements in place to ensure a safe and appropriate disposal process.
Disposed in a landfill should only be considered as a last resort when no other viable options are available. It is essential to prioritize environmentally responsible and secure methods of disposal to minimize the impact on the environment and protect personal data.