
Why is system storage taking up so much space?
The system storage on your iPhone is the portion of your device’s storage that is used to store essential system files, cached data, temporary files, and other system-related data. Over time, this storage space can accumulate and take up a significant amount of your device’s capacity, causing your iPhone to prompt you with low storage warnings. Understanding the reasons why system storage takes up so much space can help you effectively manage and optimize your device’s storage.
One major reason for the growth of system storage is the accumulation of cached and temporary files. As you use various apps and browse the web, temporary files and caches are created to improve the performance of your device. However, these files can accumulate over time and occupy a significant amount of storage space.
Another factor contributing to the increase in system storage is the presence of fragmented files. When files get fragmented on your iPhone, they take up more space than necessary. This is particularly true for larger files, such as videos and high-resolution images.
Furthermore, system updates and app installations can also contribute to the growth of system storage. When you update your iOS or install new apps, system files and data associated with these updates and installations may be stored in the system storage, taking up additional space.
Additionally, if you frequently use media-heavy apps like video editors or games that require a lot of temporary storage, it can further increase the amount of system storage being used.
Understanding these factors behind the increase in system storage can help you take the necessary steps to manage and optimize your iPhone’s storage, ensuring that you have enough space for your essential files and apps.
Steps to check system storage on iPhone
Checking the system storage on your iPhone is essential to get a clear picture of how much space is being occupied by system files and data. By following these steps, you can easily access the system storage information on your device:
- Open the “Settings” app on your iPhone’s home screen.
- Scroll down and tap on “General.”
- Select “iPhone Storage” or “Storage & iCloud Usage.”
- Wait for a few moments while your iPhone calculates the storage usage.
- Under the “Storage” section, you will see a breakdown of the various categories, including System, Apps, Photos, and more.
- Tap on “System” to view the storage occupied by system files and data.
- You will see the total size of the system storage and how much space is available.
By following these steps, you can easily check the system storage on your iPhone and determine how much space it is occupying.
It is important to note that the system storage may not be directly adjustable or deletable like other files on your device. However, understanding how much space it occupies can help you identify areas where you can potentially free up storage by managing other categories like apps, photos, and documents.
If you find that the system storage is taking up a significant amount of space on your iPhone, don’t worry. In the next sections, we will explore various methods to clear up some of this space and optimize the storage on your device.
Clear cache and cookies
Clearing cache and cookies can help free up space in the system storage of your iPhone, as these files often accumulate over time and occupy valuable storage space. Here’s how you can clear cache and cookies on your device:
- Open the “Settings” app on your iPhone’s home screen.
- Scroll down and tap on “Safari” or the browser you use.
- Scroll down and select “Clear History and Website Data.”
- Confirm your decision by tapping on “Clear History and Data.”
This process will clear the cache and cookies from your browser, helping to free up storage space on your device. Keep in mind that clearing cookies will also log you out of websites, so make sure you have any necessary login information handy.
If you use multiple browsers on your iPhone, repeat this process for each browser to clear the cache and cookies associated with them.
In addition to clearing browser cache and cookies, you can also clear app cache for individual apps. To do this:
- Open the “Settings” app on your iPhone’s home screen.
- Scroll down and tap on the app for which you want to clear the cache.
- Tap on “Offload App” or “Delete App.” This will remove the app and its associated data.
- Reinstall the app from the App Store to get a fresh version without the cached data.
Clearing the cache and cookies from your browser and individual apps can help reclaim valuable storage space on your iPhone’s system storage. It is recommended to periodically clear these files to maintain optimal device performance and storage capacity.
Delete unnecessary apps and files
Deleting unnecessary apps and files is one of the most effective ways to free up valuable space in the system storage of your iPhone. Here are the steps to delete unnecessary apps and files:
- Go to the home screen of your iPhone and locate the app you want to delete.
- Tap and hold the app icon until it starts to wiggle.
- Tap the “X” icon that appears on the top-left corner of the app icon.
- Confirm the deletion by selecting “Delete” in the pop-up window.
- Repeat this process for any other apps you want to remove.
Deleting apps that you no longer use can significantly reduce the amount of space used in the system storage. It is important to note that deleting an app will also delete its associated data, so make sure to back up any important information before removing an app. You can always reinstall the app from the App Store if needed.
In addition to apps, you can also delete unnecessary files, such as old photos, videos, and documents:
- Open the “Photos” app on your iPhone.
- Select the album or category that contains the files you want to delete.
- Tap on “Select” to choose specific items, or tap on “Select All” to delete all files in that category.
- Tap the trash bin icon to delete the selected files.
- Confirm the deletion by selecting “Delete [number] Items” in the pop-up window.
Similarly, you can delete unnecessary documents or files from other apps by accessing the respective app and following similar steps.
By regularly deleting unnecessary apps and files, you can effectively free up space in the system storage of your iPhone, ensuring that it remains optimized and running smoothly.
Clear browsing history and website data
Clearing your browsing history and website data can help reduce the amount of storage occupied by the system on your iPhone. By following these steps, you can easily clear your browsing history and website data:
- Open the “Settings” app on your iPhone’s home screen.
- Scroll down and tap on “Safari” or the browser you use.
- Scroll down and select “Clear History and Website Data.”
- Confirm your decision by tapping on “Clear History and Data.”
This process will remove your browsing history, cookies, and other website data that are stored on your device. By clearing this data, you can free up storage space in the system and improve the performance of your iPhone’s browser.
It’s important to note that clearing your browsing history and website data will log you out of websites and remove any personalized settings associated with them. However, your bookmarks and saved passwords will not be affected.
If you use multiple browsers on your iPhone, repeat this process for each browser you want to clear the browsing history and website data for.
Regularly clearing your browsing history and website data is an effective way to manage the storage space occupied by the system on your iPhone, ensuring that it remains optimized and responsive.
Offload unused apps
If you have a lot of apps installed on your iPhone that you rarely use, offloading them can help free up space in the system storage without losing any of your app data. Offloading an app removes the app itself from your device while preserving its data and settings. You can easily offload unused apps using the following steps:
- Open the “Settings” app on your iPhone’s home screen.
- Scroll down and tap on “General.”
- Select “iPhone Storage” or “Storage & iCloud Usage.”
- Under the “Storage” section, you will see a list of apps sorted by the amount of storage they occupy.
- Tap on an app that you want to offload.
- Tap on “Offload App” to remove the app from your device while keeping its data and settings.
- If you decide to reinstall the app, its data and settings will be automatically restored.
By offloading unused apps, you can free up significant amounts of space in the system storage while still having the option to retrieve the app and its data when needed. It is especially useful for apps that take up a substantial amount of storage but are rarely used.
You can also enable the “Offload Unused Apps” option on your iPhone, which allows your device to automatically offload apps that you rarely use when storage space is low. To enable this feature:
- Go to “Settings” on your iPhone.
- Tap on “iTunes & App Store.”
- Toggle on the “Offload Unused Apps” option.
Enabling this option will help manage your storage automatically by offloading unused apps as needed, without you having to manually offload them.
Keep in mind that offloading an app will remove its icon from the home screen, but its data and settings will be preserved. To reinstall an offloaded app, simply search for it in the App Store and tap on the download icon.
By offloading unused apps, you can optimize the storage on your iPhone’s system and ensure that you have enough space for the apps and files that you use regularly.
Use iCloud or other cloud storage services
One efficient way to manage system storage on your iPhone is by utilizing cloud storage services like iCloud, Google Drive, Dropbox, or OneDrive. These services allow you to store your files, documents, photos, and videos in the cloud, freeing up space on your device’s system storage. Here’s how you can use iCloud or other cloud storage services:
- Open the “Settings” app on your iPhone’s home screen.
- Tap on your name at the top of the screen, then select “iCloud” or “Apple ID.”
- Enable the desired options to back up different types of data to iCloud, such as photos, contacts, and app data.
- To manually upload files to iCloud Drive, go to the “Files” app on your iPhone, select the file you want to upload, and choose the option to save it to iCloud Drive.
- Alternatively, you can install the corresponding cloud storage app (Google Drive, Dropbox, OneDrive) and follow the instructions to back up and sync your files and data.
By utilizing cloud storage services, you can store your files securely in the cloud and access them on-demand from any device with an internet connection. This helps reduce the storage burden on your iPhone’s system storage, as you can choose to keep only essential files locally.
When using cloud storage services, it’s important to regularly review your files and delete any unnecessary or duplicated items to ensure that you are utilizing the available storage efficiently. Additionally, it’s advisable to keep a backup of your data on an external hard drive or another storage medium for added security.
By leveraging the power of cloud storage services, you can effectively manage the amount of storage used in your iPhone’s system storage, allowing for a more optimized and efficient device performance.
Delete old messages and attachments
Deleting old messages and attachments can help free up space in the system storage of your iPhone. Over time, your device accumulates a vast amount of text messages, multimedia attachments, and media files shared through messaging apps. Here’s how you can delete old messages and attachments:
- Open the “Messages” app on your iPhone’s home screen.
- Select the conversation or thread that contains the messages and attachments you want to delete.
- Swipe left on each individual message or attachment you want to remove and tap on “Delete.”
- To delete an entire conversation, swipe left on the thread in the Messages app and select “Delete.”
By deleting old messages and attachments, you can significantly reduce the storage space occupied by your iPhone’s system storage. It is worth noting that deleting messages and attachments permanently removes them from your device, so make sure to save any important information before deleting them.
In addition to the Messages app, you may have other messaging or social media apps that accumulate a large number of messages and attachments. It’s a good practice to review and delete unnecessary conversations and media from those apps as well.
It’s worth mentioning that iOS offers an option called “Optimize Storage,” which automatically removes older messages and attachments from your device while keeping them available in the cloud. To enable this feature:
- Go to “Settings” on your iPhone.
- Tap on “Messages.”
- Under the “Message History” section, enable “Keep Messages” and select the “30 Days” or “1 Year” option.
Enabling this option will help manage your message storage automatically, keeping your device clutter-free and optimized without losing your important conversations or attachments.
By regularly deleting old messages and attachments, you can reclaim valuable space in your iPhone’s system storage and ensure that your device operates efficiently.
Reset all settings
If you have tried various methods to free up space in the system storage of your iPhone but still find it crowded, resetting all settings can help. Resetting all settings will revert your device to its default settings without erasing personal data like contacts, photos, and apps. Here’s how you can reset all settings:
- Open the “Settings” app on your iPhone’s home screen.
- Scroll down and tap on “General.”
- Scroll down again and select “Reset.”
- Tap on “Reset All Settings.”
- Enter your passcode if prompted.
- Confirm the reset by selecting “Reset All Settings” again.
Your iPhone will restart and apply the default settings. Keep in mind that this process will not remove your personal data but will reset your preferences and settings like Wi-Fi passwords, notifications, display settings, and more.
Resetting all settings can be beneficial if you’ve made numerous changes to your device’s settings and want to start fresh. It can help resolve software-related issues, including freeing up some space in the system storage.
However, be cautious as it may log you out of accounts and disconnect Bluetooth devices. It’s advisable to note your customized settings before performing the reset so that you can easily reconfigure them afterward.
If resetting all settings doesn’t provide the desired outcome or sufficient space in the system storage, consider using other methods shared in this article or contacting Apple Support for further assistance.
Remember to regularly back up your iPhone before attempting any major changes to ensure the safety of your data.
Update to the latest iOS version
Updating your iPhone to the latest iOS version is crucial for optimizing system storage and overall device performance. New iOS updates often include bug fixes, security enhancements, and performance improvements that can help optimize your iPhone’s storage usage. Here’s how you can update your iOS:
- Connect your iPhone to a stable Wi-Fi network.
- Go to the “Settings” app on your iPhone’s home screen.
- Scroll down and tap on “General.”
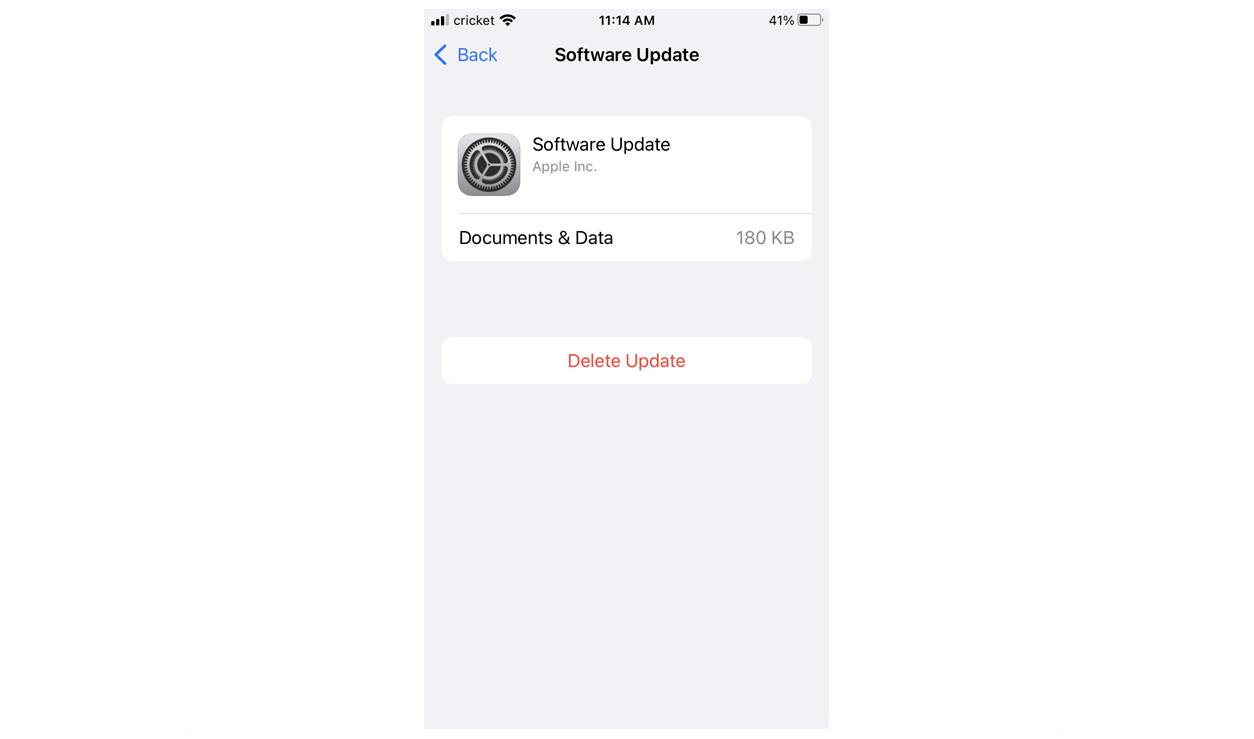
- Select “Software Update.”
- If an update is available, tap on “Download and Install.”
- Enter your passcode if prompted.
- Agree to the terms and conditions.
- Wait for the update to download and tap on “Install.”
- Follow the on-screen instructions to complete the installation.
Updating your iPhone to the latest iOS version not only provides you with the latest features but also includes performance optimizations that can help improve the management of system storage.
With each iOS update, Apple focuses on enhancing efficiency and reducing the space occupied by the system. These improvements can result in more streamlined storage usage, potentially freeing up some space in the system storage of your iPhone.
It’s important to note that major iOS updates may require a considerable amount of free space to successfully install. If you receive a storage-related error message during the update process, you may need to temporarily delete some apps, files, or media to make room for the update.
Regularly updating your iPhone to the latest iOS version ensures that you benefit from the latest performance enhancements and storage optimizations, contributing to a smoother and more efficient user experience.
Backup and restore your iPhone
Creating regular backups of your iPhone is essential for safeguarding your data and ensuring a smooth process when optimizing system storage. By backing up your iPhone, you can seamlessly restore your device and its data after performing actions like clearing storage or resetting settings. Here are the steps to backup and restore your iPhone:
Step 1: Backup your iPhone
- Connect your iPhone to a Wi-Fi network.
- Open the “Settings” app on your iPhone’s home screen.
- Tap on your name at the top of the screen, then select “iCloud” or “Apple ID” if using an older iOS version.
- Tap on “iCloud” and ensure that “iCloud Backup” is toggled on.
- Tap on “Back Up Now” to initiate an immediate backup or wait for the automatic backup to occur when your iPhone is connected to Wi-Fi, charging, and locked.
By regularly backing up your iPhone, you can ensure that your data, including photos, contacts, app data, and settings, are safely stored in the cloud.
Step 2: Restore your iPhone
- Make sure you have a recent backup available, either on iCloud or your computer using iTunes.
- Open the “Settings” app on your iPhone’s home screen.
- Tap on your name at the top of the screen, then select “iCloud” or “Apple ID” if using an older iOS version.
- Tap on “iCloud” and ensure that “iCloud Backup” is toggled on.
- Tap on “Back Up Now” to initiate an immediate backup or wait for the automatic backup to occur when your iPhone is connected to Wi-Fi, charging, and locked.
By regularly backing up your iPhone, you can ensure that your data, including photos, contacts, app data, and settings, are safely stored in the cloud.
Restoring your iPhone is useful when you want to start fresh or when you need to retrieve your data after clearing storage, resetting settings, or even getting a new iPhone. Here are the steps to restore your iPhone:
- Ensure that you have a recent backup available, either on iCloud or your computer using iTunes.
- Open the “Settings” app on your iPhone’s home screen.
- Tap on “General.”
- Select “Reset.”
- Choose “Erase All Content and Settings.”
- Enter your passcode and confirm the reset.
- Set up your iPhone as a new device or choose the option to restore from an iCloud or iTunes backup.
- Follow the on-screen instructions to complete the restoration process.
Restoring your iPhone from a backup allows you to retrieve your data and bring back your apps, settings, and personalized preferences.
Regularly backing up and restoring your iPhone gives you peace of mind, knowing that your data is safe and easily recoverable. It also helps facilitate the process of optimizing system storage without the risk of losing important files or configurations.