
Customizing the MacBook Touch Bar: A Beginner’s Guide
The MacBook Touch Bar is a versatile feature that provides quick access to various functions and controls, allowing users to customize it according to their preferences. Whether you’re a new MacBook user or someone looking to optimize your workflow, this beginner’s guide will walk you through the process of customizing the MacBook Touch Bar.
First, you need to enable the Touch Bar. By default, it should be active, but if it’s not, go to the System Preferences, select Keyboard, and under the Keyboard tab, ensure that “Touch Bar shows” is set to either “App Controls” or “Expanded Control Strip.”
Once the Touch Bar is enabled, let’s understand the controls. The Touch Bar adapts dynamically based on the app you’re using. It displays relevant buttons, sliders, and controls for different tasks. Familiarize yourself with these controls as they will be the building blocks for your customization.
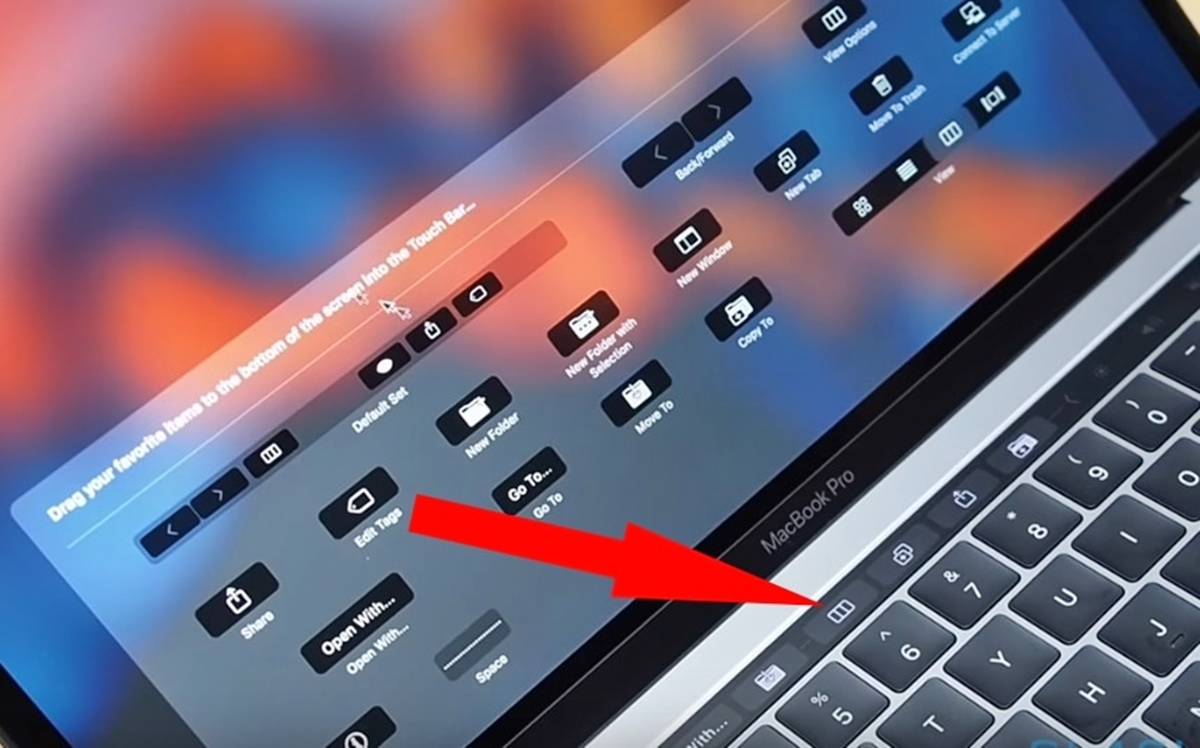
To add or remove buttons on the Touch Bar, click on the “View” menu in the application’s menu bar, then select “Customize Touch Bar.” You can drag and drop buttons from the bottom of your screen onto the Touch Bar, and vice versa.
Adjusting the brightness and volume controls is essential for a seamless experience. Tap the “Brightness” or “Volume” button on the Touch Bar to adjust the settings quickly. Slide your finger left or right to decrease or increase the levels respectively.
Now, let’s dive into app-specific controls. Some apps allow you to customize the Touch Bar further, offering additional options and shortcuts. Explore the app’s settings or preferences to discover these customization options.
If you want to rearrange the buttons on the Touch Bar, simply drag and drop them into your preferred order. This way, you can prioritize the functions that matter to you the most.
In addition to adding buttons, you can also remove default buttons that you rarely use. Customizing the Touch Bar with only the buttons you need can vastly improve your productivity.
Personalizing the Control Strip is another way to make the Touch Bar your own. Go to the Keyboard preferences, select “Customize Control Strip,” and drag and drop icons onto or off the Touch Bar as desired. This gives you quick access to your favorite controls.
Utilizing shortcuts and quick actions on the Touch Bar can save you time and effort. You can assign commonly used functions or custom actions to buttons for instant access. This streamlines your workflow and enhances efficiency.
If you prefer to have Siri available on the Touch Bar, go to System Preferences, select Keyboard, and enable the “Show Siri in Touch Bar” option. This allows you to communicate with Siri directly from the Touch Bar.
The Touch ID functionality on the right side of the Touch Bar also offers customization options. You can adjust settings related to unlocking your Mac, making purchases, and authorizing app installations to suit your preferences.
If you want to take customization to the next level, you can create and customize your own control strips. This allows you to design specific layouts tailored to your workflow or needs.
It’s worth noting that you can also import and export customizations, allowing you to share your personalized Touch Bar settings with others or transfer them to a new Mac.
If you ever want to reset the Touch Bar to its default settings, you can do so by going back to the Keyboard preferences and selecting “Restore Defaults” in the “Customize Touch Bar” menu.
Should you encounter any issues or inconsistencies with Touch Bar customization, try restarting your MacBook or updating to the latest macOS version. If the problem persists, you may want to reach out to Apple Support for further assistance.
In this beginner’s guide, we have explored the various aspects of customizing the MacBook Touch Bar. By personalizing it to suit your needs, you can streamline your workflow, increase productivity, and make the most out of this innovative feature.
Enable the Touch Bar
The MacBook Touch Bar is a powerful tool that provides quick access to various functions and controls. However, before you can start customizing it to your liking, you need to ensure that the Touch Bar is enabled on your MacBook.
By default, the Touch Bar should be active, but in case it isn’t, here’s how you can enable it:
- Click on the Apple menu in the top-left corner of your screen and select “System Preferences.”
- In the System Preferences window, click on the “Keyboard” icon.
- In the Keyboard preferences, select the “Keyboard” tab.
- Ensure that the checkbox next to “Touch Bar shows” is ticked.
- Choose between “App Controls” or “Expanded Control Strip” to determine what the Touch Bar displays.
Once you have enabled the Touch Bar, it will adapt dynamically based on the app you’re using, providing you with context-specific buttons, sliders, and controls.
It’s important to note that some older MacBook models do not have a Touch Bar. If you own one of these models, unfortunately, you won’t be able to enable or customize the Touch Bar.
The Touch Bar is an innovative feature that can greatly enhance your MacBook experience. By enabling it, you’ll have access to a variety of functions and shortcuts, making it easier and faster to perform tasks on your MacBook.
Now that we have enabled the Touch Bar, let’s move on to understanding its different controls and how you can customize them to suit your needs.
Understand the Touch Bar Controls
The Touch Bar on your MacBook is a dynamic interface that adapts to the app you’re using, providing you with relevant controls and functions. Understanding the different Touch Bar controls is vital in maximizing its potential and customizing it effectively.
When you open an app that supports the Touch Bar, you’ll notice that the controls displayed on the Touch Bar change to reflect the current task or operation. Here are some common controls you’ll find on the Touch Bar:
- Buttons: The Touch Bar often consists of various buttons that allow you to execute commands or perform actions. These buttons can include shortcuts, menu options, or controls specific to the app you’re using.
- Sliders: Sliders on the Touch Bar enable you to adjust values or settings. For example, you can use sliders to control volume, brightness, or even brush size in creative applications.
- Function Keys: The Touch Bar can also include function keys, which are traditionally found on the top row of a keyboard. Function keys provide quick access to system-level controls such as volume adjustment, display brightness, and media playback.
- Contextual Controls: One of the highlights of the Touch Bar is its ability to display context-sensitive controls. When working in specific applications, the Touch Bar will show controls that are relevant to the task at hand. For example, if you’re editing a photo, the Touch Bar may display options for cropping, rotating, or applying filters.
- Quick Actions: Some apps offer quick actions on the Touch Bar, which allow you to perform common tasks with a single tap. These actions can include sending a message, creating a new document, or sharing content.
By familiarizing yourself with these different types of Touch Bar controls, you’ll be able to navigate through the Touch Bar interface seamlessly. Understanding how each control works and what it represents will help you make more informed decisions when customizing the Touch Bar to your preferences.
It’s important to note that although the Touch Bar provides a convenient way to interact with your apps, it does not replace the traditional keyboard and trackpad. It is designed to complement your existing input methods and enhance your productivity.
Now that you have a solid understanding of the Touch Bar controls, let’s move on to the next step: adding and removing buttons to customize the Touch Bar according to your needs.
How to Add and Remove Buttons
One of the key features of customizing the MacBook Touch Bar is the ability to add and remove buttons according to your preferences. This allows you to create a personalized Touch Bar that includes the functions and controls you need most. Here’s how you can add and remove buttons on the Touch Bar:
- Open the app for which you want to customize the Touch Bar.
- Click on the “View” menu in the application’s menu bar.
- From the dropdown menu, select “Customize Touch Bar.”
- A new window will appear on your screen, displaying a representation of the Touch Bar.
- To add a button, simply drag and drop it from the bottom of your screen onto the Touch Bar in the desired location.
- To remove a button, click and hold the button on the Touch Bar, then drag it down to the bottom of your screen until it disappears.
As you customize the Touch Bar, remember that the buttons you see in the “Customize Touch Bar” window are just a representation. The actual buttons on the Touch Bar will update in real-time as you add or remove them.
When adding buttons, take into consideration your specific needs and workflow. Think about the functions you use frequently and place their respective buttons on the Touch Bar for quick access.
Similarly, when removing buttons, consider the ones that you rarely use or that are easily accessed through other means. Removing unnecessary buttons can streamline the Touch Bar and declutter the interface.
Keep in mind that the ability to add or remove buttons may vary depending on the app you’re using. Some apps may offer more extensive customization options, allowing you to add and remove specific controls that are relevant to their functionality.
Experiment with different button configurations until you find a setup that works best for you. Remember that customization is all about creating a personalized Touch Bar that enhances your productivity and workflow.
Now that you know how to add and remove buttons from the Touch Bar, let’s move on to adjusting the brightness and volume controls, which are essential aspects of the Touch Bar experience.
Adjusting the Brightness and Volume Controls
One of the convenient features of the MacBook Touch Bar is the ability to quickly adjust the brightness and volume settings. The Touch Bar provides intuitive controls that allow you to fine-tune these settings with ease. Here’s how you can adjust the brightness and volume controls on your MacBook Touch Bar:
To adjust the brightness:
- Locate the “Brightness” button on the Touch Bar. It is usually represented by a sun icon.
- Tap on the “Brightness” button.
- Drag your finger left or right on the Touch Bar to decrease or increase the brightness level respectively.
The Touch Bar will display a visual representation of the current brightness level, allowing you to make precise adjustments based on your preferences.
To adjust the volume:
- Look for the “Volume” button on the Touch Bar. It is typically represented by a speaker or sound wave icon.
- Tap on the “Volume” button.
- Similar to adjusting brightness, drag your finger left or right on the Touch Bar to decrease or increase the volume level respectively.
As you adjust the volume on the Touch Bar, you’ll also see a visual indicator of the current volume level, ensuring that you have control over the audio output on your MacBook.
These brightness and volume controls on the Touch Bar provide a convenient way to manage these settings without having to navigate through menus or use keyboard shortcuts. It offers a visually appealing and interactive interface for adjusting these vital aspects of your MacBook experience.
Keep in mind that the brightness and volume controls on the Touch Bar are context-sensitive. This means that they adapt to the active application or content. For example, while watching a video, the Touch Bar may display additional controls such as playback speed or audio balance.
By utilizing the brightness and volume controls, you can easily customize your MacBook’s display and audio experience to suit your preferences in any given situation. Now that you know how to adjust these controls, let’s explore how you can customize app-specific controls on the Touch Bar.
Customize the App-Specific Controls
One of the powerful aspects of customizing the MacBook Touch Bar is the ability to tailor the app-specific controls to your liking. Different applications may offer unique functionality and features that can be accessed through the Touch Bar. Here’s how you can customize the app-specific controls on your MacBook Touch Bar:
- Open the application for which you want to customize the Touch Bar.
- Go to the application’s menu bar and click on the “View” menu.
- From the dropdown menu, select “Customize Touch Bar.”
- A window will appear, displaying a representation of the Touch Bar.
- Drag and drop the desired controls or buttons from the bottom of your screen onto the Touch Bar in the desired location.
- If there are any default buttons or controls that you don’t need, simply click and drag them down to the bottom of the screen to remove them.
By customizing the app-specific controls, you can prioritize the functions or actions that you frequently use within a specific application. This can significantly enhance your productivity and streamline your workflow.
Take some time to explore the available controls and buttons provided by the application. Look for options that can be accessed through the Touch Bar and consider adding them for quick and efficient access.
For example, in a photo editing application, you may find controls for cropping, rotating, or applying filters on the Touch Bar. By customizing this section, you can place the most frequently used photo editing tools at your fingertips.
It’s worth noting that the customization options for app-specific controls may vary depending on the application. Some applications may provide extensive customization, allowing you to add or remove specific features, while others may offer more limited options.
Experiment with different configurations to find the setup that works best for your workflow and preferences. Remember that the goal is to create a personalized Touch Bar that enhances your user experience and makes using the application more efficient.
Now that you know how to customize app-specific controls on the Touch Bar, let’s move on to rearranging the buttons to match your workflow.
Rearrange the Buttons on the Touch Bar
Customizing the MacBook Touch Bar goes beyond adding or removing buttons—it also allows you to rearrange them to suit your preferences and workflow. Rearranging the buttons on the Touch Bar enables you to place the most important controls within easy reach. Here’s how you can rearrange the buttons on your MacBook Touch Bar:
- Open the application for which you want to rearrange the Touch Bar buttons.
- Click on the “View” menu in the application’s menu bar.
- From the dropdown menu, select “Customize Touch Bar.”
- The “Customize Touch Bar” window will appear, showing a representation of the Touch Bar.
- Click and drag the buttons on the Touch Bar to move them to your desired location.
- As you move a button, other buttons will automatically adjust to make space for the rearranged button.
Rearranging the buttons on the Touch Bar allows you to prioritize the functions that matter to you the most. By placing frequently used controls in a prominent position, you can access them with ease and streamline your workflow.
Consider your workflow and the actions or commands you use most frequently in the specific application. Rearrange the buttons on the Touch Bar to align with the logical order or your preferred layout.
It’s important to note that the ability to rearrange buttons may vary depending on the application. Some applications may offer more flexibility, allowing you to freely organize the buttons, while others may have a more structured layout.
Experiment with different button configurations to find the arrangement that optimizes your productivity. Once you’re satisfied, exit the “Customize Touch Bar” window to save your changes and start using the newly arranged Touch Bar.
Remember that the Touch Bar is a dynamic interface that adapts to the app you’re using, so rearranging the buttons in one application won’t affect the layout in another. This allows you to have tailored controls for each specific application.
Now that you know how to rearrange the buttons on the Touch Bar, let’s explore how you can add and remove default buttons to further customize its functionality.
Adding and Removing Default Buttons
The default set of buttons on the MacBook Touch Bar provides a range of commonly used controls for quick access. However, these default buttons may not always align with your specific preferences or workflow. The good news is that you can easily add or remove default buttons to customize the Touch Bar according to your needs. Here’s how:
- Open the application for which you want to customize the Touch Bar.
- Click on the “View” menu in the application’s menu bar.
- From the dropdown menu, select “Customize Touch Bar.”
- The “Customize Touch Bar” window will appear, displaying a representation of the Touch Bar.
- To add a default button, simply drag and drop it from the bottom of the screen onto the Touch Bar in your preferred location.
- To remove a default button, click and hold the button on the Touch Bar, then drag it down to the bottom of the screen until it disappears.
Adding default buttons allows you to include commonly used controls on the Touch Bar for quick and easy access. These buttons can be system-level controls, such as volume adjustment or screen brightness, or application-specific controls that are relevant to the active app.
On the other hand, removing default buttons that you don’t frequently use helps declutter the Touch Bar and provide more space for the controls that truly matter to you. Removing unnecessary buttons can simplify the interface and make it easier to navigate.
It’s important to note that not all default buttons can be removed from the Touch Bar, especially those that are deemed essential system controls. However, you can still rearrange them or customize their appearance based on your preferences.
Customizing the default buttons on the Touch Bar allows you to tailor its functionality to suit your specific needs and workflow. By adding the most useful controls and removing the ones you rarely use, you can create a personalized Touch Bar that enhances your productivity and efficiency.
Now that you know how to add and remove default buttons, let’s dive into personalizing the Control Strip, which provides additional flexibility to your customized Touch Bar experience.
Personalizing the Control Strip
The Control Strip is a section of the MacBook Touch Bar that provides quick access to system-level controls, such as brightness, volume, and Siri. Personalizing the Control Strip allows you to customize this part of the Touch Bar to include controls that are most relevant to your needs. Here’s how you can personalize the Control Strip:
- Go to the Apple menu in the top-left corner of your screen and select “System Preferences.”
- In the System Preferences window, click on the “Keyboard” icon.
- Navigate to the “Keyboard” tab.
- Click on the “Customize Control Strip” button.
- A window will appear, displaying a representation of the Control Strip.
- Drag and drop icons onto the Control Strip to add them.
- To remove an icon, click and hold it, then drag it down until it disappears.
Customizing the Control Strip allows you to include controls that you frequently use and remove those that you don’t. By personalizing this section of the Touch Bar, you can optimize your workflow and have quick access to the functions that matter most to you.
For example, you can add icons for specific system settings, such as Wi-Fi, Bluetooth, or Night Shift. You can also include app-specific controls or shortcuts that you use regularly. Tailoring the Control Strip to match your preferences enhances your overall experience with the MacBook Touch Bar.
Experiment with different configurations to find the setup that best suits your needs. As you personalize the Control Strip, consider the controls that will streamline your workflow and allow you to access important functions with ease.
It’s important to note that the Control Strip is separate from the app-specific controls on the Touch Bar. Customizing one section does not affect the other, giving you the flexibility to have different sets of controls for system-wide settings and individual applications.
Remember, personalizing the Control Strip is all about tailoring it to your specific needs and preferences. By customizing the Control Strip, you can create a Touch Bar experience that enhances your productivity and puts the most relevant controls at your fingertips.
Now that you know how to personalize the Control Strip, let’s explore how you can utilize shortcuts and quick actions on the Touch Bar.
Utilizing Shortcuts and Quick Actions
The MacBook Touch Bar offers more than just static buttons—it provides a platform for shortcuts and quick actions that can significantly enhance your productivity. By utilizing these shortcuts and quick actions, you can perform tasks more efficiently and streamline your workflow. Here’s how you can make the most out of shortcuts and quick actions on the Touch Bar:
Shortcuts:
- Open the application for which you want to utilize shortcuts.
- Take note of the available keyboard shortcuts for common actions within that application.
- Customize the Touch Bar for that application and assign the corresponding shortcuts to specific buttons.
- With the shortcut buttons on the Touch Bar, you can quickly trigger actions without having to remember or perform complex key combinations.
Quick Actions:
- Open an application that supports quick actions on the Touch Bar.
- Look for buttons on the Touch Bar that represent quick actions or common tasks within that application.
- Tap on the respective buttons to perform the associated actions instantly.
- Quick actions can include creating a new document, sending a message, or sharing content without the need for navigating through menus or performing multiple steps.
By taking advantage of shortcuts and quick actions, you can save time and effort in performing repetitive tasks or accessing commonly used functions. The Touch Bar provides a streamlined and intuitive interface for executing these actions with a simple tap or press.
Customizing the Touch Bar to include relevant shortcuts and quick actions for each application you use frequently can significantly boost your productivity. It allows you to access essential functions or perform specific tasks in a fraction of the time it would take using traditional methods.
Remember that the availability of shortcuts and quick actions may vary depending on the application. Some applications provide extensive customization options, allowing you to assign shortcuts or configure quick actions, while others may have predefined shortcuts and actions that cannot be modified.
Experiment with the available shortcuts and quick actions on your frequently used applications to discover how they can simplify your workflow. By leveraging these features, you can harness the full potential of the Touch Bar and optimize your productivity on your MacBook.
Now that you know how to utilize shortcuts and quick actions on the Touch Bar, let’s explore how you can assign Siri to the Touch Bar for quick and easy access to voice commands.
How to Assign Siri to the Touch Bar
Assigning Siri to the Touch Bar allows you to have quick and easy access to voice commands and assistance. By incorporating Siri into the Touch Bar, you can perform tasks, ask questions, and control your MacBook using natural language. Here’s how you can assign Siri to the Touch Bar:
- Click on the Apple menu in the top-left corner of your screen and select “System Preferences.”
- In the System Preferences window, click on the “Keyboard” icon.
- Under the “Keyboard” tab, check the box next to “Show Siri in Touch Bar.”
Enabling Siri on the Touch Bar ensures that you can access Siri’s functionality directly from the Touch Bar. You no longer need to use the traditional method of summoning Siri by pressing the physical keys or using a keyboard shortcut.
Once you have assigned Siri to the Touch Bar, tap on the Siri button whenever you need to interact with Siri. The Siri interface will appear on the Touch Bar, allowing you to make inquiries or give commands using your voice.
Siri can assist you with a wide range of tasks, such as searching the web, opening applications, checking the weather, sending messages, setting reminders, and much more. Accessing Siri through the Touch Bar provides a seamless and hands-free way to interact with your MacBook.
It’s worth noting that Siri’s availability and capabilities may vary depending on your location and the language settings on your MacBook. Make sure to set up Siri according to your preferred language and region for the best experience.
By assigning Siri to the Touch Bar, you can harness the power of voice commands and make your MacBook experience more intuitive and efficient. Whether you need to quickly find information, perform tasks, or control your device, Siri on the Touch Bar is just a tap away.
Now that you know how to assign Siri to the Touch Bar, let’s explore how you can customize the Touch ID functionality to suit your needs.
Customize the Touch ID Functionality
The Touch ID sensor on your MacBook provides a quick and secure way to unlock your device, make purchases, and authorize app installations. Customizing the Touch ID functionality allows you to tailor its behavior and settings to suit your preferences. Here’s how you can customize the Touch ID functionality on your MacBook:
- Click on the Apple menu in the top-left corner of your screen and select “System Preferences.”
- In the System Preferences window, click on the “Touch ID” icon.
- Authenticate yourself using your fingerprint when prompted.
- Once you’re in the Touch ID preferences, you’ll see various options to customize the Touch ID functionality.
- To enable Touch ID for unlocking your MacBook, make sure the checkbox next to “Unlocking your Mac” is selected.
- If you’d like to use Touch ID for Apple Pay, ensure the checkbox next to “Apple Pay” is selected, and follow the setup instructions if needed.
- For authorizing App Store and iTunes purchases, check the box next to “App Store & iTunes.”
- If you prefer to have Touch ID for authorizing third-party app installations, select the checkbox next to “Allow Touch ID for:” and choose “Mac App Store” or “App Store & identified developers.”
By customizing the Touch ID functionality, you can personalize how you interact with your MacBook using your fingerprint. It offers both convenience and security in accessing your device and authorizing various actions.
Enabling Touch ID for unlocking your MacBook lets you quickly and effortlessly log in to your user account without typing your password. This can save you time and provide a seamless login experience.
Using Touch ID for Apple Pay allows you to make secure and convenient purchases online or at participating retailers. By authorizing payments with your fingerprint, you can expedite the checkout process and enjoy a frictionless payment experience.
Authorizing app installations with Touch ID adds an extra layer of security by ensuring that only you can initiate the installation process. It prevents unauthorized changes and helps protect your device from potentially harmful apps.
Remember that the availability of Touch ID functionality may vary depending on the MacBook model you have. Older models may not have Touch ID capabilities, while newer models provide this feature.
By customizing the Touch ID functionality to align with your needs and preferences, you can optimize the usability and security of your MacBook. Take some time to explore and set up the Touch ID options that best suit your usage patterns and desired level of convenience.
Now that you know how to customize the Touch ID functionality, let’s explore how you can create and customize your own control strips on the Touch Bar.
Creating and Customizing Custom Control Strips
The MacBook Touch Bar allows you to go beyond the default buttons and controls by creating and customizing your own control strips. This advanced level of customization gives you the freedom to design specific layouts tailored to your workflow or personal preferences. Here’s how you can create and customize custom control strips on your MacBook Touch Bar:
- Open the application for which you want to create a custom control strip.
- Click on the “View” menu in the application’s menu bar.
- Select “Customize Touch Bar” from the dropdown menu.
- In the “Customize Touch Bar” window, click on the “Add” button (+) located at the bottom of the screen.
- A list of available controls will appear.
- Drag and drop the desired controls from the list onto the Touch Bar in the desired position.
- To remove a control from the custom control strip, click and hold the control on the Touch Bar, then drag it down until it disappears.
Creating custom control strips allows you to curate a set of controls specifically tailored to your needs within a particular application. Whether it’s adding shortcuts, frequently used commands, or unique functions, custom control strips empower you to personalize the Touch Bar’s functionality precisely.
Consider your workflow and the tasks you perform frequently in a specific application. By creating a custom control strip, you can have easy access to the most essential controls relevant to your work or preferences. This level of customization can significantly streamline your productivity and enhance your overall user experience.
Experiment with different combinations of controls and layouts to find what works best for you. It’s worth noting that the customization options for control strips may vary depending on the application. Some applications provide more extensive customization, allowing you to create multiple custom control strips tailored to different tasks or scenarios.
By taking advantage of creating and customizing custom control strips, you can transform the MacBook Touch Bar into a truly personalized tool that adapts to your unique requirements. This level of customization extends the functionality of the Touch Bar beyond what is provided by default, enhancing your productivity and accessibility.
Now that you know how to create and customize custom control strips, let’s explore how you can import and export your customizations for convenience or sharing with others.
Importing and Exporting Customizations
Importing and exporting customizations on the MacBook Touch Bar allows you to conveniently transfer your personalized settings between devices or share them with others. Whether you have created custom control strips or customized the default buttons, this feature ensures that you can easily replicate your desired setup. Here’s how you can import and export customizations on your MacBook Touch Bar:
To export your customizations:
- Click on the Apple menu in the top-left corner of your screen and select “System Preferences.”
- In the System Preferences window, click on the “Keyboard” icon.
- Under the “Touch Bar” tab, click on the “Customize Control Strip” or “Customize Touch Bar” button.
- Arrange your Touch Bar or control strip to your desired configuration.
- Once you are satisfied with your customizations, click on the “Export…” button at the bottom of the window.
- Choose a location to save the exported file, and provide it a suitable name.
To import customizations:
- Follow the steps above to open the “Customize Control Strip” or “Customize Touch Bar” window.
- Click on the “Import…” button at the bottom of the window.
- Select the exported file that you want to import and click “Open.”
- Your customizations will be applied, replicating the setup you exported previously.
Importing and exporting customizations allows you to conveniently transfer your personalized Touch Bar settings between different MacBook devices or share them with colleagues, friends, or family members. It is particularly useful if you have spent time customizing your Touch Bar and want to replicate the same setup on another MacBook.
Keep in mind that customizations are stored in a file format specific to the Touch Bar, and importing them on a compatible MacBook ensures that your settings are applied correctly. It’s important to note that importing customizations may overwrite any existing configurations on the target MacBook, so proceed with caution.
This feature allows you to effortlessly maintain consistency and continuity in your personalized Touch Bar experience, ensuring that your preferred controls and layouts are always within reach.
Now that you know how to import and export customizations, you can easily replicate your preferred Touch Bar setup and share it with others, making your MacBook experience even more personalized and efficient.
Resetting the Touch Bar to Default Settings
If you’ve made extensive customizations to your MacBook Touch Bar and want to start fresh or encounter any issues with your personalized setup, you can reset the Touch Bar to its default settings. This will restore the original layout and functionality of the Touch Bar. Here’s how you can reset the Touch Bar on your MacBook:
- Click on the Apple menu in the top-left corner of your screen and select “System Preferences.”
- In the System Preferences window, click on the “Keyboard” icon.
- Under the “Keyboard” tab, click on the “Reset Keyboard Settings…” button.
- A confirmation window will appear, warning you that resetting the keyboard settings will also reset the Touch Bar. Click on “Reset” to proceed.
- Your Touch Bar will be reset to its default settings, and any customizations or changes you made will be reverted.
Resetting the Touch Bar can be helpful in situations where you want to start over or if you encounter unexpected behavior or issues with your customized setup. It allows you to return to the original configuration, ensuring that you have a clean slate to work with.
Keep in mind that resetting the Touch Bar will remove any button configurations, rearrangements, and custom control strips you created. If you want to preserve your customized settings, make sure to export them before resetting and import them afterward.
After resetting the Touch Bar, you can start customizing it again to match your preferences or workflow. You have the flexibility to add and remove buttons, rearrange their positions, and create custom control strips to create a personalized Touch Bar experience.
Remember that resetting the Touch Bar only affects its appearance and default functionality. It does not impact the overall operation of your MacBook or affect any other settings on your device.
If you encounter persistent issues with the Touch Bar even after resetting or have concerns that go beyond customization, it’s recommended to reach out to Apple Support for further assistance.
Now that you know how to reset the Touch Bar to its default settings, you can confidently customize it again to enhance your productivity and make the most out of this unique feature on your MacBook.
Troubleshooting Common Issues with Touch Bar Customization
While customizing the Touch Bar on your MacBook can enhance your productivity and user experience, there may be instances where you encounter issues or unexpected behavior. Fortunately, there are several troubleshooting steps you can take to resolve common problems. Here are some tips for troubleshooting common issues with Touch Bar customization:
1. Restart your MacBook: A simple restart can often resolve minor software glitches and restore the Touch Bar to proper functionality.
2. Update macOS: Ensure that your MacBook is running the latest version of macOS. Software updates often include bug fixes and improvements that can address compatibility issues with the Touch Bar.
3. Reset Keyboard Settings: If you experience persistent issues with the Touch Bar, you can reset the associated keyboard settings, which will also reset the Touch Bar. Follow the steps outlined in the “Resetting the Touch Bar to Default Settings” section.
4. Check for conflicting software: Certain third-party applications or utilities can interfere with the operation of the Touch Bar. Temporarily disable or uninstall any recently installed software to identify if it is causing the issue.
5. Disable and re-enable Touch Bar customization: If you are unable to add or remove buttons or experience unresponsive controls, go to System Preferences > Keyboard > Keyboard and uncheck “Touch Bar shows” and then recheck it to reactivate Touch Bar customization.
6. Verify app-specific customization: Some applications have limited support for Touch Bar customization. Confirm if the app you are using offers customization options or if limitations exist for certain buttons or controls within the app.
7. Remove conflicting preferences: Some issues may arise due to corrupted preference files. Locate the preference file associated with the application or system functionality related to the Touch Bar and remove it. Restart your MacBook to allow the system to generate a new preference file.
8. Contact Apple Support: If you’ve exhausted troubleshooting options and continue to experience issues with Touch Bar customization, it’s advisable to seek assistance from Apple Support. They can provide further guidance and offer specialized solutions for your specific situation.
By following these troubleshooting steps, you should be able to resolve common issues with Touch Bar customization. Remember that customization options may vary depending on the application and the nature of the problem. With some patience and persistence, you can ensure that your Touch Bar is functioning optimally and tailored to your needs.
Now that you are equipped with troubleshooting techniques, you can confidently customize the Touch Bar on your MacBook and enjoy a seamless and personalized user experience.
Advanced Touch Bar Customization Tips and Tricks
Customizing the MacBook Touch Bar offers endless possibilities for tailoring your user experience. Beyond the basic customization options, there are advanced techniques and tricks that can further enhance your Touch Bar customization. Here are some advanced Touch Bar customization tips and tricks:
1. Keyboard Shortcuts Integration: Assign specific keyboard shortcuts to buttons on the Touch Bar for quick access to frequently used commands. This allows you to combine the convenience of the Touch Bar with the efficiency of keyboard shortcuts.
2. Scripting and Automation: For advanced users, you can explore scripting or automation tools to create custom functions or workflows triggered by buttons on the Touch Bar. Tools like AppleScript or Automator may provide ways to extend the functionality of the Touch Bar even further.
3. Dynamic Customization: Use application-specific scripts or tools to dynamically change the controls on the Touch Bar based on the active window or context. This advanced technique allows the Touch Bar to adapt to the specific needs of different applications or tasks.
4. Emojis and Symbols: By customizing the Touch Bar, you can add buttons that display a selection of frequently used emojis or symbols. This can be especially useful for quick access to characters that are not readily available on the keyboard.
5. Custom Iconography: Create custom icon images to use on the Touch Bar buttons, providing a personalized touch. Tools like IconJar or online icon generators enable you to design and import custom icons into your Touch Bar configuration.
6. Haptic Feedback: If your MacBook model supports it, you can enable haptic feedback for the Touch Bar. This feature provides physical feedback when you interact with the Touch Bar, giving a more tactile experience that enhances usability.
7. Gestures Integration: Combine Touch Bar customization with trackpad gestures to create a multi-dimensional user interface. Assign buttons that trigger specific actions when used in conjunction with trackpad gestures, further streamlining your interactions.
8. Multiple Control Strips: Explore the possibility of creating multiple custom control strips for different tasks or workflows. By switching between control strips, you can have customized button layouts tailored to specific activities, such as design work, programming, or video editing.
Remember to balance advanced customization with practicality and usability. Understand the limitations and compatibility of your MacBook model and applications before implementing these advanced techniques. Experiment and explore the different possibilities to create a Touch Bar configuration that truly enhances your productivity and workflow.
With these advanced Touch Bar customization tips and tricks, you can take your MacBook user experience to the next level of personalization and efficiency. Embrace the flexibility of the Touch Bar and let it become a customized tool that matches your specific needs and preferences.