
Choosing the right device and app
When it comes to creating sketches on your iPhone or iPad, the first step is to choose the right device and app that suits your needs. Both Apple devices offer a variety of options for sketching, but it’s important to consider your preferences and the features you require.
If you prefer a larger canvas and more precise drawing experience, the iPad with its larger screen size is an excellent choice. The Apple Pencil is also available for the iPad, providing even greater control and accuracy in your sketches. On the other hand, if portability is your priority, the iPhone is a convenient option that allows you to sketch on the go.
Once you’ve decided on the device, the next step is to choose the right app. Fortunately, Apple’s default Notes app provides a built-in sketching feature that is accessible and easy to use. Simply open the Notes app, create a new note, and you’ll have access to a range of sketching tools at your fingertips.
Alternatively, there are a variety of third-party apps available on the App Store that offer advanced features and customization options for sketching. These apps provide a wide array of brushes, layer options, and specialized tools for professional artists or those looking to explore more creative possibilities.
Consider your preferred stylus or input method when selecting an app. Some sketching apps are designed specifically for compatibility with the Apple Pencil, leveraging the pencil’s pressure sensitivity and tilt recognition capabilities. Other apps are optimized for touch input, allowing you to sketch effortlessly with your fingertip.
Ultimately, choosing a device and app for sketching is a personal choice based on your specific needs and preferences. Whether you opt for the simplicity of the default Notes app or explore more feature-rich third-party apps, the key is to find the combination that offers the optimal balance of usability, functionality, and artistic expression. So, take your time to research and experiment, and unleash your creativity with sketches on your iPhone or iPad.
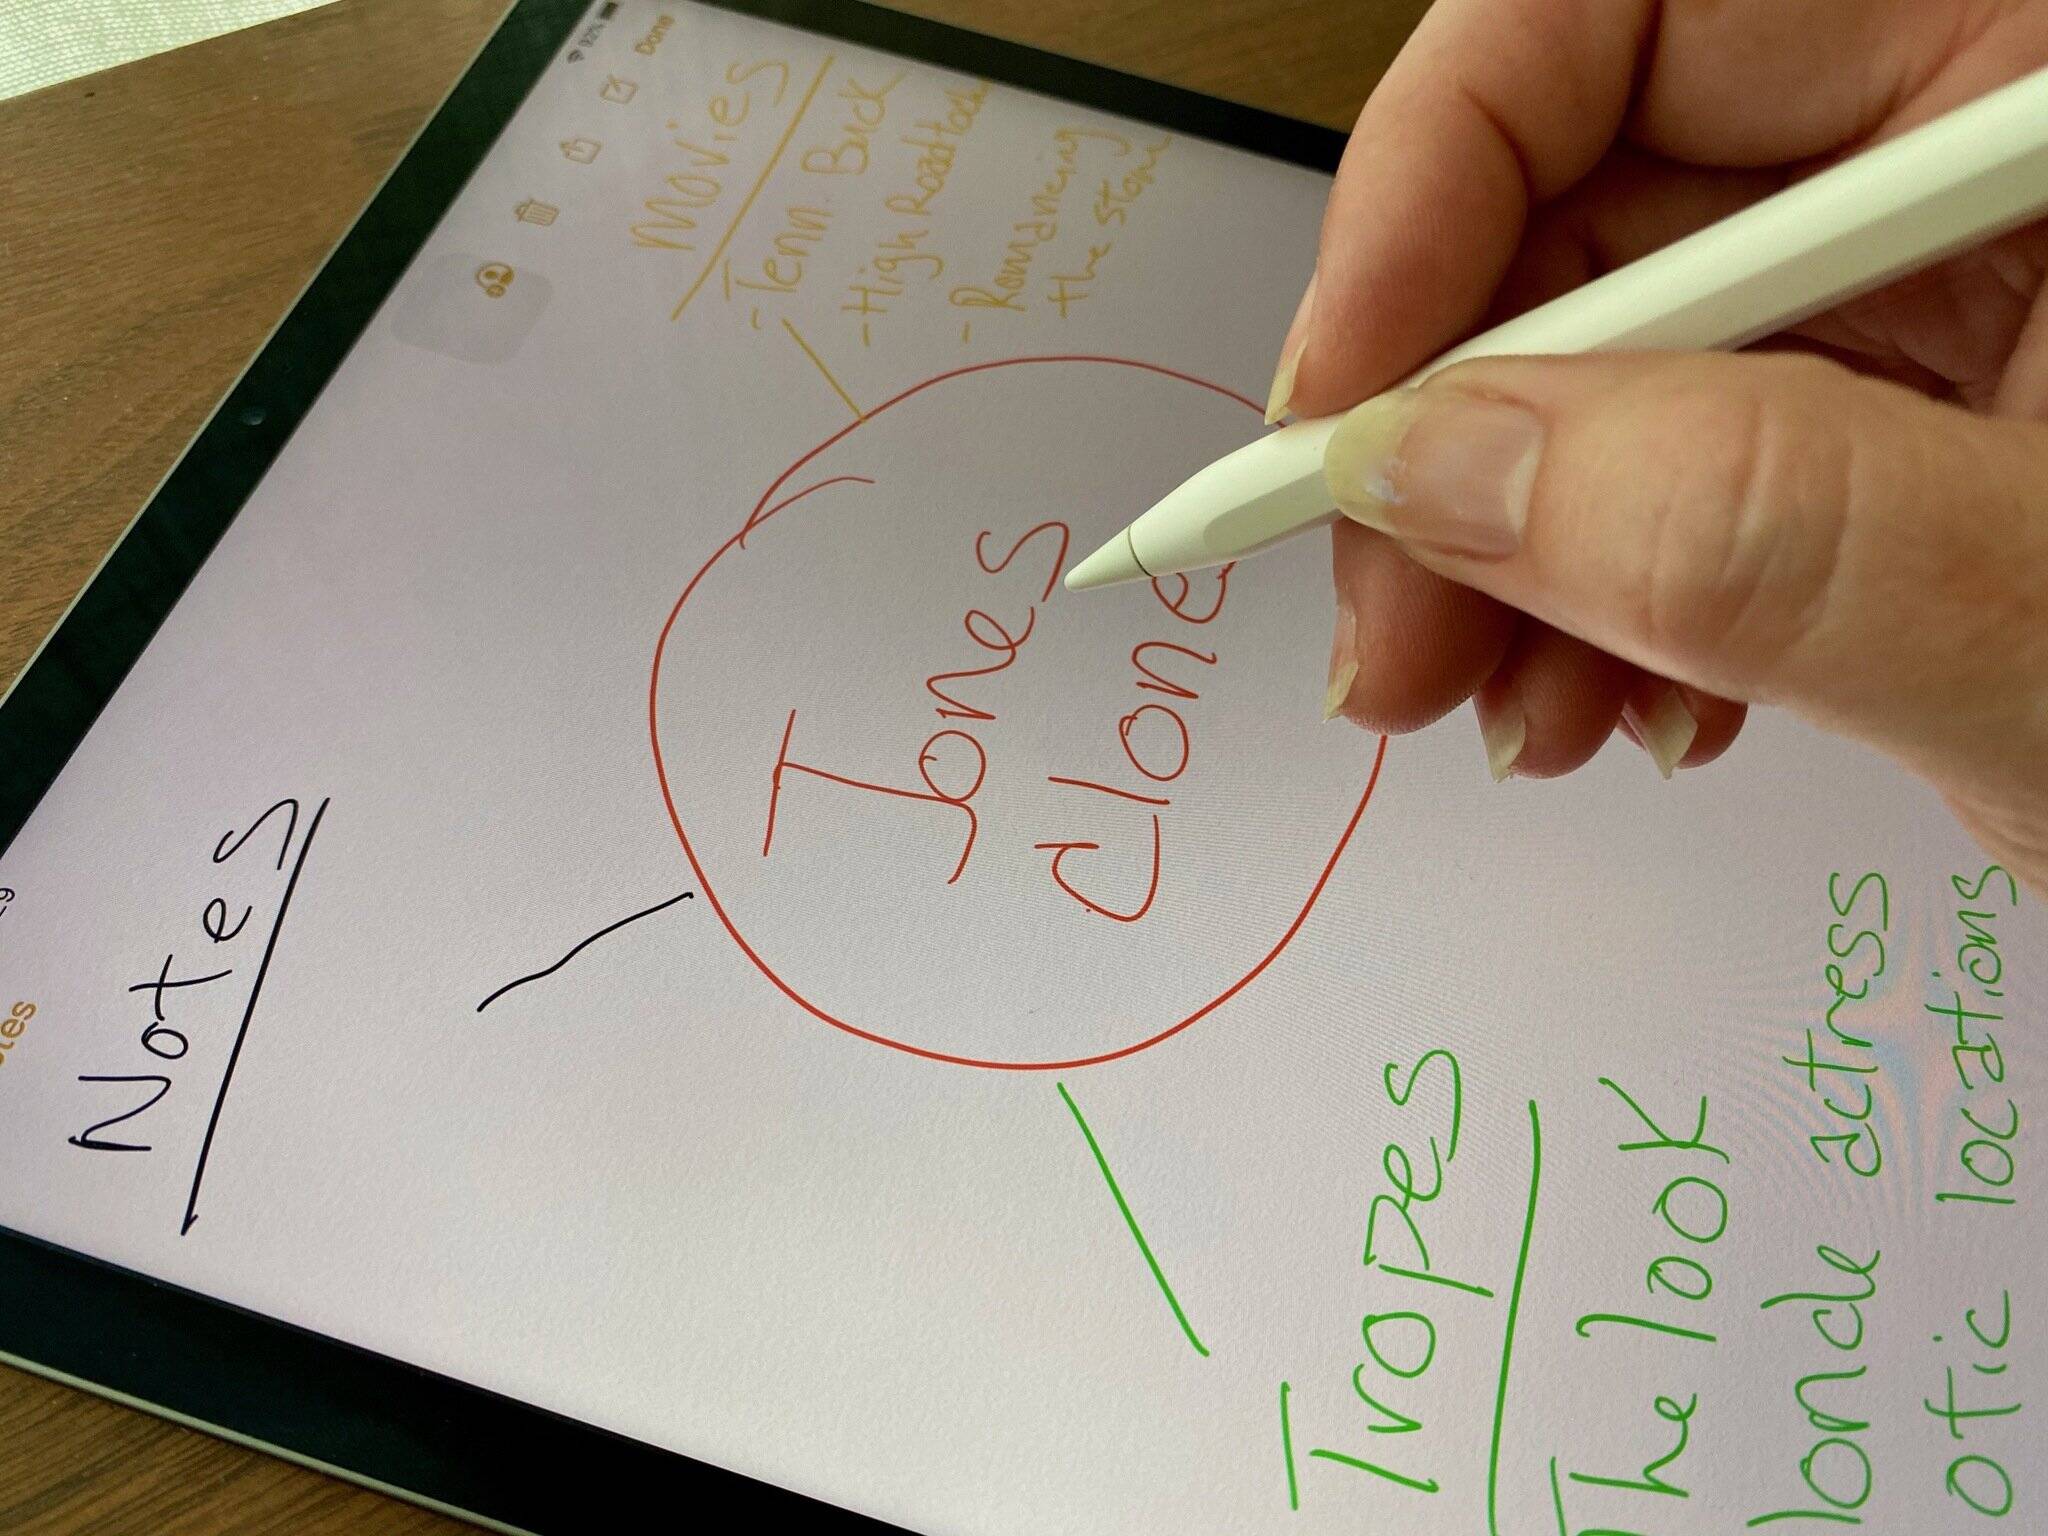
Opening the Notes app
The Notes app, available on both the iPhone and iPad, is a versatile tool that allows you to create and manage various types of content, including text, images, and, of course, sketches. To start sketching, you’ll need to open the Notes app on your device.
To open the Notes app, simply locate the app icon on your home screen. It’s a yellow icon with a white notepad and pen. Tap on the icon to launch the app. If you have a lot of apps on your device, you can use the search bar at the top of the home screen to quickly find and open the Notes app by typing “Notes” into the search bar.
Once you have opened the Notes app, you’ll be presented with your list of existing notes. If you already have a note that you want to add a sketch to, simply tap on the note to open it. If you’re starting from scratch and want to create a new note specifically for sketching, follow the next steps.
At the bottom of the screen, you’ll see a large plus sign (+) enclosed in a circle. This is the “New Note” button. Tap on it to create a new note. Alternatively, if you’re already in a note and want to create a new one, you can tap on the back arrow in the top-left corner of the screen to return to your note list, and then tap on the “New Note” button.
Upon tapping the “New Note” button, a blank note will appear on the screen. The virtual keyboard may also appear initially, but don’t worry, you won’t need it for sketching. Simply tap anywhere on the note, and the keyboard will disappear, allowing you to focus on the sketching tools and canvas.
Now that you have opened the Notes app and have a new note ready to be filled with your creative sketches, it’s time to explore the sketching tools and unleash your artistic talents.
Creating a new note
Creating a new note in the Notes app is a simple and straightforward process. Whether you want to jot down a quick idea or start a dedicated sketching session, the Notes app offers the flexibility to accommodate your needs.
To create a new note, open the Notes app on your iPhone or iPad. Once you’re in the app, you’ll see a list of your existing notes or a blank canvas if you haven’t created any notes yet. To create a new note, follow the steps below.
1. On the bottom right corner of the screen, you’ll find a large “New Note” button represented by a plus sign enclosed in a circle (+). Tap on this button to create a new note.
2. Alternatively, you can swipe up from the center of the screen to reveal the “New Note” button. This gesture is especially helpful if you’re in a note and want to create a new one without going back to the note list.
3. After tapping on the “New Note” button, a blank note will appear on the screen. By default, the note will have a title field at the top and a blank canvas underneath.
4. To add a title to your note, simply tap on the title field and start typing. You can use the on-screen keyboard or a connected external keyboard if you prefer. The title allows you to provide a brief description or label to easily identify your note.
5. If you’re focused on sketching and don’t require a title, you can simply tap on the canvas area and start sketching directly. You can always add a title later by tapping on the canvas or returning to the note list and editing the note details.
6. The Notes app also provides the option to organize your notes using folders. To create a new folder, tap on the back arrow in the top-left corner of the screen to return to the note list. Then, tap on the “New Folder” button at the bottom of the screen. You can name the folder and move notes into it for better organization.
Now that you know how to create a new note in the Notes app, you’re ready to unleash your creativity on the blank canvas or add sketches to existing notes. Continue reading to learn more about accessing and utilizing the powerful sketching tools available within the app.
Accessing the sketching tools
Once you have opened a new note or selected an existing note in the Notes app, accessing the sketching tools is a breeze. The Notes app provides a seamless and intuitive interface that allows you to quickly start sketching and experimenting with different artistic techniques. Here’s how you can access the sketching tools:
1. When you’re in a note, look for the toolbar at the bottom of the screen. You’ll notice a row of icons representing various tools and options.
2. To access the sketching tools, swipe from right to left on the toolbar. This will reveal the additional toolbar, specifically designed for sketching purposes.
3. The sketching toolbar consists of a selection of tools and options that you can use to create your sketches. These tools include a pencil, pen, marker, eraser, ruler, and more.
4. To select a tool, simply tap on its corresponding icon. For example, if you want to start sketching with a pencil, tap on the pencil icon. The selected tool will become highlighted, indicating that it is active.
5. Once you have selected a tool, you can start sketching on the canvas by using your finger or a stylus. The Notes app responds to pressure sensitivity and offers precision control for more nuanced artwork, especially when using devices like the Apple Pencil.
6. To access additional options and settings for each tool, tap on the three dots next to the selected tool. This will expand a popover menu where you can customize elements such as color, thickness, opacity, and more.
7. The sketching toolbar also includes the option to add text to your sketches. This allows you to annotate your artwork or include important details directly on the canvas. Simply tap on the “T” icon to switch to text mode and start typing.
By accessing the sketching tools in the Notes app, you have the power to express your creativity and bring your ideas to life. With a variety of options at your disposal, you can experiment with different brushes, techniques, and styles to achieve the desired effect in your sketches.
Familiarizing yourself with the toolbar
When using the Notes app for sketching on your iPhone or iPad, it’s important to familiarize yourself with the toolbar. The toolbar contains essential tools and options that allow you to customize and enhance your sketches. By understanding the functionality of each icon, you can make the most of your sketching experience. Here’s a breakdown of the toolbar and its various elements:
1. Pencil Icon: This icon represents the pencil tool, which is used for freehand drawing. It provides a versatile and natural feel, mimicking the experience of sketching with a traditional pencil.
2. Pen Icon: The pen tool is similar to the pencil tool, but creates a more defined and solid line. It’s ideal for creating bolder outlines and more prominent details in your sketches.
3. Marker Icon: The marker tool replicates the effect of using a highlighter or marker pen. It creates a wider stroke with a translucent appearance, making it ideal for adding emphasis or shading to your sketches.
4. Eraser Icon: The eraser tool allows you to correct mistakes or remove unwanted marks from your sketches. Select the eraser tool and then swipe it over the area you want to erase to clean up your artwork.
5. Ruler Icon: The ruler tool provides a straight edge that you can use to draw precise lines or shapes in your sketches. You can adjust the position and angle of the ruler to suit your needs.
6. Color Icon: The color tool enables you to select the desired color for your sketching. Tap on the color icon and choose from the available color palette or use the color picker to select a custom color.
7. Thickness Icon: The thickness tool allows you to adjust the thickness or opacity of your drawing tool. Tap on the thickness icon and use the slider to increase or decrease the size of your strokes.
8. Undo/Redo Icons: These icons let you undo or redo your previous actions in the sketch. If you make a mistake or want to backtrack, simply tap the undo icon. If you want to bring back a step you’ve undone, tap the redo icon.
By familiarizing yourself with the toolbar icons and their functions, you can easily navigate the sketching tools in the Notes app. Take some time to experiment with each tool and explore their various settings to discover the best combinations and techniques for your artistic creations.
Using the pencil tool
The pencil tool in the Notes app is a versatile and powerful tool that allows you to create precise and expressive sketches on your iPhone or iPad. With its realistic feel and customizable settings, the pencil tool is a favorite among artists and doodlers alike. Here’s how you can make the most of the pencil tool:
1. Select the pencil tool: Open the Notes app and access the sketching tools. Tap on the pencil icon in the toolbar to select the pencil tool. It will become highlighted, indicating that it is active and ready for use.
2. Start sketching: With the pencil tool selected, you can start sketching on the canvas. Use your finger or a stylus to draw freely and explore your creative ideas. The pencil tool is pressure-sensitive, so you can achieve different line thicknesses and textures based on how hard you press or lighten your strokes.
3. Experiment with angles: Tilt your device or adjust the angle of the stylus to experiment with different stroke effects. By changing the angle, you can mimic the shading techniques used in traditional drawing, adding depth and dimension to your sketches.
4. Blend and smudge: To achieve a more realistic and textured look, you can use your finger or a stylus to blend and smudge the pencil strokes. Simply swipe over the lines gently to create subtle variations in tone and texture.
5. Combine with other tools: The pencil tool works well in combination with other sketching tools. Consider using the pencil tool for sketching outlines and details, and then switch to the marker or pen tool for more defined lines or color blocking.
6. Adjust settings: To further enhance your sketching experience, you can adjust the settings of the pencil tool. Tap on the three dots next to the pencil icon to access the options menu. Here, you can customize various aspects such as color, thickness, opacity, and even the tip shape of the pencil.
7. Practice and experiment: Like any artistic skill, mastering the pencil tool requires practice and experimentation. Spend time doodling, sketching objects from life, or trying different techniques to become more comfortable and proficient with the tool.
The pencil tool in the Notes app is a fantastic feature that brings the joy of traditional sketching to your digital device. Whether you’re a professional artist or simply enjoy doodling in your spare time, the pencil tool offers a realistic and intuitive sketching experience that allows your creativity to flourish.
Changing the color and thickness of your sketches
The ability to change the color and thickness of your sketches in the Notes app provides you with endless creative possibilities. By customizing these aspects, you can add depth, style, and personality to your artwork. Here’s how you can effortlessly adjust the color and thickness of your sketches:
1. Color: To change the color of your drawing tool, tap on the color icon in the toolbar. A color palette will appear, allowing you to select from a range of pre-defined colors. Simply tap on the color you desire, and it will be applied to your sketching tool. If you want a specific color that is not available in the palette, you can use the color picker to select a custom color from any part of the color spectrum.
2. Thickness: To adjust the thickness of your drawing tool, tap on the thickness icon in the toolbar. A slider will appear, enabling you to increase or decrease the thickness of your strokes. Move the slider to the left for thinner lines or to the right for thicker lines. This allows you to create variations in line weight and add emphasis or detail to your sketches.
3. Opacity: In addition to thickness, you can control the opacity of your drawing tool. Opacity determines the transparency or visibility of your strokes. Tap on the three dots next to the selected tool icon in the toolbar and adjust the opacity slider to make your strokes more transparent or solid. This can add subtle shading effects or create layered dimensions in your artwork.
4. Combining colors and thickness: Experiment with different combinations of colors and thickness to achieve unique effects. For example, using thicker lines in contrasting colors can create bold outlines or highlights, while using thinner lines in softer tones can add delicate details or subtle shading.
5. Mixing tools and techniques: Changing the color and thickness of your sketches can be more impactful when combined with various sketching techniques. Try using different tools, such as the pencil, pen, or marker, in conjunction with varied colors and thickness settings. This allows you to create diverse textures, define focal points, and convey different moods in your artwork.
By utilizing the options to change the color and thickness of your sketches in the Notes app, you can unlock a whole new level of creativity. Whether you prefer vibrant and bold illustrations or subtle and delicate artwork, the ability to customize these aspects gives you the freedom to express yourself and bring your artistic visions to life.
Adding text to your sketches
Adding text to your sketches in the Notes app can enhance the overall message or provide additional context to your artwork. Whether you want to include annotations, labels, or simply add a personal touch, the Notes app makes it easy to incorporate text into your sketches. Here’s how you can do it:
1. Activate text mode: To add text to your sketch, tap on the “T” icon in the toolbar. This will switch the canvas to text mode and provide you with a text box where you can type your desired text.
2. Position the text box: Tap anywhere on the canvas to position the text box. You can drag it to the desired location using your finger or the Apple Pencil. The text box can be resized by dragging the corners or sides, allowing you to adjust the length, width, and overall placement of the text.
3. Enter your text: Tap inside the text box and start typing. Use the on-screen keyboard or a connected external keyboard to input your text. You can enter a single line of text or multiple lines, depending on your preference.
4. Customize text style: The Notes app allows you to customize the style of your text. You can select the text and use the options that appear above the keyboard to change the font, size, and alignment. Additionally, you can bold, italicize, or underline specific words or phrases in your text.
5. Move and edit text: If you want to move the text after entering it, simply tap and hold the text box until it lifts off the canvas. Then, drag it to the new position. To edit the text, tap inside the text box and make your changes as needed. You can also delete the text box entirely by tapping the ‘X’ icon that appears on the top left corner of the text box when selected.
6. Combine text and sketches: The ability to add text to your sketches allows you to combine visual and textual elements, creating a richer and more informative composition. You can use text to label objects, provide descriptions, convey messages, or even add personal quotes or sentiments.
7. Experiment with placement: Try placing the text in different areas of your sketch to find the most aesthetically pleasing and readable position. Consider utilizing negative space, overlapping elements, or aligning the text with specific features in your sketch to create a harmonious design.
By incorporating text into your sketches in the Notes app, you can add an extra layer of meaning and communication. This opens up new possibilities for storytelling, adding context, or simply expressing your thoughts alongside your artwork.
Erasing or undoing mistakes
When working on sketches in the Notes app, it’s common to make mistakes or want to backtrack on certain actions. The good news is that the app provides easy ways to undo or erase errors, allowing you to maintain the integrity of your artwork. Here are the methods to erase or undo mistakes in the Notes app:
1. Erasing: To explicitly remove or correct specific marks or lines in your sketch, you can use the eraser tool. Tap on the eraser icon in the toolbar to activate it. Once selected, simply swipe the eraser over the areas you want to erase. The eraser tool removes the strokes with precision, allowing you to refine your sketch as needed. If you make an error while erasing and want to bring back the erased portion, you can immediately tap on the undo button located in the toolbar.
2. Undo: If you make a mistake while sketching or using any tool in the Notes app, you have the option to undo the action. To undo the last action, tap on the undo button in the toolbar, which looks like a curved arrow pointing to the left. Each time you tap the undo button, the app will revert to the previous step, allowing you to gradually backtrack and fix any errors. You can tap the undo button multiple times to undo multiple actions depending on your needs. If you want to bring back something you’ve undone, you can use the redo button (an arrow pointing to the right) next to the undo button.
3. Gesture shortcuts: The Notes app offers gesture shortcuts that enable you to quickly perform undo and redo actions. On iPad, you can use a two-finger swipe to the left to undo, and a two-finger swipe to the right to redo. On iPhone, you can shake your device to bring up the undo and redo options. These shortcuts provide a convenient and efficient way to correct mistakes or backtrack without needing to navigate through the toolbar.
4. Clearing the canvas: If you want to start fresh and remove the entire content of your sketch, you can clear the canvas. Tap on the back arrow located in the top-left corner of the screen to return to the note list. Then, swipe the sketching area down to clear the canvas. However, be cautious when using this method, as it deletes the entire sketch and cannot be undone.
By utilizing the eraser tool, undo/redo buttons, and gesture shortcuts, you can easily erase mistakes and correct errors in your sketches. These features provide you with the freedom to experiment, refine your artwork, and ensure your final sketch represents your vision accurately.
Adding shapes to your sketches
Adding shapes to your sketches in the Notes app is a fantastic way to enhance your artwork and bring structure to your compositions. Whether you want to draw geometric shapes, incorporate recognizable symbols, or create precise outlines, the app offers a variety of tools to help you achieve your desired shapes. Here’s how you can add shapes to your sketches:
1. Access the shape tools: Open the Notes app and tap on the “+” icon to create a new note or select an existing note. Next, tap on the squiggly line icon in the toolbar. This will open the shape tools menu, displaying a selection of shapes you can add to your sketch.
2. Choose a shape: Tap on the shape you want to insert into your sketch. The available options include squares, circles, triangles, arrows, speech bubbles, and more. The selected shape will appear as a preview on the canvas.
3. Resize and position the shape: After selecting a shape, you can resize and reposition it to fit your composition. Use your fingers to pinch or expand the shape to adjust its size, and drag it around the canvas to position it precisely where you want it. This flexibility allows you to seamlessly incorporate shapes into your sketch without disrupting the flow of your artwork.
4. Customize shape properties: The Notes app offers additional options to customize the properties of the shapes. With a shape selected, tap on the style icon (a small paintbrush) that appears above the shape. Here, you can modify the shape’s fill color, stroke color, line thickness, transparency, and even add dashed lines if desired.
5. Combine shapes and freehand drawing: Incorporating shapes into your sketches allows you to blend structured elements with freeform drawing. You can use shapes as a guide or framework and then add more intricate details around and within the shapes. This combination adds visual interest and balance to your composition.
6. Layering shapes: The Notes app allows you to layer shapes, enabling you to create complex compositions. Add multiple shapes onto the canvas and arrange them in the desired order using the Bring Forward and Send Backward options. This layering feature gives you the ability to construct intricate scenes, diagrams, or illustrations within your sketches.
7. Editing and transforming shapes: If you want to modify a shape after adding it to your sketch, tap on the shape to select it. Resize, rotate, or skew the shape using the handles that appear around it. This flexibility allows you to create unique variations of shapes and adapt them to your specific creative vision.
By utilizing the shape tools in the Notes app, you can add structure, precision, and visual interest to your sketches. Experiment with different shapes, combine them with freehand drawing, and let your creativity flow as you bring your artistic ideas to life.
Using the ruler tool for precision
When it comes to achieving precise lines, straight edges, and accurate measurements in your sketches, the ruler tool in the Notes app is a valuable asset. This tool allows you to draw perfectly straight lines or create symmetrical shapes, adding a professional touch to your artwork. Here’s how you can use the ruler tool for precision:
1. Activate the ruler: Open the Notes app and access the sketching tools. Swipe from right to left on the toolbar to reveal the additional toolbar. Look for the ruler icon, which resembles a straightedge or ruler. Tap on it to activate the ruler tool.
2. Position and adjust the ruler: Once activated, the ruler appears on the canvas as a straight line with anchor points at each end. You can freely move the ruler anywhere on the canvas by tapping and dragging it. Rotate the ruler by using two fingers to twist or rotate the ruler to the desired angle for drawing straight lines or creating angled shapes.
3. Creating precise lines: To create a straight line using the ruler, position it where you want the line to start. Then, using a stylus or your finger, start drawing the line along the edge of the ruler. As you draw, the ruler stays in place, ensuring that your line remains perfectly straight. This is particularly useful for architectural drawings, technical illustrations, or any artwork that requires precise, straight lines.
4. Creating symmetrical shapes: The ruler can be used to create symmetrical shapes by positioning and rotating it accordingly. For example, to draw a symmetrical circle, place the center of the ruler where you want the center of the circle to be and rotate the ruler while drawing along its edge. The ruler ensures that both sides of the circle are balanced and evenly proportioned.
5. Measuring distances: Another useful aspect of the ruler tool is its ability to measure distances. You can use the ruler to accurately measure the length between two points on your sketch. Simply position the ruler between the two points you want to measure, and the ruler tool will display the distance in a pop-up dialog. This feature comes in handy when creating to-scale diagrams, floor plans, or any artwork that requires precise measurements.
6. Combining with other tools: The ruler tool works seamlessly with other sketching tools in the Notes app. You can use it in combination with the pencil, pen, or marker to ensure that your lines stay perfectly straight or to create more intricate designs with precise angles and shapes.
By utilizing the ruler tool in the Notes app, you can elevate the accuracy and precision of your sketches. Whether you need to draw straight lines, create symmetrical shapes, or measure distances, the ruler tool provides you with the necessary tools to achieve meticulous results and take your artwork to the next level.
Importing images to sketch over
The ability to import images into the Notes app provides you with a world of creative possibilities. By sketching over imported images, you can add unique elements, merge reality with your creativity, or use them as references for your artwork. Here’s how you can easily import images and sketch over them in the Notes app:
1. Find the image: Start by locating the image you want to import from your device’s photo library or any other source. You can also take a new photo or screenshot within the Notes app itself by tapping on the camera icon (+) in the toolbar and selecting “Take Photo” or “Scan Documents” if applicable.
2. Import the image: Once you have the image you want to use, go to the Notes app and open the note where you want to sketch over the image. Tap on the “+” icon in the toolbar and select “Photo Library”. Navigate to the desired image in your photo library and tap on it to import it into the note. The imported image will appear on the canvas, ready for you to sketch over.
3. Resize and position the image: To adjust the size and position of the imported image, simply tap and hold on it until it lifts off the canvas, and then drag it to the desired location. You can also use the handles around the image to resize it by pinching or expanding with your fingers. This flexibility allows you to fit the image appropriately for your sketch and composition.
4. Sketch over the image: With the imported image in place, you can now start sketching over it. Select the desired tool from the toolbar, such as the pencil, pen, or marker, and begin drawing on the canvas. Your sketches will appear on top of the image, allowing you to incorporate the image as a reference or trace certain elements if desired.
5. Using the imported image as a guide: The imported image can serve as a helpful guide for proportions, details, or any specific aspects you want to include in your sketch. You can refer to the image for reference and replicate its features, adapting them to your own artistic style. The ability to sketch over the image provides a unique opportunity to blend your interpretation with real-world elements.
6. Removing the imported image: If you decide that you no longer need the imported image or want to sketch without it, simply tap and hold on the image, and select “Delete” when the options appear. Note that deleting the imported image will not remove any sketches or annotations you’ve added on top of it.
By importing images into the Notes app and sketching over them, you can seamlessly blend different artistic elements, create unique compositions, or use them as references for your artwork. This feature opens up endless possibilities for adding depth, realism, and your personal touch to your sketches.
Sharing and exporting your sketches
Once you have completed your sketches in the Notes app, you may want to share or export them to showcase your artwork or collaborate with others. The app offers various ways to share and export your sketches, making it easy to distribute your creations. Here’s how you can share and export your sketches:
1. Sharing options: The Notes app allows you to share your sketches directly from the app itself. Tap on the share icon (a square with an arrow pointing upward) located in the toolbar. This will open a menu of sharing options, including AirDrop, Messages, Mail, and various social media platforms like Facebook or Twitter. Select the desired method to share your sketch with others.
2. Exporting as a PDF: If you prefer to export your sketch as a PDF file, the Notes app provides a convenient option. Tap on the share icon in the toolbar and select “Create PDF”. This will convert your sketch into a PDF document, preserving the drawing, annotations, and any added text. You can then save the PDF file to your Files app or share it with others using a compatible platform.
3. Printing your sketches: If you want a physical copy of your sketches, you can print them directly from the Notes app. Open the sketch you want to print, tap on the share icon in the toolbar, and select “Print”. This will bring up the print options where you can choose your printer and adjust settings such as paper size and orientation. Once you have configured the settings, tap “Print” to create a hardcopy of your sketch.
4. Exporting as an image: In addition to PDF format, you can also export your sketches as image files using the Notes app. Open the sketch you want to export, tap on the share icon, and select “Save Image”. This will save the sketch as an image file in your Photos app. From there, you can share the image via messaging apps, social media, or any other platform that supports image sharing.
5. Collaborating with others: The Notes app allows for collaboration, enabling you to share your sketches with others and collaborate on them in real-time. Tap on the share icon, select the desired method of sharing, and invite others to collaborate. This is particularly useful for creative teams, art communities, or collaborative projects where feedback and input from others can enhance the final artwork.
6. Exporting to other apps: If you prefer to continue working on your sketches in a different app or want to integrate them into other projects, you can export your sketches to compatible apps. Tap on the share icon, select “Copy”, and then paste the sketch into another app that supports image or document importing. This offers flexibility in incorporating your sketches into various creative workflows or applications.
With the sharing and exporting options available in the Notes app, you can easily showcase and distribute your sketches to others. Whether you want to share them digitally, print physical copies, collaborate with others, or integrate them into other projects, the app offers a seamless and convenient way to bring your artwork to a wider audience.
Mastering the gesture shortcuts
When using the Notes app for sketching on your iPhone or iPad, mastering the gesture shortcuts can greatly enhance your productivity and streamline your workflow. These intuitive gestures allow you to perform actions quickly and efficiently, eliminating the need for navigating through menus or searching for specific options. Here are the gesture shortcuts you can use to enhance your sketching experience:
1. Undo and redo: Instead of tapping on the undo and redo buttons in the toolbar, you can use simple gestures to perform these actions. On the iPad, swipe two fingers to the left to undo your last action, and swipe two fingers to the right to redo it. On the iPhone, shake your device to bring up the undo and redo options. These gestures allow for quick correction or reapplication of your most recent sketching actions.
2. Switching between tools: To switch between different sketching tools, you can use a two-finger tap gesture on the canvas. Simply tap with two fingers anywhere on the screen, and it will cycle through the available tools in the toolbar. This gesture allows you to seamlessly switch between the pencil, pen, marker, eraser, and more, without needing to manually select them from the toolbar.
3. Activating the ruler: The ruler tool in the Notes app can be quickly activated using a simple gesture. With one finger on the screen, swipe up or down with a second finger to activate or hide the ruler, respectively. This gesture saves you the time and effort of searching for the ruler icon in the toolbar and provides a quick way to add precise lines or angles to your sketches.
4. Zooming in and out: When you need to zoom in for more detailed sketching or zoom out for a broader view, you can perform pinch gestures on the canvas. Place two fingers on the screen, then pinch them together to zoom in or spread them apart to zoom out. This gesture allows you to adjust your view and focus on specific areas or get a comprehensive overview of your entire sketch.
5. Scrolling through the canvas: If your sketch extends beyond the visible area, you can easily scroll or pan across the canvas using two fingers. Place two fingers on the canvas and move them in the desired direction to scroll in that direction. This gesture is particularly useful for working on larger sketches or when you need to navigate to different sections of your artwork quickly.
By mastering the gesture shortcuts in the Notes app, you can streamline your sketching process and work more efficiently. These intuitive gestures allow for quick and seamless navigation, tool selection, zooming, scrolling, and correction of your sketches. Incorporating these gestures into your workflow will undoubtedly enhance your productivity and creativity while using the app.
Customizing your sketching experience
To truly make your sketches in the Notes app your own, it’s important to customize your sketching experience. By tailoring the settings and options to your liking, you can optimize your workflow, improve efficiency, and create artwork that reflects your unique style. Here are some ways you can customize your sketching experience:
1. Tool settings: Experiment with different settings for each sketching tool to achieve the desired effects. Tap on the tool you want to customize in the toolbar, then tap on the three dots that appear next to it. Adjust parameters such as color, thickness, opacity, and tip shape to fine-tune your brushes and drawing tools. Customizing the tools allows you to create unique textures, lines, and strokes that best suit your artistic vision.
2. Canvas background: The Notes app provides options to change the background color or style of your canvas. Tap on the share icon in the toolbar and select “Options”. From here, you can choose a different paper texture, grid, or solid color background. Experiment with different backgrounds to find one that enhances your sketches, improves visibility, or matches the mood of your artwork.
3. Smart Annotations: If you frequently use the text tool to annotate your sketches, consider enabling “Smart Annotations” in the app’s settings. This feature allows the text and annotations to automatically move and adjust as you edit or resize your sketches. It ensures that your text remains in the appropriate position as your artwork evolves, saving you the time and effort of manually repositioning or adjusting text elements.
4. Default tool: Set a default tool in the Notes app to start each sketching session with your preferred tool already selected. Go to the app’s settings, tap on “Notes”, and under “Drawing Defaults”, select your preferred tool from the options. This customization eliminates the need to repeatedly select your preferred tool from the toolbar, saving you time and allowing for a smoother sketching experience.
5. Accessories: If you’re using a compatible device like an iPad Pro, consider investing in accessories such as the Apple Pencil or a third-party stylus for a more precise and natural drawing experience. These accessories offer pressure sensitivity, tilt recognition, and other advanced features to enhance your sketches and provide more control over your strokes and lines.
6. Organizational choices: Customize how you organize and categorize your sketches within the Notes app. Utilize folders to group related sketches together or create separate notes for different themes or projects. This customization helps you stay organized and easily locate specific sketches when needed.
By customizing your sketching experience in the Notes app, you can tailor it to your preferences and create a workflow that supports your creative process. Experiment with different tool settings, backgrounds, accessories, and organizational choices to find the optimal combination that allows you to fully express your creative vision and make the most of your sketching sessions.
Exploring advanced sketching features
Beyond the basic tools and functionalities in the Notes app, there are several advanced features that can take your sketching experience to the next level. These features provide additional options, techniques, and creative opportunities for your artwork. Here are some advanced sketching features to explore:
1. Layers: The ability to work with layers allows you to separate different elements of your sketch and make adjustments without affecting the rest of the artwork. In the Notes app, you can duplicate a sketch or a specific element, move it to a new layer, and make modifications independently. This feature provides versatility and flexibility in refining and organizing your sketches.
2. Opacity and blending modes: Adjusting the opacity of a layer or using different blending modes allows you to create various depth and transparency effects. You can experiment with layering different colors, textures, or patterns, and blend them together to create unique and visually striking compositions. These features provide room for experimentation and can lead to unexpected and exciting artistic results.
3. Zoom and precision editing: When working on intricate details or precise elements in your sketches, you can zoom in to achieve a level of accuracy and granularity. Use pinch gestures to zoom in on specific areas, allowing you to add fine details or make subtle adjustments. This advanced feature ensures that even the smallest elements of your artwork are precise and well-executed.
4. Selection and transformation tools: The Notes app provides selection tools that allow you to isolate specific elements of your sketch and apply transformations or edits to them. You can use the lasso tool to draw around an area and select it, then resize, rotate, or move the selected portion as needed. This feature enables you to fine-tune and modify specific parts of your artwork with ease.
5. Color picker: The color picker tool allows you to select any color from an image or drawing and use it in your sketches. Simply tap on the color icon, then tap and hold on any part of your sketch or imported image. The app will display a magnified view of the area and pick the color you’re touching. This feature helps you achieve harmony and consistency in your color choices and facilitates seamless integration of imported images with your sketches.
6. Advanced editing tools: The Notes app offers a variety of editing tools that allow you to refine and enhance your sketches. These tools include cropping, rotating, adjusting brightness, contrast, and saturation, applying filters, or even adding annotations using the text tool. These advanced editing options give you the freedom to fine-tune your sketches and make them even more impactful.
By exploring and utilizing the advanced sketching features in the Notes app, you can push the boundaries of your creativity and elevate your artwork. Whether it’s using layers for complex compositions, leveraging opacity and blending modes for unique visual effects, or taking advantage of precision editing tools, these advanced features provide a rich and expansive canvas for your artistic expression.