
Setting Up Outlook Email Reminders
Outlook Calendar offers a convenient way to manage your schedule and stay organized. One of its key features is the ability to set email reminders for your events and appointments. These reminders help ensure that you never miss an important meeting or deadline. In this section, we will guide you through the process of setting up Outlook email reminders step by step.
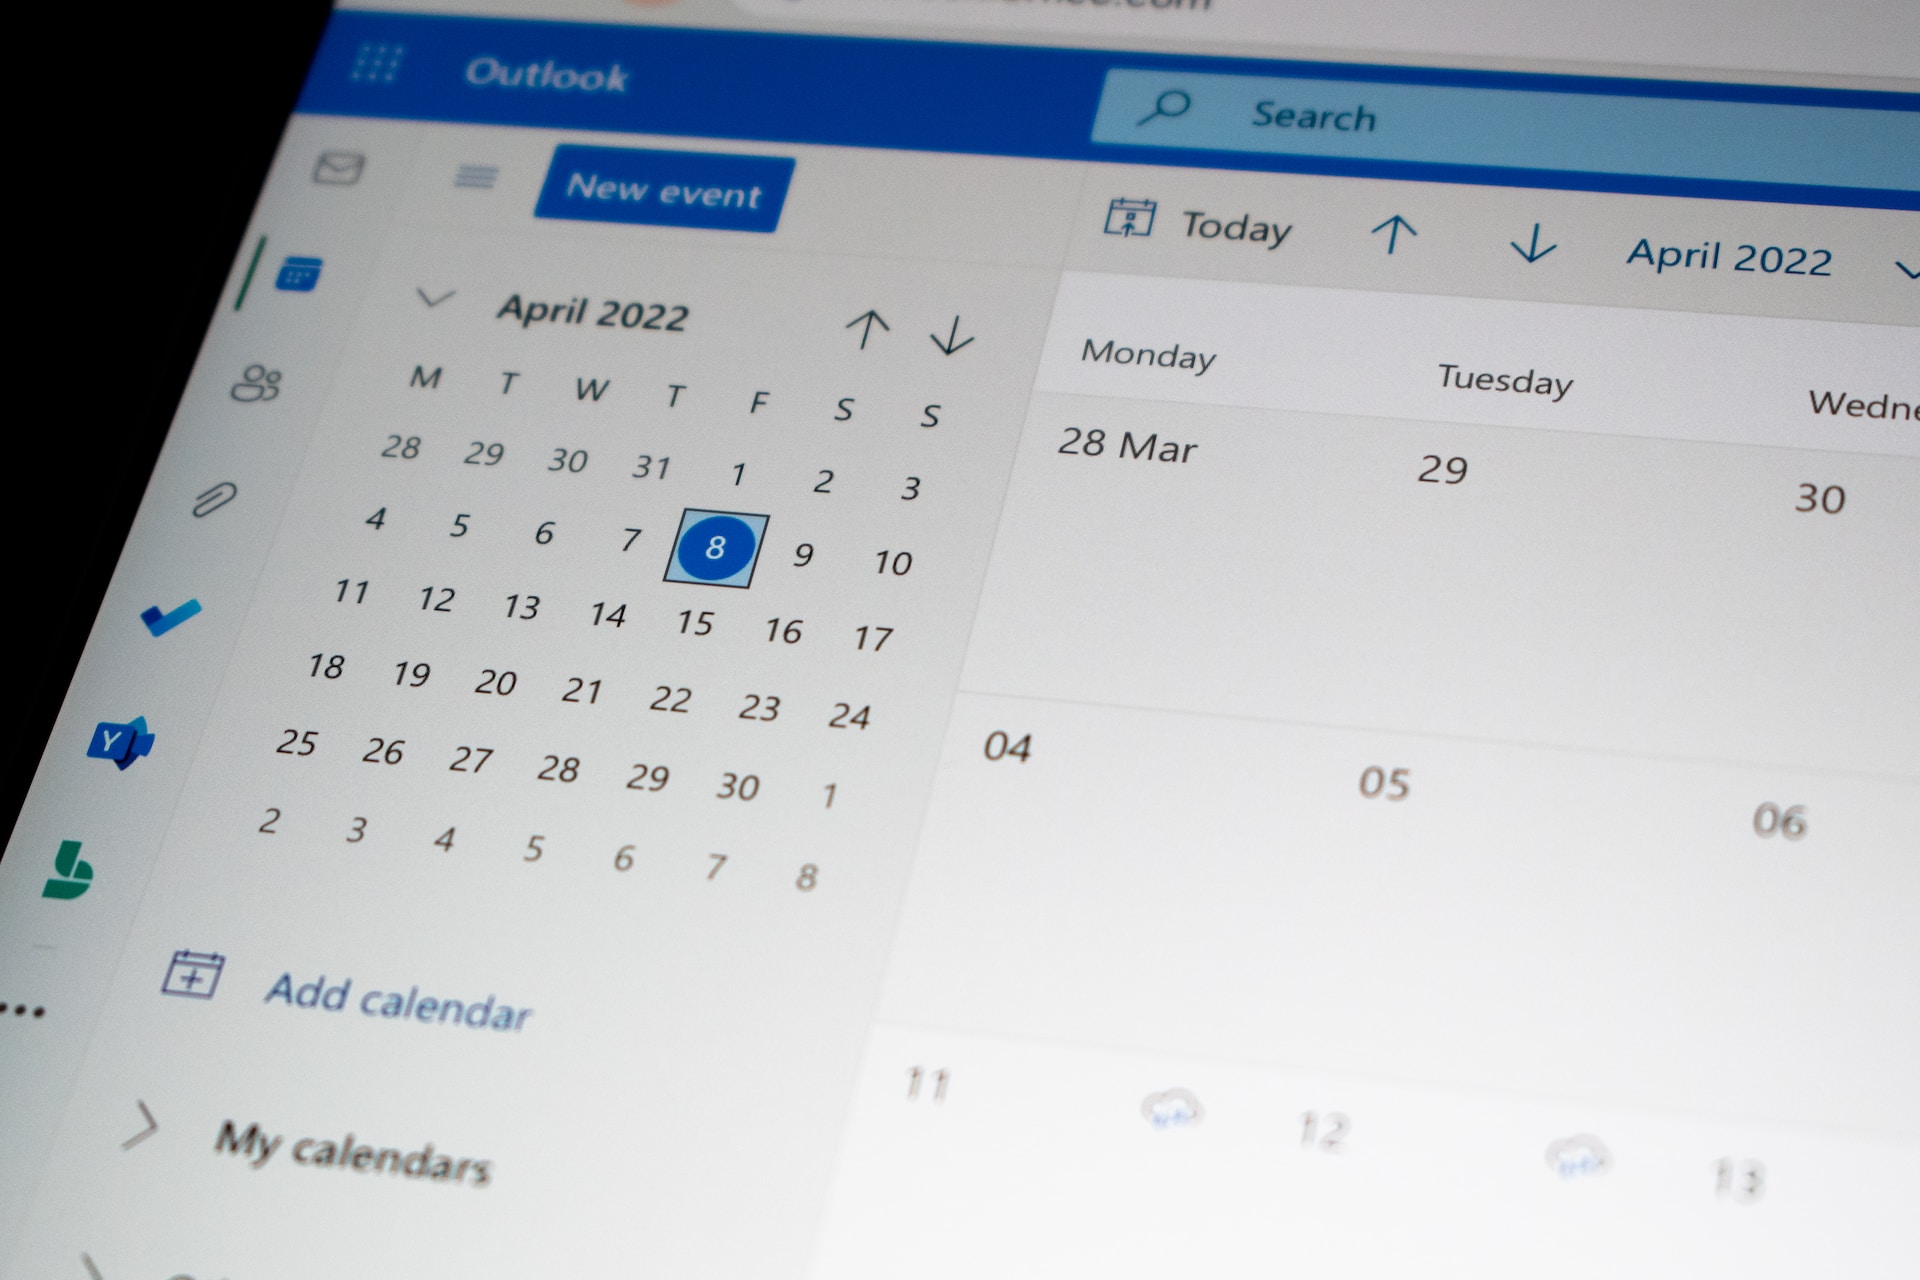
To get started, launch Outlook Calendar by clicking on the Calendar icon in the navigation pane. Once you are in the Calendar view, follow these steps:
- Click on the date and time when you want to create the event.
- Enter the event details such as the title, location, and description.
- Next, click on the “Add reminder” option to set up the email reminder.
- In the Reminder window, select the desired time before the event when you want to receive the reminder email. You can choose from predefined options like 15 minutes, 30 minutes, or customize the time according to your preference.
- Once you have set the reminder time, click on “Save” to save the event with the email reminder.
Customizing the reminder notifications is another useful feature in Outlook Calendar. To do this, follow these steps:
- Go to the File menu at the top-left corner of the Outlook window and select “Options”.
- In the Outlook Options window, click on “Calendar” from the left-hand sidebar.
- Under the “Calendar options” section, locate the “Reminders” category.
- Here, you can choose various options like displaying reminders on top of other windows, showing reminders for all-day events, or even disabling the reminder sound.
- Make the desired changes and click on “OK” to save the settings.
Managing reminder sound and pop-ups can be done from the Outlook Calendar view:
- Click on the “File” tab at the top-left corner of the Outlook window.
- Select “Options” from the drop-down menu.
- In the Outlook Options window, click on “Advanced” from the left-hand sidebar.
- Scroll down to the “Reminders” section and check the box next to “Play reminder sound” if you want to enable the sound notification.
- Additionally, you can choose to show reminders as pop-ups on your desktop by checking the box next to “Show reminders on top of other windows”.
- Once you have made the desired changes, click on “OK” to save the settings.
Disabling or snoozing reminders is a handy option for events or appointments that you no longer need to be reminded of:
- In the Outlook Calendar view, find the event for which you want to disable or snooze the reminder.
- Right-click on the event and select “Open” from the drop-down menu.
- In the event window, click on the “Reminder” dropdown and select “None” to disable the reminder for that specific event.
- If you want to snooze the reminder, you can choose the desired snooze time from the same dropdown list.
- Once you have made the changes, click on “Save & Close” to update the event.
Setting up recurring reminders in Outlook Calendar is particularly useful for tasks or events that occur on a regular basis:
- Create a new event or open an existing one in Outlook Calendar.
- Click on the “Recurrence” button in the event window.
- In the Recurrence window, choose the frequency of the event occurrence, such as daily, weekly, monthly, or yearly.
- Select the specific days or dates when the event should repeat.
- Set the desired reminder time and other options, then click on “Save” to save the recurring event with the reminder.
If you need to edit or delete a repeating event with reminders, follow these steps:
- Find the recurring event in Outlook Calendar.
- Right-click on the event and select “Open Series” or “Open Occurrence” from the drop-down menu.
- Make the necessary changes to the event details or reminder settings.
- To delete the entire series of events, click on the “Delete” button. If you only want to delete a specific occurrence, click on “Delete” and choose “Delete This Occurrence”.
- Confirm the deletion when prompted.
Synchronizing Outlook Calendar with your mobile devices allows you to receive email reminders on the go:
- Open the Outlook app on your mobile device.
- Sign in to your Outlook account and navigate to the Calendar section.
- Ensure that syncing is enabled in the app settings.
- Once synced, you will receive email reminders for your events and appointments on your mobile device.
If you encounter any issues with Outlook Calendar reminders, try the following troubleshooting steps:
- Ensure that you have the latest version of Outlook installed on your computer or mobile device.
- Check your email account settings to ensure that the reminder emails are not being marked as spam.
- Try resetting the Outlook reminders by closing and reopening the application.
- If the issue persists, you may need to repair or reinstall Outlook.
By following these steps, you can easily set up Outlook email reminders and ensure that you are always aware of your upcoming events and appointments. The customizable options and syncing capabilities of Outlook Calendar make it a powerful tool for managing your schedule efficiently.
Step 1: Launching Outlook Calendar
Outlook Calendar is a robust scheduling platform that helps you stay organized and manage your time effectively. To begin setting up email reminders, you first need to launch Outlook Calendar. Here’s how you can do it:
If you are using Outlook on your computer:
- Open the Outlook application on your desktop or laptop.
- In the navigation pane on the left-hand side, click on the “Calendar” icon. This will take you to the Outlook Calendar view.
If you are using Outlook on the web:
- Launch your preferred web browser and go to the Outlook website.
- Sign in to your Outlook account using your email address and password.
- Once you are logged in, locate the app launcher icon (usually a grid of nine squares) in the top-left corner of the screen and click on it.
- From the app launcher menu, select “Calendar”. This will open Outlook Calendar in a new tab.
Now that you have successfully launched Outlook Calendar, you can proceed to create events and set up email reminders. Outlook Calendar provides a user-friendly interface with various features and customization options to help you manage your schedule efficiently.
Whether you are using Outlook on your computer or accessing it through the web, launching Outlook Calendar is the first step towards setting up email reminders and staying on top of your appointments and tasks. Taking advantage of Outlook’s powerful scheduling capabilities can greatly enhance your productivity and ensure that you never miss an important event or deadline.
Step 2: Creating an Event
In Outlook Calendar, events are the building blocks of your schedule. They represent specific activities, appointments, or tasks that you need to manage. After launching Outlook Calendar, you can easily create events by following these steps:
- Locate the date and time on which you want to schedule your event.
- Click on that specific date and time in the calendar view. This will open the event creation window.
- In the event creation window, enter a title for your event. This should be a brief but descriptive name that represents the purpose of the event.
- If desired, you can add additional details to your event by providing a location, description, and any necessary notes. This information will help you and others understand the context and requirements of the event.
- Specify the start and end time for your event by selecting the appropriate date and entering the desired time values. You can also use the dropdown menus to choose the duration of the event, if known.
- Optionally, you can assign a category or color to your event to help visually organize your schedule. This can be particularly useful when you have multiple events happening simultaneously or when you want to differentiate between different types of events.
- Once you have entered all the relevant information, click on the “Save” or “Save & Close” button to create your event. The event will now be added to your calendar.
By creating events in Outlook Calendar, you can effectively manage your schedule and keep track of all your important activities. Whether it’s a business meeting, personal appointment, or a task reminder, Outlook Calendar provides a seamless platform for organizing and accessing your events at any time.
Remember to be mindful of the accuracy and completeness of the information you enter when creating events. This will ensure that your reminders and notifications accurately reflect the nature and requirements of each event.
With the ability to create events in Outlook Calendar, you can now move on to the next step of setting up email reminders to ensure that you never miss an important appointment or task. By leveraging the features of Outlook Calendar, you can stay organized and manage your time effectively.
Step 3: Setting the Reminder Time
In Outlook Calendar, setting the reminder time for your events is essential to ensure that you receive timely notifications and stay on top of your schedule. By specifying the reminder time, you can receive email reminders that prompt you to prepare for an upcoming event. Follow these steps to set the reminder time:
- Once you have created an event, navigate to the event window by clicking on the specific event in your calendar.
- Within the event window, locate the “Add reminder” option. This option is typically represented by a bell icon or a dropdown menu with various reminder options.
- Click on the “Add reminder” option to open the reminder settings.
- In the reminder settings, you can choose a predefined time before the event to receive the reminder. Common options include 15 minutes, 30 minutes, 1 hour, or you can select a custom time. Select the option that aligns with your preferences and the amount of time you need to prepare for the event.
- After setting the reminder time, make sure to save the changes by clicking on the “Save” or “Save & Close” button within the event window.
Setting the reminder time in Outlook Calendar allows you to stay organized and be reminded of important events well in advance. By receiving email reminders at the designated time, you have the opportunity to prepare, gather necessary materials, or make any required arrangements before the event takes place.
It’s important to consider the nature of the event and your personal preferences when setting the reminder time. For time-sensitive meetings or urgent appointments, a shorter reminder time may be more appropriate. On the other hand, for events that require more preparation or involve travel, a longer reminder time might be preferable.
By customizing the reminder time for each event in Outlook Calendar, you can ensure that you receive timely notifications and effectively manage your schedule. Proceed to the next step to explore additional customization options and enhance your reminder experience.
Step 4: Customizing Reminder Notifications
In Outlook Calendar, you have the flexibility to customize reminder notifications to suit your preferences and work style. By personalizing how you receive reminders, you can optimize your workflow and ensure that you don’t miss any important events. Follow these steps to customize your reminder notifications:
- Go to the File menu at the top-left corner of the Outlook window and select “Options”.
- In the Outlook Options window that appears, click on “Calendar” from the left-hand sidebar.
- Under the “Calendar options” section, locate the “Reminders” category.
- Within the Reminders category, you can choose various options to customize your notification preferences.
- For example, you can select the option to “Show reminders on top of other windows” if you want to ensure that your reminders are prominently displayed on your screen.
- If you prefer a more discreet notification, you can uncheck the option to “Play reminder sound” to disable audio alerts.
- You may also have the option to enable or disable reminders for all-day events.
- Once you have made the desired changes, click on “OK” to save the settings and apply the modifications to your reminder notifications.
Customizing reminder notifications in Outlook Calendar allows you to tailor the way you receive and interact with your reminders. By choosing specific options, you can ensure that the notifications align with your preferences and work environment.
Take advantage of the available options to find a balance between receiving timely reminders and minimizing disruptions to your workflow. For instance, choosing to show reminders on top of other windows can be helpful in grabbing your attention when you are focused on another task.
Additionally, the ability to enable or disable reminder sounds allows you to control the audio aspect of your notifications. Disabling reminder sounds can be beneficial in situations where auditory distractions need to be minimized.
Remember to regularly review and adjust your reminder notification settings in Outlook Calendar to match your evolving needs and preferences. By customizing reminder notifications, you can create a personalized reminder experience that supports your productivity and helps you stay on top of your schedule.
Step 5: Managing Reminder Sound and Pop-ups
In Outlook Calendar, you have the ability to manage the sound and pop-up settings of your reminder notifications to suit your preferences and work environment. By customizing these settings, you can ensure that your reminders are both noticeable and convenient. Follow these steps to manage reminder sound and pop-ups:
- Click on the “File” tab located at the top-left corner of the Outlook window.
- From the drop-down menu, select “Options”.
- In the Outlook Options window, click on “Advanced” from the left-hand sidebar.
- Scroll down to the “Reminders” section.
- To enable the reminder sound, check the box next to “Play reminder sound”.
- By default, Outlook uses the default sound assigned for new email notifications. If you prefer a different sound, click on the “Browse” button to select a custom sound file.
- Under the same “Reminders” section, you’ll find the option to “Show reminders on top of other windows”. Check this box if you want reminder pop-ups to appear on your screen, regardless of the application you are using.
- Once you have made the desired changes, click on “OK” to save the settings and apply the modifications to your reminder sound and pop-up preferences.
Managing the sound and pop-up settings of your reminder notifications in Outlook Calendar allows you to customize how you receive and interact with your reminders. By adjusting these settings, you can create a reminder experience that aligns with your preferences and work style.
The reminder sound is a helpful auditory cue that signals the arrival of a new notification. You have the option to choose from default sounds or select a custom one that suits your preferences. This audio alert can draw your attention to your reminders, ensuring that you never miss an important event or task.
The option to show reminders on top of other windows is particularly beneficial when you are multitasking or working with multiple applications. By enabling this option, your reminder pop-ups will appear prominently on your screen, regardless of the active application. This ensures that your reminders are easily visible and accessible, preventing them from getting lost among other open windows.
Regularly reviewing and adjusting your reminder sound and pop-up settings in Outlook Calendar allows you to optimize your reminder experience. By customizing these preferences, you can create a reminder system that helps you stay organized and stay on top of your schedule.
Step 6: Disabling or Snoozing Reminders
In Outlook Calendar, you have the flexibility to disable or snooze reminders for specific events based on your current needs and circumstances. By temporarily disabling or snoozing reminders, you can manage your schedule without being interrupted by unnecessary notifications. Follow these steps to disable or snooze reminders:
- Locate the event for which you want to modify the reminder in Outlook Calendar.
- Right-click on the event and select “Open” from the drop-down menu. This will open the event window.
- In the event window, look for the “Reminder” dropdown menu. Click on it to display the available reminder options.
- Select “None” from the dropdown menu if you want to disable the reminder for that specific event. This will prevent any future reminder notifications for this particular event.
- If you prefer to snooze the reminder temporarily, choose the desired snooze time from the dropdown menu. The reminder notification will reappear after the snooze period has elapsed.
- Once you have made the necessary changes, click on the “Save & Close” button to apply the modifications to the event.
Disabling or snoozing reminders in Outlook Calendar allows you to tailor your reminders to your current situation. There may be times when you are not available or simply do not need to be reminded about certain events. By adjusting the reminders accordingly, you can manage your schedule more effectively and focus on tasks without unnecessary interruptions.
This feature is particularly useful for events that are no longer relevant or urgent. By disabling reminders for such events, you can declutter your reminder notifications, ensuring that you only receive reminders that are pertinent to your current priorities.
On the other hand, snoozing reminders allows you to temporarily postpone a reminder notification. This can be beneficial if you need a few additional minutes or moments before addressing the event or task associated with the reminder.
By taking advantage of the ability to disable or snooze reminders in Outlook Calendar, you can exert greater control over your schedule and ensure that reminders are both relevant and timely. It’s important to regularly review and modify your reminders as needed to stay organized and optimize your productivity.
Step 7: Setting Up Recurring Reminders
In Outlook Calendar, recurring reminders are a powerful feature that allows you to set up reminders for events that occur on a regular basis. Instead of manually creating reminders for each occurrence, you can define the recurrence pattern and let Outlook handle the rest. Follow these steps to set up recurring reminders:
- Create a new event or open an existing event in Outlook Calendar.
- Click on the “Recurrence” button within the event window. This will open the Recurrence window.
- In the Recurrence window, you can select the frequency of the event occurrence, such as daily, weekly, monthly, or yearly. Choose the appropriate frequency option that aligns with the recurring pattern of the event.
- Specify the specific days or dates when the event should repeat. For example, if the event occurs every Monday and Wednesday, select those days in the recurrence pattern.
- Set the desired reminder time for each occurrence of the event. This ensures that you receive timely notifications for each instance of the event.
- Additionally, you can customize other options in the Recurrence window, such as the end date for the recurring event or the number of occurrences. Make the necessary adjustments to suit your needs.
- Once you have set up the recurrence pattern and reminders, click on “Save” or “Save & Close” to save the recurring event with the reminders.
Setting up recurring reminders in Outlook Calendar is particularly valuable for events or tasks that happen regularly. By defining the recurrence pattern, you eliminate the need to create separate reminders for each occurrence manually. Outlook will automatically generate the reminders according to the specified recurrence settings.
This feature is especially helpful for recurring meetings, birthdays, anniversaries, or any other event that takes place on a consistent schedule. By setting up recurring reminders, you can ensure that you stay on top of these events and never miss an important occurrence.
Regularly review and update your recurring reminders as needed. You may need to make changes to the recurrence pattern or adjust the reminder time for particular occurrences. By keeping your recurring reminders up to date, you can effectively manage your recurring events and tasks.
By leveraging the power of recurring reminders in Outlook Calendar, you can streamline your scheduling process and save time while staying organized. Whether it’s weekly team meetings or monthly bill payments, recurring reminders will help you stay on track and manage your recurring commitments effectively.
Step 8: Editing or Deleting Repeating Reminders
In Outlook Calendar, you have the flexibility to edit or delete repeating reminders, giving you full control over your schedule and updates. This allows you to make changes or remove reminders for recurring events as needed. Follow these steps to manage repeating reminders:
- Locate the repeating event in Outlook Calendar for which you want to modify the reminders.
- Right-click on the event and select “Open Series” or “Open Occurrence” from the drop-down menu. This will open the event window.
- In the event window, you can make changes to the event details or modify the reminder settings.
- To edit the event details, update the necessary information such as the title, location, or description.
- If you want to modify the reminder settings, click on the “Reminder” dropdown and select a new reminder time or change the reminder options.
- If you want to delete the entire series of recurring events, click on the “Delete” button in the event window. A prompt will appear asking if you want to delete only the selected event or the entire series.
- If you only want to delete a specific occurrence of the recurring event, click on the “Delete” button and select “Delete This Occurrence”.
- Confirm the deletion by clicking “OK” when prompted.
- Once you have made the desired changes or completed the deletion process, click on “Save” or “Save & Close” to apply the modifications or delete the event(s).
Being able to edit or delete repeating reminders in Outlook Calendar allows you to stay in control of your recurring events and their associated reminders. It provides the flexibility to modify or remove reminders that may not be relevant or necessary for certain occurrences.
Editing a repeating reminder allows you to update event details or make changes to reminder settings for future occurrences. This can be helpful when there are modifications in the schedule, location, or other event-specific details.
Delete options in Outlook Calendar give you the ability to remove the entire series of recurring events or only specific occurrences. Whether you need to cancel recurring meetings or skip a single instance of an event, the deletion options offer the necessary flexibility and control.
It’s important to exercise caution when editing or deleting repeating reminders, as it may affect multiple occurrences of the event. Double-check your changes before saving to ensure that your updates or deletion actions are applied accurately.
By efficiently managing and maintaining your repeating reminders in Outlook Calendar, you can adapt to changes in your schedule and optimize your workflow effectively.
Step 9: Syncing Outlook Calendar with Mobile Devices
Synchronizing Outlook Calendar with your mobile devices allows you to access and manage your calendar events on the go. By syncing your Outlook Calendar with your mobile device, you can stay up to date with your schedule and receive reminders wherever you are. Follow these steps to sync Outlook Calendar with your mobile device:
- Ensure that you have the Outlook app installed on your mobile device. If you don’t have it, download it from the App Store (for iOS) or Google Play Store (for Android).
- Launch the Outlook app on your mobile device.
- Sign in to your Outlook account using your email address and password.
- Once you are logged in, navigate to the Calendar section within the app.
- Check the app settings to confirm that syncing is enabled. Look for a synchronization or sync settings option in the app’s settings menu.
- If syncing is not enabled, toggle the switch or check the box to turn it on.
- Wait for the app to sync your Outlook Calendar with your mobile device. This process may take a few moments depending on the number of events and the speed of your internet connection.
After completing these steps, your Outlook Calendar will be synchronized with your mobile device. You can now access and manage your calendar events directly from the Outlook app on your phone or tablet.
The benefit of syncing Outlook Calendar with your mobile device is the accessibility it provides. Regardless of your location, you can effortlessly view and modify your calendar, ensuring that you stay organized and do not miss any important appointments or tasks.
Syncing also ensures that any changes or additions made in either Outlook on your computer or the Outlook app on your mobile device are reflected in both platforms.
Regularly syncing your Outlook Calendar with your mobile device keeps your schedule consistent and updated across all devices. This ensures that you have a seamless experience, no matter which device you use to access your calendar.
Take advantage of syncing to make the most of your Outlook Calendar and stay organized even when you’re away from your computer.
Step 10: Troubleshooting Outlook Calendar Reminders
While Outlook Calendar is a reliable tool for managing your schedule and receiving reminder notifications, there may be instances when issues arise with your reminders. If you encounter any problems with Outlook Calendar reminders, here are some troubleshooting steps you can take:
- Ensure that you have the latest version of Outlook installed on your computer or mobile device. Updates often contain bug fixes and improvements that can address issues with reminders.
- Check your email account settings to ensure that reminder emails are not being marked as spam. Sometimes, email providers may mistakenly filter out reminder notifications, so check your spam or junk folder to see if they are there.
- Try resetting the Outlook reminders by closing and reopening the application. This can help reset any temporary glitches that may be affecting reminder notifications.
- If you are using Outlook on a mobile device, make sure that you have allowed push notifications for the Outlook app. Check your device’s notification settings to ensure that reminders are enabled for the Outlook app.
- Verify that your device’s date and time settings are accurate. Incorrect date and time settings can cause issues with reminder notifications in Outlook.
- If the problem persists, you may need to repair or reinstall Outlook. Use the repair option in the Outlook application settings or reinstall Outlook to resolve any underlying issues that may be affecting reminder notifications.
- If you are using Outlook in a work environment, reach out to your IT department or system administrator for assistance. They may be able to provide additional troubleshooting steps specific to your organization’s setup.
Troubleshooting Outlook Calendar reminders can help resolve any issues that may be affecting the timely delivery of notification emails. By following these steps, you can ensure that you receive important reminders and stay organized with your schedule.
Remember, technology can sometimes encounter unexpected issues, but with a bit of troubleshooting and patience, you can often resolve these problems and restore the full functionality of your Outlook Calendar reminders.
If you continue to experience difficulties with Outlook Calendar reminders, consider reaching out to Microsoft support or consulting online forums for further assistance. These resources can provide specific solutions and guidance based on your unique situation.