
Materials Needed
Creating an animation flip book is a fun and creative project that requires just a few simple materials. Before you get started, make sure you have the following supplies on hand:
- Paper: You’ll need several sheets of paper for your flip book. Choose a paper size that suits your preference, such as A4 or letter-sized.
- Pencil: A regular pencil will work fine, but if you want to add more depth and shading to your drawings, consider using a set of drawing pencils.
- Eraser: Mistakes happen, so having a good quality eraser will come in handy for correcting any mishaps.
- Markers or Colored Pencils (Optional): If you want to add color to your animations, have a set of markers or colored pencils ready.
- Ruler: A ruler will help you create straight lines and keep your drawings aligned.
- Scissors: You’ll need scissors to cut out your individual pages and trim them to the desired size.
- Binding Clip or Stapler: To keep your flip book pages together, have a binding clip or stapler available for assembling the final book.
Make sure to set up a comfortable workspace with good lighting, where you can focus and let your creativity flow. Once you have gathered all the necessary materials, you’re ready to embark on your flip book animation journey!
Step 1: Gather Your Supplies
Before diving into the world of flip book animation, it’s important to gather all the necessary supplies. Having everything you need on hand will ensure a smooth and enjoyable creative process. Here are the supplies you’ll need:
- Paper: Start by selecting the type of paper you want to use for your flip book. You can choose from different sizes like A4, letter-sized, or even square-shaped paper. Consider the thickness of the paper as well, as thicker paper will make your flip book sturdier.
- Pencils: Make sure to have a variety of pencils on hand. For sketching your initial drawings, a regular HB pencil will do. To add depth and shading, you can use different grades of drawing pencils like 2B, 4B, and 6B.
- Eraser: Mistakes are part of the creative process, so having a good quality eraser is essential. Make sure to choose a soft eraser that won’t smudge or damage your paper.
- Markers or Colored Pencils (Optional): If you want to add a splash of color to your flip book, consider using markers or colored pencils. They can bring your animations to life and make them more visually appealing.
- Ruler: A ruler is handy for creating straight lines and maintaining the alignment of your drawings. It will help you achieve clean and professional-looking animations.
- Scissors: You’ll need a pair of scissors to cut out your individual flip book pages. Make sure they are sharp and precise to get clean cuts.
- Binding Clip or Stapler: Finally, you’ll need a binding clip or stapler to assemble your flip book. This will keep the pages together and allow for smooth flipping.
Once you have gathered all these supplies, find a comfortable and well-lit workspace where you can immerse yourself in the world of flip book animation. Having everything ready will make the creation process seamless and enjoyable, so take a moment to gather your supplies before moving on to the next step.
Step 2: Prepare the Pages
With your supplies gathered, it’s time to prepare the pages for your flip book. Follow these steps to ensure your pages are ready for animation:
- Cut the Paper: Start by cutting your chosen paper into individual pages for your flip book. You can use scissors to trim the paper to your desired size. A common size is around 2.5 inches by 4 inches, but feel free to adjust based on your preference.
- Number the Pages: To keep your pages in the correct order, use a pencil to lightly number the bottom right corner of each page. Start with number one for the first page and continue sequentially until the last page.
- Smooth Out the Pages: Flip through each page and make sure they are smooth and free of any wrinkles or folds. If you notice any imperfections, gently smooth them out with your hand or use a clean cloth to press them flat.
- Organize the Pages: Arrange the pages in sequential order, ensuring that the numbering is correct. This will ensure that your animation flows smoothly when you flip through the book.
By taking the time to prepare your pages properly, you’ll set a solid foundation for your flip book animation. Cutting the pages to size, numbering them, and organizing them in the correct order will ensure a seamless and enjoyable animation experience. Now that your pages are ready, let’s move on to the next step of creating your flip book!
Step 3: Choose Your Theme
Choosing a theme for your flip book will bring focus and cohesiveness to your animations. Consider these steps to help you select the perfect theme:
- Brainstorm Ideas: Take a moment to brainstorm different ideas for your flip book theme. Think about topics that interest you, such as nature, animals, sports, or daily life. Let your creativity flow and write down any ideas that come to mind.
- Consider Your Audience: If you’re creating the flip book for a specific audience, think about their preferences and interests. Tailoring your theme to appeal to your audience will make the flip book more engaging and relatable.
- Think About Storytelling: Consider the potential for storytelling through your flip book. You can create a simple narrative or showcase a sequence of events. Planning the storyline in advance will help guide your animations.
- Visualize the Animations: Envision how your chosen theme can be translated into a series of drawings. Consider the movements or actions you can capture in each animation frame. This will help you determine if your theme is suitable for a flip book format.
- Add a Personal Touch: Infuse your own unique style and personality into your theme. This will make your flip book stand out and reflect your individual creativity.
Remember, the theme you choose will serve as the foundation for your flip book animation. Take your time to explore different ideas and select one that sparks your enthusiasm. With a well-chosen theme, you’ll be motivated to bring your animations to life and create a flip book that truly captivates its viewers.
Step 4: Plan Your Animation
Before jumping into drawing each frame of your flip book, it’s important to plan and visualize your animation. Follow these steps to effectively plan your flip book:
- Decide on the Number of Frames: Determine how many frames or pages you want your flip book animation to have. This will depend on the complexity of your animation and the desired length of your flip book.
- Storyboard: Create a rough storyboard by sketching out the key scenes or actions in your flip book. This will help you establish the flow and progression of your animation.
- Plan the Movement: Think about the movement you want to convey in each frame. Visualize how your drawings will change from one page to the next to create the illusion of motion when the flip book is flipped.
- Consider Timing: Pay attention to the timing between each frame. Decide if you want the actions to move quickly or have a more gradual transition. Experiment with the pacing to create different effects in your animation.
- Experiment with Composition: Explore different composition techniques to make your animation visually appealing. Consider the placement of objects, characters, and backgrounds to create interesting and balanced frames.
- Test the Animation: Once you have a clear plan in mind, do a quick run-through of your flip book animation without drawing detailed frames. This will give you an idea of how the animation will play out and allow you to make any necessary adjustments before starting the drawing process.
By carefully planning your animation, you’ll have a solid foundation to work with. Storyboarding, considering movement and timing, and experimenting with composition will help you create a more cohesive and engaging flip book animation. Now that you have a plan in place, it’s time to bring your ideas to life through drawing!
Step 5: Start Drawing
Now comes the exciting part – it’s time to start drawing the individual frames of your flip book animation. Follow these steps to bring your ideas to life:
- Start with the First Frame: Begin by drawing the first frame of your animation. This is often the starting point or the initial pose of your character or scene.
- Add Incremental Changes: Move on to the second frame and make slight changes to the drawing to show gradual movement. Repeat this process for each subsequent frame, incrementally changing the positions or actions of the elements in your animation.
- Focus on Key Frames: Pay attention to the key frames – those frames that highlight significant changes or actions. These frames will create the illusion of movement when the flip book is flipped rapidly.
- Maintain Consistency: As you draw each frame, make sure to maintain consistency in the size, shape, and proportions of the objects or characters. This will ensure a smoother transition between frames and a more cohesive animation.
- Refine Your Drawings: Take time to refine your drawings by adding details, shading, or color if desired. These finishing touches can elevate the visual appeal of your flip book animation.
- Be Patient and Persistent: Drawing each frame of your flip book can be time-consuming, but remember to stay patient and persistent. The end result will be worth the effort.
Remember, the key to creating a captivating flip book animation is to focus on creating smooth transitions between frames. Take your time with each drawing, paying attention to the incremental changes and capturing the desired movements. With each stroke of the pencil, your flip book animation will come to life in a wonderful and imaginative way.
Step 6: Flip Through Your Pages
Once you have finished drawing all the frames of your flip book animation, it’s time to see your hard work in action. Follow these steps to flip through your pages and bring your animation to life:
- Stack the Pages: Ensure that all your pages are in the correct sequential order. Stack them neatly, making sure the numbering on the bottom right corner is visible.
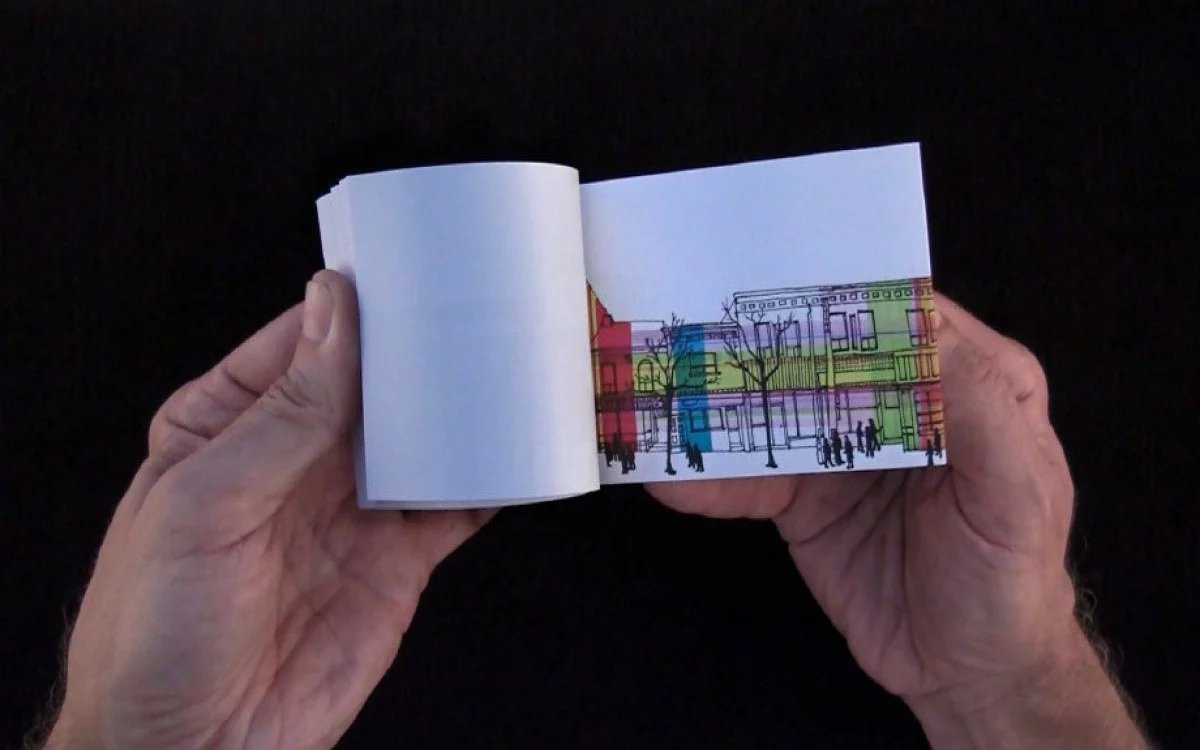
- Hold the Stack: Hold the stack of pages firmly with one hand on the bottom and the other hand on the top, allowing your fingers to slightly overlap the edges.
- Flip the Pages: Use your thumb or fingers to quickly flip through the pages from the bottom of the stack to the top. Aim for a smooth and consistent flipping motion.
- Observe the Animation: As you flip through the pages, watch the animation come to life. Pay attention to how the movements and actions in each frame create the illusion of motion.
- Adjust and Refine: If you notice any inconsistencies or areas that need improvement, go back and make necessary adjustments. You can redraw specific frames or tweak the positioning to enhance the overall animation.
Flipping through the pages of your flip book is an exciting moment as you witness your drawings seamlessly animate before your eyes. Take the time to observe the motions, transitions, and flow of the animation. By closely reviewing the animation, you can identify areas for improvement and refine your drawings, if necessary. Remember, this step is crucial in ensuring a smooth and captivating flip book animation experience.
Step 7: Add Details and Color (Optional)
Once you have completed the basic drawings for your flip book animation, you have the option to add details and color to enhance the visual appeal of your creation. Follow these steps to add those finishing touches:
- Refine Your Drawings: Take a closer look at each frame of your animation and consider adding more details to enhance the clarity and realism of your drawings. Pay attention to small elements like facial expressions, textures, and background elements.
- Experiment with Shading: Utilize shading techniques to add depth and dimension to your drawings. Consider the direction of light sources and add shadows and highlights accordingly. This can bring your animations to life and make them more visually engaging.
- Choose a Color Scheme: If you prefer to have your flip book animation in color, select a color scheme that complements your theme. Consider the mood and atmosphere you want to create and choose colors accordingly.
- Add Colors Carefully: Use markers or colored pencils to carefully add color to your drawings. Take your time to ensure clean and precise coloring. Remember, you can start with lighter shades and gradually build up intensity as needed.
- Be Consistent: Maintain consistency in the color and style throughout your flip book animation. This will create a cohesive and pleasing visual experience for the viewers.
- Test the Effect: After adding details and color, flip through your pages once again to observe the impact of your enhancements. Pay attention to the overall aesthetics and see if it enhances the storytelling and visual appeal.
Adding details and color to your flip book animation is an optional step but can significantly elevate the overall experience. With careful attention to refining your drawings, shading techniques, and color selection, you can bring an extra dimension to your creation. Whether you choose to add color or keep your flip book in black and white, the choice is yours to make based on your artistic vision.
Step 8: Assemble Your Flip Book
With all the pages of your flip book animation complete, it’s time to assemble them into a cohesive book. Follow these steps to bring your flip book to life:
- Organize the Pages: Arrange your pages in the correct sequential order, making sure the numbering on the bottom right corner is aligned.
- Align the Pages: Align the edges of your pages to ensure they are neatly stacked together. You can use a ruler or the edge of a table to make sure they are aligned perfectly.
- Clip or Staple the Pages: Use a binding clip or stapler to secure the left edge of your pages together. Place the clip or staple in the middle, ensuring that the pages are held firmly in place.
- Test the Flip: Before finalizing the assembly, flip through the pages to ensure they move smoothly. Check for any pages that may be sticking or loose, and adjust as necessary.
- Trim Excess Paper (Optional): If desired, you can use scissors to trim any excess paper around the edges of your flip book. This can create a cleaner and more professional look.
By following these steps, you will have successfully assembled your flip book into a cohesive and functional book. The binding clip or staple will keep the pages together securely, allowing for easy flipping and enjoyment of your animation. Take a moment to celebrate your accomplishment before moving on to the next step of testing your animation.
Step 9: Test Your Animation
After assembling your flip book, it’s time to test your animation and ensure that it flows smoothly. Follow these steps to successfully test your flip book animation:
- Hold Your Flip Book: Hold your flip book securely, ensuring that you have a good grip on the bottom and top edges.
- Use Your Thumb: Use your thumb to start the flipping motion of the pages. Apply gentle pressure to smoothly and quickly flip through the pages.
- Observe the Animation: Pay close attention to the movements and transitions as you flip through the pages. Ensure that the animation appears fluid and coherent.
- Make Adjustments: If you notice any frames that are unclear or do not transition smoothly, take note of them. Consider whether any adjustments need to be made to improve the flow of your animation.
- Flip Again: Repeat the flipping motion multiple times to get a better sense of the animation. This will allow you to identify any inconsistencies or areas for improvement.
Testing your flip book animation is crucial in ensuring that it delivers the desired effect. By flipping through the pages and closely observing the animation, you can identify any areas that may need fine-tuning. Take your time in this step to perfect your animation and make any necessary adjustments before sharing or exhibiting your flip book.
Step 10: Share and Enjoy
Congratulations! You have successfully completed your flip book animation. Now it’s time to share your creation with others and enjoy the fruits of your labor. Follow these steps to wrap up your flip book journey:
- Show Your Animation: Share your flip book animation with friends, family, or anyone who appreciates art and creativity. Allow them to flip through the pages and witness your animation in action.
- Share Online: If you want to reach a wider audience, consider sharing your flip book animation online. You can upload videos or images of your animation to platforms like social media, personal websites, or online art communities.
- Tell the Story Behind Your Animation: Take the opportunity to explain the concept, theme, and inspiration behind your flip book animation. Let others immerse themselves in your creative journey.
- Display and Preserve: Consider displaying your flip book animation in a frame or protective sleeve to keep it safe and intact. You can use it as a decorative piece or keep it as a cherished memento of your artistic accomplishment.
- Start a New Project: Celebrate your completed flip book animation and use it as inspiration to embark on new creative projects. Explore different techniques, themes, and mediums to further develop your artistic skills.
- Enjoy the Process: Remember to take a moment to appreciate the time, effort, and passion you put into creating your flip book animation. Enjoy the satisfaction of seeing your ideas come to life through this unique and captivating medium.
Sharing and enjoying your flip book animation is the final step in your creative journey. Whether through personal interactions, online platforms, or displays, allow others to experience and appreciate your artistic creation. Embrace the joy of artistic expression and use this accomplishment as a stepping stone to future creative endeavors. Now, go forth and continue exploring the world of art and animation!