
Benefits of creating a PlayStation Network account
Creating a PlayStation Network (PSN) account comes with a multitude of benefits that enhance your gaming experience on the PlayStation console. Whether you’re a casual player or an avid gamer, having a PSN account grants you access to a range of features and perks. Here are some key benefits of creating a PlayStation Network account:
1. Join a Thriving Gaming Community: By creating a PSN account, you become part of a vibrant gaming community that spans the globe. You can connect and play with friends, join online multiplayer matches, and engage in various gaming communities to talk, share experiences, and find new gaming buddies.
2. Access to Exclusive Content: A PSN account grants you access to exclusive content, such as demos, game betas, and early access to game releases. You also have the opportunity to download and play free games offered through the PlayStation Store and take advantage of discounts and special offers available only to PSN members.
3. Online Multiplayer: With a PSN account, you can engage in thrilling online multiplayer matches with players from around the world. Compete against friends or team up with them to tackle cooperative challenges in your favorite multiplayer games.
4. Cloud Storage: PSN provides cloud storage for your game saves, allowing you to seamlessly transfer your progress between different consoles. This ensures that your hard-earned achievements and game data are safe and can be accessed whenever and wherever you sign in with your PSN account.
5. Remote Play: PlayStation’s Remote Play feature allows you to stream and play your PS4 or PS5 games on compatible devices such as PCs, Macs, smartphones, and tablets. This means you can continue your gaming adventures even when you’re away from your console.
6. PlayStation Plus: PlayStation Plus is a premium subscription service that offers even more benefits to PSN account holders. Subscribing to PlayStation Plus grants you monthly free games, exclusive discounts, early access to demos, and the ability to play online multiplayer games.
7. Share Gaming Moments: With a PSN account, you can easily capture and share your gaming moments. Whether it’s a stunning in-game screenshot or an epic gameplay video, you can upload and share your content with the PlayStation community, friends, and social media platforms.
8. PlayStation Store: A PSN account allows you to access the PlayStation Store, where you can browse and purchase a vast library of games, downloadable content, expansions, and add-ons. With a few clicks, you can expand your gaming library without leaving the comfort of your home.
Creating a PlayStation Network account is a simple process that opens the door to a wealth of features and benefits. So, don’t miss out on the exciting opportunities that await you in the world of PlayStation gaming – create your PSN account today!
Step 1: Gathering the necessary information
Before creating a PlayStation Network (PSN) account, it’s important to gather all the necessary information to ensure a smooth and hassle-free account creation process. Here are the key details you need to have on hand:
1. Personal Information: You will need your full name, date of birth, and address. Make sure to provide accurate information as it will be associated with your PSN account.
2. Email Address: You will need a valid email address to verify your account and receive important notifications from PlayStation. If you don’t have an email address, you can easily create one through popular email service providers like Gmail or Yahoo.
3. Username: Choose a unique and memorable username that will represent you on PlayStation Network. Keep in mind that your username should comply with the PSN terms of service and community guidelines. It’s a good idea to have a few options in mind in case your preferred username is already taken.
4. Password: Choose a strong and secure password for your PSN account. Make sure it includes a combination of uppercase and lowercase letters, numbers, and special characters. Avoid using easily guessable passwords and consider using a password manager to keep your account secure.
5. Payment Information (Optional): If you plan on making purchases from the PlayStation Store or subscribing to PlayStation Plus, you will need to have payment information ready. This can include a credit or debit card, PayPal account, or prepaid PlayStation Network cards.
By gathering all the necessary information beforehand, you can streamline the account creation process and avoid any unnecessary delays or frustrations. Once you have everything ready, you’re all set to move on to the next step of creating your PlayStation Network account.
Step 2: Accessing the PlayStation Network website
To create a PlayStation Network (PSN) account, you will need to access the official PlayStation Network website. Follow these steps to get started:
- Ensure you have a stable internet connection on your device.
- Launch a web browser of your choice.
- In the address bar, type in the PlayStation Network website URL: www.playstation.com
- Press Enter or click Go to navigate to the website.
Once you have accessed the PlayStation Network website, you will be greeted with the homepage, which provides information about the latest games, upcoming releases, and other PlayStation-related news. From here, you can proceed to create your PSN account by following the necessary steps outlined on the website.
If you already have a PSN account, you can simply sign in using your existing credentials. This allows you to manage your account, access your game library, and make any necessary changes to your account settings.
It’s important to note that the PlayStation Network website is accessible from various devices, including desktops, laptops, smartphones, and tablets. This ensures that you can create or manage your PSN account from the device of your choice, providing flexibility and convenience.
Once you have successfully accessed the PlayStation Network website, you’re ready to move on to the next step of creating your PSN account. Be prepared to enter the necessary personal information and follow the step-by-step instructions provided to complete the account creation process.
Step 3: Selecting the option to create a new account
After accessing the PlayStation Network (PSN) website, the next step in creating your PSN account is to select the option to create a new account. Follow these steps to proceed:
- On the PlayStation Network website homepage, look for the “Sign In / Join” or “Create Account” button. It is usually located at the top-right corner of the page.
- Click on the “Sign In / Join” or “Create Account” button.
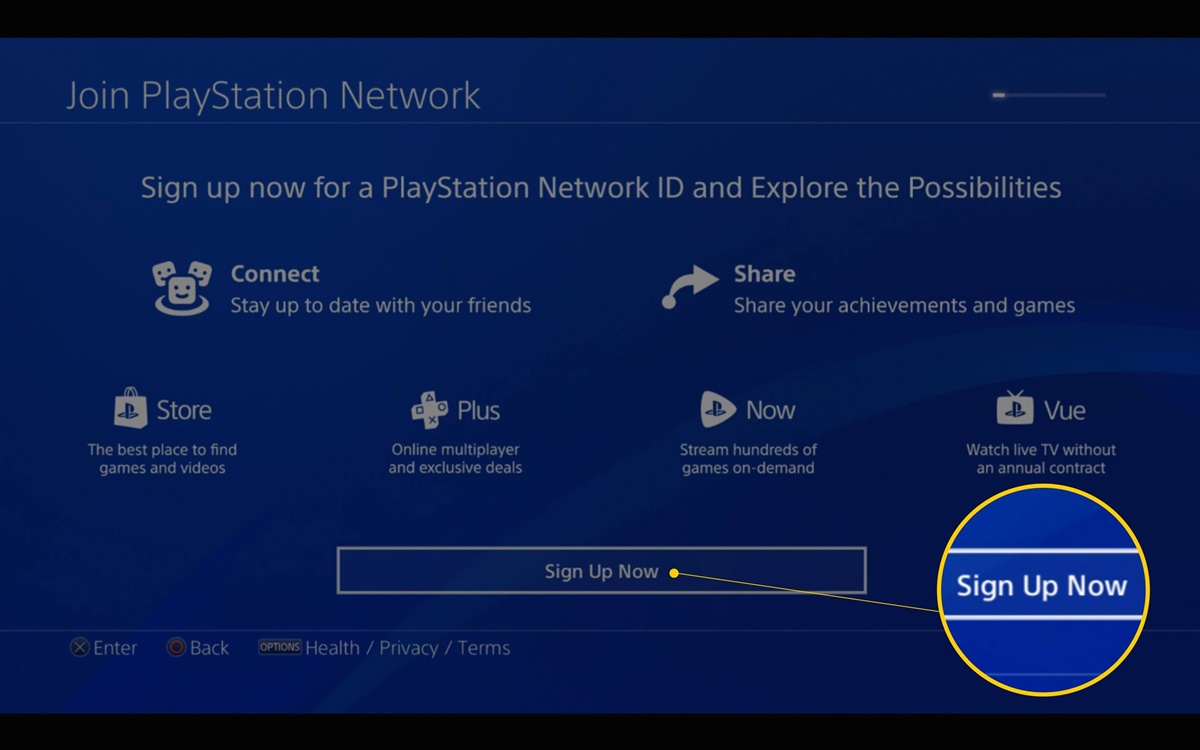
- This will redirect you to the sign-in page. Since you don’t have an account yet, look for the option to create a new account. It may be labeled as “Sign Up,” “Create Account,” or something similar.
- Click on the “Create Account” or equivalent option.
Once you have selected the option to create a new account, you will be guided through the account creation process, which typically involves entering your personal information and setting up your account credentials.
It’s important to read and review the terms of service and privacy policy of PlayStation Network before proceeding. This ensures that you understand the guidelines and policies that govern the use of the PSN platform.
Take note of any age restrictions or requirements for account creation. PlayStation Network accounts typically require users to be at least 18 years old. If you’re underage, make sure to involve a parent or guardian in the account creation process.
By selecting the option to create a new account, you’re one step closer to enjoying all the features and benefits of the PlayStation Network. Make sure to have your personal information ready as you will be prompted to enter it in the next steps of the account creation process.
Step 4: Entering personal information and creating a unique username
After selecting the option to create a new account on the PlayStation Network (PSN) website, you will be prompted to enter your personal information and create a unique username. Follow these steps to proceed:
- On the account creation page, you will see a form asking for your personal information.
- Enter your full name, including your first name and last name, in the designated fields.
- Provide your date of birth in the required format, usually in month/day/year order.
- Next, you will be prompted to create a unique username that will identify you on the PlayStation Network. Take some time to think of a username that reflects your personality or interests. Keep in mind that usernames must comply with the PSN’s terms of service and guidelines.
- Make sure to choose a username that is not already in use by another PSN member. If your preferred username is already taken, try adding numbers or modifying it slightly to make it unique.
- As you enter your personal information and username, double-check for any typos or errors to ensure accuracy.
During this step, you may also be required to read and accept the terms of service and privacy policy of PlayStation Network. It is important to review and understand these agreements before proceeding with the account creation process.
Creating a unique username is an opportunity to express yourself and showcase your gaming identity on the PSN platform. Take your time in choosing a username that you will be comfortable using and that represents you in the gaming community.
Once you have entered your personal information and created a unique username, click “Next” or an equivalent button to proceed to the next step of the account creation process. Be prepared to verify your email address, set up account security features, and customize your account preferences in the following steps.
Step 5: Verifying the email address associated with the account
After entering your personal information and creating a unique username, the next step in creating a PlayStation Network (PSN) account is to verify the email address associated with the account. Follow these steps to complete the email verification process:
- Once you have provided your email address during the account creation process, an email will be sent to the specified address.
- Open your email inbox and look for an email from PlayStation Network or a similar sender.
- Click on the verification link provided in the email. This link is usually marked as “Verify Email” or something similar.
- You will be redirected to a web page confirming that your email address has been successfully verified.
Verifying your email address is an essential step in the PSN account creation process. It ensures that you have provided a valid email address and allows you to receive important notifications, account updates, and communication from PlayStation Network.
If you don’t see the verification email in your inbox, double-check your spam or junk folder as it might have been filtered there by mistake. If you still cannot find the email, you may have entered the incorrect email address during the account creation process. In such cases, you may need to revisit the previous steps and correct any errors.
After successfully verifying your email address, you can proceed to set up account security features and customize your account preferences in the next steps of the PSN account creation process. These additional steps ensure the security of your account and allow you to tailor your gaming experience to your preferences.
By verifying your email address, you are one step closer to enjoying the vast array of features and benefits that PlayStation Network has to offer. Take a moment to celebrate this milestone before moving on to the next steps of the account creation process.
Step 6: Setting up account security features
After verifying your email address, the next crucial step in creating a PlayStation Network (PSN) account is setting up account security features. Protecting your account and personal information is of utmost importance. Follow these steps to enhance the security of your PSN account:
- On the account creation or account settings page, look for the option to set up security features.
- Choose a strong and unique password for your PSN account. A secure password should be a combination of uppercase and lowercase letters, numbers, and special characters. Avoid using common or easily guessable passwords.
- Consider enabling two-step verification (2SV) for your account. Two-step verification adds an extra layer of security by requiring a verification code in addition to your password when signing in. This code is usually sent to your registered phone number or authenticator app.
- Protect your account from unauthorized access by enabling login notifications. This feature sends alerts to your email address or phone number whenever a sign-in occurs on your account.
- It is highly recommended to avoid sharing your account credentials with anyone. Keep your account information confidential to prevent unauthorized access or potential account compromises.
By taking these measures to secure your PSN account, you can protect your personal information, game progress, and digital purchases from unauthorized access or potential threats.
Remember to periodically change your password and keep it safe. Avoid using the same password across multiple accounts to minimize the risk of a security breach. Regularly reviewing your account security settings and making necessary updates is also recommended.
Taking proactive steps to secure your PSN account ensures a worry-free gaming experience and safeguards your personal data within the PlayStation Network ecosystem.
After setting up the necessary security features, you’re ready to move on to the next steps, where you can customize your account preferences, privacy settings, and explore additional features and benefits available on PlayStation Network.
Step 7: Customizing account preferences and privacy settings
After setting up account security features, the next step in creating a PlayStation Network (PSN) account is customizing your account preferences and privacy settings. This will allow you to tailor your gaming experience to your preferences and control the privacy of your personal information. Follow these steps to customize your account:
- On the account creation or account settings page, navigate to the preferences or privacy settings section.
- Choose your communication preferences. Decide whether you want to receive promotional emails, newsletter updates, and other notifications from PlayStation Network. You can usually opt-in or opt-out of these communications.
- Review and adjust your privacy settings. PlayStation Network provides various privacy settings that allow you to control who can see your activities, friends, trophies, and other personal information. Decide how much information you want to share with others and adjust the settings accordingly.
- Consider customizing your profile information. You may have the option to add a profile picture, a bio, and other details that will be visible to other PSN members. Choose the level of personalization that you are comfortable with.
- Explore additional account settings, such as language preferences, notifications, and parental controls, if applicable. Customize these settings to enhance your gaming experience and cater it to your individual needs.
Customizing your account preferences and privacy settings allows you to have more control over your interactions within the PlayStation Network. It ensures that you have a personalized experience while also protecting your privacy.
It’s important to periodically review and update your account preferences and privacy settings as your gaming preferences and needs may change over time. This will ensure that you continue to have a tailored gaming experience that meets your requirements.
After customizing your account preferences and privacy settings, you are now ready to proceed to the next step and add payment information to your PSN account, enabling you to make purchases from the PlayStation Store and access additional features.
Step 8: Adding payment information for purchases and subscriptions
Once you have customized your account preferences and privacy settings, the next step in creating a PlayStation Network (PSN) account is adding payment information. This will enable you to make purchases, subscribe to services, and unlock additional features within the PlayStation Network ecosystem. Follow these steps to add payment information to your account:
- On the account settings page, locate the payment or billing section.
- Depending on your region, you may have different options for payment methods. Common choices include credit or debit cards, PayPal, and prepaid PlayStation Network cards.
- If you choose to use a credit or debit card, enter the cardholder’s name, card number, expiration date, and security code in the provided fields.
- If you prefer to use PayPal, select the PayPal option and follow the prompts to link your PayPal account to your PSN account.
- If you have a prepaid PlayStation Network card, choose the option to redeem a code and enter the code on the designated field.
- Review the entered payment information and ensure its accuracy before proceeding.
Adding payment information to your PSN account allows you to make purchases from the PlayStation Store, including games, downloadable content, expansions, and add-ons. It also enables you to subscribe to PlayStation Plus, Sony’s premium subscription service, which offers monthly free games, exclusive discounts, and other benefits.
It’s important to keep your payment information secure and regularly monitor your account for any unauthorized transactions. If you suspect any fraudulent activity, contact PlayStation Network support immediately to resolve the issue.
By adding payment information to your account, you unlock a world of gaming possibilities and gain access to a vast library of content and services offered by PlayStation Network. Enjoy exploring the PlayStation Store and taking advantage of the exciting offers available to you!
After successfully adding payment information, you are ready to move on to the next step, where you can explore additional features and benefits of PlayStation Network that will enhance your gaming experience even further.
Step 9: Exploring additional features and benefits of PlayStation Network
After completing the essential steps of creating a PlayStation Network (PSN) account, it’s time to dive into the vast array of additional features and benefits that the platform has to offer. Here’s a guide to help you explore and make the most of your PSN account:
- Access the PlayStation Store: Visit the PlayStation Store, where you can browse and purchase a wide range of games, downloadable content, expansions, and add-ons. Discover new titles, explore different genres, and take advantage of exclusive discounts and deals available to PSN members.
- Enjoy Free Games and Demos: PlayStation Network often offers free games and demos for PSN members to enjoy. Check out the “Free Games” section, where you can find a selection of free titles to download and play. Keep an eye out for limited-time offers and seasonal promotions.
- Join PlayStation Plus: Consider subscribing to PlayStation Plus, Sony’s premium subscription service. Membership to PlayStation Plus offers monthly free games, exclusive discounts, early access to demos, and the ability to play online multiplayer games.
- Participate in Events and Tournaments: PlayStation Network frequently hosts events and tournaments for various games. Engage in friendly competition with players from around the world, earn rewards, and showcase your skills.
- Access Entertainment Apps: PlayStation Network provides access to a variety of entertainment apps, including streaming services like Netflix, Hulu, and Amazon Prime Video. Enjoy your favorite movies, TV shows, and other media directly from your PlayStation console.
- Connect with Friends: Utilize the Friends feature on PSN to connect and interact with your gaming buddies. Send friend requests, join parties, and even start or join multiplayer matches together. Stay connected and build an active gaming community.
- Share Gaming Moments: Capture and share your gameplay with the Share feature on PSN. Record videos, take screenshots, and share your most memorable gaming moments with friends and the PlayStation community. You can also stream your gameplay on platforms like Twitch or YouTube.
- Explore PlayStation VR: If you have a PlayStation VR headset, discover the exciting world of virtual reality gaming. Immerse yourself in thrilling and immersive experiences that take gaming to a whole new level.
- Stay Updated with PlayStation Blog: Visit the official PlayStation Blog to stay informed about the latest news, updates, and announcements related to PlayStation games, consoles, events, and more.
Take the time to explore and discover the features and benefits that resonate with your gaming preferences and interests. With PlayStation Network, you have access to a diverse and dynamic gaming community that offers endless possibilities.
Remember to keep your account information secure, stay respectful to others, and adhere to the rules and guidelines set by PlayStation Network. Embrace the opportunities that PSN provides and make the most out of your gaming experience!
Troubleshooting common issues during the account creation process
While creating a PlayStation Network (PSN) account is generally a straightforward process, you may encounter some common issues along the way. Here are a few troubleshooting tips for typical account creation problems:
- Email Verification Delay: If you haven’t received the verification email, double-check your spam or junk folder as it may have been filtered there. If it’s not there, ensure that you provided the correct email address during the account creation process.
- Username Unavailability: If your preferred username is already taken, try adding numbers or altering it slightly to make it unique. Be creative and try different variations until you find an available username that suits your preferences.
- Age Restrictions: Take note of the age requirements for creating a PSN account. If you are underage, involve a parent or guardian in the account creation process as they may need to provide consent or set up a Family Manager account.
- Password Reset: If you forget your password or are unable to sign in to your account, use the password reset option to regain access. Follow the prompts to reset your password and ensure that you create a strong and secure password.
- Payment Issues: If you encounter problems when adding payment information, double-check that you are entering the correct details and that your payment method is valid and accepted on the PlayStation Network. Contact customer support if you need assistance with payment-related issues.
- Connection Problems: If you experience connectivity issues during the account creation process, ensure that you have a stable internet connection. Try refreshing the page, clearing your browser cache, or attempting the process from a different device or browser.
If you encounter any other issues that are not covered here, visit the official PlayStation support website or contact PlayStation Network customer support for further assistance. They are equipped to address technical difficulties, account-related questions, and any other concerns you may have.
Remember to stay patient and persistent when troubleshooting common issues. The PSN team is dedicated to helping users overcome any obstacles and ensuring a smooth account creation process. With a little troubleshooting and assistance, you’ll be on your way to enjoying all the features and benefits of PlayStation Network in no time.