
Check Wi-Fi
Before connecting your Kindle to Wi-Fi, it’s essential to ensure that the Wi-Fi connection is functioning properly. Follow these steps to check your Wi-Fi connection:
- Make sure that your Wi-Fi router is powered on and functioning correctly.
- Ensure that you are within range of your Wi-Fi network. Check if the Wi-Fi signal strength is sufficient.
- Verify that other devices in your home are able to connect to the Wi-Fi network. If they are not, there may be an issue with the router or the internet service.
- If you have a dual-band router, ensure that your Kindle is compatible with the frequency band (2.4GHz or 5GHz) that your network is broadcasting.
- Check if any special settings or features are enabled on your router that may affect the connectivity of your Kindle.
By ensuring that your Wi-Fi connection is stable and functional, you can proceed with connecting your Kindle to the network without any issues. It’s important to resolve any underlying Wi-Fi problems before attempting to connect your device.
Turn on Wi-Fi
To connect your Kindle to Wi-Fi, follow these steps to turn on the Wi-Fi feature:
- Unlock your Kindle device by swiping the screen or entering your passcode.
- From the home screen, tap on the “Settings” icon to open the settings menu.
- In the settings menu, locate and tap on “Wi-Fi” or “Wireless & Networks.”
- In the Wi-Fi settings, you will find a switch or button to enable Wi-Fi. Tap on it to turn on Wi-Fi.
- Wait for a few seconds for your Kindle to scan for available Wi-Fi networks.
Congratulations! Wi-Fi is now turned on and ready to connect to a network. Proceed to the next step to select a Wi-Fi network to join.
Note: If you are connecting your Kindle to Wi-Fi for the first time, you may be prompted to register your device with an Amazon account. Follow the on-screen instructions to complete the registration process before proceeding to connect to a Wi-Fi network.
Select a Wi-Fi network
After turning on Wi-Fi on your Kindle, you need to select a Wi-Fi network to connect to. Follow these steps to choose a network:
- On your Kindle device, go to the Wi-Fi settings menu as mentioned earlier.
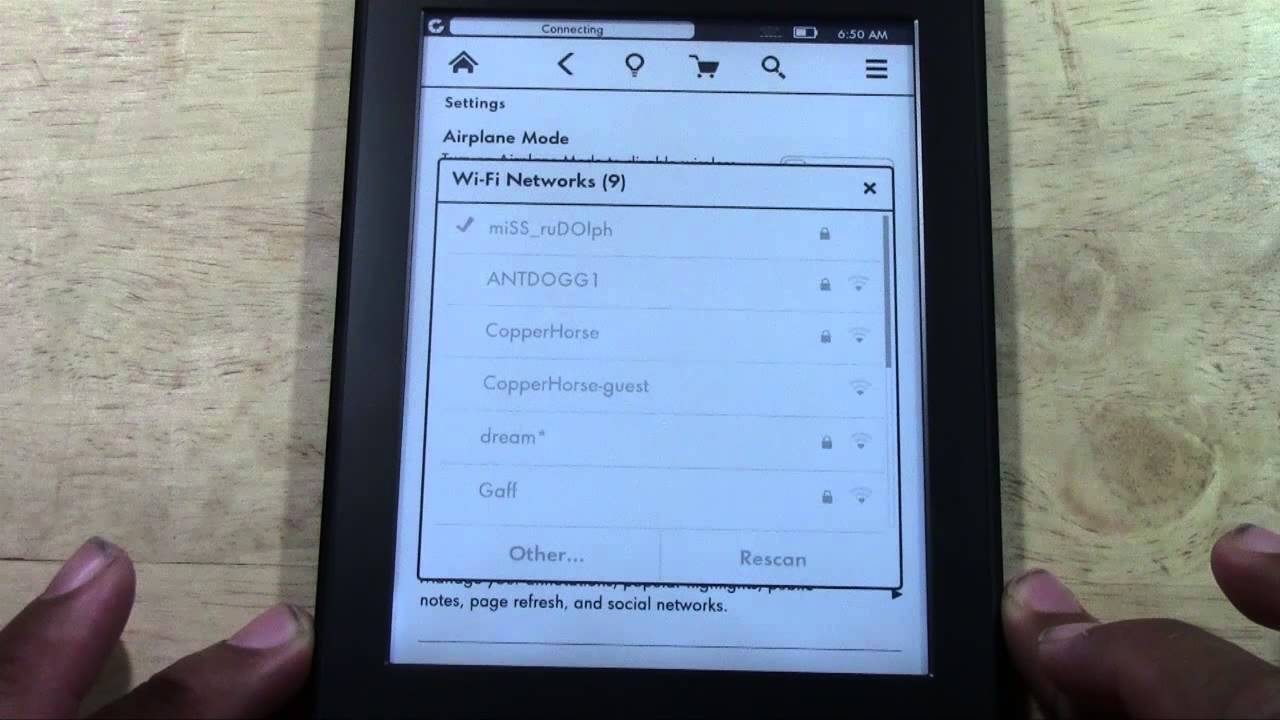
- You will see a list of available Wi-Fi networks. These networks are identified by their names, also known as SSIDs (Service Set Identifiers).
- Tap on the name of your preferred Wi-Fi network from the list. If you don’t see your network listed, make sure it is within range or try restarting your router.
- If the selected network is password-protected, you will be prompted to enter the Wi-Fi password. Use the on-screen keyboard to input the password accurately.
- Once you have entered the password, tap on the “Connect” button or a similar option to establish a connection with the selected Wi-Fi network.
- Wait for a few moments while your Kindle device connects to the network. Once connected, you will see a confirmation message or an icon indicating a successful connection.
Great! Your Kindle is now connected to the Wi-Fi network of your choice. Enjoy seamless access to the internet and a variety of online features available on your device.
Enter the Wi-Fi password
If you are connecting to a password-protected Wi-Fi network, you will need to enter the Wi-Fi password to establish a connection. Follow these steps to enter the password:
- When prompted for the Wi-Fi password, make sure you have the correct password for the network you are trying to connect to. The password is case-sensitive, so enter it exactly as provided.
- On the screen where the password is required, an on-screen keyboard will appear. Use the keyboard to enter the password.
- Take note of any special characters and ensure that you enter them correctly. Pay attention to uppercase and lowercase letters as well.
- Double-check the password before proceeding. Ensure that there are no typos or errors in the entered password.
- Once you are confident that the password has been entered correctly, select the “Connect” or “Join” button to proceed.
It may take a few moments for your Kindle device to authenticate and establish a connection with the Wi-Fi network. Be patient while the connection is being established.
If you are unsure about the Wi-Fi network password, try reaching out to the network administrator or reviewing the router documentation to retrieve the correct password.
Well done! You have successfully entered the Wi-Fi password, and your Kindle is now connected to the password-protected Wi-Fi network.
Troubleshoot Wi-Fi Connectivity Issues
Encountering connectivity issues with your Kindle’s Wi-Fi network can be frustrating, but don’t worry – there are troubleshooting steps you can take to resolve the problem. Follow these troubleshooting tips to get your Kindle connected:
- Restart your Kindle device: Sometimes, a simple restart can resolve temporary connectivity issues. Press and hold the power button on your Kindle, then select “Restart” from the menu that appears. Once the device restarts, try connecting to Wi-Fi again.
- Move closer to the router: If your Wi-Fi signal is weak, try moving closer to the router. This can improve the signal strength and help establish a stable connection.
- Restart your router: Turn off your Wi-Fi router, wait for about 30 seconds, and then turn it back on. This can help refresh the router’s settings and resolve any potential issues.
- Check for interference: Other electronic devices, such as cordless phones or microwave ovens, can interfere with Wi-Fi signals. Keep your Kindle and router away from such devices to minimize interference.
- Forget and reconnect to the Wi-Fi network: In your Kindle’s Wi-Fi settings, select the Wi-Fi network you are having trouble with and choose the “Forget” or “Remove” option. Then, reselect the network and enter the password again to establish a fresh connection.
- Update software: Ensure that your Kindle device is running the latest software version. Updates often include fixes for connectivity issues, so check for any available updates and install them.
- Reset network settings: As a last resort, you can reset your Kindle’s network settings. This will clear any saved Wi-Fi networks and reset network configurations to default. Keep in mind that you will need to reconnect to Wi-Fi networks and re-enter passwords after resetting.
If you have tried the above troubleshooting steps and still cannot connect to Wi-Fi, it may be helpful to contact Kindle support or your internet service provider for further assistance.
Tips for Improving Wi-Fi Signal Strength
A strong and stable Wi-Fi signal is crucial for a seamless online experience on your Kindle device. If you’re experiencing weak or inconsistent Wi-Fi signal, try implementing the following tips to improve signal strength:
- Reposition your router: Place your Wi-Fi router in a central location in your home, away from obstacles such as walls, furniture, or appliances. Positioning it at a higher point can also enhance signal coverage.
- Reduce interference: Keep your router away from other electronic devices that might cause signal interference, such as cordless phones, baby monitors, and Bluetooth devices.
- Update your router’s firmware: Regularly check for firmware updates for your router. Manufacturers often release updates to enhance performance, security, and signal strength.
- Use a Wi-Fi extender: If you have areas of your home where the Wi-Fi signal is weak, consider using a Wi-Fi extender or a mesh network system to amplify and extend the signal coverage.
- Optimize channel selection: If you live in a densely populated area with multiple Wi-Fi networks, changing the Wi-Fi channel on your router can minimize signal interference and improve performance. Consult your router’s manual for instructions on how to change the channel.
- Upgrade your router: If you have an older router, it may not be capable of providing strong Wi-Fi coverage. Consider upgrading to a newer model that supports the latest Wi-Fi standards for better speed and coverage.
- Reduce bandwidth usage: Disconnect or pause any devices or applications that are consuming excessive bandwidth, as this can slow down your Wi-Fi connection for other devices.
- Secure your network: Enable password protection on your Wi-Fi network to prevent unauthorized access, which can slow down your connection speed.
Implementing these tips can help improve your Wi-Fi signal strength and ensure a smoother browsing and downloading experience on your Kindle device.
Connect to a Hidden Wi-Fi Network
Sometimes, Wi-Fi networks may be hidden, meaning they do not broadcast their SSID (Service Set Identifier) for security reasons. If you need to connect your Kindle to a hidden Wi-Fi network, follow these steps:
- On your Kindle device, go to the Wi-Fi settings menu as mentioned earlier.
- Instead of selecting the visible network, look for an option that says “Add Network,” “Other Network,” or something similar.
- Enter the exact name (SSID) of the hidden Wi-Fi network you want to connect to. Make sure to type it correctly, as hidden networks are case-sensitive.
- Select the security type associated with the hidden network, such as WPA2, WPA, or WEP.
- If prompted, enter the correct password for the hidden network using the on-screen keyboard. Pay attention to uppercase and lowercase letters, as well as special characters.
- Tap on the “Connect” or “Join” button to establish a connection with the hidden Wi-Fi network.
- Wait for your Kindle device to authenticate and connect to the hidden network. Once connected, you will see a confirmation message or an icon indicating a successful connection.
It’s important to note that connecting to a hidden Wi-Fi network may require some additional manual configuration, such as entering the correct network details and security settings. If you are unsure about any of these parameters, consult the network administrator or refer to the router’s documentation for guidance.
Congratulations! Your Kindle is now connected to the hidden Wi-Fi network. Enjoy uninterrupted access to the internet and other online features on your device.