
What You Will Need
To successfully connect your Ledger Nano X to your MacBook Pro, you will need the following items and software:
- A MacBook Pro computer
- A USB-C cable
- The latest version of Ledger Live software
- A Ledger Nano X device
- The Ledger Live app installed on your MacBook Pro
Before you begin the connection process, ensure that your MacBook Pro is powered on and has a stable internet connection. It is also crucial to have your Ledger Nano X fully charged or connected to a power source to avoid any interruptions during setup. Furthermore, make sure that your MacBook Pro’s operating system and Ledger Live software are up to date, as this can help prevent any compatibility issues.
With these essential items and software in place, you are now ready to connect your Ledger Nano X to your MacBook Pro and embark on your cryptocurrency management journey. Keep the USB-C cable and Ledger Nano X handy, as you will need them throughout the setup process.
Step 1: Update Your Ledger Live Software
Before you connect your Ledger Nano X to your MacBook Pro, it is essential to ensure that your Ledger Live software is up to date. Updating the software not only provides you with the latest features and improvements but also ensures compatibility with your Ledger Nano X device.
To update your Ledger Live software, follow these steps:
- Launch the Ledger Live app on your MacBook Pro.
- If a notification prompting you to update the software appears, click on it. Alternatively, you can navigate to the “Help” menu and select “Check for Updates.”
- Wait for the app to check for updates. If an update is available, click on the “Update” button.
- Follow the on-screen instructions to complete the update process, which may involve restarting the app.
Updating your Ledger Live software ensures that you have access to the latest security features and bug fixes, providing you with a seamless and secure experience when managing your cryptocurrencies.
It is important to note that if you haven’t installed the Ledger Live app on your MacBook Pro yet, you can download it from the official Ledger website. Simply navigate to the Download page, select the appropriate version for your operating system, and follow the installation instructions.
By keeping your Ledger Live software up to date, you can take full advantage of the features and improvements provided by the Ledger team, ensuring a smooth and secure cryptocurrency management experience.
Step 2: Connect Your Ledger Nano X to Your MacBook Pro
Now that your Ledger Live software is up to date, it’s time to connect your Ledger Nano X to your MacBook Pro. Follow these simple steps to establish a connection:
- Locate the USB-C cable that came with your Ledger Nano X.
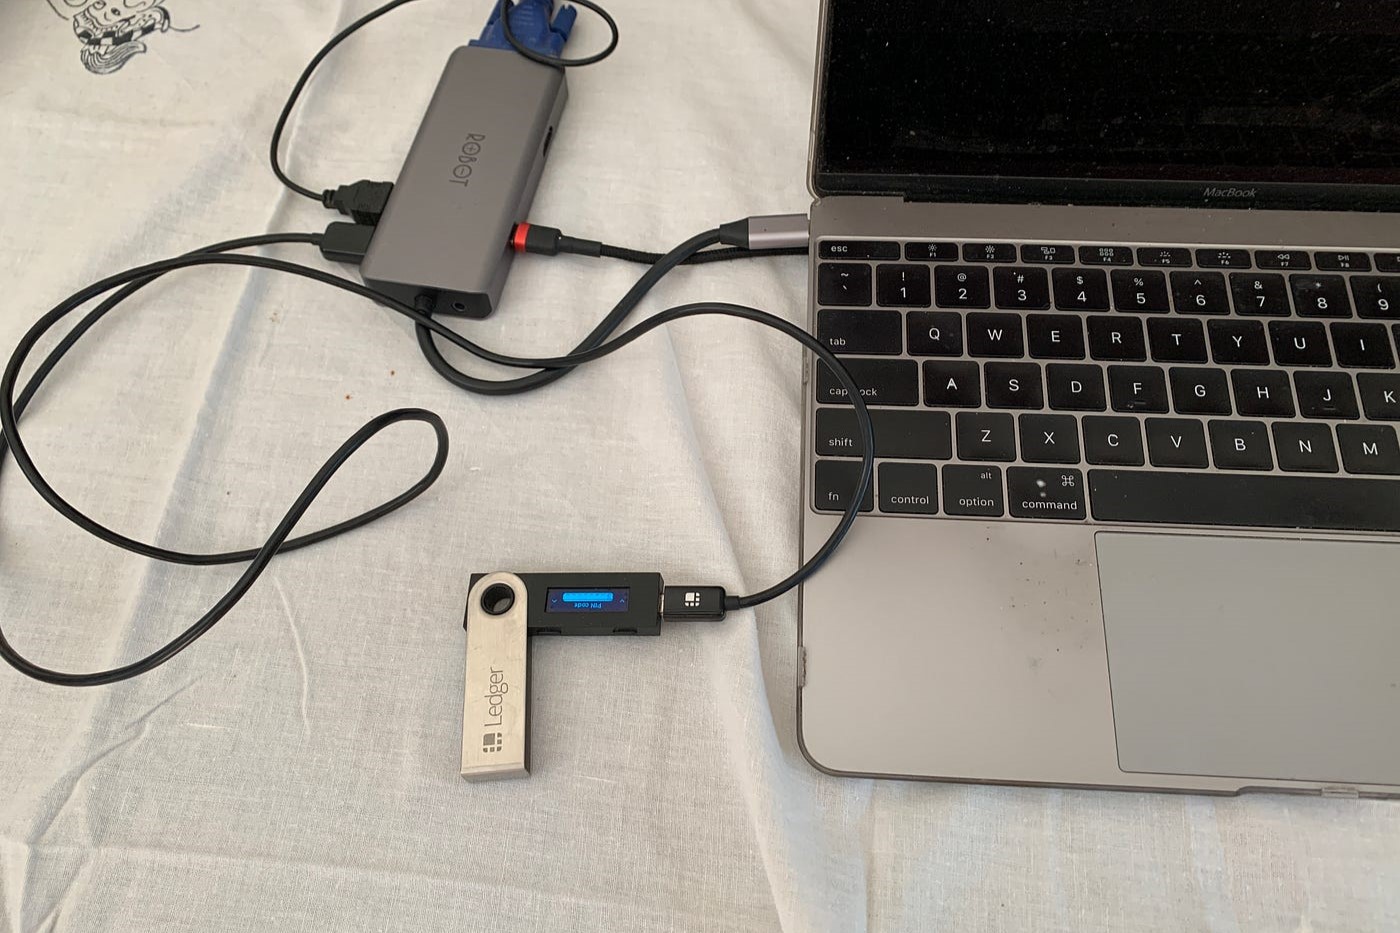
- Connect one end of the USB-C cable to your Ledger Nano X device.
- Connect the other end of the USB-C cable to an available USB-C port on your MacBook Pro.
Once the cable is securely connected, your Ledger Nano X should power on automatically. You will see a “Welcome” screen on the device’s built-in display, indicating that it is ready to be set up.
It’s important to use the USB-C cable that came with your Ledger Nano X as it is specifically designed for the device. Using a different cable may cause connectivity issues or result in unreliable communication between your Ledger Nano X and your MacBook Pro.
It’s worth mentioning that the Ledger Nano X also supports Bluetooth connectivity. If you prefer to use Bluetooth, make sure it is turned on both on your Ledger Nano X and your MacBook Pro. However, for the initial setup, connecting via the USB-C cable is recommended.
Once you have successfully connected your Ledger Nano X to your MacBook Pro, you are ready to move on to the next step: setting up your Ledger Nano X device.
Step 3: Set Up Your Ledger Nano X Device
After connecting your Ledger Nano X to your MacBook Pro, it’s time to set up the device. This step involves initializing your Ledger Nano X and creating a new cryptocurrency wallet. Follow the instructions below to complete the setup process:
- On your MacBook Pro, open the Ledger Live app.
- If this is your first time setting up a device with Ledger Live, click on the “Get Started” button. Otherwise, select “Add a device” from the left-hand menu and choose “Ledger Nano X” as the device to add.
- You will be prompted to select a device PIN. Use the buttons on your Ledger Nano X to navigate and select a PIN code of your choice. Make sure to choose a PIN that is easy for you to remember but difficult for others to guess.
- Next, the app will provide you with a 24-word recovery phrase. Write down this recovery phrase and keep it in a safe place. This recovery phrase is crucial for recovering access to your wallet if your device is lost, damaged, or stolen.
- Once you have securely stored your recovery phrase, the Ledger Live app will prompt you to confirm the phrase by selecting the words in the correct order. This step helps ensure that you have accurately recorded your recovery phrase.
- After confirming your recovery phrase, your Ledger Nano X device will be successfully set up, and you will have access to your newly created cryptocurrency wallet through the Ledger Live app.
It’s important to note that during the setup process, you will have the option to choose whether you want to set up a new Ledger Live account or restore an existing account. If you already have a Ledger Live account, you can easily restore it by selecting the appropriate option and following the on-screen instructions.
With your Ledger Nano X device set up and ready to use, you can now proceed to the next step: installing the required apps.
Step 4: Install the Required Apps
Now that your Ledger Nano X is set up, you’ll need to install the required apps on your MacBook Pro to manage your cryptocurrencies. Each cryptocurrency you wish to manage with your Ledger Nano X requires a dedicated app. Follow the steps below to install the necessary apps:
- Open the Ledger Live app on your MacBook Pro, if it’s not already open.
- Connect your Ledger Nano X to your MacBook Pro using the USB-C cable.
- In the Ledger Live app, click on the “Manager” tab located at the bottom of the sidebar on the left-hand side.
- A list of available cryptocurrencies and apps will appear. Choose the cryptocurrencies you wish to manage and click on the “Install” button next to each one.
- Follow the on-screen instructions to install the selected apps on your Ledger Nano X. The apps will be downloaded and installed directly onto your device.
- Once the installation is complete, you will now have access to the corresponding wallets for the installed cryptocurrencies in the Ledger Live app.
- You can repeat this process to install additional apps for other cryptocurrencies whenever needed.
Installing the required apps ensures that you have the necessary tools to securely manage and interact with your cryptocurrencies using your Ledger Nano X. These apps provide an interface for viewing your balances, sending and receiving transactions, and accessing additional features specific to each cryptocurrency.
With the required apps installed, you’re now one step closer to fully utilizing your Ledger Nano X and managing your cryptocurrency accounts securely.
Step 5: Authenticating Your Ledger Nano X
Once your Ledger Nano X and the necessary apps are installed, it’s time to authenticate your device with the Ledger Live app on your MacBook Pro. This step adds an extra layer of security to ensure that only you can access and manage your cryptocurrency accounts. Follow these steps to authenticate your Ledger Nano X:
- Open the Ledger Live app on your MacBook Pro.
- Connect your Ledger Nano X to your MacBook Pro using the USB-C cable.
- Enter your device PIN on the Ledger Nano X when prompted.
- In the Ledger Live app, select the cryptocurrency wallet you want to access.
- On the Ledger Nano X device, verify that the wallet address displayed on the device matches the one shown on the Ledger Live app.
- Using the buttons on your Ledger Nano X, navigate to and confirm the transaction details displayed on the device.
- Once the transaction is confirmed on your Ledger Nano X, you will be able to access and manage your cryptocurrency accounts through the Ledger Live app.
By authenticating your Ledger Nano X with the Ledger Live app, you can ensure that any actions you take within the app are securely verified and approved by your physical device. This provides an additional layer of protection against unauthorized access and potential fraudulent transactions.
It’s worth mentioning that your Ledger Nano X uses a combination of PIN entry and physical button confirmation to prevent unauthorized access. Always make sure to keep your device and PIN secure, and never share your recovery phrase with anyone. By following these security best practices, you can enjoy a safe and secure cryptocurrency management experience with your Ledger Nano X and MacBook Pro.
Step 6: Managing Your Cryptocurrency Accounts
With your Ledger Nano X connected and authenticated, you can now start managing your cryptocurrency accounts through the Ledger Live app on your MacBook Pro. This step allows you to view balances, send and receive transactions, and access various features specific to each supported cryptocurrency. Follow these steps to effectively manage your cryptocurrency accounts:
- Open the Ledger Live app on your MacBook Pro.
- Connect your Ledger Nano X to your MacBook Pro using the USB-C cable.
- Enter your device PIN on the Ledger Nano X when prompted.
- In the Ledger Live app, select the cryptocurrency wallet you want to manage.
- From the wallet dashboard, you can view your current balance, recent transactions, and other relevant information specific to the selected cryptocurrency.
- To send a transaction, click on the “Send” button and enter the recipient’s wallet address, the amount to send, and any additional details required. Confirm the transaction on your Ledger Nano X to authorize and sign the transaction.
- To receive funds, click on the “Receive” button and share your wallet address with the sender. Double-check that the address displayed on your Ledger Nano X matches the one shown on the Ledger Live app to avoid any errors or fraudulent activity.
- Explore the additional features and options provided by the Ledger Live app for each supported cryptocurrency. This may include managing account settings, staking, delegating, or interacting with decentralized applications.
- Remember to review each transaction carefully before approving it on your Ledger Nano X. This ensures that the transaction details are accurate and that you are authorizing the intended action.
By effectively managing your cryptocurrency accounts through the Ledger Live app, you can have full control over your digital assets while keeping them secure on your Ledger Nano X. Take advantage of the various features provided by the app and explore the functionalities specific to each supported cryptocurrency.
It’s important to stay vigilant and verify the accuracy of transaction details and wallet addresses before proceeding. Even small errors in address input can lead to loss of funds, so always double-check and confirm the information on your Ledger Nano X’s display.
With the ability to manage your cryptocurrency accounts securely and conveniently, you can confidently navigate the world of digital assets with your Ledger Nano X and MacBook Pro.
Step 7: Transferring Cryptocurrency to Your Ledger Nano X
Now that you have set up your Ledger Nano X and are managing your cryptocurrency accounts, you may want to transfer your existing cryptocurrency holdings to your Ledger Nano X for enhanced security and control. Follow these steps to transfer cryptocurrency to your Ledger Nano X:
- Open the Ledger Live app on your MacBook Pro.
- Connect your Ledger Nano X to your MacBook Pro using the USB-C cable.
- Enter your device PIN on the Ledger Nano X when prompted.
- In the Ledger Live app, select the cryptocurrency wallet that you want to receive funds in.
- Click on the “Receive” button to generate a receiving address for the selected cryptocurrency. Ensure the address displayed on your Ledger Live app matches the one shown on your Ledger Nano X.
- Copy the generated receiving address or scan the QR code displayed on your MacBook Pro screen.
- On the platform or wallet where your cryptocurrency is currently stored, initiate a transfer to the receiving address generated by your Ledger Live app.
- Double-check the accuracy of the receiving address before confirming the transaction on the sending platform or wallet. This helps ensure that the funds are sent to the correct address.
- Wait for the transaction to be confirmed on the respective blockchain network. The duration of the confirmation process may vary depending on the transfer’s speed and the cryptocurrency being sent.
- Once the transaction is confirmed, you will see the transferred funds reflected in your Ledger Live app’s wallet balance for the respective cryptocurrency.
Transferring your cryptocurrency holdings to your Ledger Nano X provides you with enhanced security as your funds are stored in your own hardware wallet, keeping them safe from potential online threats. When initiating a transfer, always ensure that you are using the correct receiving address associated with your Ledger Nano X.
It’s important to note that different cryptocurrencies may have varying confirmation times, transaction fees, and network requirements. Take these factors into account when transferring your funds and be patient during the confirmation process.
By transferring your cryptocurrency holdings to your Ledger Nano X, you can have peace of mind knowing that your digital assets are securely stored in your offline hardware wallet, providing you with full control and ownership.
Step 8: Safely Disconnecting Your Ledger Nano X
Once you have completed your cryptocurrency management tasks on your Ledger Nano X, it’s important to safely disconnect the device from your MacBook Pro. Safely disconnecting ensures that all transactions are completed, and the device is properly disconnected to avoid any data corruption. Follow these steps to safely disconnect your Ledger Nano X:
- Make sure that you have closed the Ledger Live app on your MacBook Pro and exited any cryptocurrency wallets you were using.
- In the top-right corner of the Ledger Live app, click on the “Disconnect” button to safely disconnect your Ledger Nano X from the app.
- On your Ledger Nano X, navigate to the appropriate menu to safely disconnect the device from your MacBook Pro. This step may involve selecting an option such as “Disconnect” or “Quit” on the device’s built-in display.
- Once the device is safely disconnected, you can unplug the USB-C cable from your Ledger Nano X and your MacBook Pro.
It is important to follow these steps to ensure that all data transfers and transactions are fully processed and stored securely on the blockchain. Safely disconnecting your Ledger Nano X helps prevent any potential data corruption or loss of funds.
Remember, your Ledger Nano X is a hardware wallet designed to keep your private keys secure. Keeping it disconnected from your MacBook Pro when not in use further reduces the risk of unauthorized access or exposure to potential online threats.
By following the proper procedures for safely disconnecting your Ledger Nano X, you can maintain the integrity and security of your cryptocurrency transactions and enjoy peace of mind knowing that your funds are kept safe.
Troubleshooting Tips
While using your Ledger Nano X with your MacBook Pro, you might encounter some issues or face challenges. Here are a few troubleshooting tips to help you resolve common problems:
- 1. Ensure a stable internet connection: To prevent connectivity issues, make sure your MacBook Pro is connected to a stable internet connection. Unstable or slow internet can cause delays or interruptions when interacting with your Ledger Nano X.
- 2. Restart your Ledger Nano X: If you are experiencing any unexpected behavior or issues with your Ledger Nano X, try restarting the device. This simple step can often resolve minor glitches or connectivity problems.
- 3. Update Ledger Live and firmware: Regularly check for updates to the Ledger Live software and your Ledger Nano X firmware. Keeping them up to date ensures you have the latest security features and bug fixes, which can help resolve potential issues.
- 4. Check USB-C cable and port: If you are experiencing connection issues, try using a different USB-C cable or connecting to a different USB-C port on your MacBook Pro. This can help identify if the issue is with the cable or the port itself.
- 5. Clear cache and restart Ledger Live: If you encounter any unusual behavior or the Ledger Live app is not responding as expected, try clearing the cache in the app settings and restarting it. This can resolve temporary software-related issues.
- 6. Reset app data: If you are facing issues with a specific cryptocurrency app on your Ledger Nano X, you can try resetting the app data. Keep in mind that this will remove all local data associated with the app, so make sure you have a backup of your necessary information.
- 7. Reach out to Ledger Support: If you have followed the troubleshooting tips above and are still experiencing issues, don’t hesitate to contact Ledger Support. They have a dedicated support team to address any questions or concerns you may have regarding your Ledger Nano X and its usage.
By following these troubleshooting tips, you can overcome common obstacles and ensure a smoother experience using your Ledger Nano X with your MacBook Pro. Remember, patience and attention to detail are crucial when troubleshooting, and don’t hesitate to seek assistance if needed.