
Gathering the Necessary Equipment
Before you can connect your GoPro camera to your Mac computer, you’ll need to gather a few essential pieces of equipment. Here’s what you’ll need:
- GoPro camera: Make sure you have your GoPro camera handy. Whether it’s a GoPro Hero, Hero7, or the latest Hero8, any of these models can be connected to your Mac.
- USB cable: You’ll need a USB cable to establish the connection between your GoPro and your Mac. Most GoPro cameras come with a USB cable included in the packaging. If you don’t have one, make sure to get a compatible USB cable with the appropriate connectors.
- Mac computer: Of course, you’ll need a Mac computer to connect your GoPro to. It can be a MacBook, MacBook Pro, iMac, or any other Mac model that has an available USB port.
- Updated GoPro firmware: It’s always a good idea to make sure that your GoPro’s firmware is up to date. Check the official GoPro website or use the GoPro app on your smartphone to ensure that your camera has the latest firmware installed. Firmware updates often address connectivity issues and add new features to your GoPro.
Once you have gathered all these necessary equipment, you’ll be ready to establish a connection between your GoPro camera and your Mac computer. Now let’s move on to the next step of updating your Mac’s software.
Updating your Mac’s Software
In order for your GoPro to connect smoothly to your Mac computer, it is essential to keep your Mac’s software up to date. Here are the steps to ensure that your Mac has the latest software version:
- Check for system updates: Click on the Apple logo in the top-left corner of your Mac’s screen and select “System Preferences.” Then, click on “Software Update.” Your Mac will check for any available updates, and if there are any, click on “Update Now” to initiate the installation process.
- Enable automatic updates: To make sure your Mac automatically checks for software updates, go back to “System Preferences” and click on “Software Update.” Then, check the box next to “Automatically keep my Mac up to date.” This ensures that your Mac will regularly check for updates and install them when available.
- Restart your Mac: After the updates have been installed, it’s a good idea to restart your Mac. This helps ensure that all the software changes take effect properly and that any potential conflicts or issues are resolved.
Updating your Mac’s software is crucial not only for establishing a seamless connection with your GoPro but also for overall system performance and security. By keeping your Mac’s software up to date, you’ll have the best compatibility and reliability when connecting your GoPro camera.
Now that your Mac’s software is up to date, let’s move on to the next step of connecting your GoPro to your Mac via USB.
Connecting the GoPro to your Mac via USB
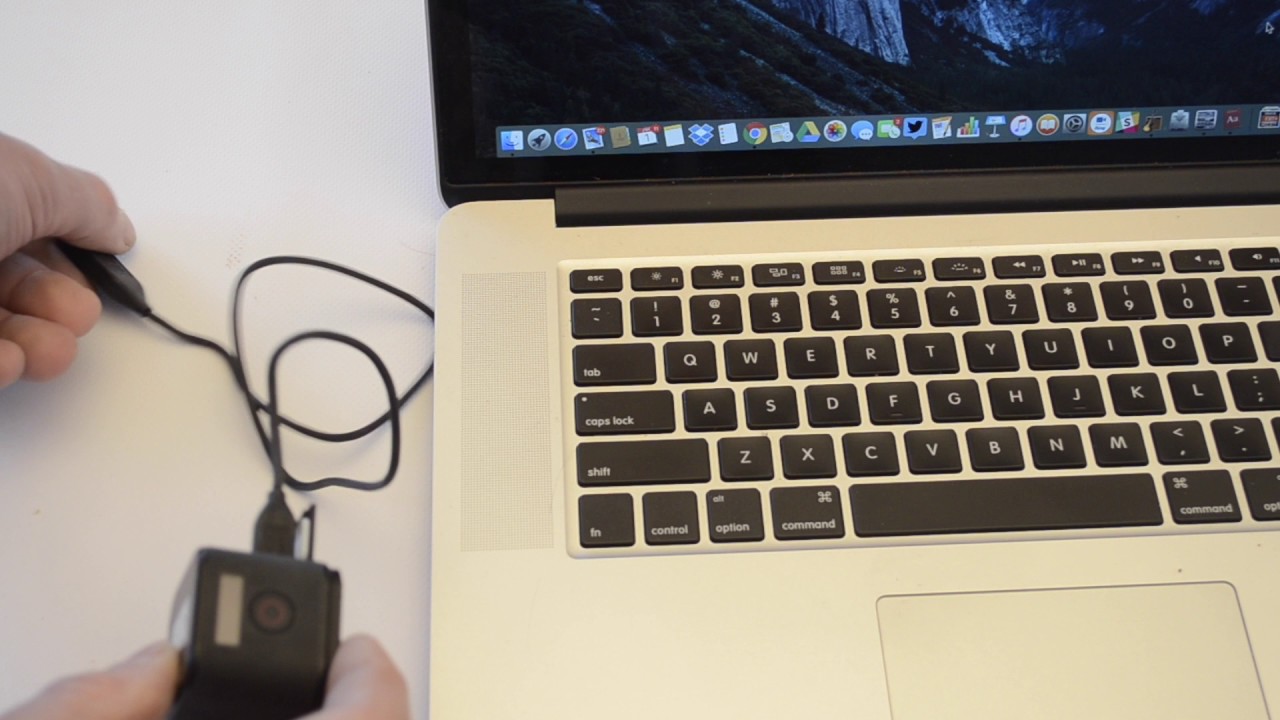
Once you have gathered the necessary equipment and ensured that your Mac’s software is up to date, it’s time to establish the connection between your GoPro camera and your Mac computer. Follow these steps to connect your GoPro to your Mac via USB:
- Turn off your GoPro: Before connecting your GoPro to your Mac, make sure the camera is turned off. This prevents any potential issues that may occur if the camera is powered on during the connection process.
- Locate the USB port on your GoPro: On most GoPro models, the USB port is located on the side of the camera. It is usually covered by a small protective flap that can be easily opened to access the port.
- Connect the USB cable: Take the USB cable and plug one end into the USB port on your GoPro camera. Make sure it is securely inserted.
- Connect the other end of the USB cable to your Mac: Take the other end of the USB cable and plug it into an available USB port on your Mac computer. Again, make sure it is firmly connected.
- Turn on your GoPro: After the USB cable is connected, you can turn on your GoPro camera. It should automatically detect the connection to your Mac.
Once the connection is established, you should see your GoPro camera appearing as a removable storage device on your Mac’s desktop or in the Finder window. This means that your Mac has recognized your GoPro and is ready to access its media files.
Now that your GoPro is connected to your Mac, let’s proceed to the next step of accessing the GoPro’s media files on your computer.
Accessing the GoPro’s Media Files
Now that you have successfully connected your GoPro camera to your Mac computer, it’s time to access the media files stored on your GoPro. Here’s how you can do it:
- Open the Finder: Click on the Finder icon in your Mac’s dock or use the keyboard shortcut Command + Spacebar to open Spotlight and type “Finder” to launch it.
- Locate your GoPro: In the sidebar of the Finder window, you should see your GoPro camera listed under the “Devices” section. Click on your GoPro’s name to view its contents.
- Browse the media files: Once you have accessed your GoPro’s storage, you can navigate through the folders to find your photos and videos. Typically, they are stored in the “DCIM” folder. Click on the folder to view its contents.
- Copy or move files: To copy or move the media files from your GoPro to your Mac, simply select the files you want to transfer and drag them to the desired location on your computer. You can create a new folder or choose an existing one to save the files.
By following these steps, you can easily access and transfer your GoPro’s media files to your Mac computer. Remember to safely eject your GoPro from your Mac once you have finished transferring the files to avoid any potential data corruption or loss.
If you encounter any issues while accessing the GoPro’s media files or if your Mac doesn’t recognize your GoPro, proceed to the next section for troubleshooting common connection issues.
Importing Photos and Videos from the GoPro to your Mac
To import your photos and videos from your GoPro camera to your Mac, you have a few different options. Here are three common methods you can use:
- Using the Photos app: If you have the Photos app installed on your Mac, you can import your GoPro media files directly into the app. Connect your GoPro to your Mac via USB, then open the Photos app. Click on the “Import” tab, select the photos and videos you want to import, and click “Import Selected” to transfer them to your Mac’s Photos library.
- Using the Image Capture app: The Image Capture app is a built-in tool on your Mac that allows you to import media files from various devices, including your GoPro camera. Connect your GoPro to your Mac via USB, then open the Image Capture app. Select your GoPro in the sidebar, choose the destination folder for your imported files, select the photos and videos you want to import, and click “Import” to transfer them to your Mac.
- Manually copying files: If you prefer a more manual approach, you can simply open a Finder window, locate your GoPro’s media files as described in the previous section, and manually copy and paste or drag and drop the files to the desired location on your Mac.
Choose the method that suits your preferences and workflow. Regardless of the method you choose, make sure to wait until the transfer process is complete and verify that all files have been successfully imported before disconnecting your GoPro from your Mac.
Now that you know how to import your GoPro photos and videos to your Mac, you can easily organize, edit, and share them with friends and family.
Troubleshooting Common Connection Issues
While connecting your GoPro camera to your Mac computer is usually a straightforward process, you may encounter some common connection issues. Here are a few troubleshooting steps to help you resolve these problems:
- Check the USB cable: Ensure that you are using a fully functional USB cable that is compatible with your GoPro camera. Try using a different cable to see if the issue persists.
- Restart your Mac and GoPro: Sometimes, a simple restart can resolve connectivity issues. Turn off your Mac and GoPro, then turn them back on and try the connection again.
- Update your GoPro firmware: Make sure your GoPro camera has the latest firmware installed. Visit the official GoPro website and follow the instructions to update the firmware if necessary.
- Check USB port and cable connections: Ensure that the USB cable is securely connected to both your GoPro and your Mac. Also, try connecting the cable to a different USB port on your computer to rule out any port-related issues.
- Reset your GoPro’s connection settings: On your GoPro camera, go to the settings menu and locate the “Connections” or “Connectivity” section. Reset the connection settings to their default values and try connecting again.
- Check for software conflicts: It’s possible that other software or drivers on your Mac are conflicting with the GoPro’s connectivity. Try disconnecting any other USB devices and temporarily disable any security or antivirus software that may be interfering with the connection.
- Try a different computer: If you have access to another Mac or PC, try connecting your GoPro to it to determine if the issue lies with your computer or the camera.
If you have tried the troubleshooting steps mentioned above and are still experiencing connection issues, it may be helpful to consult the official GoPro support website or contact their customer support for further assistance.
By troubleshooting these common connection issues, you can ensure a smooth and reliable connection between your GoPro camera and your Mac computer.