Checking Compatibility
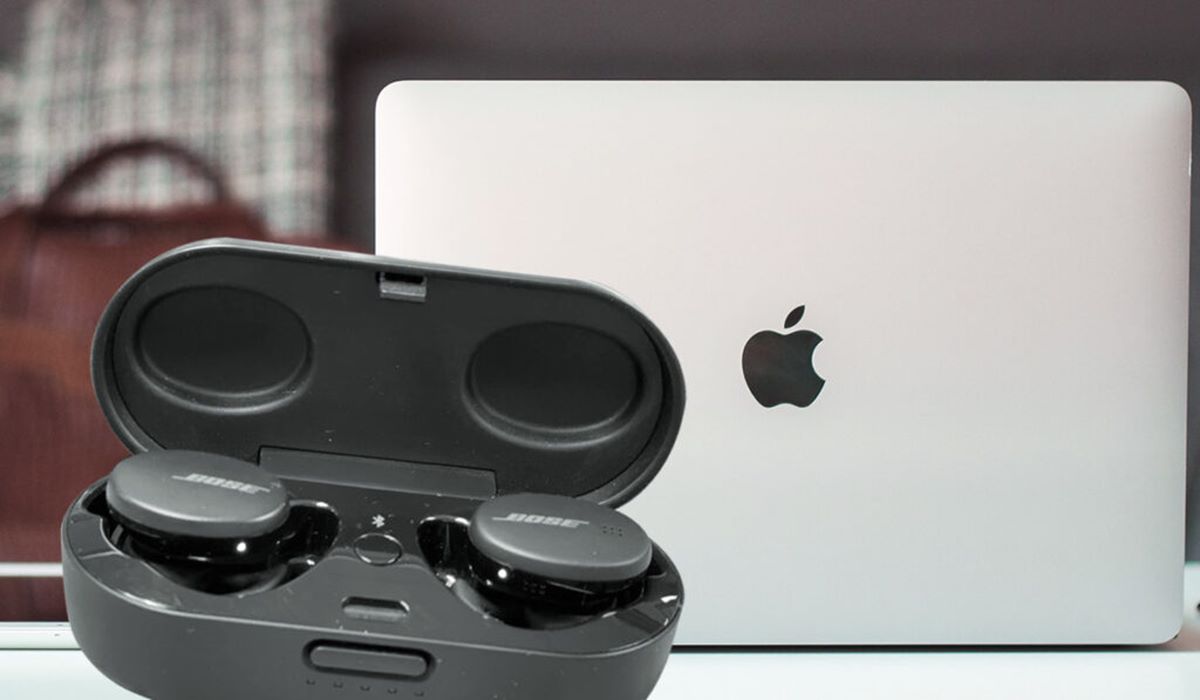
Bose earbuds are widely known for their exceptional sound quality and wireless convenience. If you want to connect your Bose earbuds to a laptop, the first step is to ensure that they are compatible with your device. Here are a few things to check:
- Bluetooth Capability: Verify that your laptop is equipped with Bluetooth functionality. Most modern laptops come with built-in Bluetooth, but if yours doesn’t, you may need to purchase an external Bluetooth adapter.
- Operating System: Make sure your laptop’s operating system supports Bluetooth connectivity. Whether you’re using Windows, macOS, or Linux, check the system requirements to ensure compatibility.
- Bose Earbud Model: Different Bose earbud models may have varying compatibility with laptops. Check the user manual or the official Bose website to confirm if your specific earbud model supports laptop connectivity.
- Device Driver Updates: Ensure that your laptop’s device drivers, especially the ones related to Bluetooth functionality, are up-to-date. Outdated drivers can cause compatibility issues and connectivity problems with your Bose earbuds.
By verifying these compatibility factors, you can avoid frustration and ensure a smooth connection between your Bose earbuds and laptop. If you have checked all these aspects and everything appears to be compatible, you are now ready to proceed to the next steps of connecting and pairing your earbuds with your laptop.
Connecting via Bluetooth
Once you have confirmed the compatibility of your Bose earbuds with your laptop, the next step is to connect them via Bluetooth. Follow these steps to establish a connection:
- Enable Bluetooth: On your laptop, navigate to the settings or control panel and locate the Bluetooth options. Ensure that Bluetooth is turned on.
- Put Earbuds in Pairing Mode: If your Bose earbuds have a dedicated pairing button, press and hold it until the LED indicator starts flashing. For models without a pairing button, refer to the user manual for instructions on activating pairing mode.
- Scan for Devices: On your laptop, click on the Bluetooth settings and select the option to scan for available devices. Wait for a few moments as your laptop searches for nearby Bluetooth devices.
- Select Earbuds: Once your Bose earbuds appear as an available device in the list, click on them to select and connect. Some laptops may prompt you to enter a pairing code, which can usually be found in the earbuds’ manual or on the official Bose website. Follow any on-screen instructions to complete the pairing process.
- Successful Connection: Once the pairing is successful, you will see a confirmation message on your laptop. Additionally, the LED indicator on your earbuds may turn solid or stop flashing, indicating a stable connection.
After successfully connecting your Bose earbuds to your laptop, you can enjoy high-quality wireless audio while working, watching movies, or listening to music. If you experience any connection issues or are unable to pair your earbuds, continue reading for troubleshooting tips in the next section.
Pairing the Earbuds
After establishing a Bluetooth connection between your Bose earbuds and laptop, the next step is to pair them. Pairing ensures that your earbuds and laptop communicate seamlessly. Follow these steps to pair your Bose earbuds:
- Enable Bluetooth: Make sure Bluetooth is enabled on your laptop and that it’s in discoverable mode.
- Put Earbuds in Pairing Mode: If your Bose earbuds aren’t already in pairing mode, put them into pairing mode by following the instructions specific to your earbud model. This usually involves pressing and holding a button until the LED indicator starts flashing.
- Open Bluetooth Settings: On your laptop, navigate to the Bluetooth settings and look for the section that displays available devices.
- Select Earbuds: Look for your Bose earbuds in the list of available devices and click on them to initiate the pairing process. Some earbuds may require you to enter a PIN or passkey—refer to the manual for the specific code.
- Confirm Pairing: After clicking on your earbuds, a prompt may appear asking you to confirm the pairing. Click “Pair” to complete the process.
- Test the Connection: Once paired, play audio on your laptop to ensure it’s coming through your Bose earbuds. Adjust the volume settings on both your laptop and earbuds as needed.
Congratulations! You have successfully paired your Bose earbuds with your laptop. From now on, whenever your earbuds are in range of your laptop with Bluetooth enabled, they should automatically connect and deliver sound wirelessly. If you encounter any issues during pairing or experience connectivity problems, don’t worry. The next section will provide troubleshooting tips to help you resolve any potential issues.
Troubleshooting Connection Issues
While connecting and pairing your Bose earbuds with your laptop should be a straightforward process, occasionally, you may encounter connection issues. Here are some troubleshooting steps to help you resolve any potential problems:
- Ensure Proper Range: Make sure your earbuds are within the Bluetooth range of your laptop. Keep in mind that obstacles like walls or other electronic devices can interfere with the signal.
- Restart Devices: Try restarting both your earbuds and laptop. Sometimes, a simple restart can resolve connectivity issues.
- Update Bluetooth Drivers: Ensure that your laptop’s Bluetooth drivers are up to date. Visit the manufacturer’s website or use the Device Manager to check for driver updates.
- Reset Earbuds: If your earbuds continue to have connection problems, try resetting them. Refer to the user manual for instructions on how to reset your specific earbud model.
- Remove Interference: Move away from other electronic devices that may be causing interference, such as Wi-Fi routers or microwaves. These devices can disrupt the Bluetooth signal.
- Re-pair the Earbuds: Sometimes, re-pairing your earbuds can solve connection issues. Unpair your earbuds from your laptop and then repeat the pairing process outlined earlier.
- Update Firmware: Check if there are any firmware updates available for your Bose earbuds. Updating the firmware can address compatibility issues and improve overall performance.
By following these troubleshooting steps, you should be able to overcome most connection issues between your Bose earbuds and laptop. If problems persist, consider seeking further support from the Bose customer service or referring to the user manual for specific troubleshooting guidance related to your earbud model.
Updating Bluetooth Drivers
Outdated or incompatible Bluetooth drivers can often cause connectivity issues between your Bose earbuds and laptop. By updating the Bluetooth drivers, you can ensure optimal performance and enhance the stability of the connection. Here’s how to update the Bluetooth drivers on your laptop:
- Identify Your Bluetooth Hardware: First, you need to identify the specific Bluetooth hardware in your laptop. You can do this by checking the device documentation or visiting the manufacturer’s website.
- Visit the Manufacturer’s Website: Once you have identified the Bluetooth hardware, visit the manufacturer’s website. Look for the “Support” or “Downloads” section where you can find the latest drivers for your Bluetooth hardware.
- Download the Latest Drivers: Locate the appropriate driver for your Bluetooth hardware and download it. Ensure that you select the driver that matches your operating system version (e.g., Windows 10, macOS, etc.)
- Install the Drivers: After downloading the driver, run the installation file and follow the on-screen instructions to install the latest drivers for your Bluetooth hardware. It may require you to restart your laptop after the installation process is complete.
- Verify Driver Update: Once your laptop has restarted, go to the Device Manager and locate the Bluetooth hardware. Check if the driver version has been updated to the latest one. If it has, you have successfully updated your Bluetooth drivers.
Updating your Bluetooth drivers can address compatibility issues and improve the overall functionality of your Bluetooth connection with the Bose earbuds. It is recommended to periodically check for driver updates to ensure a smooth and uninterrupted experience.
Setting the Earbuds as Default Output Device
After successfully connecting your Bose earbuds to your laptop, it’s important to set them as the default output device to ensure that the audio is played through the earbuds. Here’s how you can do it:
- Access Sound Settings: Right-click on the volume icon in the taskbar and select “Sounds” or “Playback devices.” This will open the sound settings on your laptop.
- Select Earbuds as Default: In the playback devices tab, look for your Bose earbuds. Right-click on them and select “Set as Default Device” or “Set as Default Playback Device.” This will set the earbuds as the default output device for audio.
- Adjust Volume Settings: You can adjust the volume of the earbuds by using the volume control on your laptop or the volume control on the earbuds themselves. Ensure that the volume is set to a comfortable level.
- Test the Audio: Play a sound or video on your laptop to test if the audio is playing through your Bose earbuds. If you can hear the sound through the earbuds, you have successfully set them as the default output device.
By setting your Bose earbuds as the default output device, you can ensure that all audio is routed to the earbuds for an immersive listening experience. Keep in mind that you may need to repeat this process if you connect your laptop to other audio devices in the future.
Adjusting Sound Settings
Once you have connected your Bose earbuds to your laptop and set them as the default output device, you may want to fine-tune the sound settings to enhance your listening experience. Here are a few adjustments you can make:
- Equalizer Settings: Many laptops come with built-in equalizer settings that allow you to adjust the audio frequencies for different types of music or content. Explore the sound settings on your laptop to access the equalizer and experiment with different presets or customize the settings to your preference.
- Bose Connect App: If your Bose earbuds are compatible with the Bose Connect app, consider installing the app on your smartphone or laptop. The app provides additional sound customization options, including personalized settings, noise cancellation control, and firmware updates.
- Volume Balancing: Adjust the volume balance between the left and right earbuds to ensure equal sound distribution. Some devices or audio players have an option to adjust the balance in the sound settings menu.
- Sound Enhancements: Some laptops offer sound enhancement features such as virtual surround sound or bass boosting. Explore these options to enhance your audio experience, but keep in mind that personal preferences may vary.
- Third-Party Audio Software: If you’re looking for more advanced sound customization, you can consider using third-party audio software. These software programs provide extensive control over audio settings, allowing you to adjust equalizer settings, sound effects, and more.
By adjusting the sound settings to your liking, you can optimize the audio quality and tailor it to your preferences while using your Bose earbuds with your laptop. Experiment with different settings and presets to find the perfect balance that enhances your listening experience.
Using Bose Connect App
If you own a pair of Bose earbuds that are compatible with the Bose Connect app, you can further enhance your listening experience by utilizing the features and controls provided by the app. Here’s how you can make the most out of the Bose Connect app:
- Download and Install the App: Make sure you have the Bose Connect app downloaded and installed on your smartphone or laptop. You can find the app on your device’s app store or on the official Bose website.
- Pair Your Earbuds: Open the Bose Connect app and follow the on-screen instructions to pair your Bose earbuds with the app. This step may vary depending on your specific earbud model.
- Personalize Your Experience: Once your earbuds are connected to the app, you can personalize your listening experience. The app typically offers features such as noise cancellation control, volume-optimized equalization, and quick access to favorite music apps.
- Firmware Updates: The Bose Connect app also provides firmware updates for your earbuds. These updates can enhance performance and add new features. Check for updates regularly to ensure you have the latest firmware installed.
- Find Your Earbuds: If you misplace your earbuds, the Bose Connect app can help you locate them. The app uses Bluetooth signals to track the last known location of your earbuds.
- Connect Multiple Devices: The Bose Connect app allows you to connect your earbuds with multiple devices simultaneously. You can easily switch between devices and enjoy a seamless listening experience without the need to constantly re-pair your earbuds.
By using the Bose Connect app, you can unlock additional features, personalize your sound settings, and stay up to date with the latest firmware for your Bose earbuds. Take advantage of the app to maximize the capabilities of your earbuds and enjoy a customized listening experience.
Troubleshooting Audio Quality Issues
If you’re experiencing audio quality issues with your Bose earbuds while using them with your laptop, there may be a few factors contributing to the problem. Here are some troubleshooting steps to help you improve the audio quality:
- Check Earbud Fit: Ensure that your earbuds are properly inserted and create a tight seal in your ears. A loose fit can affect the sound quality and bass response.
- Clean the Earbuds: Over time, earwax and debris can accumulate on the earbuds and affect the sound quality. Clean your earbuds regularly using a soft, dry cloth or an alcohol wipe to remove any buildup.
- Adjust Equalizer Settings: Experiment with the equalizer settings on your laptop or in the audio settings of the media player you’re using. Adjusting the equalizer can help fine-tune the sound and enhance specific frequencies.
- Check Audio Source: Verify that the audio source, such as a video or music file, is of high quality. Poorly recorded or low-bitrate audio files can impact the overall audio experience.
- Update Audio Drivers: Ensure that your laptop’s audio drivers are up to date. Outdated drivers can cause audio glitches and affect the sound quality. Check the manufacturer’s website or use the Device Manager to update the audio drivers.
- Disable Audio Enhancements: Some laptops have audio enhancement features or effects that can interfere with the original sound produced by your earbuds. Disable any audio enhancements and test the sound quality again.
- Test with Different Devices: To isolate the issue, try connecting your Bose earbuds to other devices like smartphones or tablets. If the audio quality is better on those devices, it may indicate a problem with your laptop’s audio settings or hardware.
By following these troubleshooting steps, you can identify and resolve audio quality issues with your Bose earbuds while using them with your laptop. If the problems persist, consider contacting Bose customer support for further assistance.
Disconnecting the Earbuds from the Laptop
When you’re done using your Bose earbuds with your laptop or if you want to switch to a different audio output device, it’s important to properly disconnect the earbuds to avoid any potential issues. Here’s how you can disconnect your earbuds from the laptop:
- Pause Audio Playback: Before disconnecting your Bose earbuds, make sure to pause any audio or video playback on your laptop. This will prevent any sudden interruption or audio glitches.
- Open Bluetooth Settings: Go to the Bluetooth settings on your laptop, usually accessible through the system tray or the settings/control panel. Look for the connected devices list.
- Locate Earbuds: In the connected devices list, find your Bose earbuds. They should be labeled with their model or name.
- Disconnect the Earbuds: Click on the “Disconnect,” “Remove,” or “Forget” option next to your earbuds in the connected devices list. This will initiate the disconnection process.
- Verify Disconnection: After disconnecting, ensure that the status of your earbuds in the Bluetooth settings changes to “Not Connected” or similar. This confirms that the earbuds are no longer connected to your laptop.
- Turn Off Bluetooth: If you’re not planning to use Bluetooth for other devices, you can turn off Bluetooth on your laptop to save battery and avoid potential interference.
By following these steps, you can safely disconnect your Bose earbuds from your laptop without causing any disruptions or connection issues. Remember to disconnect the earbuds whenever you’re not using them to conserve battery life and optimize your Bluetooth connectivity.