
Step 1: Set Up Your Arlo Camera System
Setting up your Arlo camera system is the first step towards connecting it to Google Home. Follow the steps below to ensure a seamless installation process.
1. Choose a suitable location: Before you start, decide where you want to place your Arlo cameras. Consider areas such as entrances, walkways, or any other spots that require monitoring. Ensure that the cameras are within range of your Wi-Fi network.
2. Install the Arlo app: Download the Arlo app on your smartphone or tablet from the App Store or Google Play Store. Create an Arlo account to access the full range of features.
3. Sync your camera to the Arlo base station: Connect the Arlo base station to your Wi-Fi router using the provided Ethernet cable. Wait for the power and internet LED lights to turn green. Then, press the sync button on the base station and the sync button on the camera simultaneously. The camera LED will blink blue to confirm successful sync.
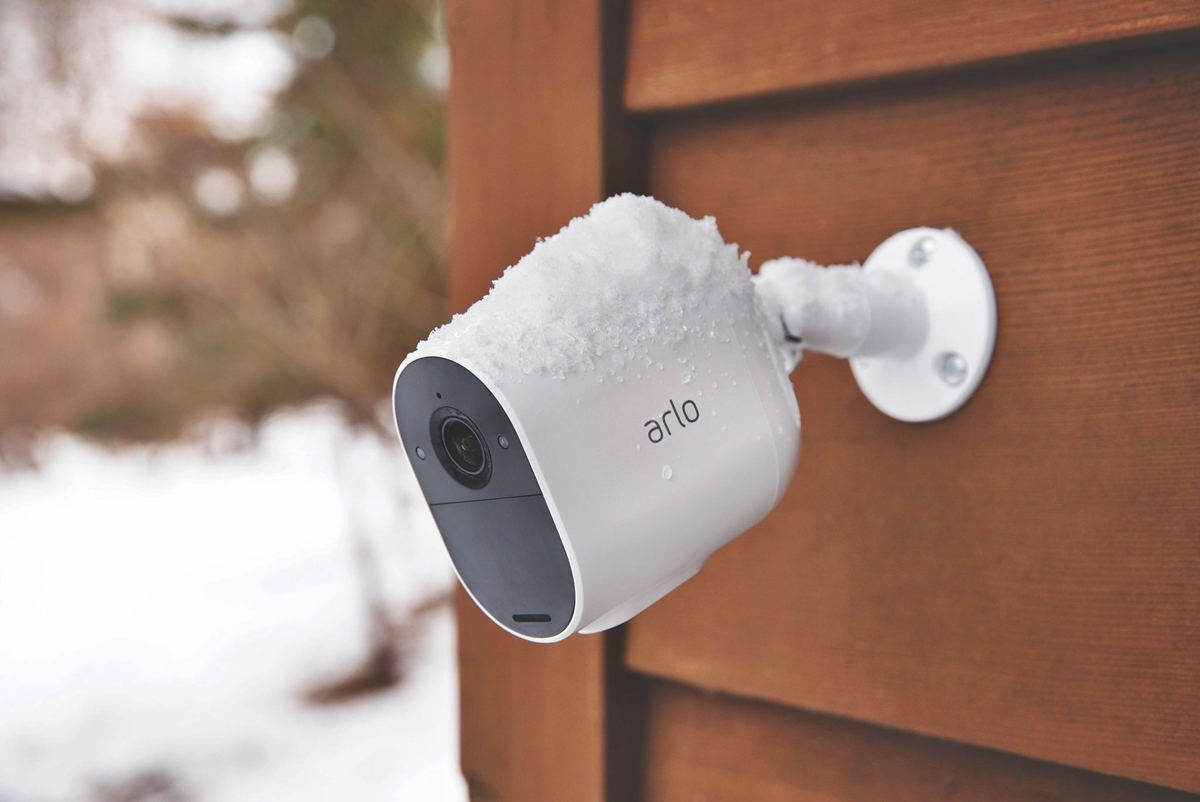
4. Position and mount your cameras: Choose the desired mounting option and place your camera in the chosen location. Use screws or adhesive mounts depending on the surface. Ensure that the camera is positioned correctly for optimal coverage.
5. Connect the Arlo base station to your account: Open the Arlo app and follow the on-screen instructions to connect the base station to your Arlo account. This will establish a connection between your cameras and the app, allowing you to view the live feed and manage settings.
6. Test your cameras: Once the cameras are set up, test their functionality by accessing the live feed through the Arlo app. Ensure that you are receiving clear video and audio signals from each camera.
7. Update firmware and customize settings: Check for firmware updates in the Arlo app and install them if available. Customize the camera settings according to your preferences, such as motion detection sensitivity or recording length.
By following these steps, you will have successfully set up your Arlo camera system. With your cameras ready to go, you can now proceed to the next step of connecting them to your Google Home device.
Step 2: Set Up Your Google Home Device
Before you can connect your Arlo camera system to Google Home, you need to ensure that your Google Home device is properly set up. Follow the steps below to get started:
1. Unbox and plug in your Google Home device: Start by unboxing your Google Home device and plugging it into a power outlet. Wait for the device to power on and indicate that it is ready for setup.
2. Download the Google Home app: On your smartphone or tablet, download the Google Home app from the App Store or Google Play Store. This app will be used to connect your Google Home device to your Wi-Fi network and manage its settings.
3. Connect your device to the Google Home app: Open the Google Home app and follow the on-screen prompts to connect your Google Home device to the app. Make sure your smartphone or tablet is connected to the same Wi-Fi network that you want your Google Home device to be connected to.
4. Set up your Google Assistant: During the device setup process, you will be prompted to set up Google Assistant. Follow the instructions on the app to configure your preferences, including your preferred language and location.
5. Link your Google account: After setting up Google Assistant, you will be asked to link your Google account to your Google Home device. This allows you to access personalized information and services through your device.
6. Configure your device preferences: Once your Google Home device is connected and your Google account is linked, you can customize preferences such as music streaming services, home automation integration, and more. Explore the settings in the Google Home app to tailor the device to your needs.
7. Test your Google Home device: After completing the setup process, test your Google Home device by using voice commands to play music, ask questions, or control other compatible devices. Ensure that your device is responding accurately and functioning as expected.
With your Google Home device set up and ready to go, you are now prepared to connect it to your Arlo camera system. Proceed to the next step to learn how to establish a connection between these two devices.
Step 3: Install the Google Assistant App
In order to connect your Arlo camera system to Google Home, you will need to install the Google Assistant app. This app serves as the bridge between your Arlo cameras and your Google Home device. Follow the steps below to install the Google Assistant app:
1. Check device compatibility: Before proceeding, ensure that your smartphone or tablet is compatible with the Google Assistant app. The app is available for both Android and iOS devices. Check the respective app stores to verify compatibility.
2. Open the app store: On your smartphone or tablet, open the App Store (iOS) or Google Play Store (Android).
3. Search for the Google Assistant app: In the search bar of the app store, type “Google Assistant” and search for the official Google Assistant app.
4. Install the app: Once you locate the Google Assistant app, tap on the “Install” button to begin the installation process. Wait for the app to download and install on your device.
5. Launch the app: Once the installation is complete, tap on the “Open” button to launch the Google Assistant app.
6. Sign in to your Google account: In order to use the Google Assistant app, you will need to sign in with your Google account. Enter your credentials and follow the on-screen instructions to complete the sign-in process.
7. Grant necessary permissions: The Google Assistant app may require certain permissions in order to enable full functionality. Be sure to grant permissions when prompted, allowing the app to access relevant features on your device.
8. Customize your preferences: Once you have successfully installed and launched the Google Assistant app, you can customize various settings and preferences. This includes language preferences, voice command settings, and more. Explore the app to tailor it to your specific needs.
By installing the Google Assistant app on your smartphone or tablet, you have taken a vital step toward connecting your Arlo camera system to Google Home. Proceed to the next step to learn how to establish the connection and enjoy the benefits of controlling your Arlo cameras using Google Home.
Step 4: Connect Arlo to Google Home
Now that your Arlo camera system is set up and you have installed the Google Assistant app, it’s time to connect your Arlo cameras to Google Home. Follow these steps to establish the connection:
1. Open the Google Assistant app: Launch the Google Assistant app on your smartphone or tablet. Make sure you are signed in to your Google account.
2. Access the settings menu: Look for the settings icon, usually located in the top-right or bottom-right corner of the app. Tap on it to access the settings menu.
3. Select the devices option: In the settings menu, find and select the “Devices” option. This will allow you to manage and connect your Arlo cameras to Google Home.
4. Tap on the “+” or “Add” button: Look for the “+” or “Add” button within the devices section of the app. Tap on it to start the process of adding a new device.
5. Select “Arlo” from the device options: You will see a list of available device options. Look for “Arlo” in the list and tap on it to select it as the device you want to add.
6. Follow the on-screen prompts: The Google Assistant app will guide you through the process of connecting your Arlo cameras to Google Home. Follow the on-screen prompts to complete the setup.
7. Sign in to your Arlo account: During the setup process, you will be prompted to sign in to your Arlo account. Enter your Arlo account credentials to proceed.
8. Grant necessary permissions: To enable the connection between Arlo and Google Home, you may need to grant certain permissions and authorizations. Make sure to review and approve these permissions when prompted.
9. Complete the setup: Once you have signed in and granted the necessary permissions, the setup process will be completed. You should now see your Arlo cameras listed within the Google Assistant app.
With your Arlo cameras successfully connected to Google Home, you can now enjoy the convenience of controlling and managing your cameras using voice commands and the Google Home device. Proceed to the next step to learn more about managing your Arlo cameras using Google Home.
Step 5: Manage Arlo Cameras Using Google Home
Now that your Arlo cameras are connected to Google Home, you can easily manage and control them using voice commands or the Google Home app. Here are the ways to manage your Arlo cameras using Google Home:
1. View live camera feeds: With Arlo cameras connected to Google Home, you can simply say, “Hey Google, show me [camera name]” to view the live feed on a compatible device with a screen, such as a Google Nest Hub or Chromecast-enabled TV. This allows you to monitor your home or desired area effortlessly.
2. Control camera settings: You can also use voice commands to control various camera settings. For example, say “Hey Google, turn on motion detection for [camera name]” or “Hey Google, turn off sound detection for [camera name]” to adjust specific camera configurations as needed.
3. Arm and disarm your cameras: Secure your home by arming or disarming your Arlo cameras using voice commands. For example, say “Hey Google, arm [camera name]” to activate the camera’s motion detection, or “Hey Google, disarm [camera name]” to deactivate it when you’re in the vicinity.
4. Set up routines: Utilize Google Home routines to create custom commands that trigger specific camera actions. For instance, you can create a routine that says, “Hey Google, I’m leaving home” to automatically arm your Arlo cameras and enable motion detection.
5. Get camera status updates: Stay informed about the status of your Arlo cameras by asking Google Home for updates. You can ask questions like “Hey Google, is [camera name] recording?” or “Hey Google, are all my cameras armed?” to receive real-time updates on the status of your cameras.
6. Set up camera groups: If you have multiple Arlo cameras, organize them into groups to control them collectively. Create a group in the Google Home app and assign specific cameras to it. Then, use voice commands to control the entire group by saying commands like “Hey Google, show me [group name].”
7. Use Google Home app for more control: In addition to voice commands, you can also manage your Arlo cameras using the Google Home app. Open the app, select the camera you wish to control, and adjust settings such as motion detection sensitivity, recording length, and more.
With Google Home and the Google Assistant app, managing your Arlo cameras becomes effortless and convenient. Take advantage of these features to monitor, control, and secure your home with ease.
Step 6: Troubleshooting Tips and Common Issues
While connecting your Arlo cameras to Google Home is a seamless process, you may encounter some common issues or glitches. Here are a few troubleshooting tips to help you resolve any problems:
1. Ensure Wi-Fi connectivity: Make sure that both your Arlo cameras and Google Home device are connected to the same Wi-Fi network. Stable and reliable network connectivity is crucial for seamless communication between the devices.
2. Verify firmware updates: Check for any firmware updates for both your Arlo cameras and Google Home device. Keeping the devices up-to-date can help resolve compatibility issues and improve overall performance.
3. Restart the devices: Try restarting your Arlo cameras and Google Home device. Power them off, wait for a few seconds, and power them back on. This simple step can often resolve connectivity issues.
4. Re-sync the devices: If the connection between your Arlo cameras and Google Home has been disrupted, you may need to re-sync them. Follow the instructions provided in the Arlo and Google Home apps to perform a re-syncing process.
5. Check device compatibility: Ensure that your Arlo camera models are compatible with Google Home. Not all Arlo camera models are compatible, so make sure to check the compatibility list provided by Arlo or Google.
6. Check camera placement: If you are experiencing poor camera performance or connectivity issues, the physical placement of your Arlo cameras may be a factor. Ensure that the cameras are within range of your Wi-Fi network and positioned properly for optimal coverage.
7. Reset the devices: As a last resort, you can try performing a factory reset on both your Arlo cameras and Google Home device. Be aware that this will erase all settings and configurations, so be prepared to set them up again from scratch.
If you are still experiencing issues, consult the support documentation provided by Arlo and Google. Their websites and customer support channels can provide additional troubleshooting steps specific to your devices.
By following these troubleshooting tips, you can address common issues that may arise when connecting your Arlo cameras to Google Home, ensuring a smooth and uninterrupted experience.
Step 7: Best Practices for Using Arlo with Google Home
To optimize your experience when using Arlo cameras with Google Home, consider following these best practices:
1. Position your cameras strategically: Place your Arlo cameras in strategic locations to cover the areas you want to monitor. Consider factors such as line of sight, lighting conditions, and potential obstructions to maximize their effectiveness.
2. Customize motion detection settings: Use the Arlo app to customize motion detection settings for each camera. Adjust the sensitivity level and detection zones to minimize false alerts and focus on specific areas of interest.
3. Label your cameras: Assign descriptive names to your Arlo cameras in the Arlo app. This allows you to easily identify and command specific cameras when using Google Home voice commands.
4. Group cameras for easier control: Create camera groups in the Google Home app to control multiple cameras at once. This is particularly useful if you have multiple cameras monitoring a particular area or part of your home.
5. Use routines for automation: Leverage Google Home routines to automate tasks involving your Arlo cameras. For example, you can create a routine that automatically turns on motion detection for all cameras when you leave home or disarm them when you return.
6. Regularly check for firmware updates: Keep your Arlo cameras and Google Home device up to date by installing any available firmware updates. These updates often include bug fixes, security enhancements, and new features to improve performance.
7. Protect your privacy: Be mindful of your camera placement and ensure they are not capturing areas where privacy might be compromised. Additionally, take advantage of the privacy features offered by both Arlo and Google Home to safeguard your personal information.
8. Learn and explore voice commands: Familiarize yourself with the available voice commands supported by Google Home for controlling your Arlo cameras. Experiment with different commands to find the ones that work best for your needs.
9. Ensure a stable internet connection: A strong and stable internet connection is crucial for smooth communication between your Arlo cameras, the Google Home device, and the Google Assistant app. Consider optimizing your Wi-Fi network to minimize any connectivity issues.
By following these best practices, you can enhance the functionality and effectiveness of your Arlo cameras when using them in conjunction with Google Home. Enjoy the convenience and peace of mind that comes with seamless integration and control over your home security system.