
Preparing the iPhone for Connection
Before you can connect your iPhone to a mini projector, it’s important to ensure that your device is properly prepared. Follow these steps to get your iPhone ready for connection:
- Charge your iPhone: Ensure that your iPhone has enough battery power to sustain the connection and playback duration. It is recommended to fully charge your device before connecting it to the mini projector to avoid any interruptions during your presentation or media playback.
- Update your iPhone software: Regularly updating your iPhone’s software is crucial, as it brings bug fixes and improvements that may enhance compatibility with external devices like mini projectors. Check for any available software updates by going to Settings > General > Software Update and installing the latest version, if applicable.
- Clear storage space: Deleting unnecessary files, apps, and media from your iPhone will help create more storage space for smooth playback and prevent any delays or buffering issues. Go through your device and remove any items that are no longer needed to free up space.
- Disable auto-lock: To prevent your iPhone screen from automatically locking and interrupting the connection, it’s advisable to disable the auto-lock feature temporarily. Go to Settings > Display & Brightness > Auto-Lock and select the ‘Never’ option. Remember to re-enable auto-lock after you disconnect from the mini projector or when you’re done using it.
- Create a backup: It’s always a good practice to create a backup of your iPhone’s data before connecting it to any external device. This ensures that your important files are protected in case of any unforeseen issues during the connection process.
By following these preparation steps, you can ensure that your iPhone is optimized for a seamless and hassle-free connection to a mini projector. Once your device is ready, you can proceed to the next steps to choose the right cable or adapter for your connection.
Choosing the Right Cable or Adapter
When connecting your iPhone to a mini projector, it’s essential to choose the right cable or adapter to establish a successful connection. The specific cable or adapter you’ll need depends on the type of connectors available on both your iPhone and the mini projector. Here are some options to consider:
- Lightning to HDMI Adapter: If your iPhone has a Lightning port (commonly found on newer models), you can use a Lightning to HDMI adapter to connect it directly to the HDMI port on the mini projector. This adapter allows you to mirror your iPhone’s screen on the projector to display presentations, videos, and other media. Make sure to purchase a reputable adapter from trusted brands for optimal performance.
- USB-C to HDMI Cable: For iPhones with a USB-C port (such as the latest iPhone models), a USB-C to HDMI cable is the ideal choice. Simply connect the USB-C end to your iPhone and the HDMI end to the mini projector. This cable also enables screen mirroring and supports high-resolution video and audio playback.
- 30-Pin Dock Connector to VGA/HDMI Adapter: If you’re using an older iPhone model with a 30-pin Dock Connector instead of Lightning or USB-C, you’ll need a 30-pin Dock Connector to VGA or HDMI adapter. This type of adapter allows you to connect your iPhone to the mini projector via VGA or HDMI, depending on the available ports on the projector.
- Wireless HDMI Adapter: Alternatively, if you prefer a wireless connection, you can use a wireless HDMI adapter that plugs into the HDMI port on the mini projector. This adapter connects to your iPhone wirelessly, allowing you to stream the contents of your screen to the projector without the need for any physical cables.
When selecting a cable or adapter, consider the compatibility of your iPhone’s port with the available ports on the mini projector. It’s also important to ensure that the cable or adapter supports the necessary resolution and audio capabilities to deliver the best quality output to the projector.
Remember to purchase high-quality cables or adapters from reputable sources to ensure reliable connectivity and avoid any potential compatibility issues. With the right cable or adapter in hand, you’re ready to move on to the next step and connect your iPhone to the mini projector.
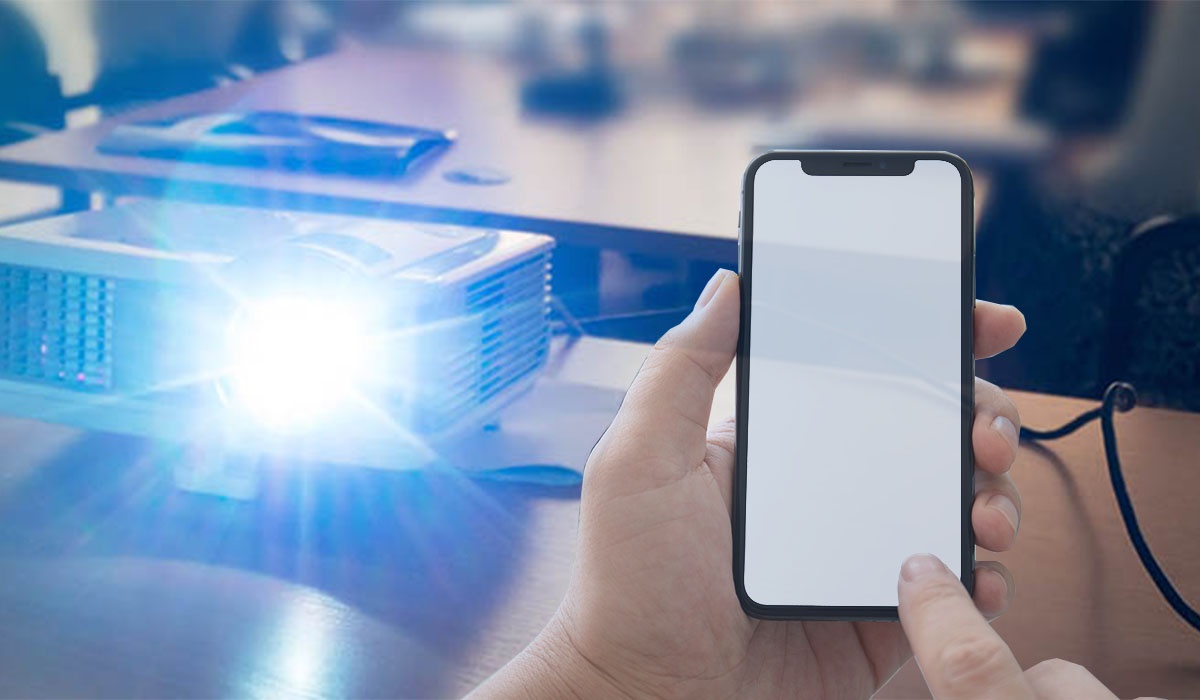
Connecting the iPhone to the Mini Projector
Once you have prepared your iPhone and chosen the appropriate cable or adapter, it’s time to connect your iPhone to the mini projector. Follow these steps to establish a seamless connection:
- Connect the cable or adapter to your iPhone: Plug one end of the cable or adapter into the corresponding port on your iPhone, whether it’s the Lightning port, USB-C port, or 30-pin Dock Connector. Ensure a secure connection to avoid any interruptions during the connection process.
- Connect the other end to the mini projector: Take the other end of the cable or adapter and connect it to the HDMI or VGA port on the mini projector, depending on the available options. Again, make sure the connection is secure to ensure a stable connection throughout your presentation or media playback.
- Turn on the mini projector: Switch on the mini projector and set it to the appropriate input source (e.g., HDMI or VGA). This allows it to recognize the connection from your iPhone and display the content properly on the projector screen.
- Unlock your iPhone: If your iPhone has security features like a passcode, Touch ID, or Face ID, unlock your device to initiate the connection. Depending on your iPhone’s settings, you may need to grant permission for the connection to be established.
- Adjust the display settings, if necessary: On your iPhone, go to Settings > Display & Brightness to adjust the resolution or screen mirroring settings, if needed. You can choose whether to mirror your entire screen or only specific apps depending on your presentation or media requirements.
Once these steps are completed, your iPhone should be successfully connected to the mini projector, and you should see the content from your iPhone displayed on the projector screen. If the connection is not established, double-check the cable or adapter connections, ensure the mini projector is set to the correct input source, and recheck your iPhone’s display settings.
Now that your iPhone is connected to the mini projector, you’re ready to proceed to the next section and learn about adjusting the settings on your iPhone to optimize the viewing experience.
Adjusting the Settings on Your iPhone
After successfully connecting your iPhone to the mini projector, it’s important to adjust the settings on your iPhone to ensure the best viewing experience. Follow these steps to optimize the display settings:
- Brightness and Display: Depending on the lighting conditions in the room, you may need to adjust the brightness level on your iPhone. Swipe down from the top-right corner of the screen (or up from the bottom on older models) to access the Control Center and adjust the brightness slider accordingly. Additionally, you can go to Settings > Display & Brightness to configure other display settings like text size, display zoom, and True Tone.
- Screen Mirroring Options: If you want to control how your iPhone screen is mirrored on the mini projector, go to Settings > General > AirPlay & Handoff. Here, you can choose between mirroring your entire screen or selecting specific apps to be mirrored. This allows you to tailor the content to be displayed on the projector screen and prevent distractions from other open apps.
- Sound Output: By default, the audio output is usually played through the iPhone’s internal speakers. However, you can customize the sound output to play through the mini projector’s audio system if available. To do this, go to Settings > Bluetooth & Audio Devices and select the appropriate audio output device.
- Orientation Lock: If you want to prevent the screen orientation from changing when you move your iPhone, activate the Orientation Lock. Swipe down from the Control Center and tap the lock icon with an arrow inside a circle. This ensures that the content on your iPhone screen remains fixed in one orientation during your presentation or media playback.
- Auto-Lock and Do Not Disturb: To prevent any interruptions during your presentation or media playback, adjust the Auto-Lock and Do Not Disturb settings. Go to Settings > Display & Brightness > Auto-Lock to select a longer duration or disable auto-lock altogether. Additionally, activate Do Not Disturb mode by swiping up from the Control Center and tapping the crescent moon icon to silence notifications.
By adjusting these settings on your iPhone, you can customize the viewing experience to your preference and ensure that the content is displayed optimally on the mini projector. Take some time to adjust the settings before you begin your presentation or enjoy your media content.
If you encounter any issues with the settings or adjustments, refer to the user manual of your iPhone or consult the manufacturer’s support resources for further assistance. With the settings optimized, you can now proceed to the next section and troubleshoot common connection issues that may arise during the process.
Troubleshooting Common Connection Issues
While connecting your iPhone to a mini projector, you may encounter some common connection issues. Here are a few troubleshooting steps to help you resolve these problems:
- No image on the projector screen: If you don’t see any image on the projector screen after connecting your iPhone, ensure that the connections are secure and the projector is set to the correct input source. Additionally, try restarting both your iPhone and the mini projector to reset any potential glitches or conflicts.
- Poor or distorted image quality: If the image quality appears blurry or distorted on the projector screen, check the resolution settings on your iPhone. Make sure it is set to the optimal resolution supported by the mini projector. You can adjust the resolution by going to Settings > Display & Brightness and selecting the appropriate settings.
- No sound from the mini projector: If you’re not hearing any sound from the mini projector after connecting your iPhone, ensure the audio output is configured correctly. Go to Settings > Bluetooth & Audio Devices and select the mini projector as the audio output device. Also, make sure the volume on both your iPhone and the projector is not muted or set too low.
- Intermittent connection or frequent disconnections: If you experience intermittent connection issues or frequent disconnections between your iPhone and the mini projector, check for any physical damage or loose connections on the cables or adapters. Try using a different cable or adapter if possible. Also, ensure that both devices have sufficient battery charge to sustain a stable connection.
- Compatibility issues: In some cases, certain mini projectors may not be fully compatible with all iPhone models or operating system versions. Check the specifications and requirements of your mini projector to ensure compatibility with your iPhone. If compatibility issues persist, consider contacting the customer support of the mini projector manufacturer for further assistance.
If the above troubleshooting steps do not resolve the connection issues with your iPhone and the mini projector, it’s advisable to consult the user manual of the mini projector or seek technical support from the manufacturer. They can provide specific guidance tailored to your device and troubleshoot any potential hardware or software-related problems.
By addressing and resolving these common connection issues, you can enjoy a seamless connection between your iPhone and the mini projector, ensuring a smooth presentation or media playback experience.
Maximizing the Image Quality and Performance
When using your iPhone with a mini projector, you want to ensure that the image quality and performance are maximized for the best possible viewing experience. Here are some tips to help you achieve optimal image quality:
- Adjust the projector settings: Explore the settings on the mini projector to adjust parameters like brightness, contrast, color temperature, and aspect ratio to enhance the image quality according to your preferences. Experimenting with these settings can significantly improve the projected image.
- Use a smooth, flat projection surface: Make sure to project the image onto a smooth and flat surface. This will help minimize distortions and maintain the image’s clarity and sharpness. Avoid projecting onto textured or uneven surfaces that may compromise the image quality.
- Optimize ambient lighting conditions: Consider the ambient lighting conditions in the room. Dimming the ambient light or creating a controlled lighting environment can greatly enhance the projected image’s contrast and visibility. Be cautious of direct light sources that may wash out the projected image.
- Clean the projector lens: Regularly clean the lens of the mini projector to remove any dust or smudges that may affect image quality. Use a soft, lint-free cloth and gentle circular motions to clean the lens. Avoid using harsh chemicals or abrasive materials that could damage the lens.
- Position the projector optimally: Properly position the projector to achieve the desired image size and focus. Adjust the distance and angle of the projector to ensure a rectangular projection with maximum clarity and sharpness. Refer to the mini projector’s user manual for recommended projection distances and angles.
In addition to maximizing image quality, consider these tips to maximize overall performance:
- Close unnecessary apps: Before connecting your iPhone to the mini projector, close any unnecessary apps running in the background. This will free up system resources and improve the performance of both your iPhone and the projector during the connection and playback.
- Ensure sufficient device storage: Make sure your iPhone has enough available storage space to accommodate the media files or apps you’re using during the presentation or playback. Insufficient storage can lead to performance issues or interruptions during the connection.
- Manage battery usage: If possible, connect your iPhone to a power source or have a fully charged battery before connecting to the mini projector. This will prevent any unexpected battery drain during the connection and ensure uninterrupted usage.
- Keep your software up to date: Regularly update your iPhone’s software to ensure it has the latest bug fixes and performance improvements. These updates can enhance compatibility with external devices like mini projectors and optimize overall performance.
- Avoid running multiple resource-intensive apps: Running multiple resource-intensive apps simultaneously may put a strain on your iPhone’s performance and cause lag or disruptions in the connection and playback. Close any unnecessary apps and focus on one app at a time for a smooth experience.
By implementing these tips, you can maximize the image quality and performance when using your iPhone with a mini projector, creating a visually stunning presentation or media playback experience.
Using the iPhone with Apps and Content on the Mini Projector
Once your iPhone is connected to the mini projector, you can enjoy using various apps and content on the larger projection screen. Here are some ways to make the most of this setup:
- Presentations and slideshows: Use productivity apps like Keynote or PowerPoint to deliver impressive presentations on the mini projector. Showcase your slides, charts, and visuals to captivate your audience with a larger display and enhanced visibility.
- Video and media playback: Enjoy watching videos, movies, or TV shows from streaming apps like Netflix, YouTube, or Apple TV+. Immersive yourself in a cinematic experience on the big screen, with superior audio quality by connecting external speakers for a complete multimedia setup.
- Gaming and interactive apps: Connect your iPhone to the mini projector for a more immersive gaming experience. Play games with stunning visuals and engage with interactive apps on a larger display to enhance the gameplay excitement.
- Collaborative work: Use collaboration apps like Google Docs or Microsoft Teams to work on documents, spreadsheets, or presentations with colleagues or clients. Discuss and brainstorm ideas while everyone can easily view and participate in real-time.
- Virtual meetings and video calls: Participate in virtual meetings or video calls on the mini projector for enhanced collaboration. Apps like Zoom, Skype, or Microsoft Teams allow you to connect with remote colleagues or clients, creating an immersive and engaging communication experience.
- Photo and video sharing: Display your favorite photos or videos from your Camera Roll or cloud storage services like iCloud or Google Photos. Share your memories with friends and family or make stunning visual presentations using photo editing apps and video editing tools.
When using apps and content on the mini projector, take advantage of the larger screen to ensure that your audience can view and engage with the content effectively. Adjust the projector settings to optimize the image quality, and consider using a pointer or wireless presenter to navigate through the apps or presentation slides with ease.
Furthermore, be mindful of any potential copyright restrictions when streaming or projecting protected content. Always respect the intellectual property rights of others and seek proper licensing or permission where necessary.
By using the iPhone with various apps and content on the mini projector, you can unlock the full potential of your device and create captivating and engaging experiences for yourself and your audience.
Tips and Tricks for a Successful Connection
To ensure a successful and hassle-free connection between your iPhone and the mini projector, consider the following tips and tricks:
- Use high-quality cables and adapters: Invest in reliable and high-quality cables or adapters that are specifically designed for your iPhone and mini projector. Poor-quality or incompatible cables can lead to unreliable connections and degraded image quality.
- Keep your devices updated: Regularly update your iPhone’s software and keep the mini projector firmware up to date, if applicable. Software updates often include bug fixes and performance improvements that can enhance the compatibility and stability of the connection.
- Test the connection before your presentation: Always perform a test connection between your iPhone and the mini projector before your actual presentation or event. This allows you to identify any potential issues or compatibility conflicts in advance and address them accordingly.
- Charge your iPhone during extended use: If you anticipate a long presentation or media playback session, consider connecting your iPhone to a power source or having a fully charged battery. This ensures that your device won’t run out of power and interrupt the connection midway.
- Check for external interference: Keep your iPhone and the mini projector away from potential sources of interference, such as other electronic devices, Wi-Fi routers, or Bluetooth devices. These can cause signal disruptions that may affect the stability of the connection.
- Use a stable surface for the mini projector: Place the mini projector on a stable surface to prevent any vibrations or movement that may lead to a shaky or distorted projection. A mounted tripod or secure stand can provide a stable foundation for the projector.
- Practice proper cable management: Arrange and manage the cables between your iPhone and the mini projector to prevent any accidental disconnections or tangled cables during your presentation. Use cable ties or clips to keep the cables organized and out of the way.
- Have a backup plan: Despite taking precautions, unforeseen circumstances can still arise. Be prepared with a backup plan, such as having a backup cable or adapter on hand, or having alternative presentation materials available in case of any technical difficulties.
- Be mindful of overheating: Extended use of the iPhone and the mini projector simultaneously can generate heat. Be mindful of the temperature and ensure proper ventilation for both devices to avoid overheating. If necessary, take breaks in between to allow the devices to cool down.
By following these tips and tricks, you can significantly increase the chances of a successful connection between your iPhone and the mini projector. A reliable and stable connection ensures a seamless experience during your presentations, media playback, or any other activity where you utilize your iPhone with the mini projector.
Frequently Asked Questions about Connecting an iPhone to a Mini Projector
Here are some commonly asked questions regarding the connection of an iPhone to a mini projector:
-
- Can I connect any iPhone model to a mini projector?
Yes, you can connect most iPhone models to a mini projector. However, the specific cable or adapter requirement can vary depending on the iPhone’s port (Lightning, USB-C, or 30-pin Dock Connector) and the available ports on the mini projector.
-
- Do I need an internet connection to connect my iPhone to a mini projector?
No, you do not need an internet connection specifically for the connection between your iPhone and the mini projector. The connection is primarily established through the physical cable or adapter. However, if you are using internet-dependent apps or streaming services on your iPhone, you will need an active internet connection for those services to function.
-
- Can I mirror my entire iPhone screen on the mini projector?
Yes, you can mirror your entire iPhone screen on the mini projector. By enabling screen mirroring in the iPhone settings, you can display everything from apps, home screen, videos, presentations, and more on the projector screen.
-
- Can I connect my iPhone wirelessly to a mini projector?
Yes, you can connect your iPhone wirelessly to a mini projector using a wireless HDMI adapter or a projector that supports wireless connectivity. These adapters allow you to establish a wireless connection between your iPhone and the mini projector without the need for physical cables.
-
- What should I do if there’s no sound from the mini projector?
If you experience no sound from the mini projector while using your iPhone, ensure that the audio output is correctly configured. Go to your iPhone’s settings and select the mini projector as the audio output device. Also, check the volume settings on both your iPhone and the projector to ensure they are not muted or set too low.
-
- Can I connect my iPhone to a mini projector and use it as a second display?
Yes, some mini projectors support the use of iPhones as a second display. You can extend your display to the projector screen and use it as an additional workspace or monitor for multitasking or presenting content. However, this functionality may depend on the capabilities of the mini projector and the apps you are using.
If you have any other specific questions or concerns regarding connecting your iPhone to a mini projector, refer to the user manual of your iPhone or seek support from the manufacturer of the mini projector for further assistance.