
Checking Compatibility
Before attempting to connect a wireless mouse to your Chromebook, it’s essential to ensure that the mouse is compatible with Chrome OS. While most modern wireless mice are compatible, it’s always wise to double-check to avoid any compatibility issues that may arise. Here’s how you can check the compatibility:
- 1. Check the Chrome OS compatibility: Chrome OS is known for its versatility and compatibility with a wide range of hardware. However, it’s crucial to make sure that your wireless mouse is officially supported by Chrome OS. Visit the manufacturer’s website or refer to the instruction manual to verify compatibility with Chrome OS.
- 2. Verify the wireless technology: Different wireless mice use various technologies, such as Bluetooth or USB receivers. Chromebooks typically have built-in Bluetooth functionality, so wireless mice that use Bluetooth technology tend to be the easiest to connect. However, if your mouse comes with a USB receiver, ensure that your Chromebook has a USB port or an adapter to connect the receiver.
- 3. Consider the Chromebook model: Chromebooks come in various models, and while most modern Chromebooks support wireless mouse connectivity, it’s worth checking the specifications of your specific model. Review the user manual or visit the manufacturer’s website to confirm that your Chromebook supports wireless mouse connectivity.
By checking the compatibility of your wireless mouse with Chrome OS, you can save yourself from potential frustration and ensure a smooth connection process. Once you have ensured compatibility, you can move on to the next steps of connecting your wireless mouse to your Chromebook.
Turning on Bluetooth
Before you can connect a wireless mouse to your Chromebook, it’s important to have Bluetooth turned on. Bluetooth is the wireless technology that allows devices to communicate with each other without the need for cables. Here’s how you can turn on Bluetooth on your Chromebook:
- 1. Open the settings: Click on the clock in the bottom right corner of the screen, and then click on the gear icon to open the settings menu.
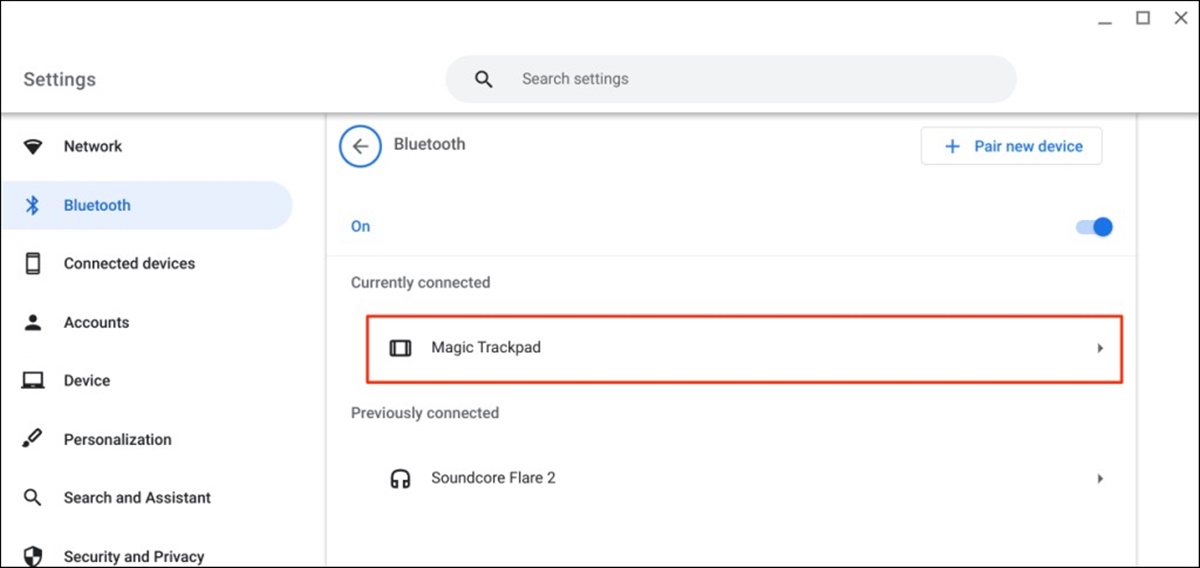
- 2. Access Bluetooth settings: In the settings menu, locate and click on the “Bluetooth” option. This will take you to the Bluetooth settings page.
- 3. Enable Bluetooth: On the Bluetooth settings page, you will find a switch or button that allows you to enable or disable Bluetooth. Click on the switch to turn on Bluetooth. Once enabled, the switch will display as “On” or show a green color.
- 4. Check for Bluetooth devices: After turning on Bluetooth, your Chromebook will automatically start searching for nearby Bluetooth devices. The wireless mouse should appear in the list of available devices. If not, make sure the mouse is in pairing mode or consult the mouse’s instruction manual for specific pairing instructions.
Once Bluetooth is turned on and your wireless mouse is in pairing mode, you can proceed to the next steps of connecting the mouse to your Chromebook. It’s worth noting that enabling Bluetooth on your Chromebook will also allow you to connect other Bluetooth devices, such as headphones or speakers, for a convenient wireless experience.
Preparing the Wireless Mouse
Before connecting your wireless mouse to your Chromebook, it’s important to ensure that the mouse is properly prepared and ready for pairing. Here are the steps to follow:
- 1. Insert batteries or ensure the mouse is charged: Depending on the type of wireless mouse you have, you may need to insert batteries or charge the mouse before use. Check the mouse’s instruction manual for specific battery insertion or charging instructions. Ensure that the mouse has enough power to establish a connection.
- 2. Locate the pairing button or switch: Most wireless mice have a pairing button or switch that needs to be activated to enter pairing mode. This button is usually located on the bottom of the mouse. Press or slide the pairing button or switch to activate pairing mode. Refer to the mouse’s instruction manual if you’re having trouble locating the pairing button.
- 3. Make the mouse discoverable: Once the mouse is in pairing mode, it becomes discoverable to other devices, allowing your Chromebook to establish a connection. Some mice will automatically enter pairing mode when batteries are inserted or when the mouse is turned on. However, if the mouse requires manual activation of pairing mode, ensure that it remains discoverable until the connection is established.
- 4. Keep the mouse and Chromebook close: It’s important to keep the mouse close to your Chromebook during the pairing process. This will ensure a strong and stable Bluetooth connection. Place the mouse within a few feet of the Chromebook to ensure a successful pairing.
By properly preparing your wireless mouse for pairing, you increase the chances of a smooth and hassle-free connection process. Once the mouse is ready, you can move on to the next steps of pairing the mouse with your Chromebook.
Pairing the Mouse with the Chromebook
Now that your wireless mouse is prepared and ready, it’s time to pair it with your Chromebook for a seamless user experience. Here’s how you can pair the mouse with your Chromebook:
- 1. Open the Bluetooth settings: Click on the clock in the bottom right corner of the screen, and then click on the gear icon to open the settings menu. From there, navigate to the Bluetooth settings page.
- 2. Click on “Add device”: On the Bluetooth settings page, you will find a list of available devices. Click on the “Add device” button to initiate the pairing process.
- 3. Select the wireless mouse: Your Chromebook will start searching for nearby devices. Locate your wireless mouse in the list of available devices and click on it to select it for pairing.
- 4. Complete the pairing process: Follow the on-screen instructions to complete the pairing process. This may involve entering a passcode or confirming a code displayed on both the Chromebook and the mouse. Once the pairing is successful, you will receive a notification on your Chromebook.
After completing these steps, your wireless mouse should now be paired with your Chromebook, allowing you to enjoy the freedom of a wireless connection. Test the mouse by moving it around to ensure that it’s working correctly.
It’s worth noting that once the mouse is paired, it will automatically connect to your Chromebook whenever it’s in range. If you want to connect the mouse to another device, you may need to unpair it from the Chromebook first to establish a new connection.
Troubleshooting Connection Issues
While connecting a wireless mouse to a Chromebook is usually a straightforward process, it’s possible to encounter connection issues along the way. If you’re experiencing difficulties, here are some troubleshooting steps you can take:
- 1. Check battery or power: Ensure that the batteries in the wireless mouse are inserted correctly and have sufficient charge. If the mouse is rechargeable, connect it to a power source and make sure it’s fully charged.
- 2. Restart the Chromebook: Sometimes a simple restart can resolve connectivity issues. Reboot your Chromebook and try pairing the mouse again after it’s back on.
- 3. Move closer to the Chromebook: If the wireless mouse is not in close proximity to the Chromebook, it may experience connection problems. Move the mouse closer to the Chromebook and try reconnecting.
- 4. Disable and re-enable Bluetooth: Go to the Bluetooth settings on your Chromebook and disable Bluetooth. After a few seconds, enable it again and attempt to pair the mouse once more.
- 5. Unpair and re-pair the mouse: If the mouse is previously paired with the Chromebook but not connecting, try unpairing it and then re-pairing it from scratch. Remove the mouse from the list of connected devices and go through the pairing process again.
- 6. Update Chrome OS: Make sure your Chrome OS is up to date with the latest software version. Outdated software can sometimes cause connectivity issues. Go to the settings and check for any available updates.
- 7. Try a different USB port: If you’re using a wireless mouse that comes with a USB receiver, try connecting the receiver to a different USB port on your Chromebook. Sometimes, using a different port can resolve connection problems.
If you’re still unable to establish a connection between your wireless mouse and Chromebook, refer to the mouse’s instruction manual for specific troubleshooting steps. Additionally, reaching out to the manufacturer’s customer support can provide further assistance in resolving any connection issues.
Customizing Mouse Settings
Once your wireless mouse is successfully connected to your Chromebook, you have the option to customize its settings according to your preferences. Chrome OS provides various mouse settings that you can adjust to enhance your user experience. Here’s how you can customize the mouse settings:
- 1. Open the settings: Click on the clock in the bottom right corner of the screen, and then click on the gear icon to open the settings menu.
- 2. Access mouse settings: In the settings menu, locate and click on the “Mouse and touchpad” option. This will take you to the mouse settings page.
- 3. Adjust pointer speed: On the mouse settings page, you can adjust the pointer speed to make it slower or faster. Move the slider to the desired position to customize the speed at which the mouse pointer moves across the screen.
- 4. Enable natural scrolling: If you prefer the scrolling motion to be intuitive, you can enable natural scrolling. When enabled, scrolling downwards will move the content up, similar to touchscreen scrolling.
- 5. Configure additional settings: Depending on your wireless mouse model, you may have additional customization options available, such as button assignments or scroll wheel behavior. Explore the mouse settings page to see if any additional settings are provided.
- 6. Test and apply changes: After customizing the mouse settings, it’s a good idea to test them out. Move the mouse around and scroll to ensure that the changes you made are applied correctly and suit your preferences.
Customizing the mouse settings can significantly enhance your productivity and comfort while using your Chromebook. Take advantage of the available options to tailor the mouse behavior to your liking and optimize your overall user experience.
Disconnecting the Mouse
When you no longer need to use your wireless mouse with your Chromebook or if you want to connect it to a different device, it’s important to properly disconnect it to ensure a smooth transition. Here’s how you can disconnect the mouse from your Chromebook:
- 1. Open the Bluetooth settings: Click on the clock in the bottom right corner of the screen, and then click on the gear icon to open the settings menu. From there, navigate to the Bluetooth settings page.
- 2. Locate the connected mouse: On the Bluetooth settings page, you will see a list of devices that are currently connected to your Chromebook. Locate your wireless mouse in the list.
- 3. Click on the settings icon: Next to the name of your connected mouse, you will find a small settings icon (usually represented by three vertical dots or horizontal lines). Click on this icon to access the mouse settings.
- 4. Choose “Disconnect”: From the mouse settings menu, select the “Disconnect” option. This will disconnect the mouse from your Chromebook.
After disconnecting the mouse, it will no longer be able to communicate with your Chromebook. You can now either connect the mouse to a different device or store it away until you need to use it again.
It’s important to note that disconnecting the mouse does not remove its pairing information from your Chromebook. If you want to completely remove the mouse from your Chromebook’s list of connected devices, you will need to unpair it instead. Unpairing the mouse will require going through the Bluetooth settings and removing the mouse from the list of connected devices.
By properly disconnecting your wireless mouse from your Chromebook, you ensure that resources are not wasted on maintaining an unnecessary connection and you can seamlessly switch to using a different input device if needed.