
Reasons for connecting a PC to a Wi-Fi extender
In today’s digitally connected world, having a strong and reliable Wi-Fi connection is crucial, especially when it comes to your PC. However, there are instances where your Wi-Fi signal may not reach certain areas of your home or office, leading to a weak or unstable connection. This is where a Wi-Fi extender comes in handy. Here are some compelling reasons why you should consider connecting your PC to a Wi-Fi extender:
1. Extended Wi-Fi coverage
A Wi-Fi extender, also known as a range extender, is specifically designed to expand the coverage area of your wireless network. By connecting your PC to a Wi-Fi extender, you can enjoy a more reliable and consistent connection throughout your space, even in areas where the original Wi-Fi signal may be weak.
2. Overcoming physical obstacles
Thick walls, multiple floors, and other physical obstacles can interfere with your Wi-Fi signal, resulting in slow speeds and dropped connections. A Wi-Fi extender helps overcome these obstacles by transmitting the Wi-Fi signal from your router to areas that are difficult to reach, ensuring a seamless browsing and streaming experience on your PC.
3. High-speed internet for bandwidth-intensive tasks
Connecting your PC to a Wi-Fi extender can be particularly beneficial if you regularly engage in bandwidth-intensive activities such as online gaming, video streaming, or large file downloads. With an extended Wi-Fi range, you can enjoy faster internet speeds and reduced lag, enabling you to have a smooth and uninterrupted online experience.
4. Flexibility in device placement
By using a Wi-Fi extender, you have the flexibility to position your PC in any part of your home or office, regardless of its proximity to the router. This means you can set up your PC in a more comfortable or private space while still ensuring a strong and consistent Wi-Fi connection.
5. Cost-effective solution
Investing in a Wi-Fi extender is often more cost-effective than purchasing additional routers or running Ethernet cables throughout your space. It’s a convenient and affordable solution to extend your Wi-Fi coverage, especially if you only require an improved connection in specific areas where your PC is used frequently.
By connecting your PC to a Wi-Fi extender, you can enjoy an extended Wi-Fi coverage, overcome physical obstacles, access high-speed internet for demanding tasks, enjoy flexibility in device placement, and save money compared to alternative solutions. So, if you’re facing Wi-Fi connectivity issues with your PC, a Wi-Fi extender is certainly worth considering.
Step 1: Understand the basics of a Wi-Fi extender
Before you can connect your PC to a Wi-Fi extender, it’s essential to have a clear understanding of what a Wi-Fi extender is and how it works. This knowledge will help you make informed decisions when selecting and setting up your Wi-Fi extender. Here are the key points to understand:
1. What is a Wi-Fi extender?
A Wi-Fi extender is a device that amplifies and extends the existing Wi-Fi signal from your router to reach areas with weak or no signal. It acts as a bridge between your router and your PC, improving the wireless coverage and providing a more reliable connection.
2. How does a Wi-Fi extender work?
A Wi-Fi extender works by receiving the Wi-Fi signal transmitted by your router and rebroadcasting it to reach areas with poor reception. It creates a new network that your PC can connect to, effectively extending the coverage range of your existing Wi-Fi network.
3. Single-band vs. dual-band Wi-Fi extenders
Wi-Fi extenders are available in two primary types: single-band and dual-band. Single-band extenders operate on a single frequency band, typically 2.4 GHz, which can cause potential interference with other devices in the vicinity. Dual-band extenders, on the other hand, operate on both 2.4 GHz and 5 GHz frequency bands, providing better performance and reducing the chances of interference.
4. Compatibility with your router
When choosing a Wi-Fi extender, it’s crucial to consider its compatibility with your existing router. Ensure that the extender supports the same Wi-Fi standard (e.g., 802.11ac) and has the necessary security protocols (e.g., WPA2) to ensure a seamless connection.
5. Placement considerations
Proper placement of your Wi-Fi extender is essential for optimal performance. Ideally, place it halfway between your router and the area where you want to improve the Wi-Fi signal. Avoid obstructions like walls, furniture, and appliances that can hinder the extender’s signal transmission.
By understanding the basics of a Wi-Fi extender, you can make an informed decision when selecting the right extender for your PC. Consider the type of extender, compatibility with your router, and proper placement to ensure a successful connection. Now that you have a solid foundation, it’s time to move on to the next step: purchasing a Wi-Fi extender that suits your needs.
Step 2: Purchase a Wi-Fi extender that suits your needs
Now that you understand the basics of a Wi-Fi extender, it’s time to choose the right one that suits your specific requirements. With various options available in the market, it can be overwhelming to make the right choice. Here are some factors to consider when purchasing a Wi-Fi extender:
1. Range and coverage
Determine the range and coverage area you need for your Wi-Fi extender. Consider the size of your home or office space and identify areas where you require a stronger Wi-Fi signal. Look for extenders with appropriate coverage and range capabilities to ensure optimal performance throughout your desired area.
2. Wi-Fi standard compatibility
Check if the Wi-Fi extender you’re considering is compatible with your router’s Wi-Fi standard. For example, if your router supports the latest 802.11ac standard, ensure that the extender also supports the same standard to maximize compatibility and performance.
3. Single-band or dual-band
Decide whether you want a single-band or dual-band Wi-Fi extender. Single-band extenders operate on the 2.4 GHz frequency band, while dual-band extenders operate on both 2.4 GHz and 5 GHz frequency bands. Dual-band extenders are generally recommended for better performance, especially in areas with high Wi-Fi congestion.
4. Additional features
Consider any additional features or functionalities that you may require. This could include features like Ethernet ports, which allow you to connect wired devices to the extender, or a mobile app for easy setup and management of the extender.
5. Price and budget
Set a budget for your Wi-Fi extender purchase and find one that offers a good balance between price and performance. Remember, while it’s important to stay within budget, sacrificing too much on quality may result in subpar performance.
6. Customer reviews and ratings
Before making a final decision, read customer reviews and ratings of the Wi-Fi extender you’re considering. This can help you gain insights into the real-world performance and reliability of the product.
By considering these factors, you can make an informed decision and purchase a Wi-Fi extender that best meets your needs. Once you have the Wi-Fi extender in hand, you can move on to the next step: positioning the extender correctly for optimal coverage and performance.
Step 3: Position your Wi-Fi extender correctly
Proper positioning of your Wi-Fi extender is crucial to ensure optimal coverage and performance. The placement of the extender plays a significant role in extending the Wi-Fi signal to the desired areas. Follow these guidelines to position your Wi-Fi extender correctly:
1. Find the optimal location
Locate the areas in your home or office where the Wi-Fi signal is weak or non-existent. These are the areas where you’ll want to position your extender. Place the extender within a reasonable distance from your router, ideally halfway between the router and the areas you want to cover.
2. Avoid obstructions
Avoid placing the Wi-Fi extender near obstacles that can potentially interfere with the signal transmission. Thick walls, furniture, appliances, and metal objects can obstruct the Wi-Fi signal and reduce the extender’s effectiveness. Choose a location where there are minimal obstructions between the extender and the desired coverage area.
3. Maintain line of sight
If possible, try to maintain a direct line of sight between the Wi-Fi extender and your PC. While this may not always be feasible, especially in multi-story buildings, it can improve the signal strength and minimize interference.
4. Experiment with placement
If you’re unsure about the optimal placement, don’t hesitate to experiment with different locations. Try moving the Wi-Fi extender to different areas and test the signal strength on your PC. This trial and error approach can help you find the best position that provides the desired coverage and performance.
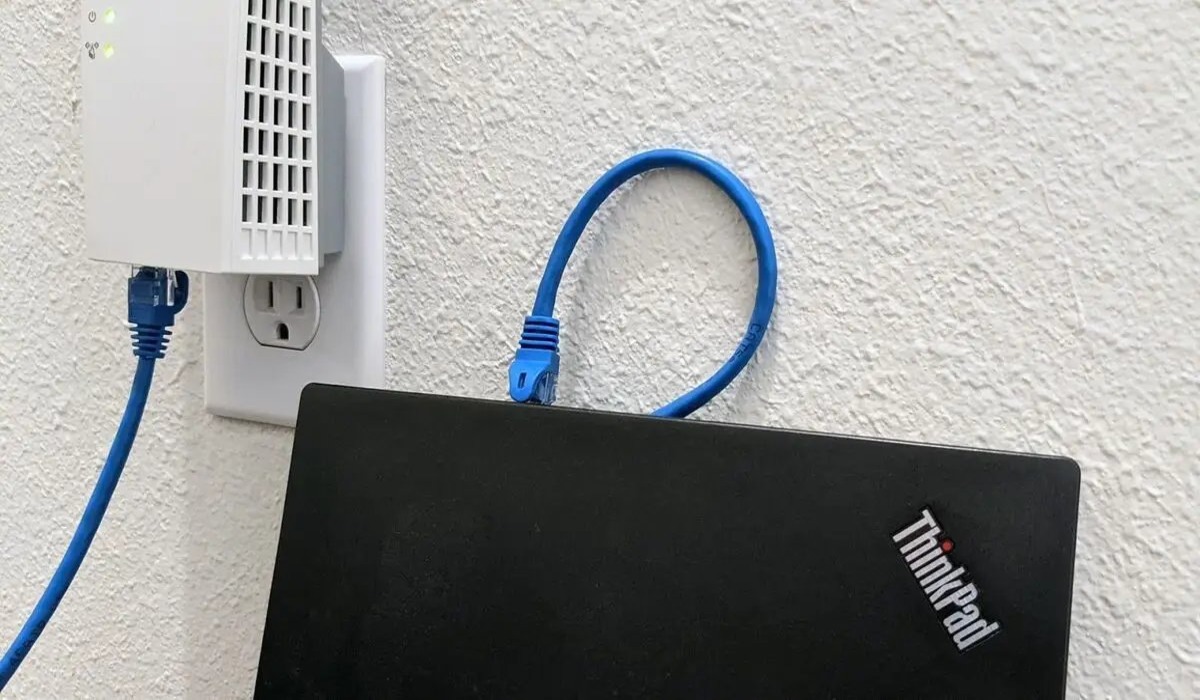
5. Consider using Ethernet or Powerline adaptors
If your Wi-Fi extender has Ethernet ports or supports Powerline adaptors, consider utilizing them for connecting the extender to your PC. This can provide a more stable and reliable connection, especially for devices that require higher bandwidth, such as gaming consoles or multimedia streaming devices.
By positioning your Wi-Fi extender correctly, you can ensure that the Wi-Fi signal reaches the desired areas, ensuring optimal performance and coverage for your PC. Once you have placed the extender in the optimal position, it’s time to move on to the next step: connecting the Wi-Fi extender to a power source.
Step 4: Connect the Wi-Fi extender to a power source
After positioning your Wi-Fi extender correctly, the next step is to connect it to a power source. This will provide the necessary electrical power for the extender to function and amplify your Wi-Fi signal. Follow these steps to connect the Wi-Fi extender to a power source:
1. Locate a nearby power outlet
Find a power outlet within close proximity to where you have positioned your Wi-Fi extender. Ensure that the outlet is easily accessible and can accommodate the power adapter that comes with the extender.
2. Connect the power adapter
Take the power adapter included with the Wi-Fi extender and plug it into the designated power input on the extender. Make sure it is securely connected to avoid any interruptions in the power supply.
3. Plug into the power outlet
Insert the other end of the power adapter into the power outlet you located in the previous step. Ensure a firm connection, and make sure the extender receives a consistent power supply. It’s recommended to avoid using power strips or surge protectors, as they can cause interference and affect the extender’s performance.
4. Check the power LED indicator
Once connected to the power source, the Wi-Fi extender should display a power LED indicator. This LED light indicates that the extender has successfully powered on. It’s important to note that different extenders may have different LED indicators, so consult the user manual of your specific extender model for details.
5. Wait for the extender to initialize
After connecting the extender to the power source, give it a few moments to initialize. The extender will go through a booting process, during which it establishes a connection with your router and prepares to extend your Wi-Fi network. This initialization process may take a couple of minutes, so be patient and wait for the extender to be ready.
By connecting the Wi-Fi extender to a power source, you have provided the necessary electrical power for it to function. Now that the extender is powered on and initialized, it’s time to proceed to the next step: accessing the Wi-Fi extender settings using a web browser.
Step 5: Access the Wi-Fi extender settings using a web browser
Once your Wi-Fi extender is powered on, the next step is to access its settings through a web browser. This allows you to configure and customize the extender according to your specific network requirements. Follow these steps to access the Wi-Fi extender settings:
1. Connect your PC to the Wi-Fi extender network
Before accessing the settings, ensure that your PC is connected to the Wi-Fi extender network. Locate the Wi-Fi network name (SSID) and password for the extender, which are usually mentioned on the extender’s label or user manual.
2. Open a web browser
Launch your preferred web browser on your PC, such as Google Chrome, Mozilla Firefox, or Microsoft Edge. Make sure you have a stable internet connection from your PC.
3. Enter the extender’s IP address
Type the IP address of your Wi-Fi extender into the address bar of your web browser and press Enter. The IP address is usually mentioned in the extender’s user manual or can be found on the extender’s label. Common IP addresses include 192.168.0.1 or 192.168.1.1.
4. Enter the login credentials
When prompted, enter the login credentials for the Wi-Fi extender. These credentials are specific to your extender model and can also be found in the user manual or on the label. If you haven’t changed the default credentials, you can often find them as ‘admin’ for both the username and password fields.
5. Access the Wi-Fi extender settings
Once you have successfully logged in, you will be directed to the web interface of the Wi-Fi extender. Here, you can access various settings and configurations that are specific to your extender model. These settings may include network name and password, security settings, channel selection, and Wi-Fi extender mode.
6. Configure the Wi-Fi extender settings
Explore the different settings available and configure them according to your preferences. It’s recommended to refer to the extender’s user manual or online documentation for detailed instructions on each setting. Pay close attention to the network name (SSID) and password settings to ensure they align with your existing Wi-Fi network.
By accessing the Wi-Fi extender settings through a web browser, you can customize and fine-tune the extender to meet your specific network requirements. Now that you have configured the extender settings, it’s time to move on to the next step: connecting your PC to the Wi-Fi extender network.
Step 6: Configure the Wi-Fi extender to connect to your existing Wi-Fi network
After accessing the Wi-Fi extender settings, the next step is to configure it to connect to your existing Wi-Fi network. This process will allow the extender to extend the range of your current network and provide a seamless connection. Follow these steps to configure the Wi-Fi extender:
1. Locate the wireless settings
Within the extender settings, locate the wireless settings or wireless setup section. This is where you will configure the extender to connect to your existing Wi-Fi network.
2. Choose your existing Wi-Fi network
From the list of available networks, select your existing Wi-Fi network. This is the network that you want the extender to extend and amplify.
3. Enter your Wi-Fi network password
Once you have selected your existing Wi-Fi network, enter the password for that network. This is the same password that you use to connect to your Wi-Fi network on your other devices. Ensure you enter the password correctly to establish a successful connection.
4. Configure the extender’s Wi-Fi network settings
Next, you will have the option to configure the Wi-Fi network settings for the extender itself. This includes choosing a network name (SSID) and password for the extender’s network. These settings should be different from your existing Wi-Fi network to avoid any conflicts.
5. Save and apply the settings
Once you have entered the necessary Wi-Fi network information, save and apply the settings. The extender will then establish a connection to your existing Wi-Fi network and extend its range.
6. Wait for the connection to establish
After saving the settings, give the Wi-Fi extender a few moments to establish a connection with your existing Wi-Fi network. The extender’s LED indicators may indicate its connectivity status. Consult the manual or documentation for your specific extender model for further guidance.
7. Test the extended Wi-Fi signal
Once the connection is established, test the extended Wi-Fi signal by moving to the areas that previously had weak or no Wi-Fi coverage. Check the signal strength on your PC and ensure that the connection is stable and reliable.
By configuring the Wi-Fi extender to connect to your existing network, you can extend the range and coverage of your Wi-Fi signal. With the Wi-Fi extender now connected to your network, it’s time to proceed to the next step: connecting your PC to the Wi-Fi extender network.
Step 7: Connect your PC to the Wi-Fi extender network
With the Wi-Fi extender configured and connected to your existing network, the next step is to connect your PC to the Wi-Fi extender network. By doing so, you can benefit from the extended Wi-Fi coverage and enjoy a stronger and more stable connection. Follow these steps to connect your PC to the Wi-Fi extender network:
1. Access your PC’s Wi-Fi settings
On your PC, access the Wi-Fi settings. This can usually be done by clicking on the Wi-Fi icon in the taskbar or navigating through the Network and Internet settings.
2. Scan for available networks
In the Wi-Fi settings, scan for available networks. You should see the network name (SSID) of the Wi-Fi extender listed among the available networks.
3. Connect to the Wi-Fi extender network
Select the network name of the Wi-Fi extender from the available networks. Click on the “Connect” button to establish a connection.
4. Enter the Wi-Fi extender network password
When prompted, enter the password for the Wi-Fi extender network. This is the password that you configured for the extender’s network during the setup process. Ensure you enter the password correctly to successfully connect.
5. Wait for the connection to establish
Once you have entered the password, your PC will attempt to establish a connection to the Wi-Fi extender network. It may take a few moments for the connection to be established, so be patient.
6. Confirm the connection
Once the connection is established, you should see a notification or an indication that your PC is connected to the Wi-Fi extender network. You can also check the Wi-Fi settings to ensure that the connection is active and the signal strength is strong.
7. Test the connection
To ensure a successful connection, test the Wi-Fi signal and browse the internet on your PC. Move to different areas within the extended coverage range and check if the connection remains stable and reliable. You should experience improved signal strength and faster speeds.
By connecting your PC to the Wi-Fi extender network, you can take advantage of the extended Wi-Fi coverage and enjoy a stronger and more reliable connection. With your PC now connected, it’s time to proceed to the next step: testing the connection and optimizing the Wi-Fi extender settings for optimal performance.
Step 8: Test the connection and optimize the Wi-Fi extender settings
After connecting your PC to the Wi-Fi extender network, it’s important to test the connection and optimize the Wi-Fi extender settings to ensure the best possible performance. Follow these steps to test and optimize the connection:
1. Test the Wi-Fi signal strength
Move around your space and check the Wi-Fi signal strength on your PC. Ensure that the signal remains strong and stable, even in the areas that previously had weak or no coverage. If you notice any weak spots, consider repositioning the extender or adjusting its antennas for better coverage.
2. Check internet speed
Use an internet speed test, available through various online tools or mobile apps, to check your internet speed. Compare the speed to what you were experiencing before setting up the extender. Ideally, you should see an improvement in speed and a reduction in latency.
3. Optimize Wi-Fi extender settings
Access the Wi-Fi extender settings through the web interface and explore the available options. Look for settings related to channel selection, bandwidth, and security. Experiment with different configurations to find the best performance for your specific network environment.
4. Disable conflicting settings
If you have other devices or services that can interfere with your Wi-Fi signal, such as cordless phones or microwave ovens, consider disabling or relocating them to reduce interference. Additionally, ensure that your Wi-Fi extender is operating on a different channel than your router to minimize any potential conflicts.
5. Update firmware
Check if there are any firmware updates available for your Wi-Fi extender. Manufacturers frequently release updates to improve performance, fix bugs, or enhance security. Refer to the extender’s user manual or website for instructions on how to update the firmware.
6. Repeat testing and adjustments
Repeat the signal strength and speed tests after making changes to the settings or environment. This will help you identify any further adjustments that may be required to optimize the connection.
By testing the connection and optimizing the Wi-Fi extender settings, you can ensure that your PC is getting the best possible performance from the extended Wi-Fi network. Regularly monitor and fine-tune the settings as needed to maintain an optimal connection.
Troubleshooting common issues when connecting a PC to a Wi-Fi extender
While connecting a PC to a Wi-Fi extender is generally a straightforward process, you may encounter some common issues along the way. Understanding and troubleshooting these issues can help ensure a smooth and successful connection. Here are some common issues and troubleshooting steps:
1. Weak or intermittent Wi-Fi signal
If you experience a weak or intermittent Wi-Fi signal after connecting to the extender, try repositioning the extender to a different location. Experiment with different placements and antenna orientations to maximize the signal strength and coverage.
2. Incorrect Wi-Fi extender settings
If the Wi-Fi extender settings were not properly configured, your PC may have difficulty connecting to the extender network. Double-check the settings, including the network name (SSID) and password, to ensure they match the extender’s configuration and your Wi-Fi network settings.
3. Interference from other devices
Other devices or appliances in close proximity to the Wi-Fi extender can cause signal interference and impact the connection quality. Move the extender away from potential sources of interference such as cordless phones, microwave ovens, and Bluetooth devices.
4. Incompatible Wi-Fi standards
Ensure that your PC’s Wi-Fi adapter supports the Wi-Fi standard used by the extender. If there is a mismatch in standards, you may experience connectivity issues. Consider updating the Wi-Fi adapter drivers or upgrading the adapter to a compatible standard if necessary.
5. Insufficient power supply
A weak or unstable power supply to the extender can cause connectivity problems. Check that the extender is receiving constant and adequate power from the power outlet. Avoid using power strips or surge protectors, as they can introduce power fluctuations and affect the extender’s performance.
6. Firmware issues
Outdated firmware on the extender can cause compatibility and performance issues. Ensure that the extender is running the latest firmware version by checking the manufacturer’s website or the extender’s settings. If an update is available, follow the instructions to upgrade the firmware.
7. Incorrect PC settings
Double-check your PC’s network settings and ensure that it is set to obtain an IP address automatically. Improper network settings, such as a static IP address or incorrect DNS configuration, can lead to connectivity problems.
If you encounter any of these issues, follow the troubleshooting steps provided to resolve them. Additionally, consult the user manual and documentation for your specific Wi-Fi extender model for further assistance and troubleshooting guidance.
Final thoughts and tips for using a Wi-Fi extender with your PC
Using a Wi-Fi extender can greatly enhance your PC’s connectivity and allow you to enjoy a strong and reliable wireless network. Here are some final thoughts and tips to make the most out of your Wi-Fi extender:
1. Regularly check and optimize the positioning
Monitor the Wi-Fi signal strength on your PC and make adjustments to the Wi-Fi extender’s position as needed. Walls, furniture, and other obstacles can affect the signal, so regularly experiment with different placements to find the optimal position for your extender.
2. Secure your Wi-Fi extender
Set a strong and unique password for your Wi-Fi extender network to ensure that only authorized devices can connect to it. This helps protect your network from unwanted access and potential security risks.
3. Keep your devices up to date
Regularly check for firmware updates for both your Wi-Fi extender and PC’s Wi-Fi adapter. Updating to the latest firmware and drivers can improve performance, security, and compatibility with the latest technology standards.
4. Monitor Wi-Fi network usage
Use network monitoring tools to keep track of the devices connected to your Wi-Fi extender network. This allows you to identify any unauthorized devices or potential network performance issues.
5. Consider additional Wi-Fi extender features
Some Wi-Fi extenders come with additional features such as Ethernet ports, USB ports, or even built-in VPN capabilities. Evaluate your needs and choose an extender that offers the features that will enhance your PC’s connectivity and functionality.
6. Opt for a mesh Wi-Fi system for larger spaces
If you have a large home or office with multiple floors and extensive coverage needs, consider investing in a mesh Wi-Fi system instead of a standalone extender. Mesh systems provide seamless coverage throughout the entire area and can offer better performance and scalability.
By following these final thoughts and tips, you can maximize the benefits of using a Wi-Fi extender with your PC. Enjoy faster speeds, extended coverage, and a reliable wireless connection that enables you to stay productive and enjoy online activities without interruption.