
Understanding Wireless Home Networks
In today’s digital age, having a reliable and fast internet connection is essential. One of the most popular ways to connect devices to the internet is through a wireless home network. A wireless home network allows you to connect multiple devices, such as laptops, smartphones, and tablets, to the internet without the need for pesky cables. But how does a wireless home network actually work?
At its core, a wireless home network relies on a wireless router to transmit and receive data between the devices and the internet. The router acts as the central hub, allowing devices to connect wirelessly and share information. It uses radio waves to establish a connection between the router and the devices, eliminating the need for physical connections.
When setting up a wireless home network, you will need a few key components. The first is a modem, which connects your home network to the internet service provider (ISP) via a wired connection. The modem receives signals from the ISP and converts them into a form that can be used by your devices.
The second component is the wireless router. The router takes the internet signal from the modem and broadcasts it wirelessly, allowing devices within range to connect to the network. It also serves as a firewall, protecting your devices from unauthorized access.
Lastly, you’ll need wireless adapters for each device you want to connect to the network. Most modern devices come with built-in wireless capabilities, but older devices may require a separate wireless adapter to establish a connection.
Wireless home networks operate on different frequencies, typically 2.4 GHz or 5 GHz. The frequency you choose will depend on factors such as the number of devices connected and the distance from the router. The 2.4 GHz frequency offers wider coverage but may experience interference from other devices, while the 5 GHz frequency provides faster speeds but has a shorter range.
Understanding the basics of wireless home networks is crucial before setting up your own. It allows you to select the right equipment and troubleshoot issues that may arise. In the following sections, we will explore how to choose and install a wireless adapter on your PC, configure network settings, connect your PC to the wireless network, troubleshoot common issues, enhance network security, and expand the network’s range and performance.
Choosing the Right Wireless Adapter for Your PC
When it comes to connecting your PC to a wireless home network, having the right wireless adapter is crucial. A wireless adapter, also known as a network interface card (NIC), allows your PC to communicate with the wireless router and access the internet. With various options available in the market, selecting the right wireless adapter for your PC can seem overwhelming. Here are some factors to consider:
- Compatibility: Ensure that the wireless adapter is compatible with your PC’s operating system. Most adapters support Windows, macOS, and Linux, but it’s always best to check the compatibility before making a purchase.
- Wireless Standards: Look for adapters that support the latest wireless standards, such as IEEE 802.11ac or IEEE 802.11ax (Wi-Fi 6). These standards offer faster speeds and better performance compared to older standards like IEEE 802.11n or IEEE 802.11g.
- Speed: Consider the wireless adapter’s maximum speed. Adapters that support higher speeds will allow you to take full advantage of your internet connection’s capabilities. Look for adapters with speeds of 300 Mbps or higher for optimal performance.
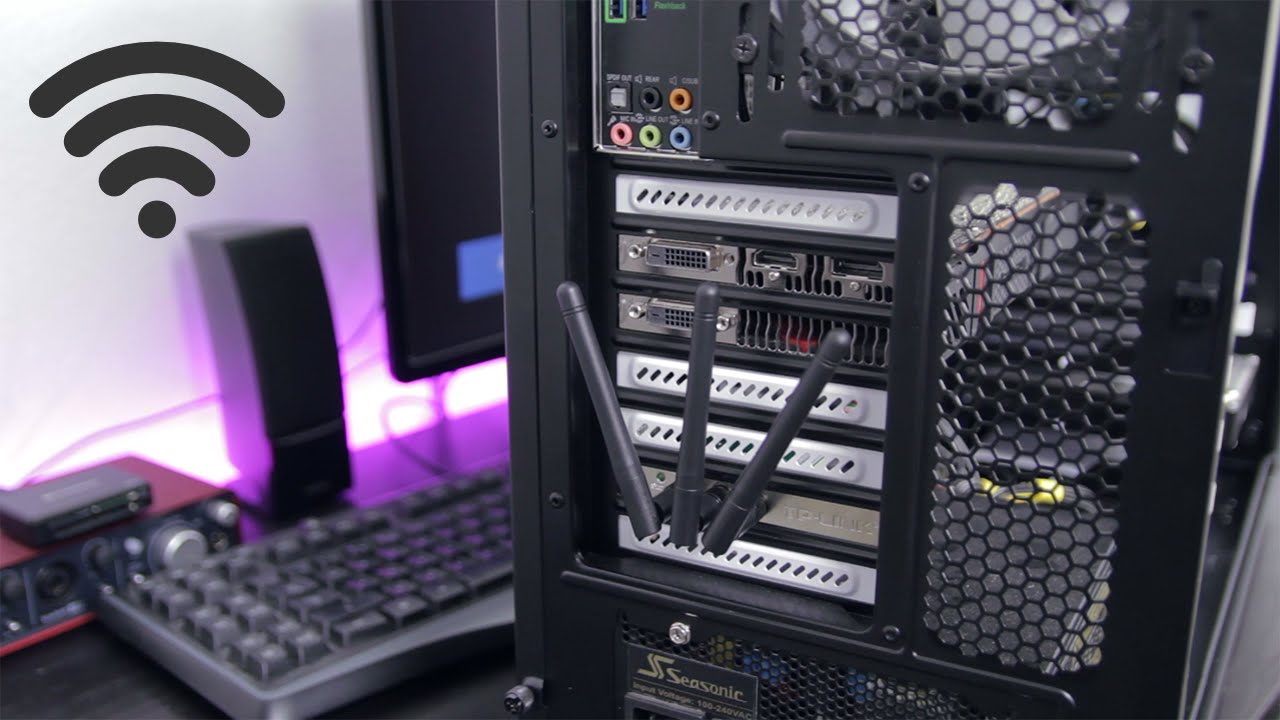
- Antenna Configuration: Pay attention to the adapter’s antenna configuration. Adapters with external antennas tend to have better range and signal strength compared to those with internal antennas. If you require a wider coverage area, consider adapters with adjustable external antennas.
- USB vs. PCI: Decide whether you want a USB or PCI wireless adapter. USB adapters are portable and can be easily plugged into any available USB port, making them suitable for laptops or PCs with limited expansion slots. On the other hand, PCI adapters are installed directly into the motherboard’s PCI or PCI Express slot, providing a more stable and permanent connection.
- Budget: Consider your budget when choosing a wireless adapter. While it’s tempting to go for the cheapest option, investing in a reliable and high-quality adapter will ensure better performance and longevity.
By considering these factors, you can select the right wireless adapter that meets your PC’s requirements and enhances your wireless network experience. Once you have chosen the adapter, the next step is to install it on your PC, which we will explore in the following section.
Installing the Wireless Adapter on Your PC
After selecting the right wireless adapter for your PC, the next step is to install it correctly. While the installation process may vary depending on the adapter and your PC’s operating system, here are the general steps to install a wireless adapter:
- Prepare the Adapter: Before starting, ensure that you have the necessary drivers and software for your specific wireless adapter. These are usually provided by the manufacturer and can be found on their website or included in the adapter’s packaging.
- Power off Your PC: Turn off your PC and unplug it from the power source to avoid any electrical mishaps during the installation process.
- Find an Available Slot: If you are using a PCI wireless adapter, open your PC’s casing and find an available PCI or PCI Express slot. These slots are usually located towards the bottom of the motherboard.
- Insert the Adapter: Carefully insert the wireless adapter into the chosen slot. Ensure that the adapter is securely seated and aligned with the slot, then fasten it in place using the screws provided, if applicable.
- Connect the Antenna: If your wireless adapter has external antennas, attach them securely to the adapter. Adjust the antennas’ orientation for optimal signal strength.
- Close the Casing: Once the adapter is securely installed and the antennas are connected, close your PC’s casing and fasten it properly.
- Power on Your PC: Connect your PC to the power source and power it on. Wait for the operating system to recognize the new hardware.
- Install the Drivers: Insert the drivers CD into your PC’s CD/DVD drive, or download the latest drivers from the manufacturer’s website. Follow the on-screen instructions to install the necessary drivers and software.
- Configure the Adapter: Once the drivers are installed, you may need to configure the adapter’s settings. This can usually be done through the provided software or through the operating system’s network settings.
After completing these steps, your wireless adapter should be installed and ready to connect to your wireless home network. Ensure that you have the correct network credentials, such as the network name (SSID) and password, as you will need them during the network configuration process, which we will cover in the next section.
Configuring the Network Settings on Your PC
Once the wireless adapter is installed on your PC, the next step is to configure the network settings. This will allow your PC to successfully connect to your wireless home network. The configuration process may differ based on your operating system, but here is a general guide to help you:
- Access Network Settings: On your PC, navigate to the network settings. This can usually be done by clicking on the network or Wi-Fi icon in the taskbar or by accessing the network settings in the control panel or system preferences.
- Scan for Available Networks: Within the network settings, you should see an option to scan for available networks. Click on this option to view the list of wireless networks in your area.
- Select Your Network: From the list of available networks, select your wireless home network. Ensure that you choose the correct network name (SSID).
- Provide Network Credentials: Once you select your network, you will be prompted to enter the network password, also known as the pre-shared key (PSK). Enter the password correctly to establish a secure connection to your wireless home network.
- Configure Network Settings: After entering the network password, you may have additional options to configure the network settings. This includes options like obtaining an IP address automatically (DHCP) or manually entering IP addressing information.
- Save and Connect: Once you have configured the network settings, save the changes and connect to your wireless home network. Your PC will attempt to establish a connection, and upon successful authentication, you will be connected to the network.
It is important to note that the configuration process may differ slightly depending on the operating system you are using. Some operating systems provide a more guided setup process, while others require more manual configuration. Additionally, if you encounter any issues during the configuration process, consult the documentation provided with the wireless adapter or seek assistance from the manufacturer’s support resources.
With the network settings properly configured, you can now enjoy the benefits of being connected to your wireless home network. In the next section, we will discuss how to troubleshoot common issues that may occur with wireless connections.
Connecting Your PC to the Wireless Home Network
Once you have installed and configured the wireless adapter on your PC, it’s time to connect your PC to the wireless home network. Follow these steps to establish a connection:
- Turn on Wi-Fi: Make sure that the Wi-Fi feature on your PC is enabled. Most PCs have a physical switch or a function key combination (e.g., Fn + F12) to turn Wi-Fi on and off. Check your PC’s user manual or keyboard for the specific key or switch.
- Open Network Settings: Go to your PC’s network or Wi-Fi settings. This can typically be accessed by clicking on the network or Wi-Fi icon in the taskbar or by going to the network settings in the control panel or system preferences.
- Scan for Available Networks: Within the network settings, look for an option to scan for available networks. Click on this option to view the list of wireless networks in your vicinity.
- Select Your Network: From the list of available networks, choose your wireless home network. Make sure to select the correct network name (SSID).
- Enter Network Credentials: Once you have selected your network, enter the network password or pre-shared key (PSK). This password is the same one you used during the network configuration process.
- Connect to the Network: After entering the network password, click on the “Connect” or “Join” button to establish a connection to the wireless home network. Your PC will now attempt to connect.
- Verify Connection: Once the connection is established, you should see the Wi-Fi icon in the taskbar change to indicate a successful connection. You may also notice a notification or tooltip confirming the connection.
- Test the Connection: To ensure that your PC is connected to the network, open a web browser or any application that requires an internet connection. Visit a website or try accessing online services to verify that the internet is working correctly.
If you encounter any difficulties connecting your PC to the wireless home network, double-check that the network password is entered correctly, and ensure that the wireless adapter and router are functioning properly. If the problem persists, try restarting both your PC and wireless router, as this can often resolve connection issues.
Congratulations! Your PC is now connected to your wireless home network, allowing you to enjoy the freedom of wireless internet access. In the next section, we will discuss common issues that may arise with wireless connections and how to troubleshoot them.
Troubleshooting Common Issues with Wireless Connections
While wireless connections offer convenience and flexibility, they can sometimes be prone to issues. Here are some common problems you may encounter with your wireless home network and troubleshooting steps to help you resolve them:
- Weak Signal or Limited Range: If you are experiencing a weak signal or limited range, try repositioning your wireless router to a more central location in your home. Additionally, minimizing physical barriers such as walls and obstructions can help improve the signal strength.
- Interference from Other Devices: Wireless networks can be affected by interference from other electronics or neighboring networks. Modify the wireless channel on your router settings to avoid conflicting signals from other devices or networks. Experiment with different channels to find the one with the least interference.
- Slow Internet Speed: Slow internet speed can be caused by various factors. First, check if multiple devices are connected and consuming bandwidth. If so, you may need to upgrade your internet plan for faster speeds. Additionally, outdated router firmware or an outdated wireless adapter driver can impact performance. Ensure that both are up to date.
- Connection Drops or Intermittent Connectivity: If your wireless connection frequently drops or has intermittent connectivity, restart your wireless router. This can help resolve temporary issues. If the problem persists, consider updating the router’s firmware or contacting your internet service provider for assistance.
- Password Authentication Issues: If you are unable to connect to your wireless network due to password authentication issues, double-check that you have entered the correct password. Ensure that there are no typos or extra spaces. If needed, reset the router and reconfigure the network settings.
- Device Compatibility Issues: Some devices may have compatibility issues with certain wireless networks or encryption types. If a specific device fails to connect, check its compatibility with your router and network settings. You may need to adjust the router’s settings or update the device’s firmware to achieve compatibility.
- Router Overheating: Overheating routers can cause performance issues. Ensure that your router is placed in a well-ventilated area and not obstructed by objects. Consider using a cooling pad or fan, if necessary, to prevent overheating.
If you encounter any other persistent issues with your wireless home network, consult the documentation provided with your router, wireless adapter, or contact the manufacturer’s support for further assistance. Remember, troubleshooting steps may vary depending on the specific equipment and software you are using.
By understanding these common issues and following the troubleshooting steps, you can resolve many problems that arise with your wireless connections and ensure a smooth and reliable wireless network experience.
Enhancing the Security of Your Wireless Home Network
Securing your wireless home network is crucial to protect your personal information and prevent unauthorized access. By taking a few simple steps, you can enhance the security of your network and ensure a safe online experience. Here are some measures you can implement:
- Change the Default Admin Username and Password: When setting up your wireless router, change the default admin credentials. Use strong, unique passwords that are not easily guessable.
- Enable Encryption: Enable Wi-Fi encryption on your wireless router. The most common encryption types include WPA2 (Wi-Fi Protected Access 2) or WPA3. These encryption protocols ensure that the data transmitted between your devices and the router is securely encrypted.
- Use a Strong Wireless Network Password: Set a strong password for your wireless network (also known as the pre-shared key or network passphrase). Use a combination of uppercase and lowercase letters, numbers, and symbols. Avoid using common phrases or easily guessable passwords.
- Change the Default Network Name (SSID): Modify the default network name (SSID) of your router. Using a unique name can help prevent attackers from targeting your network.
- Disable SSID Broadcasting: Consider disabling the broadcasting of your network’s SSID. This prevents your network from being visible to others, adding an extra layer of security. However, note that this may make it more challenging to connect new devices to the network.
- Enable MAC Address Filtering: MAC address filtering allows you to control which devices can connect to your network. You can create a whitelist of approved MAC addresses, ensuring that only authorized devices can access your network.
- Enable Firewall Protection: Activate the firewall feature on your wireless router. Firewalls help block unauthorized access attempts from the internet and provide an additional layer of security for your network.
- Keep Firmware Updated: Regularly check for firmware updates for your router and apply them when available. Firmware updates often include security patches and bug fixes that help protect against vulnerabilities.
- Regularly Monitor Connected Devices: Periodically check the list of connected devices on your router. If you see any unfamiliar devices or unauthorized connections, take immediate action by changing the Wi-Fi password and investigating further.
- Consider Guest Network: If your router supports it, set up a separate guest network for visitors. This segregates the access to your primary network, minimizing the risk of unwanted access to your personal devices and data.
Implementing these security measures will significantly enhance the protection of your wireless home network. By ensuring your network is secure, you can have peace of mind while enjoying the benefits of a wireless connection.
Managing Multiple PCs on the Same Wireless Network
If you have multiple PCs in your household, it’s important to manage them effectively on the same wireless network. This allows for seamless connectivity and efficient sharing of resources. Here are some tips on how to manage multiple PCs on the same wireless network:
- Assign Static IP Addresses: To ensure each PC has a consistent IP address and to avoid IP conflicts, consider assigning static IP addresses to each PC. This can be done through the router’s settings or by manually configuring the network settings on each individual PC.
- Group PCs into Workgroups: Grouping PCs into workgroups (Windows) or homegroups (Windows 10 or earlier versions) can make sharing files and printers easier. By assigning the same workgroup or homegroup name to all PCs, you can easily access shared resources from one PC to another.
- Create User Accounts: Set up individual user accounts on each PC to ensure privacy and security. User accounts allow each person to have their personal desktop settings, documents, and preferences. This also helps in managing file access and sharing permissions among the PCs.
- Enable File and Printer Sharing: Share files and printers between PCs by enabling file and printer sharing options on each PC. This allows you to access files and print documents from any PC on the network, increasing productivity and convenience.
- Use Network Attached Storage (NAS): Consider setting up a NAS device on your network to store and share files centrally. This allows all PCs to access shared files from a single location, reducing duplication and improving collaboration.
- Enable Remote Desktop Access: If you need to access one PC from another PC remotely, enable the remote desktop feature. This allows you to control one PC from another over the network, ideal for troubleshooting issues or accessing files when you are away from a particular PC.
- Optimize Bandwidth Usage: If you have bandwidth-intensive activities such as online gaming or video streaming, prioritize bandwidth allocation to specific PCs. Most routers offer Quality of Service (QoS) settings that allow you to allocate more bandwidth to specific devices or applications.
- Update Software and Enable Antivirus: It’s crucial to keep all PCs on the network updated with the latest operating system updates, software patches, and antivirus software. Regular updates and security measures help protect the network and its connected devices from potential harm.
- Regularly Monitor Network Performance: Utilize network monitoring tools to keep track of network performance. This allows you to identify and troubleshoot any bottlenecks or issues that may be affecting the performance of the network or individual PCs.
- Secure Your Network: Implement the security measures mentioned earlier to ensure your wireless network is secure. Protecting your network from unauthorized access helps safeguard all connected PCs.
By following these tips, you can effectively manage multiple PCs on the same wireless network, ensuring smooth connectivity, efficient resource sharing, and a secure network environment.
Upgrading Your Wireless Network for Better Performance
If you’re experiencing slow speeds or poor performance on your wireless network, it may be time to consider upgrading your setup. Upgrading your wireless network can significantly improve your internet speed and overall network performance. Here are some options to consider:
- Upgrade Your Wireless Router: If you’ve had your router for a while, it may be outdated. Consider upgrading to a newer model that supports the latest wireless standards, such as IEEE 802.11ac or IEEE 802.11ax (Wi-Fi 6). These routers offer faster speeds, improved range, and better performance compared to older models.
- Utilize Dual-Band or Tri-Band Technology: Dual-band routers operate on both the 2.4 GHz and 5 GHz frequency bands, allowing you to connect devices to the less crowded 5 GHz band for faster speeds. Tri-band routers offer an additional 5 GHz band, reducing congestion and providing an even better wireless experience for multiple devices.
- Upgrade to a Mesh Wi-Fi System: If you have a large home or struggle with dead zones, upgrading to a mesh Wi-Fi system can provide better coverage and eliminate Wi-Fi dead spots. Mesh systems consist of multiple access points that work together to create a seamless Wi-Fi network throughout your home.
- Consider Powerline Adapters or Ethernet Connections: If you have devices that require a stable and high-speed connection, such as gaming consoles or desktop computers, consider using powerline adapters. These adapters use your home’s electrical wiring to transmit data, providing a wired-like experience. Alternatively, connecting devices directly to your router through Ethernet cables can also deliver the best performance.
- Upgrade Your Internet Plan: If you’ve upgraded your router but still experience slow speeds, consider upgrading your internet plan with your service provider. A higher-speed plan can provide faster download and upload speeds, improving your overall network performance.
- Optimize Router Placement: Ensure that your router is placed in a central location within your home and away from obstructions. Avoid placing it near metal objects or walls that may interfere with the signal. Adjusting the antennas on your router can also help optimize coverage and signal strength.
- Update Router Firmware and Drivers: Regularly check for firmware updates for your router and install them as they become available. Firmware updates often include performance improvements, bug fixes, and security enhancements.
- Minimize Interference: Reduce potential interference by placing your router away from other electronic devices that operate on similar frequencies, such as cordless phones or microwaves. Additionally, change the Wi-Fi channel on your router to avoid overlapping with neighboring networks.
- Enable Bandwidth Management: If you have multiple devices connected to your network, enable Quality of Service (QoS) settings on your router. This allows you to prioritize specific applications or devices, ensuring that critical tasks receive the bandwidth they need for optimal performance.
By upgrading your wireless network and implementing these improvements, you can enjoy faster internet speeds, improved coverage, and better overall performance. Evaluate your current network needs and consider the options that best suit your requirements and budget.
Extending the Range of Your Wireless Home Network
If you’re experiencing weak signals or dead zones in certain areas of your home, extending the range of your wireless home network can help ensure consistent connectivity throughout your entire house. Here are some effective methods for extending the range of your wireless network:
- Position Your Router Strategically: Place your router in a central location in your home, away from obstructions and interference, such as thick walls or large appliances. This allows the signal to reach a wider area and reduces signal degradation.
- Adjust Router Antennas: Position and adjust the antennas on your router to optimize signal coverage. Experiment with different antenna angles and orientations to find the best signal strength and range.
- Upgrade to a Higher-Gain Antenna: Consider upgrading the antennas on your router to higher-gain antennas. These antennas have higher signal output and can extend the range of your network by boosting the signal strength.
- Use a Wireless Range Extender: A wireless range extender, also known as a wireless repeater or booster, can enhance your network’s coverage. It receives the existing wireless signal from your router and rebroadcasts it to extend the range further. Place the range extender strategically between your router and the area with weak signal coverage.
- Set Up a Wi-Fi Mesh Network: A Wi-Fi mesh network consists of multiple access points that work together to create a seamless Wi-Fi network. This helps extend coverage throughout your home, eliminating dead zones. Each mesh node communicates with other nodes to ensure a strong and stable connection, even in large or multi-story houses.
- Install a Powerline Adapter with Wi-Fi: A powerline adapter with Wi-Fi capability allows you to extend your network range by using your home’s electrical wiring. Simply connect the main unit to your router via Ethernet and plug it into an electrical outlet. Then, place the Wi-Fi-enabled adapter in any area of your home where you need better coverage.
- Consider Wi-Fi Range Extending Apps: Some routers offer companion apps with Wi-Fi analytics, allowing you to assess signal strength and identify dead zones. These apps provide insight into the performance of your network and can help you optimize router placement and antenna positions for maximum coverage.
- Upgrade to a Wi-Fi 6 Router: Wi-Fi 6 routers, based on the IEEE 802.11ax standard, offer improved range and performance compared to previous generations. Upgrading to a Wi-Fi 6 router can extend the range of your wireless network and provide faster speeds, especially when multiple devices are connected simultaneously.
- Minimize Interference: Reduce interference from other devices by keeping your router away from electronics that operate on similar frequencies, such as cordless phones or microwave ovens. Additionally, changing the channel on your router’s settings can help reduce interference from neighboring networks.
- Utilize Wi-Fi Signal Boosters: Wi-Fi signal boosters, also known as amplifiers or extenders, can boost the signal strength of your wireless network. These devices amplify and rebroadcast the existing signal to increase coverage range, especially in areas with weak signals.
By employing these methods, you can extend the range of your wireless home network, eliminate dead zones, and enjoy reliable connectivity throughout your entire home. Experiment with different solutions to find the one that works best for your specific environment and network needs.