
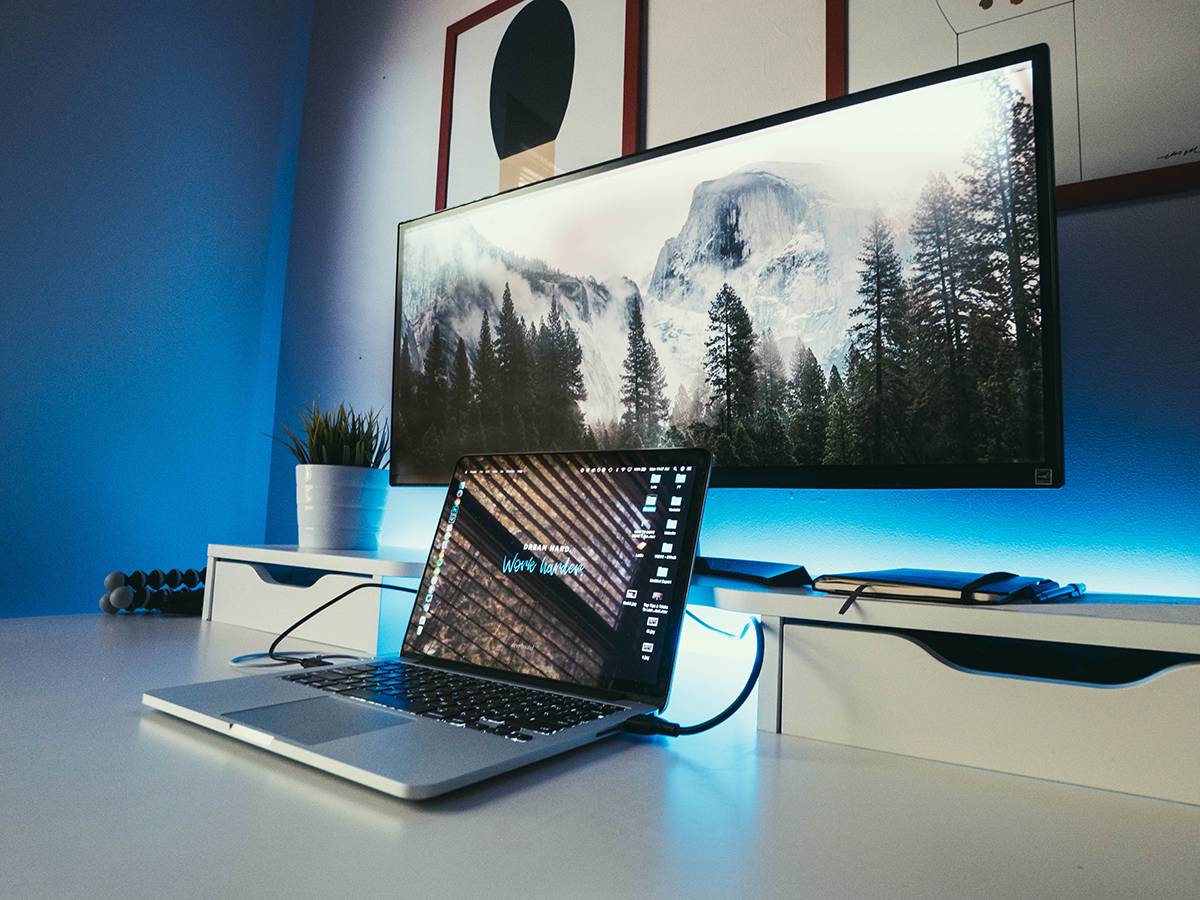
Check the ports on your laptop and monitor
Before you can connect a laptop to a monitor via HDMI, it’s important to check the available ports on both your laptop and monitor. This will ensure compatibility and determine the type of HDMI cable you need.
First, look at your laptop and identify the available ports. Most modern laptops feature an HDMI port, which is a rectangular-shaped port often labeled “HDMI.” However, there may be other types of video ports, such as DisplayPort or VGA, so make sure to double-check.
Next, examine your monitor to find its available ports. Most monitors have an HDMI port, but some older models may only have VGA or DVI ports. It’s crucial to verify that your monitor has an HDMI port to establish a successful connection.
If both your laptop and monitor have HDMI ports, you’re good to go! However, if your monitor only has VGA or DVI ports, don’t worry. You can still connect your laptop using an adapter or a different type of cable.
Remember, it’s essential to check the ports on both your laptop and monitor to ensure they are compatible before proceeding with the connection. Once you’ve confirmed that you have the necessary ports, it’s time to move on to the next step.
Get the right HDMI cable
Once you’ve checked the ports on your laptop and monitor, the next step is to find the right HDMI cable for your connection. HDMI cables come in various types and versions, so it’s essential to choose the one that best suits your needs.
The most common type of HDMI cable is the standard HDMI cable. It supports high-definition video and audio and is suitable for most home and office setups. Make sure to choose a cable that is long enough to reach from your laptop to the monitor without being too short or too long.
If you plan to connect your laptop to a monitor with a higher resolution, such as a 4K monitor, you’ll need a High-Speed HDMI cable. These cables can handle the increased bandwidth required for 4K video and ensure a crisp and clear display.
For specific requirements, such as connecting your laptop to multiple monitors or using advanced features like Ethernet connectivity or ARC (Audio Return Channel), you may need an HDMI cable with additional capabilities. These cables are typically labeled as “Premium High-Speed” and offer enhanced functionality.
It’s important to avoid purchasing overly expensive HDMI cables, as they do not necessarily provide better picture or sound quality. In most cases, a standard or high-speed HDMI cable will suffice for regular laptop-to-monitor connections.
When purchasing an HDMI cable, make sure it is certified by HDMI Licensing, LLC. This certification ensures that the cable meets the required standards for performance and compatibility.
Once you’ve selected the appropriate HDMI cable for your laptop and monitor setup, you’re ready to proceed with connecting them. In the next section, we’ll walk you through the step-by-step process of connecting one end of the HDMI cable to your laptop.
Connect one end of the HDMI cable to your laptop
Now that you have the right HDMI cable, it’s time to connect one end of it to your laptop. Follow these simple steps to establish the first part of the connection:
- Locate the HDMI port on your laptop. It is typically found on the side or back of the laptop and is labeled “HDMI.”
- Take one end of the HDMI cable and insert it into the HDMI port on your laptop. Ensure a secure connection by pushing the cable gently but firmly into the port.
- Once the HDMI cable is securely connected to your laptop, you’re ready to move on to the next step: connecting the other end of the cable to your monitor.
It’s worth noting that some laptops may require you to adjust the display settings in order to mirror or extend the screen onto the monitor. We will cover this in more detail in the upcoming section.
By following these steps, you have successfully connected one end of the HDMI cable to your laptop. Now let’s proceed to the next section to connect the other end of the cable to your monitor.
Connect the other end of the HDMI cable to your monitor
With one end of the HDMI cable connected to your laptop, it’s time to connect the other end to your monitor. Follow these steps to complete the connection:
- Locate the HDMI port on your monitor. It is usually located on the back or side and is labeled “HDMI.”
- Take the other end of the HDMI cable and insert it into the HDMI port on your monitor. Make sure to push the cable in securely to establish a stable connection.
- Once the HDMI cable is connected to both your laptop and monitor, you have successfully established the physical connection between the two devices.
Now that the cable is securely connected, you may need to adjust the display settings on your laptop to ensure the monitor is properly recognized and configured.
Note: If your monitor does not have an HDMI port, you may need to use an adapter or a different type of cable to connect your laptop and monitor. Make sure to check the available ports on your monitor and use the appropriate cable or adapter for the connection.
In the next section, we will explore how to adjust the display settings on your laptop to optimize the connection and ensure the monitor is functioning as expected.
Adjust the display settings on your laptop
Once you have connected your laptop to the monitor via HDMI, it’s important to adjust the display settings on your laptop to optimize the connection and ensure the monitor is functioning correctly. Follow these steps to adjust the display settings:
- Right-click on your desktop and select “Display settings” from the context menu. This will open the display settings menu on your laptop.
- In the display settings menu, you will see a diagram representing your laptop and the connected monitor. From here, you can choose how you want the displays to be configured:
- Extend displays: This option allows you to use the monitor as an extended desktop, providing additional screen space. You can drag windows and applications from your laptop screen to the monitor and vice versa.
- Mirror displays: This option duplicates your laptop screen onto the monitor. Whatever you see on your laptop screen will be exactly replicated on the monitor.
- Show only on 1: This option disables your laptop screen and only displays the output on the connected monitor. This is useful if you want to use your laptop as a desktop computer and only need the monitor for output.
- Select the desired display configuration option and click “Apply” to save the changes. Your laptop screen and the monitor will adjust accordingly based on your selection.
- To fine-tune the display settings, you can click on the “Advanced display settings” link. Here, you can adjust the resolution, orientation, and color settings for the monitor.
- Once you have made the necessary adjustments, click “OK” to save the changes and exit the display settings menu.
If you encounter any issues with the display settings, make sure that both the laptop and monitor have the latest graphics drivers installed. You can visit the manufacturer’s website or use Windows Update to check for and install any available driver updates.
In the next section, we will cover how to calibrate the display settings on your monitor to ensure accurate color reproduction and optimal visual experience.
Calibrate the display settings on your monitor
After connecting your laptop to the monitor via HDMI and adjusting the display settings on your laptop, it’s important to calibrate the display settings on your monitor for accurate color reproduction and optimal visual experience. Follow these steps to calibrate the display settings:
- Access the monitor settings menu by pressing the menu button on your monitor. The location of the menu button may vary depending on your monitor.
- Navigate through the on-screen menu using the arrow keys on your monitor or any other designated buttons.
- Look for an option related to “Display Settings,” “Color Settings,” or “Calibration.” Select this option to enter the calibration menu.
- Once inside the calibration menu, you will have various options to adjust the monitor settings. These may include brightness, contrast, color temperature, gamma, and more.
- Start by adjusting the brightness and contrast settings to achieve a comfortable and balanced level of brightness without losing details in dark or bright areas of the screen.
- Next, adjust the color settings to ensure accurate color reproduction. This includes adjusting the color temperature, saturation, and hue. You may also have the option to select a preset color profile or create a custom color profile based on your preferences.
- If your monitor has a gamma adjustment option, you can fine-tune it to enhance the contrast and visibility of objects on the screen.
- Make small adjustments to each setting and refer to any on-screen guides or calibration tools provided by your monitor. If available, use an external calibration device for more precise results.
- Once you are satisfied with the adjustments, save the changes in the monitor settings menu and exit the calibration menu.
It’s recommended to recalibrate the display settings periodically to ensure optimal performance and accurate color reproduction. Factors such as aging of the monitor and changes in lighting conditions can affect the display over time.
By calibrating the display settings on your monitor, you can enjoy a more vibrant and accurate visual experience while using your laptop connected via HDMI. In the next section, we will discuss common troubleshooting tips for any issues that may arise during the connection process.
Troubleshooting common issues
While connecting your laptop to a monitor via HDMI is generally a straightforward process, there may be instances where you encounter certain issues. Here are some common problems that may arise and troubleshooting steps to resolve them:
- No display on the monitor:
- Check if the HDMI cable is securely connected to both your laptop and monitor. Reinsert the cable to ensure a proper connection.
- Verify that the monitor is powered on and set to the correct input source (HDMI).
- Try restarting your laptop and monitor to refresh the connection.
- If using an adapter or converter, ensure that it is compatible with your laptop and monitor.
- Poor display quality:
- Adjust the display settings on your laptop, including resolution and scaling, to match the capabilities of your monitor.
- Update the graphics driver on your laptop to the latest version. Visit the manufacturer’s website or use Windows Update to check for available updates.
- Calibrate the display settings on your monitor to ensure accurate color reproduction and optimal visual experience.
- No sound from the monitor:
- Check if the volume on the monitor is muted or set too low. Adjust the volume settings on the monitor accordingly.
- Ensure that the audio output on your laptop is set to the correct device (HDMI), and the volume is not muted or too low.
- Restart your laptop and monitor to refresh the audio connection.
- Incompatible display settings:
- If you are unable to see the entire screen on the monitor, adjust the display resolution settings on your laptop to ensure compatibility with the monitor.
- Make sure that the refresh rate setting on your laptop is compatible with the monitor. High refresh rates may not be supported by older monitors.
- Intermittent connection or flickering:
- Check the HDMI cable for any physical damage or bent pins. Replace the cable if necessary.
- Try using a different HDMI port on your laptop or monitor to rule out a faulty port.
- Ensure that your laptop and monitor are using the latest firmware updates available.
If you encounter any other issues or the troubleshooting steps mentioned above do not resolve the problem, consult the user manual for your laptop and monitor or contact the manufacturer’s support for further assistance.
In the next section, we will discuss how to safely disconnect your laptop from the monitor after use.
Disconnecting your laptop from the monitor
After using your laptop connected to a monitor via HDMI, it’s important to properly disconnect the two devices to avoid any potential damage. Follow these steps to safely disconnect your laptop from the monitor:
- First, close any applications or documents that you may have open on the extended or mirrored display on the monitor. This ensures that you don’t accidentally lose any unsaved work.
- On your laptop, go to the display settings menu and select the appropriate display configuration option to revert back to the laptop screen only. For example, choose “Show only on 1” or “Disconnect this display.”
- Once the laptop screen is the sole display, you can safely disconnect the HDMI cable.
- Hold the HDMI connector firmly and gently pull it out of the HDMI port on your laptop. Avoid applying excessive force or pulling at an angle to prevent damage to the port or cable.
- Next, reach towards the monitor and disconnect the HDMI cable from its HDMI port. Again, ensure that you handle the cable with care and remove it gently.
- If you have any other peripherals or cables connected to your laptop or monitor, disconnect them as well.
After disconnecting the HDMI cable, you can now proceed to store it in a safe place, ensuring that it remains untangled and protected from any potential damage.
Remember, it’s always a good practice to power off both your laptop and monitor before connecting or disconnecting any cables. This minimizes the risk of any electrical surges and ensures a safe connection process.
Now that you have successfully disconnected your laptop from the monitor, you can resume using your laptop’s built-in display or connect it to other devices as needed.