
Dusting the Speaker Cabinets
Dusting your home stereo speaker cabinets is an essential step in maintaining their performance and longevity. Dust can accumulate on the cabinets, affecting the sound quality and potentially damaging the speakers. Here are some tips on how to properly dust your speaker cabinets:
- Start by turning off your speakers and unplugging them from the power source. This ensures your safety and prevents any accidental damage to the speakers.
- Use a soft microfiber cloth or a clean feather duster to gently remove the dust from the speaker cabinets. Avoid using abrasive materials or rough cloths that could scratch the surface.
- If there are stubborn dust spots, slightly dampen the cloth with water or a mild cleaning solution specifically designed for audio equipment. Ensure the cloth is not too wet, as excessive moisture can damage the cabinets.
- Using gentle, circular motions, wipe the surfaces of the cabinets, paying attention to the corners and edges where dust tends to accumulate.
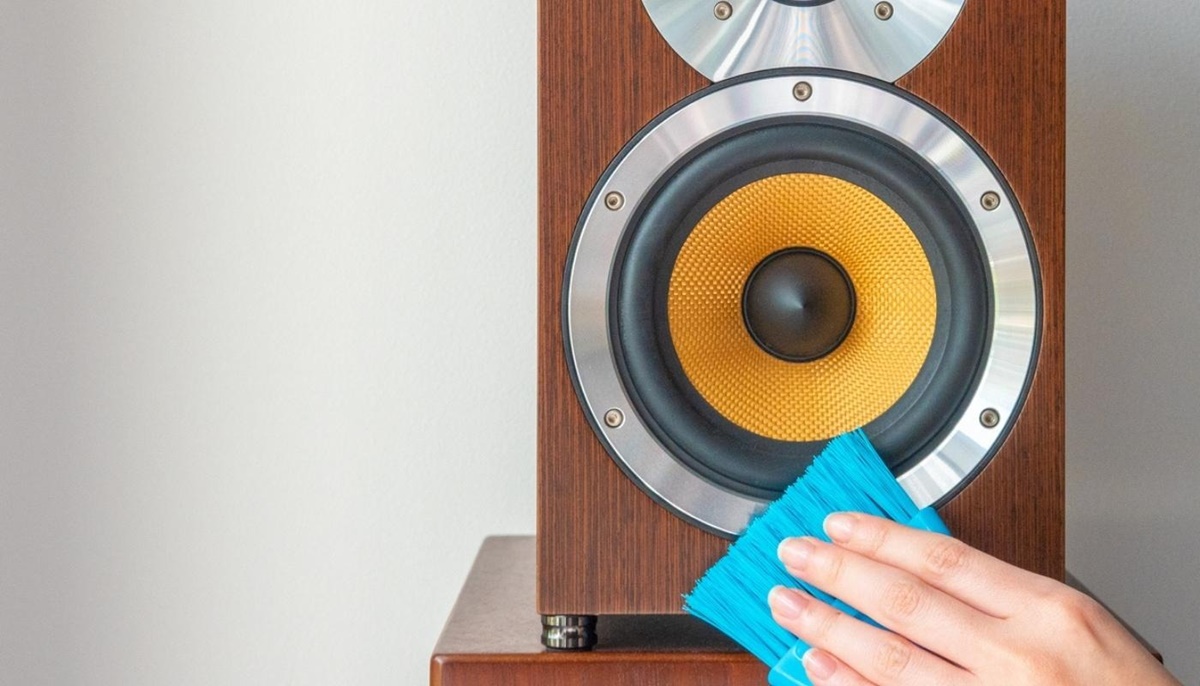
- For speaker cabinets with intricate designs or grille patterns, use a soft-bristled brush to reach into the crevices and remove any trapped dust.
- Avoid spraying any cleaning solutions directly onto the speaker cabinets. Instead, lightly dampen the cloth and then wipe the cabinets. This prevents any liquid from seeping into the speaker components.
- Once you have thoroughly dusted the cabinets, allow them to air dry before plugging in and turning on the speakers again.
Regularly dusting your speaker cabinets not only improves their appearance but also helps maintain their overall performance. By removing dust and debris, you can ensure that your speakers deliver clean and clear sound for years to come.
Cleaning the Speaker Grills
The speaker grills not only serve as a protective barrier for the speaker components but also contribute to the overall aesthetics of your home stereo. To keep them looking clean and free of dust, it’s important to clean the speaker grills regularly. Follow these steps to effectively clean your speaker grills:
- Start by gently removing the speaker grills from the cabinets. Some grills may be attached with screws, while others can be easily popped off.
- Once you have removed the grills, inspect them for any visible dirt, dust, or stains. If there is loose dirt, you can first try lightly tapping the grills to dislodge the debris.
- If the grills are still dirty, fill a basin or sink with warm water and a mild detergent. Submerge the grills in the soapy water and let them soak for a few minutes.
- Using a soft brush or cloth, gently scrub the grills to remove any remaining dirt or stains. Be cautious not to apply too much pressure, as this can damage the grill material.
- Rinse the grills thoroughly with clean water to remove any soap residue.
- Use a clean towel or paper towels to pat dry the grills. Avoid rubbing vigorously, as this can cause the grill material to fray.
- Before reattaching the grills, make sure they are completely dry to prevent any moisture from getting trapped inside the speaker cabinets.
- Carefully align the grills with the speaker cabinets and secure them back in place. If there were screws, tighten them carefully but avoid over-tightening.
Regularly cleaning the speaker grills not only improves their appearance but also helps maintain the performance of your home stereo speakers. By removing dust and dirt, you can ensure that the sound quality remains clear and unobstructed.
Removing Stains and Spots from Speaker Grills
Over time, speaker grills can accumulate stains and spots that can affect their appearance. Removing these blemishes can help restore the visual appeal of your home stereo system. Follow these steps to effectively remove stains and spots from your speaker grills:
- Start by assessing the type of stain or spot on the grill. Common stains include beverage spills, dust buildup, or discoloration from exposure to sunlight.
- If the stain is fresh, you can try blotting it gently with a clean cloth or paper towel to absorb as much of the stain as possible. Avoid rubbing the stain, as this can spread it and cause further damage.
- If the stain persists or is older, you can create a cleaning solution by mixing warm water with a mild detergent. Dampen a soft cloth or sponge in the solution and gently blot the stained areas.
- For more stubborn stains, you can use a mild stain remover or upholstery cleaner. Apply a small amount of the cleaner to a clean cloth and gently rub the stained areas. Test the cleaner on a small, inconspicuous area of the grill first to ensure it does not cause any discoloration or damage.
- Rinse the grill with clean water to remove any cleaning solution residue. Make sure not to saturate the grill with excessive water.
- After rinsing, gently pat dry the grill with a clean towel or paper towels. Avoid rubbing vigorously, as this can damage the grill material or leave lint behind.
- Allow the grill to air dry completely before reattaching it to the speaker cabinets. This prevents any moisture from being trapped and causing mold or mildew.
By following these steps, you can effectively remove stains and spots from your speaker grills, restoring their appearance and ensuring that your home stereo system looks as good as new.
Cleaning the Speaker Cones
The speaker cones are an integral part of your home stereo system, responsible for generating sound. To maintain their performance and prevent any distortion, it’s important to keep the speaker cones clean. Here’s how you can effectively clean your speaker cones:
- Begin by turning off the speakers and disconnecting them from the power source. This ensures your safety and prevents any accidental damage to the speakers.
- If the speaker cones can be easily accessed, use a soft-bristled brush or a clean, dry cloth to gently remove any loose dust or debris. Alternatively, you can use a can of compressed air to blow away the dust.
- If there are visible stains or spots on the speaker cones, dampen a soft cloth with water or a mild cleaning solution specifically designed for audio equipment. Gently wipe the cones, being careful not to apply too much pressure or moisture.
- For stubborn stains or residue on the speaker cones, avoid using harsh chemicals or abrasive materials. Instead, consult the manufacturer’s instructions or contact a professional for guidance on the appropriate cleaning method.
- Ensure that the speaker cones are completely dry before reconnecting and powering on the speakers. Moisture on the cones can affect the sound quality and potentially cause damage to the speakers.
Regular maintenance and cleaning of the speaker cones help ensure optimal performance and longevity of your home stereo system. By keeping them clean and free from dust and debris, you can enjoy superior audio quality for years to come.
Removing Dust and Debris from Speaker Connectors
The speaker connectors play a crucial role in transmitting audio signals from your audio source to your speakers. Over time, dust and debris can accumulate on these connectors, affecting the quality of the audio output. Follow these steps to effectively remove dust and debris from your speaker connectors:
- Start by turning off your audio system and disconnecting the speakers from the power source.
- Inspect the speaker connectors for any visible dust or debris. If you notice any buildup, gently blow on the connectors or use compressed air in short bursts to dislodge the particles.
- If the dust or debris is stubborn, you can use a clean, soft-bristled brush or a cotton swab to carefully brush or wipe the connectors. Be cautious not to apply excessive pressure that could damage the connectors.
- For connectors that are heavily soiled or oxidized, you can use a specialized contact cleaner or electronic cleaning solution. Apply a small amount of the cleaner to a cotton swab or a soft cloth and gently wipe the connectors. Follow the manufacturer’s instructions for the specific cleaner you are using.
- Avoid using any harsh chemicals or abrasive materials on the connectors, as these can damage the delicate metal surfaces.
- Once you have cleaned the connectors, allow them to air dry completely before reconnecting the speakers.
- Before reconnecting, double-check that all connections are secure and properly aligned. This ensures optimal audio transmission.
Regularly cleaning the speaker connectors helps maintain a strong and uninterrupted connection, ensuring optimal audio performance. By removing dust and debris, you can enjoy clear and distortion-free sound from your home stereo system.
Polishing the Speaker Cabinets
Polishing the speaker cabinets not only enhances the appearance of your home stereo system but also helps protect the cabinet’s surface from potential damage. Here’s how you can effectively polish your speaker cabinets:
- Begin by turning off your speakers and unplugging them from the power source to ensure your safety.
- Remove any dust or debris from the speaker cabinets using a soft cloth or a feather duster.
- Choose a suitable polish for the material of your speaker cabinets. For wooden cabinets, you can use a furniture polish recommended for wood surfaces. For other materials such as plastic or metal, use a suitable cleaner and polish as recommended by the manufacturer.
- Apply a small amount of the polish onto a soft cloth and gently rub it onto the surface of the cabinets in circular motions. Start with a small area and gradually move to other sections.
- Ensure that the polish is evenly distributed, paying special attention to areas that may have accumulated more dirt or stains.
- Allow the polish to sit on the cabinets for a few minutes, as directed by the manufacturer’s instructions.
- Using a separate clean cloth, gently buff the cabinets in a circular motion to remove any excess polish and bring out the desired shine.
- Take care not to apply too much pressure or use abrasive materials, as these can cause scratches or damage to the cabinet surface.
- Once you have finished polishing, allow the cabinets to air dry completely before reassembling and powering on the speakers.
Regularly polishing your speaker cabinets can help maintain their appearance and protect them from everyday wear and tear. By following these steps, you can keep your speaker cabinets looking clean and shiny, adding an extra touch of elegance to your home stereo system.
Cleaning the Speaker Wires
Cleaning the speaker wires is an often overlooked but important aspect of maintaining your home stereo system. Over time, dust and debris can accumulate on the wires, affecting the sound quality and potentially causing connectivity issues. Follow these steps to effectively clean your speaker wires:
- Start by turning off your audio system and disconnecting the speakers from the power source.
- Inspect the speaker wires for any visible dust or debris. If you notice any buildup, gently wipe the wires with a clean and dry microfiber cloth. Avoid using rough materials that can damage the wires.
- If the speaker wires are heavily soiled or greasy, you can create a cleaning solution by mixing a small amount of mild detergent with warm water.
- Dampen the microfiber cloth with the cleaning solution and gently wipe the wires, ensuring not to soak them in the solution. Be cautious as excessive moisture can damage the wires or affect their performance.
- Rinse the cloth with clean water and wring it out to remove excess moisture. Gently wipe the wires again to remove any residual cleaning solution.
- Allow the speaker wires to air dry completely before reconnecting them.
- Inspect the connectors at the ends of the wires for any corrosion or oxidation. If you notice any, gently clean the connectors with a cotton swab dipped in rubbing alcohol. Be careful not to damage the connectors or push any debris further into the connectors.
- Ensure that all connections are secure and properly aligned before reconnecting the speakers.
Regularly cleaning the speaker wires helps maintain a strong and uninterrupted audio signal, ensuring optimal sound quality from your home stereo system. By keeping the wires clean and free from debris, you can enjoy crisp and clear audio reproduction.
Maintaining and Cleaning Amplifiers and Receivers
Amplifiers and receivers are the heart of your home stereo system, responsible for amplifying and processing audio signals. It is important to maintain and clean them regularly to ensure optimal performance and longevity. Here are some tips for maintaining and cleaning your amplifiers and receivers:
- First, turn off your audio system and unplug the amplifiers and receivers from the power source. This is crucial for your safety and to prevent any accidental damage.
- Inspect the exterior of the amplifiers and receivers for dust and debris. Use a soft microfiber cloth or a brush to gently remove any surface dirt or dust. Pay close attention to the ventilation grills, as they can accumulate a significant amount of dust.
- If there are stubborn spots or stains, dampen a cloth with water or a mild cleaning solution and gently wipe the affected area. Avoid using excessive moisture and ensure that the cloth is not dripping wet.
- To clean the ventilation grills, use a brush with soft bristles or compressed air. Be careful not to push the dust further into the device. You can also use a vacuum cleaner with a brush attachment to remove the dust.
- Do not use any abrasive chemicals, solvents, or alcohol-based cleaners on the amplifiers and receivers, as they can damage the internal components or the exterior finish.
- Inspect the input and output connections for any dirt or corrosion. If necessary, use a cotton swab dipped in rubbing alcohol to gently clean the connectors and remove any oxidation.
- Pay attention to the cooling fans if your amplifiers or receivers have them. Dust can accumulate on the fan blades, hindering proper ventilation and causing overheating. Gently clean the fan blades with a soft brush or compressed air.
- Allow the amplifiers and receivers to air dry completely before reconnecting and powering them back on.
Regularly maintaining and cleaning your amplifiers and receivers not only improves their performance but also extends their lifespan. By keeping them free from dust and debris, you can enjoy clear and reliable audio reproduction for years to come.
Precautions to Take when Cleaning Speakers
Cleaning your speakers is an important aspect of their maintenance routine, but it’s essential to take certain precautions to ensure that you clean them properly without causing any damage. Here are some precautions to keep in mind when cleaning your speakers:
- Before starting the cleaning process, make sure to turn off and unplug your speakers from the power source. This eliminates the risk of electric shock and prevents any accidental damage to the speakers or amplifier.
- Refer to the manufacturer’s instructions or documentation for any specific cleaning guidelines or recommendations. Different speaker models may have unique cleaning requirements, and it is important to follow these guidelines to prevent any damage or voiding of warranties.
- Use the right cleaning materials and tools for the specific components of your speakers. For example, use a soft microfiber cloth, feather duster, or a brush with soft bristles to clean the cabinets, grills, and other surfaces. Avoid using abrasive materials or rough cloths that may scratch or damage the speaker components.
- Avoid using excessive moisture when cleaning speakers. If you need to use a damp cloth or cleaning solution, ensure that the cloth is lightly damp, not wet, to prevent liquid from seeping into the speaker components and causing damage.
- Be cautious when cleaning speaker grills or cones. These components are delicate and can be easily damaged. Avoid applying too much pressure, abrasive cleaners, or rough movements that may cause tears or distortion of the grill material.
- Take extra care when cleaning speaker wires and connectors. Ensure that the speakers are disconnected from the power source and any audio equipment before attempting to clean the wires. Gently wipe the wires with a clean cloth to remove dust and debris, avoiding any twisting or pulling that may damage the connections.
- Never spray cleaning solutions directly onto the speakers or their components. The liquid may damage the speaker cones, amplifier circuits, or other sensitive parts. Instead, lightly dampen a cloth with the cleaning solution and wipe the surfaces gently.
- Allow sufficient drying time after cleaning before reconnecting and turning on the speakers. This helps prevent any moisture from compromising the electrical components and causing damage or malfunctions.
- If you are unsure or have any concerns about cleaning your speakers, consider consulting a professional or contacting the manufacturer for guidance. They can provide specific instructions or recommend authorized service centers for more complex cleaning tasks or repairs.
By following these precautions, you can clean your speakers effectively and safely, ensuring their longevity and continued high-quality sound performance.