
Prepare the Necessary Camera Cleaning Supplies
Keeping your digital camera clean is essential for maintaining its performance and ensuring the longevity of your device. But before you embark on the cleaning process, it is crucial to prepare the necessary camera cleaning supplies. By having the right tools at your disposal, you can effectively remove dust, smudges, and debris that may have accumulated on your camera.
Here are the essential camera cleaning supplies you will need:
- Clean Microfiber Cloth: This soft, lint-free cloth is ideal for wiping away smudges and fingerprints from the camera body, lens, and LCD screen without scratching the surface.
- Camera Cleaning Solution: Use a camera-specific cleaning solution or lens cleaning fluid to safely remove stubborn smudges and stains from the lens or camera body.
- Blower Brush: This tool is designed to blow away loose dust and particles from hard-to-reach crevices in your camera.
- Sensor Cleaning Kit: If you notice spots or specks appearing in your photographs, you may need to clean the camera sensor. Invest in a sensor cleaning kit specifically designed for your camera model.
- Cotton Swabs: These are handy for cleaning small areas or corners of your camera that are difficult to reach with a cloth.
- Rubber Air Blower: Use a rubber air blower to gently remove dust and debris from the camera’s buttons, dials, and crevices.
Ensure that all the cleaning supplies you use are specifically designed for camera equipment. Using inappropriate cleaning tools or chemicals can damage your camera’s delicate components.
Now that you have prepared the necessary camera cleaning supplies, you are ready to begin the cleaning process. This will help you maintain the pristine condition of your camera and ensure that it captures stunning images for years to come.
Turn off the Camera and Remove the Battery
Before starting the cleaning process, it is crucial to turn off your digital camera and remove the battery. This step is essential for ensuring your safety and protecting your camera from potential damage.
Here’s how you can safely turn off your camera and remove the battery:
- Power Off: Switch your camera off using the power button or any dedicated power switch. This will prevent any accidental operations during the cleaning process.
- Review Battery Placement: Familiarize yourself with the location and positioning of the battery compartment. Cameras usually have a dedicated latch or slide mechanism to secure the battery.
- Open the Battery Compartment: Carefully open the battery compartment following the manufacturer’s instructions. This step may involve sliding or releasing a latch or unscrewing a cover, depending on your camera model.
- Remove the Battery: Gently remove the battery from its compartment, ensuring that no force or excessive pressure is applied. Be mindful of any connectors or metal contacts on the battery.
By turning off your camera and removing the battery, you minimize the risk of accidental button presses or damage to the camera’s internal components. It also ensures that the camera is powered down, reducing the chance of electrical hazards during the cleaning process.
Keep in mind that some camera models may have additional steps or precautions specific to their design. Consult your camera’s manual for detailed instructions on safely turning off the camera and removing the battery.
Now that you have safely turned off your camera and removed the battery, you can proceed to clean the various components of your camera with confidence.
Clean the Exterior of the Camera Body
The exterior of your digital camera can accumulate dirt, dust, fingerprints, and other unwanted residues over time. Cleaning the camera body not only improves its appearance but also ensures that the buttons and dials function smoothly. Here’s how you can clean the exterior of your camera body:
- Use a Microfiber Cloth: Start by gently wiping the camera body with a clean microfiber cloth. The cloth should be soft and lint-free to avoid scratching the surface. Wipe in a circular motion, paying extra attention to areas with visible smudges or fingerprints.
- Focus on Button and Dial Area: Use a cotton swab or a soft brush to clean around the buttons and dials. Be careful not to apply excessive pressure or get any moisture inside the crevices.
- Target Stubborn Stains: For stubborn stains or sticky residues, lightly dampen the microfiber cloth with a small amount of camera cleaning solution or lens cleaning fluid. Gently wipe the affected areas, ensuring that the cloth is not too wet to avoid any moisture seeping into the camera.
- Pay Attention to Connectors: Clean the connectors and ports on the camera body using a clean, dry cotton swab. This helps maintain good electrical connections and prevents any debris from interfering with the camera’s functionality.
- Inspect the Memory Card and Battery Compartment: Check the memory card and battery compartment for any dust or debris. Use a blower brush or a rubber air blower to blow away any loose particles without direct contact with the camera’s components.
Remember to approach the cleaning process gently and avoid using excessive force. It is important to be cautious and mindful of the camera’s delicate parts, such as the LCD screen and ports. If you encounter any stubborn stains or residues that are difficult to remove, consult your camera’s user manual or contact the manufacturer for further guidance.
By regularly cleaning the exterior of your camera body, you not only maintain its aesthetic appeal but also improve its overall functionality and extend its lifespan.
Clean the Camera Lens
The camera lens is one of the most important components of your digital camera as it directly affects the quality of your photographs. Keeping the lens clean is crucial for capturing clear and sharp images. Here’s how you can effectively clean your camera lens:
- Remove Loose Dust: Start by using a blower brush to gently remove any loose dust or particles from the lens surface. Hold the camera facing downwards to prevent any dust from settling back onto the lens.
- Use a Lens Cleaning Solution: Apply a few drops of lens cleaning solution to a lens cleaning cloth or a microfiber cloth specifically designed for lenses. Avoid using regular cloths or tissues as they may scratch the lens.
- Gently Wipe the Lens: With a light touch, gently wipe the lens in a circular motion from the center towards the outer edges. Be thorough but gentle to avoid smudging or scratching the lens.
- Target Stubborn Stains: For stubborn stains or smudges, you may need to use a lens cleaning pen. Follow the manufacturer’s instructions to effectively clean the affected area without damaging the lens coating.
- Check for Smear-Free Surface: After cleaning, inspect the lens under good lighting conditions to ensure there are no smears, streaks, or particles left behind. If necessary, repeat the cleaning process until the lens is perfectly clean.
It’s important to note that excessive cleaning or using incorrect techniques can damage the lens. Avoid applying excessive pressure or using abrasive materials that can scratch or leave marks on the lens surface.
If you encounter persistent dust or spots that are difficult to clean, consider using a sensor cleaning kit or consulting a professional camera technician for assistance. They can help ensure proper cleaning and maintenance of your lens.
Maintaining a clean camera lens not only optimizes image quality but also ensures that your photographs are free from unwanted artifacts or distortions caused by dirt or smudges on the lens. Regularly cleaning your camera lens is a simple yet effective way to enhance your photography results.
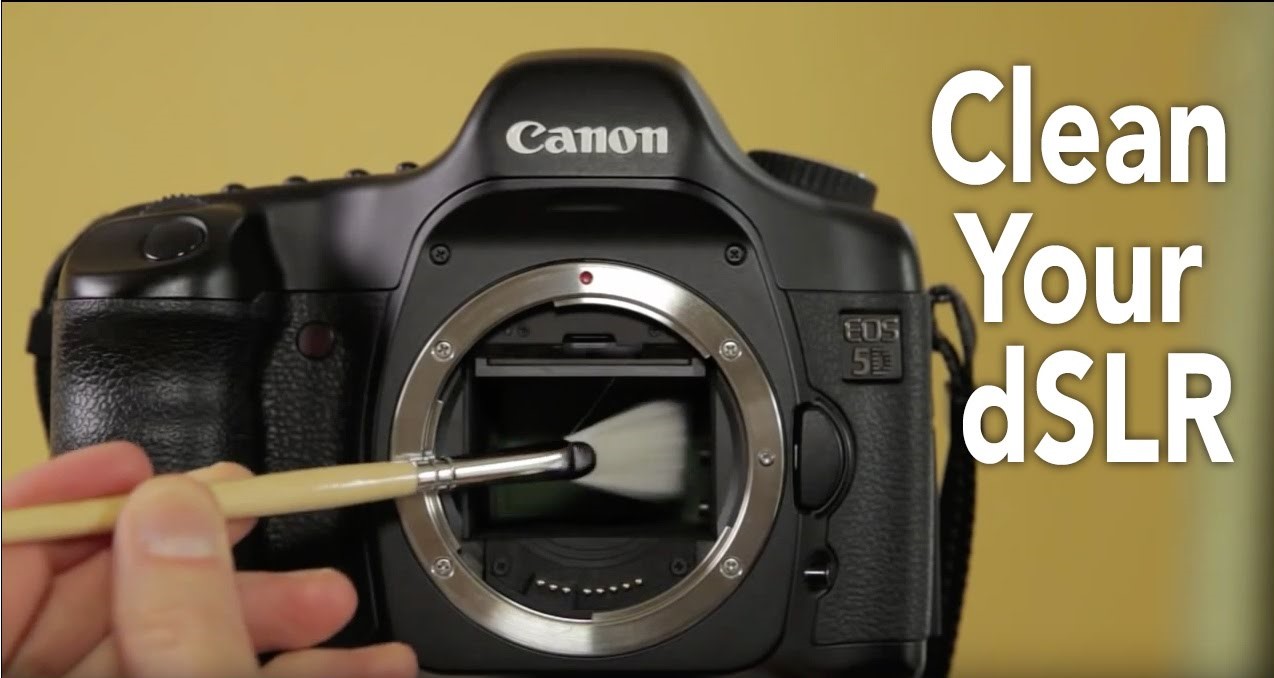
Clean the Camera Sensor
The camera sensor is a vital component that captures the image when you take a photograph. Over time, dust, dirt, and other particles can accumulate on the sensor, resulting in visible spots or blemishes on your images. Cleaning the camera sensor requires caution and proper tools. Here’s how you can effectively clean your camera sensor:
- Select a Sensor Cleaning Kit: Invest in a sensor cleaning kit specifically designed for your camera model. These kits usually include a sensor cleaning solution, sensor swabs, and a blower brush.
- Choose a Suitable Environment: Find a clean and dust-free environment to perform the sensor cleaning. A well-lit room with no drafts is ideal.
- Remove the Lens: Carefully remove the lens from your camera body to expose the sensor. Ensure that your camera is turned off during this process.
- Use a Blower Brush: Before proceeding with the sensor cleaning, gently use a blower brush to remove any loose dust or particles from the sensor surface. Hold the camera facing downward to prevent any dust from falling back onto the sensor.
- Apply the Sensor Cleaning Solution: Follow the instructions provided with your sensor cleaning kit to apply a small amount of the cleaning solution to the sensor swab.
- Swipe the Sensor: With steady hands and a gentle touch, carefully swipe the sensor with the moistened sensor swab in a single direction. Avoid excessive pressure or multiple swipes, as this can damage the sensor.
- Inspect the Sensor: Use a magnifying loupe or the camera’s built-in sensor cleaning function to inspect the sensor for any remaining spots or debris. If necessary, repeat the cleaning process until the sensor is free from visible particles.
It’s important to note that cleaning the camera sensor carries some risks, and if you’re uncomfortable doing it yourself, it’s best to seek professional assistance. Mishandling the sensor can cause permanent damage to your camera.
Regularly cleaning the camera sensor ensures that your images remain clear and free from unwanted spots or blemishes. By following proper techniques and using appropriate tools, you can effectively clean your camera sensor and maintain its optimal performance.
Clean the Camera LCD Screen
The LCD screen on your digital camera is not only essential for previewing and reviewing your photographs but also serves as a display for various camera settings. Keeping the LCD screen clean is vital to ensure clear visibility and prevent any smudges or dirt from obstructing your view. Here’s how you can effectively clean your camera’s LCD screen:
- Power Off: Ensure that your camera is turned off before cleaning the LCD screen. This prevents accidental button presses and reduces the risk of damage to the screen.
- Remove Loose Dust: Use a blower brush or a rubber air blower to gently remove any loose dust or particles from the screen surface. This helps prevent scratches during the cleaning process.
- Use a Microfiber Cloth: Dampen a clean microfiber cloth with a small amount of lens cleaning solution, or use a dedicated LCD screen cleaning solution. Avoid spraying the solution directly onto the screen; instead, apply it to the cloth.
- Gently Wipe the Screen: With a light touch, gently wipe the LCD screen in a circular motion. Start from one corner and work your way across, ensuring that you cover the entire surface. Pay extra attention to any visible smudges or fingerprints.
- Target Stubborn Stains: For stubborn stains or smudges that are difficult to remove, lightly dampen the microfiber cloth with the cleaning solution and apply gentle pressure while wiping the affected area. Avoid pressing too hard to prevent damage to the screen.
- Inspect for Smear-Free Surface: After cleaning, inspect the LCD screen for any smears, streaks, or remaining particles. If necessary, repeat the cleaning process until the screen is free from any visible residues.
It’s important to note that the LCD screen is a sensitive component and should be treated with care. Avoid using excessive force or abrasive materials that can scratch or damage the screen. Additionally, be cautious around any buttons or ports located near the screen to prevent liquid damage.
Regularly cleaning the camera LCD screen ensures optimal visibility and enhances your overall photography experience. By following these steps and using the appropriate cleaning supplies, you can keep your LCD screen clear and free from smudges or dirt.
Clean the Camera Viewfinder
The camera viewfinder is an essential component that helps you compose and focus your shots. Over time, dust, smudges, and debris can accumulate on the viewfinder, affecting the clarity of your view. Cleaning the camera viewfinder is crucial for maintaining accurate framing and ensuring a pleasant shooting experience. Here’s how you can effectively clean your camera’s viewfinder:
- Power Off: Before cleaning the viewfinder, make sure the camera is turned off. This prevents accidental button presses and reduces the risk of damage.
- Remove Loose Dust: Use a blower brush or a gentle puff of air to remove any loose dust particles from the viewfinder. This helps prevent scratches and ensures a clear view during the cleaning process.
- Use a Lens Cleaning Cloth: Dampen a clean lens cleaning cloth or a microfiber cloth with a small amount of lens cleaning solution, if needed. Ensure that the cloth is lint-free and soft to avoid scratching the viewfinder.
- Gently Wipe the Viewfinder: With a light touch, gently wipe the viewfinder’s eyepiece and surrounding area with the damp cloth. Use circular motions and pay extra attention to any visible smudges or fingerprints.
- Target Stubborn Stains: If there are stubborn stains or smudges, lightly dampen a cotton swab with the lens cleaning solution and gently clean the affected area of the viewfinder. Be careful not to apply excessive pressure.
- Inspect for Smear-Free Surface: After cleaning, inspect the viewfinder for any remaining smears, streaks, or particles. If necessary, repeat the cleaning process until the viewfinder is clear and free from any visible residues.
Remember to be cautious and use gentle pressure while cleaning the viewfinder. Excessive force or rubbing can damage the delicate components.
Regular cleaning of the camera viewfinder ensures a clear and unobstructed view while composing your shots. By following these steps and using the appropriate cleaning supplies, you can maintain the clarity and functionality of your camera’s viewfinder.
Clean the Camera Focusing Screen
The camera focusing screen plays a crucial role in helping you achieve accurate focus in your photographs. Over time, dust, smudges, and debris can accumulate on the focusing screen, affecting the clarity and accuracy of your focus. Cleaning the camera focusing screen is essential to ensure sharp and precise focus. Here’s how you can effectively clean the camera focusing screen:
- Power Off: Before cleaning the focusing screen, make sure to turn off your camera. This prevents accidental button presses and reduces the risk of damage.
- Remove Loose Dust: Use a blower brush or a gentle puff of air to remove any loose dust or particles from the focusing screen. This helps prevent scratches during the cleaning process and ensures a clear view.
- Inspect the Focusing Screen: Examine the focusing screen to identify any visible smudges, fingerprints, or stubborn stains. Identify the type of focusing screen your camera has, as different types may require specific cleaning methods.
- Use a Lens Cleaning Cloth or Cleaning Solution: Depending on the type of focusing screen, you can either use a clean, dry lens cleaning cloth or a small amount of lens cleaning solution applied to the cloth. Ensure that the cloth is soft and lint-free to avoid scratching the screen.
- Gently Wipe the Focusing Screen: With a light touch, gently wipe the focusing screen in a circular motion or along the designated cleaning direction. Be careful not to apply excessive pressure, as it can damage the screen.
- Target Stubborn Stains: If there are stubborn stains or smudges on the focusing screen, lightly dampen a cotton swab with the lens cleaning solution and gently clean the affected areas. Avoid pressing too hard or using excessive moisture.
- Inspect for Clarity: After cleaning, inspect the focusing screen to ensure it is clear and free from any remaining smudges, streaks, or particles. If necessary, repeat the cleaning process until the focusing screen is pristine.
It’s important to note that focusing screens are delicate and sensitive components. Handle them with care and avoid touching them with your fingers to prevent leaving oil or dirt behind. If you’re unsure about the cleaning process, consult your camera’s user manual or contact the manufacturer for specific instructions.
Regularly cleaning the camera focusing screen ensures that you can achieve accurate focus and maintain the clarity of your photographs. By following these steps and using the appropriate cleaning supplies, you can keep your camera’s focusing screen in optimal condition.
Clean the Camera’s Hot Shoe
The hot shoe on your camera is a crucial interface that allows you to attach external flash units and other accessories. Over time, dust, dirt, and debris can accumulate in the hot shoe, affecting the connection and potentially interfering with the functionality of your accessories. Cleaning the camera’s hot shoe is essential to maintain a secure and reliable connection. Here’s how you can effectively clean the camera’s hot shoe:
- Power Off: Before cleaning the hot shoe, ensure that your camera is turned off. This prevents accidental damage and reduces the risk of electrical shock.
- Remove Loose Dust: Use a blower brush or a gentle puff of air to remove any loose dust or particles from the hot shoe. This helps prevent scratches and ensures a clean connection.
- Inspect the Hot Shoe: Examine the hot shoe for any visible debris, dirt, or oxidation. Pay close attention to the metal contact pins and the surrounding area.
- Use a Soft Brush: Using a soft brush, gently sweep away any remaining dust or debris from the hot shoe. Be careful not to apply excessive pressure or cause damage to the delicate metal contacts.
- Clean the Metal Contacts: If the metal contacts appear dirty or oxidized, use a clean, dry cotton swab lightly moistened with isopropyl alcohol or a contact cleaner specifically designed for electronics. Gently rub the metal contacts to remove any dirt or oxidation.
- Remove Residue: After cleaning the contacts, use a clean, dry cotton swab to remove any residue or excess cleaning solution. Ensure that the area is completely dry before using the hot shoe.
It’s important to note that the hot shoe is a delicate area, and any damage to the metal contacts can affect the functionality of your accessories. Use caution and avoid using excessive force or abrasive materials during the cleaning process.
Regularly cleaning the camera’s hot shoe ensures a reliable connection and optimal performance of your external flash units and other accessories. By following these steps and using the appropriate cleaning techniques, you can maintain a clean and functioning hot shoe on your camera.
Clean the Camera’s Memory Card and Battery Port
The memory card and battery port of your camera are essential components that require regular maintenance to ensure proper functionality. Over time, dust, dirt, and debris can accumulate in these areas, potentially impacting the performance of your camera. Cleaning the camera’s memory card and battery port is important to maintain a secure connection and prevent any issues. Here’s how you can effectively clean these areas:
- Power Off: Before cleaning the memory card and battery port, ensure that your camera is turned off. This prevents accidental operations and reduces the risk of electrical damage.
- Remove Loose Dust: Use a blower brush or a gentle puff of air to remove any loose dust or particles from the memory card slot and battery port. This helps prevent debris from interfering with the connection.
- Inspect the Areas: Use a flashlight or a well-lit area to inspect the memory card slot and battery port for any visible dirt, dust, or corrosion. Pay close attention to the metal contacts in these areas.
- Use a Soft Brush: Using a soft brush, gently sweep away any remaining debris or dust from the memory card slot and battery port. Be careful not to apply excessive pressure or cause damage to the metal contacts.
- Clean the Metal Contacts: If you notice any corrosion on the metal contacts, use a clean, dry cotton swab lightly moistened with isopropyl alcohol. Gently rub the metal contacts to remove the corrosion and ensure a clean connection.
- Remove Residue: After cleaning, use a clean, dry cotton swab to remove any residue or excess cleaning solution from the memory card slot and battery port. Ensure that the areas are completely dry before inserting a memory card or battery.
It’s important to note that the memory card and battery port are sensitive areas, and any damage to the metal contacts can affect the proper functioning of your camera. Use caution and avoid using excessive force or abrasive materials during the cleaning process.
Regularly cleaning the camera’s memory card and battery port ensures a secure connection, preventing any disruptions in power or data transfer. By following these steps and using the appropriate cleaning techniques, you can maintain a clean and functional memory card slot and battery port on your camera.
Clean the Camera’s Buttons and Dials
The buttons and dials on your camera are the primary means of controlling its various settings and functions. Over time, these buttons and dials can accumulate dirt, dust, and other particles, affecting their responsiveness and overall usability. Cleaning the camera’s buttons and dials is important for maintaining smooth operation and ensuring a pleasant shooting experience. Here’s how you can effectively clean them:
- Power Off: Before cleaning the buttons and dials, make sure your camera is turned off. This prevents accidental operations and reduces the risk of damage to your camera.
- Remove Loose Dust and Debris: Use a blower brush or a gentle puff of air to remove any loose dust or particles from around the buttons and dials. Pay close attention to any hard-to-reach areas.
- Use a Soft, Lint-Free Cloth: Dampen a clean, lint-free cloth with water or a mild cleaning solution if necessary. Wring out any excess moisture to ensure the cloth is slightly damp, not wet.
- Gently Wipe the Buttons and Dials: With a light touch, gently wipe the buttons and dials using the damp cloth. Make sure to cover all surfaces, paying extra attention to areas with visible dirt or grime.
- Target Stubborn Stains: For stubborn stains or sticky residues, apply a small amount of cleaning solution directly onto a cotton swab. Gently rub the affected areas, being careful not to apply excessive pressure.
- Remove Excess Moisture: After cleaning, use a dry cloth to remove any excess moisture from the buttons and dials. Ensure that they are completely dry before turning on the camera.
It’s important to note that excessive moisture or using abrasive materials can damage the buttons and dials. When using a cleaning solution, be sure it is safe for the specific materials used in your camera.
Regularly cleaning the buttons and dials helps maintain their smooth operation and prolongs the lifespan of your camera. By following these steps and using appropriate cleaning practices, you can ensure that your camera’s controls remain responsive and functional for your photography needs.
Clean the Camera Strap
The camera strap is an essential accessory that provides comfort and security while carrying your camera. However, over time, the camera strap can accumulate dirt, sweat, and other residues, making it less comfortable and potentially unhygienic. Cleaning the camera strap is important to maintain its functionality, appearance, and overall comfort. Here’s how you can effectively clean your camera strap:
- Identify the Materials: Camera straps are made from various materials such as nylon, fabric, leather, or neoprene. Identify the specific material of your camera strap as the cleaning method may vary.
- Read the Manufacturer’s Instructions: Check for any specific cleaning instructions provided by the manufacturer. Some camera straps may have limitations or recommendations regarding the cleaning process.
- Prepare Cleaning Solution: For fabric or nylon camera straps, create a mixture of mild detergent and warm water. For leather straps, use a leather cleaner or a mixture of mild soap and water.
- Spot Cleaning: If there are specific areas with stains or dirt, gently spot clean them using a soft cloth or sponge dampened with the cleaning solution. Avoid excessive rubbing or using harsh chemicals that can damage the strap.
- Hand Wash or Machine Wash: Depending on the material, you can either hand wash the camera strap or machine wash it on a gentle cycle. Follow the specific instructions and recommended water temperature for the material.
- Drying: After washing, lay the camera strap flat on a clean towel or hang it to air dry. Avoid exposing it to direct sunlight or high heat, as it can cause fading or damage.
- Conditioning (Leather Straps): If you have a leather camera strap, you may consider conditioning it with a leather conditioner or oil to keep it supple and prevent cracking. Follow the instructions provided by the manufacturer of the conditioning product.
It’s important to note that not all camera straps are machine washable, especially those with specialized padding or intricate designs. Always check the manufacturer’s instructions or consult with a professional if you’re unsure about cleaning methods for your specific camera strap.
Regularly cleaning your camera strap not only helps maintain its cleanliness and functionality but also ensures a comfortable and hygienic shooting experience. By following these steps and using appropriate cleaning techniques for your camera strap material, you can keep it in optimal condition.
Store Your Camera Properly
Properly storing your camera when it is not in use is essential for protecting it from damage and maintaining its performance. By following a few simple steps, you can ensure that your camera is stored safely and ready for use whenever you need it. Here’s how you can store your camera properly:
- Clean the Camera: Before storing your camera, ensure that it is clean and free from dust, dirt, and fingerprints. Use a soft, lint-free cloth to wipe down the camera body, lens, and other components.
- Remove the Battery: If you don’t plan to use your camera for an extended period, it’s advisable to remove the battery. This helps prevent battery drain and reduces the risk of leakage, which can damage the camera.
- Protect the Lens: Attach a lens cap or cover to protect the lens from dust, scratches, and accidental damage. Consider using a lens hood for added protection and to minimize glare.
- Store in a Protective Bag or Case: Use a camera bag or case that provides cushioning and protection from impact. Opt for a bag with customizable dividers to securely store extra lenses, memory cards, and other accessories.
- Avoid Extreme Temperatures and Humidity: Store your camera in a cool, dry location away from direct sunlight and excessive heat or cold. Extreme temperatures and high humidity can cause damage to the camera’s internal components or lead to condensation.
- Keep Away from Magnetic Fields: Magnetic fields can potentially affect the camera’s electronic components. Avoid storing your camera near strong magnets or magnetic devices.
- Use Silica Gel Packs: Place silica gel packs in your camera bag or case to absorb moisture and help maintain a dry environment. Regularly check and replace the silica gel packs as needed.
- Store Memory Cards Properly: Keep your memory cards in a protective case or holder to prevent damage or loss. Store them in a cool, dry environment to maintain their performance and avoid data corruption.
- Regularly Check and Use Your Camera: Even if you’re not using your camera regularly, it’s beneficial to take it out and use it periodically. This helps ensure that the camera remains in good working condition.
By following these guidelines, you can properly store your camera and protect it from damage. Remember that each camera and its accessories may have specific storage requirements, so it is always a good idea to refer to your camera’s user manual for manufacturer recommendations.
By storing your camera properly, you can extend its lifespan and be confident that it is protected and ready for capturing those memorable moments.