
Why Check Computer Specs?
When it comes to purchasing a new computer or upgrading an existing one, it’s essential to be aware of the computer’s specifications. Understanding the specifications of a computer will help you determine if it meets your requirements and expectations. Here’s why checking computer specs is important:
Compatibility: Computer specs play a crucial role in determining the compatibility of software and hardware. By checking the specs, you can ensure that the programs and peripherals you plan to use will work seamlessly with your computer.
Performance: The specifications directly impact your computer’s performance. The CPU, RAM, storage, and GPU are crucial components that determine how fast your computer can run tasks, handle multitasking, and run resource-intensive applications like video editing software or games.
Future-proofing: Technology is constantly evolving, and what might be considered high-end today could become outdated in a relatively short time. By checking computer specs, you can future-proof your purchase or upgrade by investing in hardware that can handle upcoming software advancements.
Budget planning: Understanding computer specs helps you make informed decisions during budget planning. You can prioritize which components are most important based on your specific needs and allocate your budget accordingly.
Troubleshooting: When experiencing issues or seeking support, knowing the computer specs can be invaluable. It helps technicians diagnose and troubleshoot problems effectively and efficiently.
Upgrade decisions: Checking computer specs allows you to determine if your current system can handle the upgrade you have in mind. If your computer’s specs fall short, you can plan for necessary hardware upgrades or consider purchasing a new system altogether.
Overall, checking computer specs is crucial for ensuring compatibility, optimizing performance, future-proofing your investment, budget planning, troubleshooting, and making informed upgrade decisions. By understanding the specifications, you can make smarter choices and maximize the potential of your computer.
Checking Computer Specs on Windows
Windows operating system provides several methods to check computer specs. Here are a few ways to access and review the specifications on a Windows computer:
- System Information: Open the Start menu, type “System Information” in the search bar, and click on the corresponding result. This tool provides detailed information about the computer’s hardware, software, and components. From the System Summary, you can view the processor, memory, and operating system details.
- Task Manager: Press Ctrl+Shift+Esc to open the Task Manager. In the Task Manager window, click on the “Performance” tab to view real-time data and utilization of the CPU, memory, disk, and network. This can help you get an idea of your computer’s current performance.
- Control Panel: Open the Control Panel and navigate to “System and Security” > “System” to view basic information about your computer. Here, you can find details such as the processor, RAM, and Windows edition.
- DXDiag: Press Win+R to open the Run dialog box. Type “dxdiag” and hit Enter. The DirectX Diagnostic Tool provides information about your computer’s DirectX version, display, sound, and input devices.
- Third-party Software: There are various third-party software programs available that provide comprehensive details about your computer’s specs. Programs like CPU-Z, Speccy, and HWiNFO are popular choices that offer in-depth information about the processor, motherboard, memory, and other hardware components.
By utilizing these methods, you can easily access and review the computer specs on your Windows operating system. Understanding the specifications will empower you to make informed decisions regarding upgrades, compatibility, and troubleshooting.
Checking Computer Specs on Mac
Mac users can easily check their computer specs using built-in tools and features provided by macOS. Here are a few methods to access and review the specifications on a Mac:
- About This Mac: Go to the Apple menu in the top-left corner of the screen and click on “About This Mac.” A window will open, displaying an overview of your Mac’s specifications, including the processor, memory (RAM), and macOS version.
- System Information: Within the “About This Mac” window, click on the “System Report” button. This will launch the System Information application, where you can find detailed information about your Mac’s hardware and software. It provides specific details about the processor, memory, storage, graphics, and peripherals connected to your Mac.
- Activity Monitor: Open the “Applications” folder, go to the “Utilities” folder, and launch “Activity Monitor.” In the Activity Monitor window, click on the “System Memory” tab to view information about your Mac’s memory (RAM) usage.
- Spotlight Search: Use Spotlight by clicking on the magnifying glass icon in the top-right corner of the screen or pressing Command+Space. Type “System Information” and click on the corresponding result to open the System Information application directly.
- Terminal: For advanced users familiar with the command line, you can use the Terminal to access and view computer specs. Open the Terminal from the Utilities folder, then enter specific commands such as “system_profiler SPHardwareDataType” to display hardware-related information.
Additionally, third-party software applications like MacTracker and iStat Menus can provide even more detailed information about your Mac’s specifications, including battery health, temperature, and fan speeds.
By using these methods, Mac users can easily access and review the computer specs of their macOS-powered machines. Understanding the specifications allows for better decision-making when it comes to software compatibility, upgrades, and troubleshooting.
Checking Computer Specs on Linux
Linux distributions offer several ways to check computer specifications. Here are a few methods to access and review the specs on a Linux system:
- Terminal Commands: Linux provides command-line tools that allow you to access hardware information directly from the terminal. Commands like “lshw” (list hardware), “lscpu” (list CPU information), and “free” (display memory information) can provide detailed specs about your computer’s hardware components, CPU, and memory.
- System Monitor: Many Linux desktop environments come with a system monitor tool that displays real-time resource utilization. You can access it through the system menu or by searching for “System Monitor” in the application launcher. It provides information about CPU usage, memory usage, disk usage, and network activity.
- GUI System Information Tools: Linux distributions often include graphical user interface (GUI) tools that provide system information. Examples include “HardInfo,” “CPU-G,” and “inxi.” These tools display detailed hardware information, including processor, memory, storage, graphics, and network devices.
- Proc File System: The /proc directory in Linux contains detailed information about the running system, including hardware and software configurations. You can navigate through various files in this directory to find specific details about CPU, memory, storage devices, and more.
- DMIDECODE: The dmidecode command-line tool is available on many Linux distributions. It retrieves information from the DMI (Desktop Management Interface) table, which contains data about the computer’s hardware components. Running “sudo dmidecode” provides detailed hardware information such as the manufacturer, model, BIOS version, and more.
These methods allow Linux users to access and review their computer’s specifications easily. Whether you prefer command-line tools or graphical interfaces, Linux provides various options to gather information about hardware components, CPU, memory, and more. Understanding these specs is essential for compatibility, troubleshooting, and making informed decisions regarding software and hardware upgrades on your Linux system.
Important Specs to Look for
When checking computer specs, it’s essential to understand which specifications are important and how they can impact your computer’s performance and functionality. Here are some of the key specs to consider:
- CPU (Central Processing Unit): The CPU is often referred to as the “brain” of the computer. It determines how quickly your computer can execute tasks and process information. Look for specifications such as the number of cores, clock speed, and cache size to gauge the CPU’s performance.
- RAM (Random Access Memory): RAM is responsible for temporarily storing data that your computer needs to access quickly. Having sufficient RAM allows for smooth multitasking and faster loading times. Consider the amount of RAM available and its speed (usually measured in MHz) when evaluating computer specs.
- Storage: The storage capacity and type (HDD or SSD) affect how much data you can store and how quickly your computer can access and retrieve that data. SSDs are generally faster and more reliable than traditional HDDs, but they tend to have smaller storage capacities. Assess your storage needs and consider a balance between capacity and speed.
- GPU (Graphics Processing Unit): The GPU is responsible for rendering graphics and accelerating computations related to graphics-intensive tasks, such as gaming, video editing, and 3D modeling. If you plan to engage in activities that require high-quality graphics, prioritize the GPU’s specifications, including VRAM size and clock speed.
- Display: The display specifications, such as resolution, size, and panel type, determine the visual experience and usability of your computer. Higher resolutions provide crisper images, while panel types like IPS offer better color accuracy and wider viewing angles.
- Operating System: The operating system specs are essential for compatibility with software and hardware. Check the recommended operating system versions to ensure that your computer can run the desired software smoothly.
- Networking: Networking specs, such as Wi-Fi and Ethernet capabilities, determine your computer’s connectivity options. Consider the supported standards (e.g., 802.11ac for Wi-Fi) and the availability of Ethernet ports for stable and fast internet connections.
- Peripherals: Check the available ports and connections for peripherals you plan to use, such as USB ports, HDMI ports, audio jacks, and card readers. Ensure that the computer has the necessary ports to connect your devices.
- Power Supply: Understanding the power supply specifications is crucial for ensuring that your computer can handle the power demands of its components. Consider the wattage rating and efficiency certification (e.g., 80 Plus) to determine if your power supply can provide sufficient and stable power.
- Sound: If audio quality is important to you, consider the sound specs such as the audio chipset, number of channels, and support for advanced audio technologies (e.g., Dolby Atmos).
- Cooling: Adequate cooling is vital to maintain optimal performance and prevent overheating. Check for specifications like the number and type of cooling fans, any liquid cooling solutions, and heat sink designs.
- Other Considerations: Depending on your specific needs, you may want to research additional specs such as battery life, weight, dimensions, and durability for laptops, and expandability options for desktops.
Understanding and evaluating these important specs will help you choose a computer that meets your needs and preferences, whether you’re gaming, working with multimedia, or performing other demanding tasks. +
Checking CPU Specs
The CPU (Central Processing Unit) is one of the most crucial components of a computer, responsible for executing instructions and performing calculations. When checking CPU specs, there are key specifications to consider that can help you understand its performance and capabilities. Here’s how you can check CPU specs:
- System Information: On Windows, navigate to the “System Information” tool by opening the Start menu, typing “System Information” in the search bar, and selecting the corresponding result. In the “Processor” field, you’ll find details about the CPU, including its name, model, clock speed, and number of cores.
- Task Manager: Windows users can quickly view basic CPU information through the Task Manager. Press Ctrl+Shift+Esc to open the Task Manager, then click on the “Performance” tab. Under the “CPU” section, you’ll find real-time data about CPU usage, clock speed, and the number of logical processors.
- About This Mac: Mac users can access CPU information by clicking on the Apple menu in the top-left corner of the screen and selecting “About This Mac.” The overview window displays the CPU type and speed under the “Processor” section.
- Terminal Commands: Linux users can leverage terminal commands like “lscpu” or “cat /proc/cpuinfo” to access detailed CPU information. These commands provide data such as the CPU model, architecture, clock speed, and cache size.
- CPU-Z: CPU-Z is a popular third-party software available for Windows and Linux. It provides extensive information about CPU specifications, including the model, clock speed, cache sizes, instructions sets supported, and more. It’s a great tool for users who want a comprehensive view of their CPU.
- Activity Monitor: Mac users can gain insights into CPU usage and other statistics by opening the Activity Monitor. The “CPU” tab displays real-time data on CPU utilization, process activity, and overall performance.
When checking CPU specs, key specifications to consider include the CPU model, clock speed, number of cores, cache size, and architecture. These details determine the CPU’s overall performance, multitasking capabilities, and ability to handle demanding applications. Additionally, considering factors like thermal design power (TDP) and overclocking potential can be important for users interested in advanced performance optimization.
Whether you’re a gamer, content creator, or simply want a fast and efficient computer, checking CPU specs is essential. Understanding the specifications will help you make informed decisions when purchasing or upgrading a computer and ensure that it meets your specific needs and requirements.
Checking RAM Specs
RAM (Random Access Memory) is a critical component of a computer that affects its performance and multitasking capabilities. When checking RAM specs, there are a few key specifications to consider. Here’s how you can check RAM specs:
- About This Mac / System Information: On macOS, you can find RAM information by clicking on the Apple menu in the top-left corner of the screen and selecting “About This Mac.” In the overview window, you’ll find details about the RAM capacity and type. For more detailed information, click on “System Report,” navigate to “Hardware” > “Memory” and view specifics like the RAM type, speed, and number of memory slots utilized.
- Task Manager / Resource Monitor: Windows users can check RAM information using the Task Manager. Press Ctrl+Shift+Esc to open the Task Manager, and go to the “Performance” tab. Under the “Memory” section, you’ll find details about total installed memory, available memory, and memory usage. On Windows, you can also use the Resource Monitor to get more detailed information, including the speed and form factor of the RAM installed.
- Terminal Commands: For Linux users, various terminal commands can unveil RAM specifications. “free -h” provides an overview of total, used, and available RAM. “dmidecode –type memory” offers detailed information such as the type, size, speed, and form factor of installed RAM modules.
- Third-party Software: Several third-party software programs provide detailed RAM information. Tools like CPU-Z, Speccy, and HWiNFO offer comprehensive insights into RAM specifications, including the type, capacity, speed, and timings of the installed RAM modules.
When checking RAM specs, key specifications to consider include the capacity, type, speed, and number of memory modules. The capacity of the RAM determines how much data your computer can store and access quickly. The type of RAM (e.g., DDR4, DDR3) is important for compatibility with your computer’s motherboard. The speed of the RAM (e.g., 2400 MHz, 3200 MHz) affects its data transfer rate, and the number of memory modules determines the potential for upgrading or expanding your system’s RAM.
Understanding the RAM specifications is crucial for ensuring smooth multitasking, efficient operation of memory-intensive applications, and overall system performance. Whether you’re a gamer, content creator, or simply require a snappy and responsive computer, checking RAM specs will assist you in making informed decisions when purchasing or upgrading your computer’s memory.
Checking Storage Specs
When it comes to checking storage specs, there are important factors to consider that impact a computer’s capacity, speed, and reliability. Here’s how you can check storage specs:
- About This Mac / System Information: On macOS, click on the Apple menu in the top-left corner of the screen, select “About This Mac,” and navigate to the “Storage” tab. This will provide an overview of your computer’s storage capacity and details about the type of storage drive (e.g., SSD or HDD) installed.
- File Explorer / Disk Management: Windows users can open File Explorer, right-click on the main drive (usually C:), and select “Properties” to view information about the storage capacity, used space, and file system type. Additionally, Disk Management offers detailed insights into the storage drive’s partition style, file system, and other valuable details.
- Terminal Commands: Linux users can utilize terminal commands to check storage specs. The “df -h” command displays a summary of the storage capacity and usage for all mounted file systems. To obtain detailed information about specific partitions or drives, the “lsblk” command provides details like the size, type, and mount point.
- System Information / Disk Utility: On both macOS and Linux, navigating through the system utilities or searching for Disk Utility can provide an in-depth view of your computer’s storage specs. You can check details such as the storage capacity, type of drive (SSD or HDD), file system format, and any partitions or volumes present.
When checking storage specs, important specifications to consider include the storage capacity, drive type, and interface (e.g., SATA, NVMe). Storage capacity dictates how much data you can store on your computer, so ensure it meets your needs. Drive type, such as solid-state drives (SSDs) or hard disk drives (HDDs), determines the speed, durability, and power consumption of your storage. SSDs generally offer faster read and write speeds compared to HDDs. Additionally, the interface, such as SATA or NVMe, affects the data transfer rate between the storage drive and the rest of the system.
Understanding storage specs is crucial to ensure you have enough space for your files and applications and to ensure optimal performance. Whether you require fast data access, large storage capacity, or both, checking storage specs allows you to make informed decisions when purchasing or upgrading your computer’s storage solution.
Checking GPU Specs
When it comes to checking GPU (Graphics Processing Unit) specs, there are important specifications to consider that impact a computer’s graphics performance and capabilities. Here’s how you can check GPU specs:
- Device Manager / System Information: On Windows, you can access GPU information through the Device Manager. Right-click on the Start menu, select “Device Manager,” and expand the “Display adapters” section to view the installed GPU. Additionally, in the System Information tool (accessible by searching in the Start menu), you can navigate to the “Components” > “Display” section to find details about your GPU.
- About This Mac / System Information: On macOS, you can find GPU information by clicking on the Apple menu in the top-left corner, selecting “About This Mac,” and navigating to the “Displays” tab. This offers information about the GPU model and VRAM.
- Command Line: Linux users can use command-line tools to check GPU information. Commands such as “lshw -C display” and “nvidia-smi” provide details about the GPU model, driver version, and memory configuration.
- Third-party Software: Utilizing third-party software can provide more detailed information about the GPU. Programs like GPU-Z and Speccy (available for both Windows and Linux) offer comprehensive insights into GPU specifications, including GPU model, VRAM size, clock speeds, and driver versions.
When checking GPU specs, important specifications to consider include the GPU model, VRAM (Video RAM) size, clock speeds, and compute capabilities. The GPU model determines the overall performance and features of the graphics card. VRAM size is important for graphics-intensive tasks, such as gaming and video editing, as it determines the amount of memory available for storing and manipulating graphical data. Clock speeds, including core clock and memory clock, impact the GPU’s processing power and memory bandwidth. Compute capabilities, such as CUDA cores for NVIDIA GPUs, determine the GPU’s ability to handle parallel computing tasks.
Understanding your GPU’s specifications is crucial for tasks that rely heavily on graphics performance, such as gaming, 3D rendering, and video editing. Whether you’re a casual gamer or a professional in the creative field, checking GPU specs allows you to make informed decisions when choosing or upgrading a graphics card to ensure it meets the demands of your specific needs.
Checking Display Specs
When checking display specs, there are important factors to consider that impact the visual experience and usability of a computer. Here’s how you can check display specs:
- About This Mac / System Preferences: On macOS, click on the Apple menu in the top-left corner of the screen and select “About This Mac.” In the overview window, click on the “Displays” tab to view information about the connected display(s), including the display resolution.
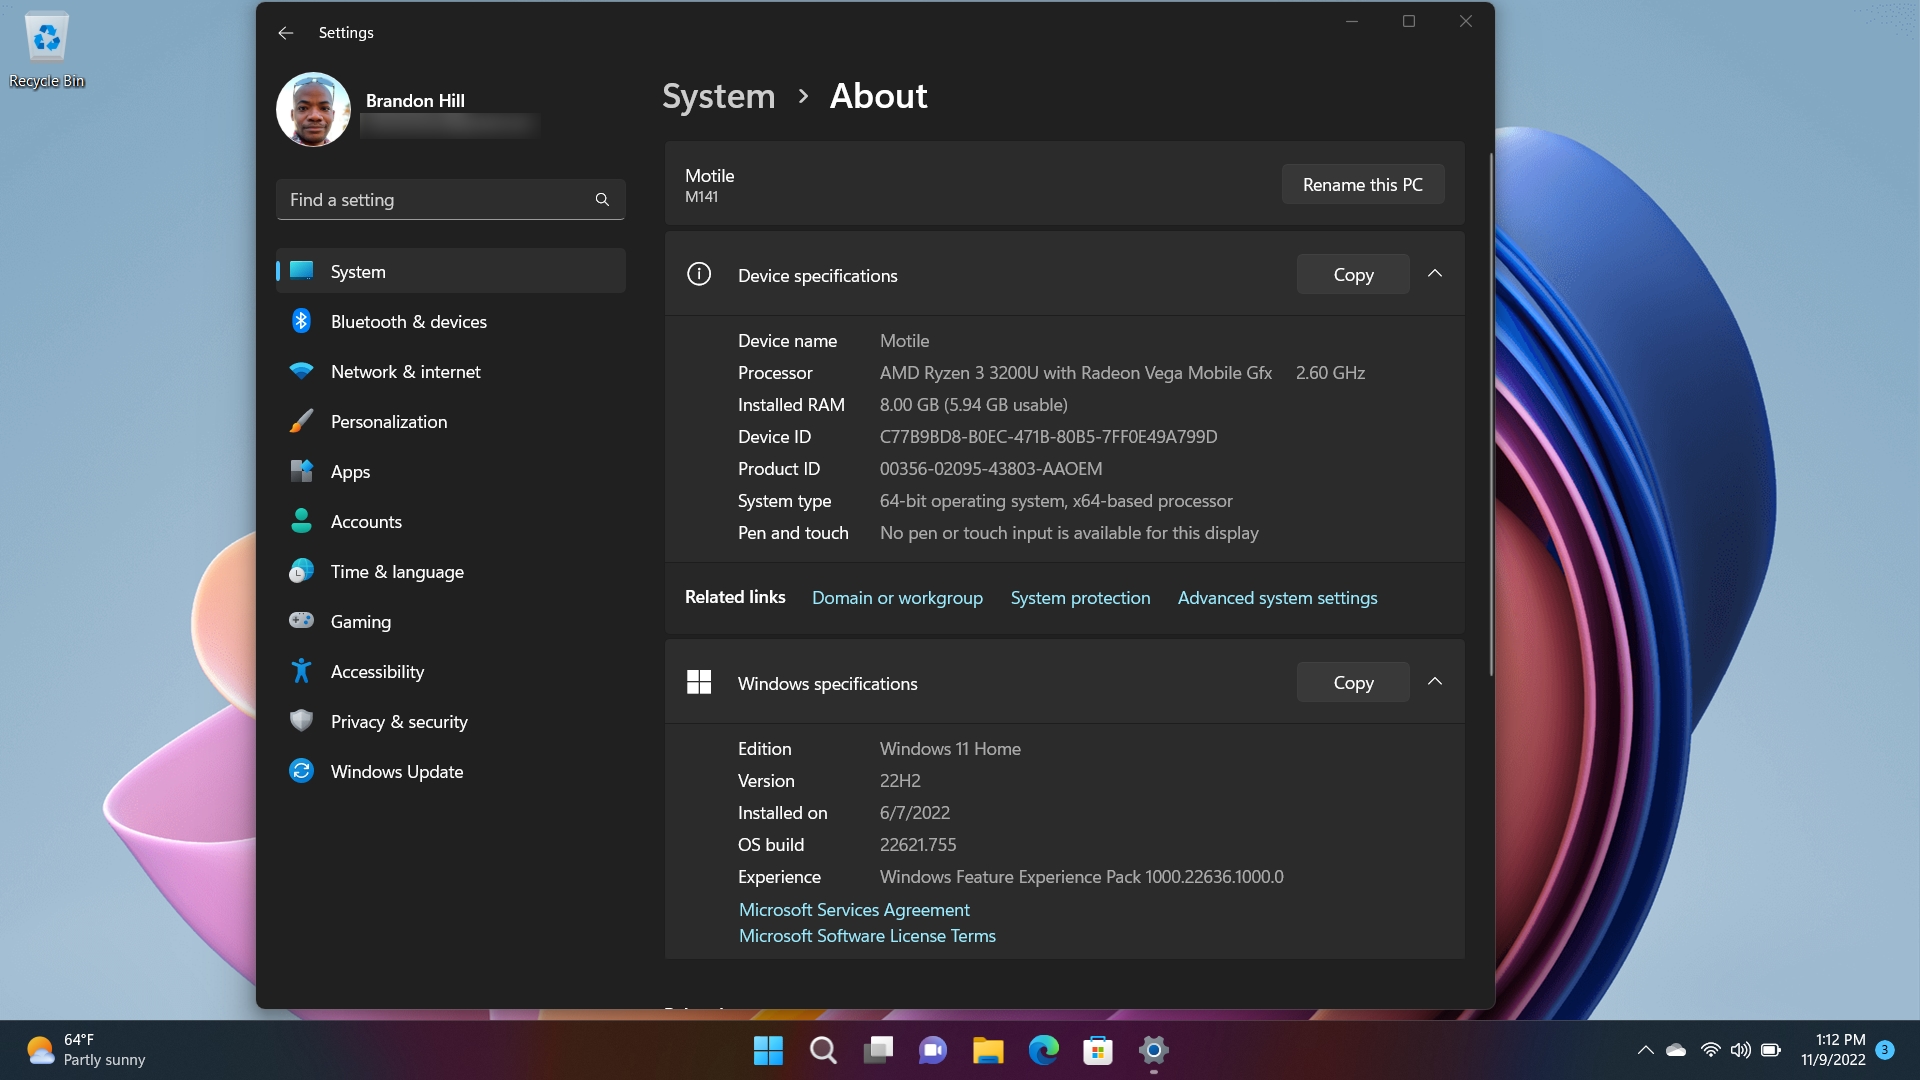
- Settings / Display Settings: On Windows, open the Settings app, navigate to the “System” section, and click on “Display.” Here you can view the display resolution and other display-related settings such as orientation and scaling.
- Terminal Commands: Linux users can utilize terminal commands to check display specs. The “xrandr” command displays information about available displays, including their resolutions and supported refresh rates.
- Third-party Software: There are also third-party software applications available that provide detailed information about display specs. Programs like HWiNFO, GPU-Z, and AIDA64 offer comprehensive insights into display specifications, including resolution, pixel density, and supported refresh rates.
When checking display specs, important specifications to consider include the display resolution, pixel density, panel type, and supported refresh rates. The display resolution determines the number of pixels on the screen and influences the level of detail visible. Higher pixel density, measured in pixels per inch (PPI) or dots per inch (DPI), provides a crisper and more detailed visual experience. The panel type, such as IPS (In-Plane Switching) or TN (Twisted Nematic), affects factors like color accuracy, contrast, and viewing angles. Supported refresh rates, measured in Hertz (Hz), determine how many times the display can refresh the image per second, affecting smoothness and responsiveness, particularly in fast-paced activities like gaming or video playback.
Understanding display specs allows you to choose a monitor or laptop with the right resolution, pixel density, panel type, and refresh rate for your needs, ensuring an optimal visual experience and usability. Whether you require accurate color representation for graphic design, fast refresh rates for gaming, or high-resolution displays for video editing, checking display specs is crucial to enhancing your overall computing experience.
Checking Operating System Specs
When checking operating system specs, it’s important to understand the specifications and requirements of the operating system you are using or planning to install. Here’s how you can check operating system specs:
- About This Mac / System Information: On macOS, click on the Apple menu in the top-left corner of the screen and select “About This Mac.” This will provide an overview of the macOS version and some basic hardware information.
- System Information / Settings: On Windows, you can access detailed operating system information through the System Information tool. Press the Windows key + R, type “msinfo32,” and hit Enter. In the System Information window, you’ll find information about the Windows version, system type, and other system details. In the Settings app, navigate to the “System” section and click on “About” to view basic operating system information.
- Command Line: Linux users can use command-line tools to check operating system specs. For example, the “lsb_release -a” command displays information about the Linux distribution and version you are using. Other commands like “uname -a” can provide details about the kernel version and system architecture.
- Software Tools: Various third-party software programs are available that provide detailed information about the operating system. Tools like CPU-Z, SIW, and Belarc Advisor offer comprehensive insights into operating system specifications, including version, build, and additional system details.
When checking operating system specs, important specifications to consider include the specific version and build number of the operating system, as well as the system architecture (32-bit or 64-bit). It is crucial to know whether the software and hardware you plan to use are compatible with your operating system. Additionally, understanding the system requirements for the operating system can help you assess if your computer meets the necessary specifications.
Checking operating system specs is vital for ensuring compatibility with software applications and hardware devices. It allows you to make informed decisions when it comes to system upgrades, software installations, and troubleshooting. Keeping your operating system updated and aligned with the recommended specifications ensures optimal performance, security, and stability.
Checking Network Specs
Checking network specs is essential to ensure that your computer has the necessary capabilities for seamless and reliable network connectivity. Here’s how you can check network specs:
- Control Panel / Network Settings: On Windows, open the Control Panel and navigate to “Network and Internet” > “Network and Sharing Center.” Here, you can view details about your network connection, including the type of connection (e.g., Ethernet, Wi-Fi), IP address, and network status. In the Settings app, you can access the “Network & Internet” section to view and manage network settings and connections.
- System Preferences / Network: On macOS, click on the Apple menu in the top-left corner of the screen and select “System Preferences.” In the “Internet & Wireless” section, click on “Network” to access network settings. Here, you can view details about your network connections, such as IP address, connection type, and network status.
- Terminal Commands: Linux users can use the command line to check network specs. Tools like “ifconfig,” “iwconfig,” and “ip link show” provide detailed network configuration information, including IP addresses, MAC addresses, and network interface details. The “nmcli” command can display network information for systems running NetworkManager.
- Router Configuration Page: Accessing your router’s configuration page allows you to view information about your network connection. Enter your router’s IP address in a web browser, log in with your credentials, and navigate to the status or configuration section to find details about connected devices, network speed, and IP allocations.
When checking network specs, important specifications to consider include:
- Connection Type: Determine whether you are using Ethernet (wired) or Wi-Fi (wireless) for network connectivity.
- Network Speed: Check the speed of your network connection, typically measured in megabits per second (Mbps) or gigabits per second (Gbps).
- IP Address: Determine the IP address assigned to your computer, which is crucial for network communication and addressing.
- DNS Servers: Find the DNS (Domain Name System) server addresses used to resolve domain names to IP addresses.
- MAC Address: Identify the unique hardware address of your network interface, which is necessary for network identification and troubleshooting.
- Network Status: Check whether your network connection is functioning properly and whether you are connected to the network.
Understanding your network specs allows you to troubleshoot network issues, ensure compatibility with network devices, and make informed decisions when upgrading network hardware or planning network expansions. Having a stable and reliable network connection is crucial for activities such as browsing the web, streaming media, online gaming, and transferring files over the network.
Checking Peripheral Specs
Checking peripheral specs is crucial to ensure compatibility and optimal performance when connecting additional devices to your computer. Here’s how you can check peripheral specs:
- Device Manager / System Information: On Windows, open the Device Manager by right-clicking on the Start menu and selecting “Device Manager.” Expand the different categories to view the connected devices and their specifications. In the System Information tool (accessible by searching in the Start menu), you can find details about hardware components and peripherals under various sections.
- System Profiler / System Information: On macOS, click on the Apple menu in the top-left corner and select “About This Mac.” In the overview window, click on “System Report” to open the System Information tool. Here, you can find detailed information about your computer’s hardware, including peripherals and other connected devices.
- lsusb / lspci: Linux users can utilize the “lsusb” command to list connected USB devices and their corresponding specifications. Similarly, the “lspci” command provides details about connected PCI devices, including graphics cards, network adapters, and sound cards.
- Third-party Software: Various third-party software programs are available that provide detailed information about connected peripherals. Programs such as HWiNFO, Speccy, and USBDeview offer comprehensive insights into peripheral specifications, including manufacturer, model, driver versions, and other relevant details.
When checking peripheral specs, important specifications to consider include the manufacturer, model, connection type, and driver versions. These specifications can help ensure compatibility between your computer and the peripheral devices you plan to connect. Additionally, understanding the capabilities of your peripherals, such as resolution for monitors or DPI for mice, can help optimize their performance.
Checking peripheral specs allows you to make informed decisions when purchasing new peripherals or troubleshooting issues with existing ones. It ensures that your computer can support and effectively utilize the additional devices, enhancing your overall computing experience and productivity.
Checking Power Supply Specs
Checking power supply specs is important to ensure that your computer’s power needs are met and that all components can operate safely and efficiently. Here’s how you can check power supply specs:
- Label on the Power Supply Unit (PSU): Open your computer case and locate the power supply unit. On the PSU itself, there should be a label displaying important specifications such as the wattage rating, efficiency rating (e.g., 80 Plus), and input voltage range.
- System Information: On Windows, you can find information about your power supply by using the System Information tool. Open the Start menu, type “System Information,” and select the corresponding result. In the summary section, under “Components” > “Power,” you’ll find details about the power supply wattage.
- Third-Party Tools: There are third-party software programs available that can provide detailed information about your computer’s power supply. Tools like HWiNFO, Speccy, and AIDA64 offer comprehensive insights into power supply specifications, including wattage, amperage, and voltage values.
When checking power supply specs, important specifications to consider include:
- Wattage: Determine the wattage rating of the power supply. It indicates the maximum amount of power the PSU can deliver to your computer’s components.
- Efficiency Rating: Look for an efficiency rating, such as 80 Plus certification, which indicates the power supply’s efficiency in converting AC power to DC power. Higher efficiency ratings mean less energy is wasted, resulting in reduced heat and lower electricity bills.
- Modularity: Consider whether the power supply is modular or non-modular. Modular power supplies have detachable cables, allowing for a cleaner and more organized cable management setup.
- Connectors: Take note of the available power connectors (e.g., SATA, PCIe) to ensure compatibility with your computer’s components, such as hard drives, SSDs, and graphics cards.
- Form Factor: The power supply’s form factor should match the case (e.g., ATX, SFX) to ensure proper installation and fit.
Understanding your power supply’s specifications is crucial for system stability and ensuring that it can adequately power all components. Be mindful of the power requirements of your CPU, graphics card, storage devices, and other peripherals to ensure that the power supply can handle the overall power demands of your system.
Checking power supply specs helps you make informed decisions when building or upgrading your computer. It ensures that you choose a power supply that is compatible with your components and capable of providing sufficient and stable power for optimal performance and longevity.
Checking Sound Specs
When it comes to checking sound specs, there are important factors to consider that impact the audio quality and capabilities of your computer. Here’s how you can check sound specs:
- Control Panel / Sound Settings: On Windows, open the Control Panel and navigate to “Hardware and Sound” > “Sound.” Here, you can view and configure details about your computer’s sound devices, including the audio chipset, available playback and recording devices, and sound enhancements.
- System Preferences / Sound: On macOS, click on the Apple menu in the top-left corner and select “System Preferences.” In the “Hardware” section, click on “Sound” to access sound settings. Here, you can view information about the audio devices, including input and output devices, sound effects, and balance settings.
- Terminal Commands: Linux users can use terminal commands to check sound specs. For example, the “aplay -l” command lists available audio devices, the “asoundconf list” command displays the ALSA sound card configuration, and the “pactl list” command provides detailed information about the sound devices and their properties.
- Device Manager: Both Windows and macOS users can access the Device Manager to view installed sound devices and their associated drivers. In Windows, right-click on the Start menu and select “Device Manager.” In macOS, open the “About This Mac” window and click on “System Report” to access the Device Manager.
- Third-party Software: Various third-party software programs can provide detailed information about sound specs. Programs like HWiNFO, Sound Control, and SIW offer comprehensive insights into sound specifications, including audio chipsets, driver versions, and supported audio formats.
When checking sound specs, important specifications to consider include:
- Audio Chipset: Determine the audio chipset used in your computer, as it plays a significant role in audio performance and capabilities.
- Supported Audio Formats: Check the supported audio formats to ensure compatibility with your audio files, games, and multimedia applications.
- Number of Audio Channels: Consider the number of audio channels supported, such as stereo (2-channel), 5.1 surround, or 7.1 surround, depending on your audio setup preferences.
- Audio Outputs: Look for available audio outputs, such as speakers, headphone jacks, and digital audio interfaces, to connect external devices.
- Sound Enhancements: Explore available sound enhancements or effects to customize your audio experience, such as equalizers, virtual surround, or noise cancellation.
Understanding sound specs allows you to make informed decisions when selecting audio devices, such as speakers or headphones, and configuring sound settings. Whether you’re a music enthusiast, gamer, or video editor, checking sound specs helps ensure that you have the right audio capabilities and the best audio experience on your computer.
Checking Cooling Specs
Checking cooling specs is crucial to maintaining optimal performance and preventing overheating in your computer. Here’s how you can check cooling specs:
- Physical Examination: Inspect your computer’s cooling system physically. Ensure that all fans, including the CPU fan and any case fans, are spinning properly. Look for any signs of dust buildup or obstructions that could impede airflow.
- System Monitoring Software: Use system monitoring software to check temperature readings and fan speeds. Programs like HWMonitor, SpeedFan, or Open Hardware Monitor can provide real-time information on CPU temperatures, GPU temperatures, and fan speeds.
- BIOS/UEFI: Access your computer’s BIOS/UEFI settings by restarting the computer and pressing the corresponding key during the boot process (often Del or F2). Look for system health or temperature monitoring sections that might provide information about fan speeds, temperature thresholds, and other cooling-related settings.
- Manufacturer Website: Visit the manufacturer’s website for your computer or motherboard model. Look for documentation or specifications that outline the cooling system, including the number and size of fans, heat sink design, and any additional cooling features or technologies implemented.
- Non-Stock Cooling Solutions: If you’ve installed an aftermarket cooling solution, refer to the specifications or documentation provided by the manufacturer. This will provide detailed information about the cooling performance, fan speeds, noise levels, and compatibility with your specific hardware.
When checking cooling specs, important factors to consider include:
- Fan Speeds: Check the fan speeds to ensure they are operating within the desired range. Higher fan speeds indicate increased airflow, which aids in cooling. However, higher speeds may also result in more noise.
- Heat Sink Design: Assess the heat sink design, particularly for the CPU. Larger heat sinks with more fins tend to dissipate heat more effectively.
- Number and Placement of Fans: Consider the number of fans in your case and their placement. Proper airflow is essential to maintain lower temperatures. Intake and exhaust fans should be strategically positioned to optimize airflow and remove hot air from the case efficiently.
- Cooling Technologies: Some cooling solutions may incorporate additional technologies, such as heat pipes or liquid cooling. These advanced technologies enhance heat dissipation and promote efficient cooling.
Checking cooling specs allows you to ensure that your computer remains properly cooled, preventing overheating and potential damage to components. Adequate cooling contributes to stable operation, longer system lifespan, and improved performance, especially during resource-intensive tasks like gaming or video rendering.
Checking Other Specs
When it comes to checking computer specs, there are additional specifications to consider beyond the main components. Here are some “other” specifications to check:
- Dimensions: Check the dimensions of your computer or specific components to ensure compatibility with your workspace or any intended enclosures.
- Weight: Consider the weight of your computer, especially for laptops, if portability is a factor.
- Connectivity: Assess the available connectivity options, such as USB ports (USB 2.0, USB 3.0, USB-C), HDMI, DisplayPort, Thunderbolt, and any audio ports or card readers you require.
- Expansion Slots: Examine the expansion slots on your motherboard to determine compatibility with additional cards, such as graphics cards, network adapters, or sound cards. Consider the available PCI Express slots and their generation for optimal compatibility.
- Optical Drive: Determine if your computer has an optical drive (CD/DVD/Blu-ray) for reading and writing discs.
- Keyboard and Mouse: Check the specifications of your keyboard and mouse, such as wired or wireless connectivity, ergonomic features, and any additional functionality or programmable buttons.
- Battery Life: For laptops, consider the battery life specifications to ensure they meet your usage needs.
- Camera: Determine the specifications of your computer’s built-in camera, including resolution and video capabilities.
- Microphone: Check the specifications of the computer’s built-in microphone or any external microphones to ensure they meet your audio recording needs.
- Operating Temperature Range: Some components may have specified operating temperature ranges. Review these ranges to ensure your computer can operate optimally in the intended environment.
Checking these “other” specifications helps you make informed decisions according to your specific needs and preferences. Whether it’s considering connectivity options, assessing the dimensions and weight for portability, or evaluating expansion capabilities, paying attention to these details ensures that your computer setup aligns with your requirements.
Considering these “other” specs allows you to create a well-rounded computing system that not only meets your performance needs but also caters to your desired features and functionality.