
Different Fitbit Models
Fitbit offers a range of fitness trackers and smartwatches that cater to various needs and preferences. Each model comes with its unique features, designs, and charging methods. Here are some of the popular Fitbit models you might come across:
- Fitbit Charge Series: The Fitbit Charge series, including Charge 2, Charge 3, and Charge 4, has a sleek band design with a built-in heart rate monitor and activity tracking features. These devices use a proprietary charging cable that connects to the charging port.
- Fitbit Versa Series: The Fitbit Versa series comprises smartwatches that combine fitness tracking with smart features like music storage and app notifications. The charging method for these watches involves using a charging dock that connects magnetically to the back of the device.
- Fitbit Inspire Series: The Fitbit Inspire series, including Inspire and Inspire HR, offers a slim and lightweight design for everyday use. These trackers use a clip-on charging cable that connects to the charging port.
- Fitbit Ionic: The Fitbit Ionic is a feature-rich smartwatch suitable for athletes and fitness enthusiasts. It utilizes a charging cradle that holds the device securely and connects to the charging port.
- Fitbit Ace: The Fitbit Ace is specifically designed for children, promoting a healthy and active lifestyle. It requires a charging cable that connects to the charging port.
It’s important to note that the charging method may vary slightly between different versions of the same model. It’s always advisable to refer to the user manual or the official Fitbit website for detailed instructions specific to your device.
Understanding the various Fitbit models and their respective charging methods will help ensure that you can effectively charge your device without any issues. Let’s dive deeper into the different types of charging cables used by Fitbit in the next section.
Type of Charging Cables
Fitbit devices utilize different types of charging cables, depending on the model and version. Understanding the type of charging cable your Fitbit uses is essential for efficient and successful charging. Here are the common types of charging cables you may encounter:
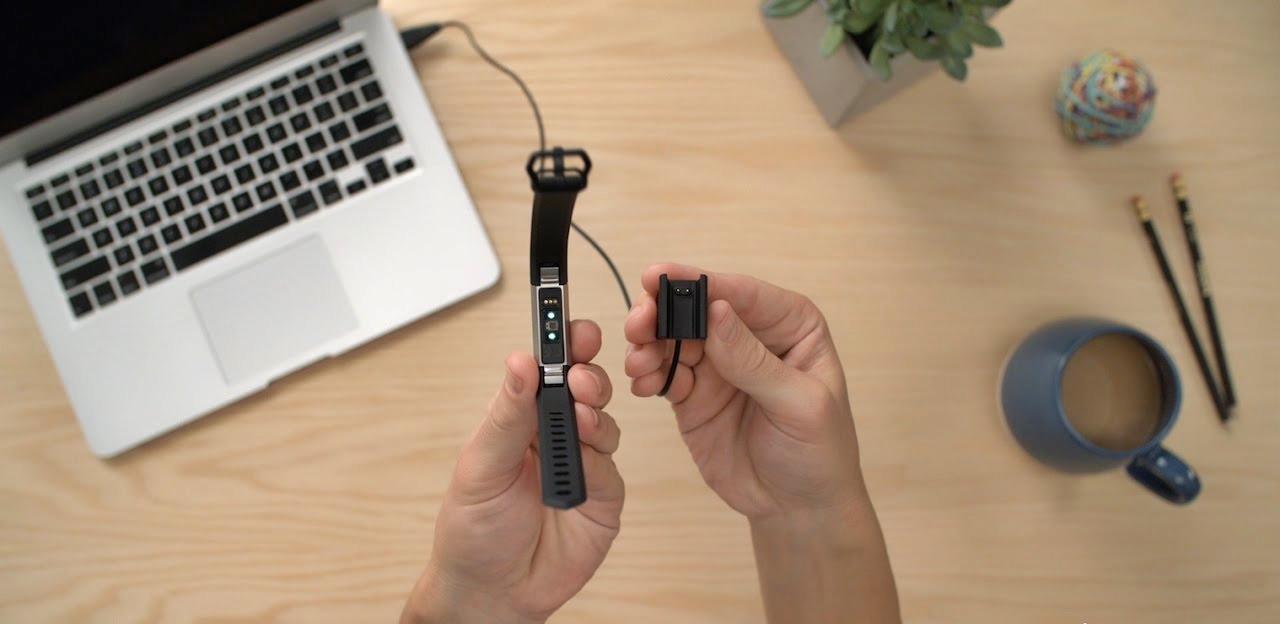
- Proprietary Charging Cable: Many Fitbit models come with a proprietary charging cable. These cables have a unique design that fits into the charging port of the device. The other end of the cable usually connects to a USB port for charging.
- Magnetic Charging Dock: Some Fitbit smartwatches, such as those in the Versa series, use a magnetic charging dock. The dock attaches magnetically to the back of the watch, ensuring a secure connection during charging. The other end of the dock is typically connected to a USB port.
- Clip-On Charging Cable: Fitbit Inspire series trackers use a clip-on charging cable. The cable clips onto the tracker’s charging port, allowing for easy and reliable charging. The other end of the cable, as with other charging cables, is connected to a USB port.
- Charging Cradle: The Fitbit Ionic smartwatch requires a charging cradle for charging. The cradle holds the device securely and ensures a stable connection between the charger and the watch. The cradle’s other end is connected to a USB port for charging.
It’s essential to use the original charging cable that comes with your Fitbit device or purchase a genuine replacement cable from authorized sellers. Using third-party or counterfeit cables may not provide optimal charging performance and could potentially damage your device.
If you’re unsure about the type of charging cable your Fitbit device uses, you can always refer to the user manual or check the official Fitbit website for specific information about your device’s charging requirements.
Now that you have a better understanding of the charging cables used by Fitbit, let’s move on to the next section, where we’ll discuss how to locate the charging port on your device.
Finding the Charging Port
Locating the charging port on your Fitbit device is crucial before you can start charging it. The placement of the charging port may vary depending on the model and version of your Fitbit. Here are some general guidelines on how to find the charging port:
- Fitbit Charge Series: For Fitbit Charge devices, the charging port is typically located on the back of the tracker. Look for a small port or connector at the bottom of the device. The charging cable should easily connect into this port.
- Fitbit Versa Series: The charging port for Fitbit Versa smartwatches is usually located on the back of the device. Inspect the back of the watch for a small indentation or port where the charging dock can be attached magnetically.
- Fitbit Inspire Series: Fitbit Inspire trackers have their charging port on the underside of the device. Flip your Inspire over and look for a small connector or port where the clip-on charging cable can be attached.
- Fitbit Ionic: The Fitbit Ionic smartwatch has a unique charging port that is located on the back of the device near the bottom. The charging cradle is designed to fit securely onto this port.
- Fitbit Ace: For Fitbit Ace devices, the charging port is typically located on the side or bottom edge of the device. Look for a small port or connector where the charging cable can be inserted.
If you’re still unsure about the location of the charging port on your specific Fitbit model, it’s always recommended to refer to the user manual or visit the official Fitbit website for detailed instructions and visual aids.
Now that you know where to find the charging port let’s move on to the next section, where we’ll explore different methods of charging your Fitbit using various power sources.
Charging with a USB Port
One of the most common and convenient ways to charge your Fitbit device is by using a USB port. Most Fitbit charging cables are designed to connect to a standard USB port, which can be found on various devices such as laptops, desktop computers, USB wall adapters, and even some car chargers. Here’s how to charge your Fitbit with a USB port:
- Ensure that your Fitbit device is properly aligned with the charging cable and that the connectors are securely connected.
- Locate an available USB port on your device or charging source. It can be a USB port on your computer, a USB wall adapter, or any other device with a USB port.
- Insert the USB connector end of the charging cable into the USB port firmly. You should feel a click or see a visual indication that the cable is securely connected.
- Once connected, your Fitbit device will start charging. You may see a battery icon or charging indicator on the screen of your Fitbit to indicate that it is charging.
- Leave your Fitbit connected to the USB port until it reaches a full charge. The time it takes to fully charge your device may vary depending on the model and battery level.
- Once your Fitbit is fully charged, you can disconnect the charging cable from the USB port.
Remember to use a reliable and high-quality USB cable to ensure optimal charging performance. Avoid using damaged or frayed cables that may disrupt the charging process or cause damage to your device.
Charging your Fitbit with a USB port gives you the flexibility to charge your device using various power sources, making it a convenient option for everyday use. In the next section, we’ll discuss an alternative method of charging your Fitbit device – using an electrical outlet.
Charging with an Outlet
If you prefer a faster and more direct charging method, you can charge your Fitbit device using an electrical outlet. This method allows you to plug your Fitbit charging cable into a wall adapter, providing a convenient and efficient way to recharge your device. Here’s how to charge your Fitbit with an outlet:
- Ensure that your Fitbit device is securely connected to the charging cable.
- Find a wall adapter that has a USB port. This can be a dedicated USB wall adapter that came with your Fitbit or any other reputable USB wall adapter.
- Plug the USB connector end of the charging cable into the USB port of the wall adapter.
- Locate an available electrical outlet near your desired charging location.
- Insert the wall adapter into the electrical outlet firmly.
- Your Fitbit device will start charging once connected to the electrical outlet. Look for a battery icon or charging indicator on the screen of your Fitbit to confirm that it is charging.
- Allow your Fitbit to charge fully before disconnecting it from the electrical outlet. The charging time may vary depending on your device’s model and battery level.
- Once your Fitbit is fully charged, unplug the wall adapter from the electrical outlet and disconnect the charging cable from your device.
Using an electrical outlet to charge your Fitbit can be particularly useful when you need a faster charging solution or when you’re away from a computer or USB port. Just make sure to use a reliable wall adapter and ensure that it is compatible with your Fitbit charging cable.
Next, we’ll explore another charging option that involves using a computer’s USB port to recharge your Fitbit device.
Charging via a Computer
If you don’t have access to an electrical outlet or wall adapter, you can still charge your Fitbit device by connecting it to a computer’s USB port. This method allows you to charge your Fitbit while utilizing the power from your computer. Here’s a step-by-step guide on how to charge your Fitbit via a computer:
- Ensure that your Fitbit device is securely connected to the charging cable.
- Locate an available USB port on your computer. This can be a USB port on your desktop computer, laptop, or even a USB hub.
- Insert the USB connector end of the charging cable into the USB port of your computer.
- Make sure that the Fitbit device is properly aligned with the charging cable and that the connectors are securely connected.
- Your Fitbit device will begin charging once connected to the computer’s USB port. Look for a battery icon or charging indicator on your Fitbit’s screen to confirm that it is charging.
- Allow your Fitbit to charge fully before disconnecting it from the computer. The charging time may vary depending on your device’s model and battery level.
- Once your Fitbit is fully charged, unplug the charging cable from your computer.
Charging your Fitbit using a computer’s USB port provides a convenient charging option when you are working or spending time near your computer. It’s important to note that some computers may have varying power outputs on their USB ports, which can affect the charging speed. If you encounter slow charging or your Fitbit doesn’t charge at all, try using a different USB port or consider using an electrical outlet or USB wall adapter for faster and more reliable charging.
In the next section, we’ll provide some useful charging tips and precautions to optimize the charging experience for your Fitbit device.
Charging Tips and Precautions
When it comes to charging your Fitbit device, there are a few tips and precautions to keep in mind to ensure a smooth and safe charging experience. Here are some helpful tips to optimize the charging process:
- Use the Original Charging Cable: Always use the original Fitbit charging cable that came with your device or purchase a genuine replacement cable from authorized sellers. Using third-party or counterfeit cables can result in subpar performance and potential damage to your device.
- Charge in Optimal Conditions: Make sure to charge your Fitbit in a clean and dry environment, away from moisture or extreme temperatures. Avoid exposing your device to direct sunlight or excessive heat during charging.
- Regularly Clean the Charging Ports and Connectors: Dust, lint, or debris can accumulate in the charging ports and connectors over time, affecting the charging efficiency. Use a soft, dry cloth or a small brush to clean the charging ports and connectors, ensuring a proper connection.
- Avoid Overcharging: Although Fitbit devices are designed with built-in protection against overcharging, it’s advisable not to leave your device connected to the charger for an extended period once it reaches full charge. Overcharging can impact the overall battery performance and lifespan.
- Monitor Charging Progress: Some Fitbit models display a battery icon or charging indicator on the screen during charging. Keep an eye on this indicator to verify that your device is charging properly. If you encounter any issues, refer to the troubleshooting section or contact Fitbit customer support.
- Charge Regularly: For optimal performance, it’s recommended to charge your Fitbit device regularly. Follow the manufacturer’s guidelines on the ideal charging frequency to maintain your device’s battery health and ensure it’s ready for use whenever you need it.
By following these tips and taking necessary precautions, you can ensure that your Fitbit device remains in good condition and provides reliable performance over time. Now that you’re equipped with the knowledge of charging your Fitbit, let’s address any potential charging issues you may encounter in the next section.
Troubleshooting Charging Issues
Experiencing charging issues with your Fitbit device can be frustrating, but there are several troubleshooting steps you can follow to resolve common problems. Here’s a guide to help you troubleshoot charging issues with your Fitbit:
- Ensure Proper Connection: Double-check that the charging cable is securely connected to both your Fitbit device and the power source. Make sure the connectors are clean and free from debris.
- Restart Your Fitbit: Sometimes, a simple restart can resolve charging issues. Restart your Fitbit device by turning it off and then turning it back on again.
- Use a Different Charging Cable: If you have access to another Fitbit charging cable, try using it to see if the issue is with the cable itself. A faulty cable can hinder the charging process.
- Try a Different Power Source: If you’re using a USB port on a computer, try using a different port or a USB wall adapter. The USB port you are using may have a low power output, which can result in slow or ineffective charging.
- Clean the Charging Port: Use a soft, dry cloth or a small brush to clean the charging port on your Fitbit device. Dust or debris can accumulate over time, obstructing the charging connection.
- Check for Firmware Updates: Ensure that your Fitbit device’s firmware is up to date. Sometimes, firmware updates address charging-related issues and improve overall performance.
- Contact Fitbit Support: If you have tried all the troubleshooting steps and your Fitbit device still doesn’t charge properly, it may be necessary to reach out to Fitbit customer support for further assistance and guidance.
Remember, charging issues can vary depending on the Fitbit model and specific circumstances. It’s always beneficial to refer to the user manual or the official Fitbit website for model-specific troubleshooting information.
With these troubleshooting tips, you should be able to address most common charging issues with your Fitbit device. Remember to stay patient and persistent when diagnosing the problem. Now, armed with the knowledge on troubleshooting, you can confidently resolve any charging problems you may encounter.