
Why Change the Default Browser in Windows
The default web browser in Windows is the program that opens when you click on a link or open a webpage. While Windows comes with its built-in browser, such as Microsoft Edge, you may prefer to use a different browser that better suits your needs. There are several reasons why you might want to change the default browser in Windows.
Firstly, different browsers offer various features and functionalities. Some browsers may have better security measures, while others may provide faster browsing speeds or more customization options. By changing the default browser, you can take advantage of these different features and enhance your browsing experience.
Secondly, you may have a preferred browser that you are comfortable using. It could be a browser that you’ve used on another device, such as a smartphone or tablet, and want to keep a consistent browsing experience across different platforms. Changing the default browser in Windows allows you to use your preferred browser as the primary option for accessing the internet.
Additionally, certain web applications or websites may work better with specific browsers. Some websites might not be fully compatible with the default browser, resulting in slower loading times or missing functionality. By changing the default browser, you can ensure optimal performance and compatibility when accessing these websites.
Moreover, some users may have privacy concerns and want to utilize a browser that provides better privacy protection. Different browsers have varying levels of privacy features, such as built-in tracking blockers, ad blockers, or enhanced incognito modes. Changing the default browser allows you to prioritize your privacy preferences and have more control over your online activities.
Lastly, changing the default browser in Windows allows you to explore and try out different browsers. There are numerous browsers available, each with its own unique features and user interface. By switching the default browser, you can experiment with different options and find the one that best suits your browsing style and preferences.
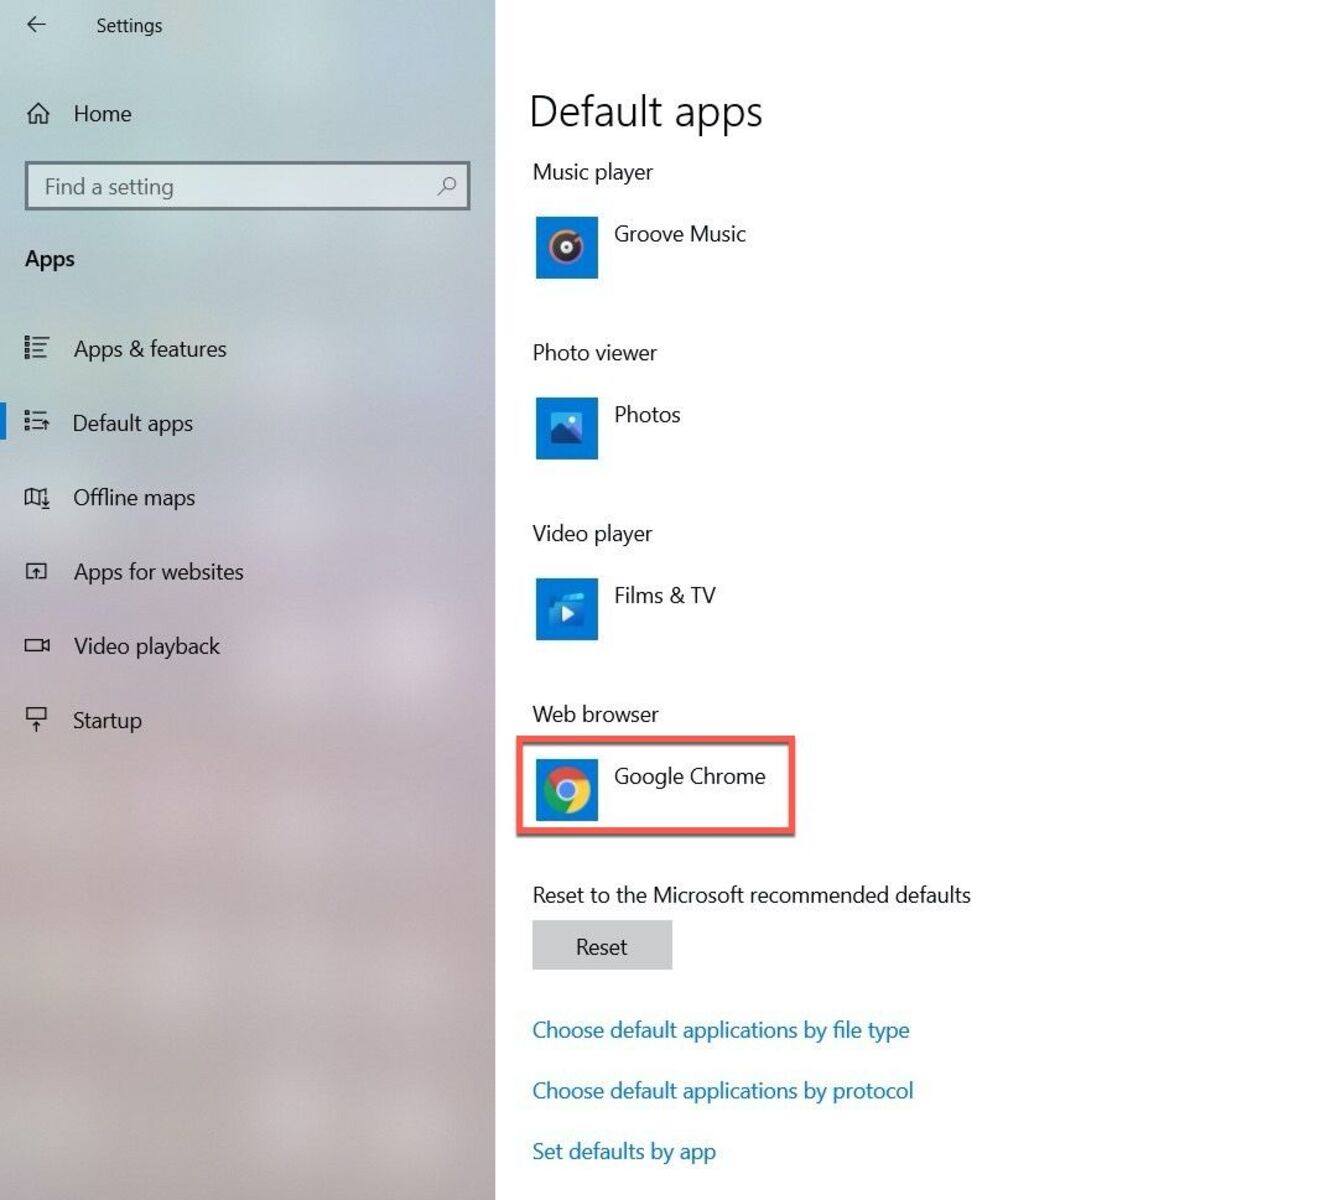
Step 1: Open Default Apps Settings
To change the default browser in Windows, you need to access the Default Apps settings. Follow these steps to open the Default Apps settings:
- Click on the “Start” button in the bottom left corner of your screen. This will open the Start menu.
- Select the “Settings” icon, which looks like a gear. This will open the Windows Settings menu.
- In the Windows Settings menu, click on the “Apps” option. This will open the Apps settings.
- On the left side of the Apps settings, click on the “Default Apps” tab. This will display a list of default apps categories.
- Scroll down the list of categories and locate the “Web browser” category. This is where you can change the default browser for web-related activities.
Once you have accessed the Default Apps settings and located the Web browser category, you are ready to proceed to the next step and select a new default browser.
Step 2: Select the “Web Browser” Option
After opening the Default Apps settings in Windows, the next step is to select the “Web browser” option to change the default browser. Follow these steps to do so:
- Within the Default Apps settings, locate the “Web browser” category.
- Click on the current default browser listed under the “Web browser” category. This will open a dropdown menu with a list of available browsers installed on your system.
- Scroll through the list of browsers and select the one you want to set as the new default browser. If the browser you prefer is not listed, make sure it is installed on your system before proceeding.
Once you have selected a new browser from the dropdown menu, you are ready to move on to the next step and apply the changes to make it your default browser in Windows.
Step 3: Choose a New Default Browser
Now that you have opened the Default Apps settings and selected the “Web browser” option, it’s time to choose a new default browser. Follow these steps to select your preferred browser as the new default:
- Review the list of available browsers that appear in the dropdown menu under the “Web browser” category.
- Consider the features, performance, and user interface of each browser listed, and choose the one that best suits your needs and preferences.
- Click on your preferred browser from the list to select it as the new default browser.
It’s important to note that only the browsers you have installed on your system will appear in the dropdown menu. If the browser you want to set as the default is not listed, ensure that it is properly installed on your computer before proceeding.
Once you have chosen a new default browser, you are ready to move on to the next step and apply the changes to make it the default browser in Windows.
Step 4: Make Sure the Changes Are Applied
After selecting a new default browser in the Default Apps settings, it’s important to ensure that the changes are properly applied. Follow these steps to confirm that your chosen browser is set as the default:
- Close the Default Apps settings window by clicking the “X” button in the upper-right corner.
- Open any link or webpage to test if it opens in your newly selected default browser. You can do this by clicking on a link in an email, document, or website.
- Observe whether the link or webpage opens in the browser you have chosen as the default. If it does, it means that the changes have been successfully applied.
Sometimes, Windows may take a moment to update the default browser settings. If you find that the changes are not immediately reflected when opening a link or webpage, wait for a few seconds and try again. You can also restart your computer to ensure the changes are fully applied.
If the desired browser still does not open when clicking on a link or webpage, you may need to troubleshoot the issue further. Check if there are any specific browser settings or plugins that could be conflicting with the default browser setting. Additionally, ensure that the chosen browser is up to date and compatible with your Windows version.
By following these steps and ensuring that the changes are applied, you can confidently use your new default browser for all web-related activities on your Windows system.
Step 5: Check If the New Browser Has Become Default
After making changes to the default browser settings in Windows, it’s crucial to check if your chosen browser has become the new default. Follow these steps to verify that your selected browser is indeed the default option:
- Open the Start menu by clicking on the “Start” button in the bottom-left corner of your screen.
- Locate and click on the “Settings” icon, which resembles a gear, to open the Windows Settings menu.
- In the Windows Settings menu, click on the “Apps” option to access the Apps settings.
- Within the Apps settings, click on the “Default Apps” tab on the left side of the window.
- Scroll down until you find the “Web browser” category and ensure that your selected browser is listed underneath it.
If your chosen browser appears under the “Web browser” category, it means that it has successfully become the default browser in Windows. This means that all web-related activities, such as opening links or webpages, will be automatically directed to your selected browser.
However, if your chosen browser does not appear under the “Web browser” category, it may not have been set as the default option. In this case, revisit the previous steps and confirm that you have correctly selected and applied the changes in the Default Apps settings.
In some cases, you may need to restart your computer for the changes to take effect and for the selected browser to be recognized as the default. After restarting, follow the steps outlined above to check if your desired browser is now the default option in Windows.
By following these steps and confirming that the new browser is set as the default, you can ensure a seamless browsing experience with your preferred browser as the go-to option for all web-related activities on your Windows system.
Tips for Troubleshooting the Default Browser Change
While changing the default browser in Windows is a straightforward process, you may encounter some issues or unexpected behavior. Here are a few tips to troubleshoot and resolve any problems you may come across during the default browser change:
- Ensure the browser is correctly installed: Make sure that the browser you want to set as the default is properly installed on your computer. Check for any installation errors or missing files that may prevent it from being recognized as a valid option.
- Restart your computer: After making changes to the default browser settings, it can be beneficial to restart your computer. This helps ensure that all changes are fully applied and any temporary configuration issues are resolved.
- Update your browser: Ensure that you are using the latest version of the browser you want to set as the default. Updating to the latest version can fix any bugs or compatibility issues that may have been present in previous versions.
- Check default program settings: In some cases, other programs or system settings might be overriding the default browser settings. Check the settings of other applications and ensure that they are not set to open links or webpages in a specific browser.
- Reset file associations: If links or webpages still do not open in your chosen default browser, you may need to reset file associations. To do this, open the Default Apps settings, scroll down to the “Choose default apps by file type” section, and click “Choose default apps by file type.” Reset the file association for the file types related to web content, such as HTML or HTTP, to your preferred browser.
- Contact browser support: If you have tried all the troubleshooting steps but still experience issues with changing the default browser, reach out to the support team of the browser you want to set as the default. They can provide specific guidance and assistance to resolve any browser-related problems.
By following these tips and troubleshooting steps, you should be able to successfully change the default browser in Windows and resolve any issues that may arise during the process.