
Understanding the Fitbit Blaze Band
The Fitbit Blaze is a popular fitness tracker that allows users to monitor their activity levels, heart rate, and sleep patterns. One of the key features of the Fitbit Blaze is its interchangeable band, which allows users to customize their device to suit their style or activity. Understanding the Fitbit Blaze band is important before you decide to change it.
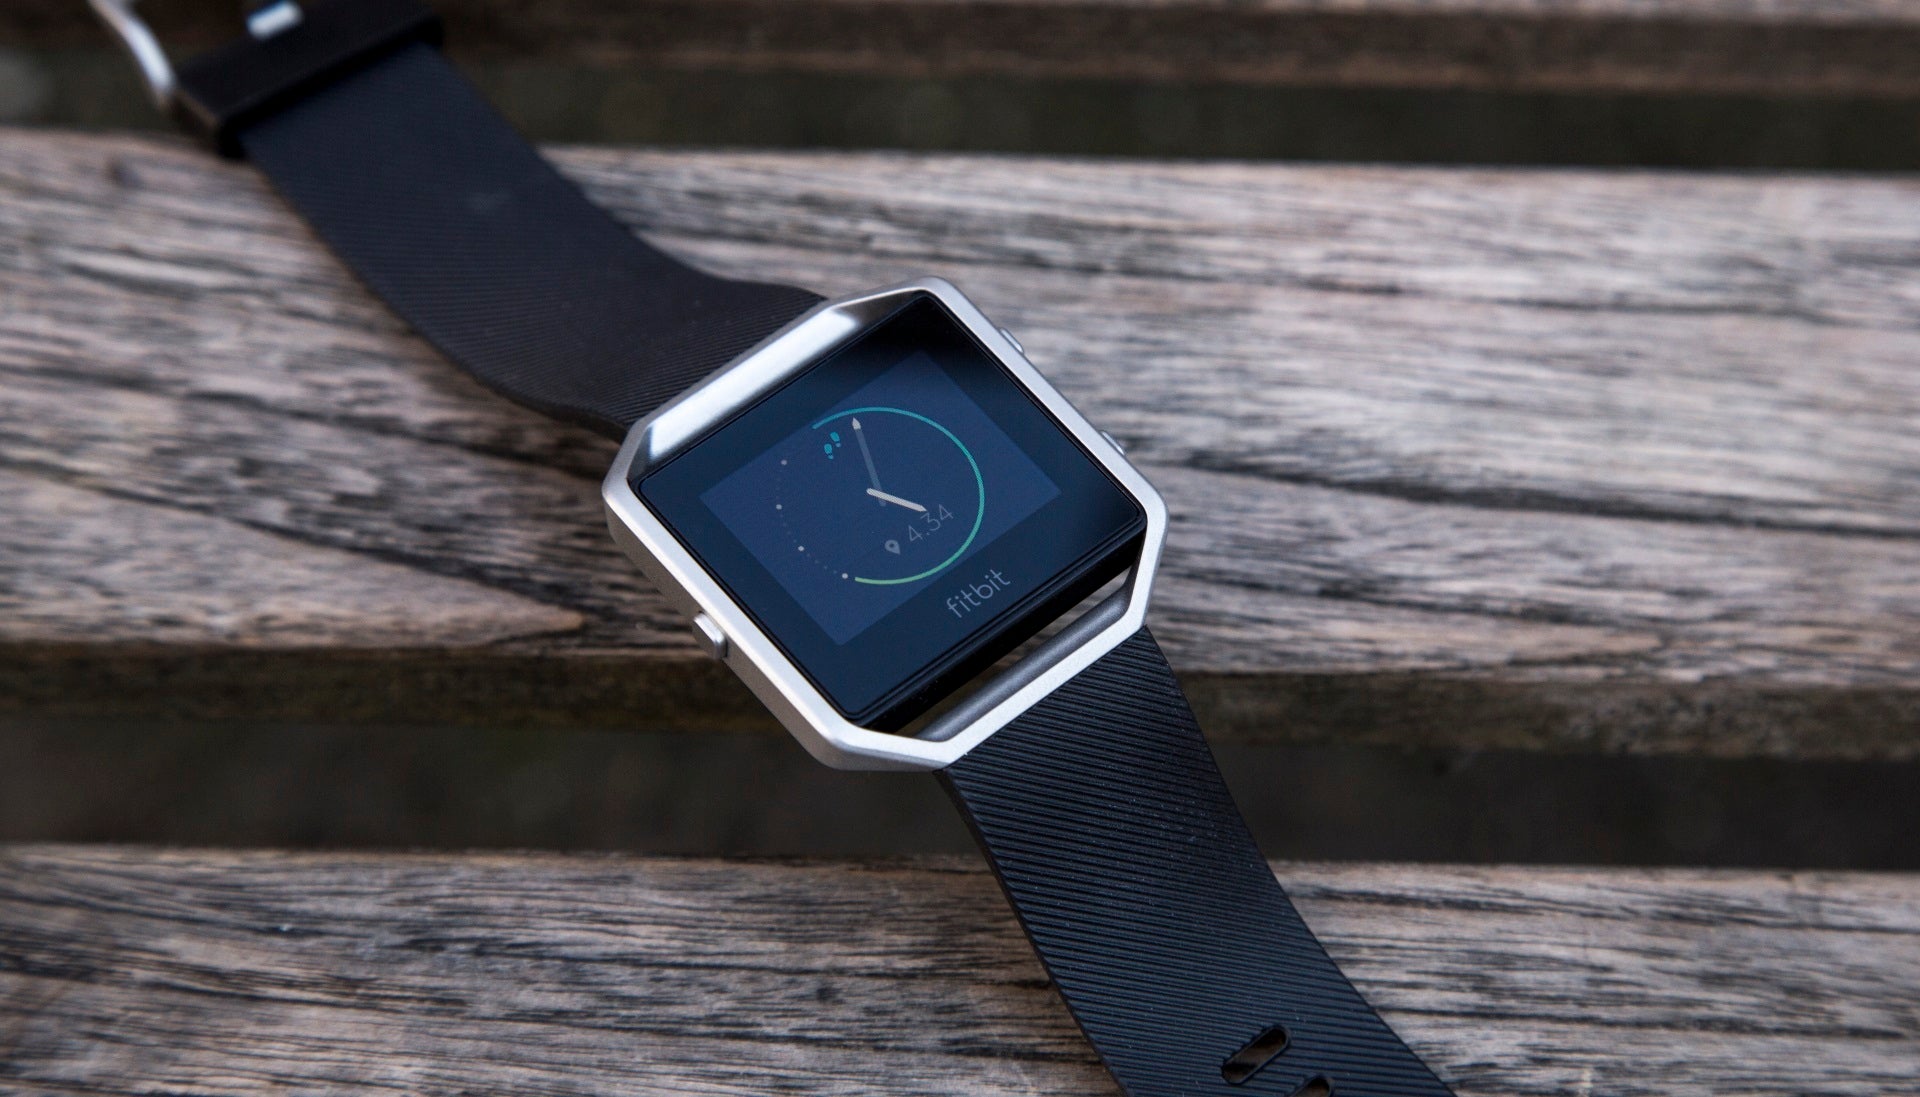
The Fitbit Blaze band consists of two main components: the frame and the strap. The frame is the part of the band that attaches to the actual device and holds it securely in place. The strap is the adjustable portion that wraps around your wrist. Fitbit offers a range of different bands, including silicone, leather, and stainless steel, allowing users to choose the material that suits their preferences and needs.
When changing the Fitbit Blaze band, it is important to note that the bands are designed to be easily removable and interchangeable. This means that you can effortlessly switch between different bands to match your outfit, activity, or mood. The bands are securely fastened to the frame using small pins or screws, ensuring that the device stays securely in place during your activities.
It is recommended to choose a replacement band that is compatible with the Fitbit Blaze. Fitbit provides official replacement bands that are specifically designed for the device, ensuring a seamless fit and optimal performance. However, there are also third-party bands available in the market that offer a wide range of styles and materials to choose from.
Understanding the Fitbit Blaze band and how it functions is essential before changing it. Knowing the different components of the band, the options available, and the compatibility with the device will help you make informed decisions when selecting and replacing the band.
Choosing the Right Replacement Band
When it comes to choosing a replacement band for your Fitbit Blaze, there are a few important factors to consider. Selecting the right replacement band will not only enhance the look and feel of your device but also ensure a comfortable and secure fit during your activities.
The first factor to consider is the material of the replacement band. Fitbit offers a range of bands with different materials, including silicone, leather, and stainless steel. Silicone bands are lightweight and flexible, making them ideal for sports and workouts. Leather bands add a touch of elegance and are suitable for everyday use. Stainless steel bands provide durability and a sleek, professional look.
Next, consider the size and fit of the replacement band. Fitbit offers bands in various sizes, so it’s crucial to choose the size that matches your wrist circumference. A band that is too tight can be uncomfortable, while a band that is too loose may not provide accurate heart rate monitoring. Refer to the Fitbit sizing guide to determine the correct size for your replacement band.
It’s also important to assess your activity level and lifestyle when selecting a replacement band. If you lead an active lifestyle and engage in rigorous workouts, choosing a band that is sweat-resistant and durable is essential. On the other hand, if you prefer a more fashionable band for everyday use, consider options that align with your personal style and preferences.
In addition to Fitbit’s official replacement bands, there are third-party bands available in the market. These bands often offer a wider range of styles, colors, and materials to choose from. However, it’s important to ensure that the third-party band is specifically designed for the Fitbit Blaze to ensure compatibility and proper functionality.
Finally, consider your budget when selecting a replacement band. Fitbit’s official bands can be more expensive compared to third-party brands. Understanding your budget and finding a band that meets your needs and preferences within your price range is important.
By considering the material, size, activity level, compatibility, and budget, you can choose the right replacement band for your Fitbit Blaze. Remember, the right replacement band not only enhances the aesthetics of your device but also ensures a comfortable and secure fit for all your fitness activities.
Removing the Old Band
Before you can attach a new band to your Fitbit Blaze, you need to remove the old band. Although it may seem intimidating at first, removing the old band is a straightforward process that can be easily done with a few simple steps.
To remove the old band, follow these steps:
- Flip your Fitbit Blaze over and locate the two metal pins or screws on the underside of the device.
- Using a small tool, such as a paperclip or a watch pin removal tool, carefully push the release button or unscrew the screws to loosen the pins or screws holding the band in place.
- Once the pins or screws are loosened, gently slide them out of their slots.
- With the pins or screws removed, the old band should easily detach from the frame of the Fitbit Blaze.
It’s important to exercise caution while removing the old band to avoid any damage to the device or injury to yourself. Take your time and be gentle when handling the pins or screws.
If you’re encountering difficulties in removing the old band or feel unsure about the process, you can refer to the Fitbit Blaze user manual or contact Fitbit’s customer support for further assistance.
Once you have successfully removed the old band, you can proceed to attach the new band and customize your Fitbit Blaze to suit your style and preferences.
Attaching the New Band
After removing the old band from your Fitbit Blaze, it’s time to attach the new band. Attaching a new band to your Fitbit Blaze is a simple process that can be completed in just a few steps.
Here’s how you can attach the new band:
- Take your new replacement band and ensure that it matches the correct size and compatibility for your Fitbit Blaze model.
- Align the end of the new band with the frame of the Fitbit Blaze.
- Insert the metal pins or screws into the corresponding slots on the frame. Make sure the pins or screws are securely aligned.
- Gently press the pins or screws into place until you hear or feel a click, indicating that they are securely fastened.
- Check that the new band is properly attached by giving it a gentle tug to ensure it doesn’t easily come loose.
It’s important to ensure that the new band is securely attached to the frame to prevent it from accidentally detaching during your activities. Taking the time to properly align and fasten the pins or screws will ensure a secure and reliable attachment.
If you encounter any difficulties while attaching the new band or find that it doesn’t fit properly, double-check the compatibility with your Fitbit Blaze model and refer to the manufacturer’s instructions. Additionally, you can contact Fitbit’s customer support for further assistance or guidance.
Once the new band is successfully attached, you can now enjoy your Fitbit Blaze with a fresh and personalized look. Don’t forget to adjust the fit of the new band to ensure comfort and accurate tracking during your fitness activities.
Adjusting the Fit of the Band
Ensuring a proper fit of your Fitbit Blaze band is crucial for comfort and accurate tracking during your activities. After attaching the new band, you may need to make adjustments to achieve the perfect fit for your wrist.
Follow these steps to adjust the fit of the band:
- Put on your Fitbit Blaze and fasten the band around your wrist, leaving a small gap for comfort.
- Take note of how loose or tight the band feels.
- If the band is too tight, it can cause discomfort or restrict blood flow. Loosen the band by moving the pin or screw to a looser hole or adjusting the buckle or clasp.
- If the band is too loose, it can move around and affect the accuracy of heart rate monitoring. Tighten the band by moving the pin or screw to a tighter hole or adjusting the buckle or clasp.
- Once you’ve made the necessary adjustments, try wearing the Fitbit Blaze and check the fit again. Repeat the process until you find the most comfortable and secure fit.
Remember that the band should be snug but not excessively tight or loose. It should be comfortable to wear throughout the day and during various activities.
After adjusting the fit, it’s a good idea to test the Fitbit Blaze by engaging in different activities and monitoring its performance. Pay attention to the comfort level and accuracy of the band during physical movements.
If you continue to experience discomfort or difficulty in achieving a proper fit, it may be helpful to consult Fitbit’s user manual or contact their customer support for further guidance.
By properly adjusting the fit of the band, you can ensure comfort, accuracy, and optimal performance from your Fitbit Blaze throughout your fitness journey.
Cleaning and Caring for the Band
To keep your Fitbit Blaze band in optimal condition and prolong its lifespan, proper cleaning and maintenance are necessary. Regularly cleaning and caring for the band will help remove dirt, sweat, and odors, ensuring it remains comfortable and looking its best.
Here are some tips for cleaning and caring for your Fitbit Blaze band:
- Before cleaning the band, make sure to detach it from the device following the instructions provided by Fitbit.
- If your band is made of silicone or a similar material, you can use mild soap and water to clean it. Gently scrub the band with a soft cloth or sponge to remove any dirt or residue. Rinse thoroughly and let it air dry before reattaching it to the Fitbit Blaze frame.
- If your band is made of leather or fabric, it’s best to avoid water. Instead, use a clean, dry cloth to gently wipe and remove any surface dirt or stains. For tougher stains, consider using a specialized leather cleaner or fabric stain remover as directed by the manufacturer.
- Avoid exposing the band to extreme temperatures, excessive sunlight, or harsh chemicals, as they can cause discoloration or damage.
- If you frequently engage in workouts or activities that lead to excessive sweating, it’s recommended to clean the band more frequently. Sweat can accumulate and cause odors or discomfort over time.
- In addition to regular cleaning, it’s a good idea to periodically inspect the band for any signs of wear and tear. If you notice any damage, such as cracks, tears, or loose parts, consider replacing the band to maintain optimal performance and safety.
- When not in use, store your Fitbit Blaze and the band in a clean and dry place. Avoid storing it in areas with high humidity or extreme temperatures.
By following these cleaning and caring tips, you can ensure that your Fitbit Blaze band remains clean, comfortable, and functional for a long time. Regular maintenance will help you get the most out of your device and keep it looking great throughout your fitness journey.
Troubleshooting Common Issues
While the Fitbit Blaze band is designed to be durable and reliable, occasionally you may encounter some common issues. Fortunately, many of these issues can be easily resolved through troubleshooting. Here are some common issues you may come across and the troubleshooting steps you can take:
- Band not securely attached: If you find that your band is not securely attached to the frame, ensure that the metal pins or screws are properly aligned and inserted. Gently press them into place until you hear or feel a click. If the issue persists, double-check the compatibility of the replacement band or contact Fitbit’s customer support for assistance.
- Band causing discomfort: If the band is causing discomfort or irritation on your wrist, double-check the fit and adjust it accordingly. Ensure that the band is not too tight or too loose. If the discomfort persists, consider trying a different type of band, such as a silicone band that offers flexibility and breathability.
- Band discoloration: Over time, your Fitbit Blaze band may experience discoloration, especially if it is made of a lighter-colored material. To prevent or reduce discoloration, clean the band regularly using mild soap and water or a specialized cleaner. Avoid exposing the band to harsh chemicals or extreme temperatures.
- Band not tracking accurately: If you find that the band is not accurately tracking your activity or heart rate, ensure that it is securely fastened and properly positioned on your wrist. Also, make sure that the sensors on the underside of the device are clean and free from any dirt or residue. If the issue continues, try restarting your Fitbit Blaze or contact Fitbit’s customer support for further assistance.
- Band damaged or broken: If you notice any signs of damage or breakage on your Fitbit Blaze band, such as cracks, tears, or loose parts, it’s best to replace the band. Continued use of a damaged band may affect its performance and compromise your comfort and safety.
If you encounter any other issues with your Fitbit Blaze band that are not addressed here, the best course of action is to consult the user manual or reach out to Fitbit’s customer support. They have a dedicated team that can provide personalized assistance and guidance to resolve any specific issues you may encounter.
By troubleshooting common issues and taking proactive steps to maintain your Fitbit Blaze band, you can ensure a smooth and enjoyable experience with your fitness tracker.