
Step 1: Ensure your Echo is ready for setup
Before you begin changing the WiFi network on your Amazon Echo, it’s important to make sure that your Echo device is ready for setup.
First, check that your Echo is powered on and connected to a power source. Ensure that the device is in a location with a stable internet connection. This will ensure a smooth and uninterrupted setup process.
Next, make sure that your Echo device is in setup mode. To put your Echo into setup mode, press and hold the action button, which is usually located on the top of the device. Keep holding the button until the light ring around the top of the Echo turns orange. This indicates that the device is in setup mode and ready for configuration.
Once your Echo is in setup mode, it’s essential to have your smartphone or tablet ready with the Alexa app installed. The Alexa app is available for download on both iOS and Android devices. If you don’t have the app yet, you can download it from the respective app store for your device.
Now that your Echo is properly prepared for setup, let’s move on to the next step of changing the WiFi network.
Step 2: Connect to the Echo through the Alexa app
To change the WiFi network on your Amazon Echo, you’ll need to connect to the device through the Alexa app on your smartphone or tablet. Follow these steps to establish a connection:
- Open the Alexa app on your device. If you haven’t logged in to your Amazon account, enter your credentials to sign in.
- In the bottom right corner of the app, you’ll find a menu icon (usually represented by three horizontal lines or dots). Tap on it to open the menu.
- In the menu, select “Devices” to access the list of Alexa-enabled devices registered to your account.
- Look for your Echo device in the list and tap on it to select it.
By following these steps, you should now have successfully connected to your Echo device through the Alexa app. In the next step, we’ll explore how to change the WiFi network for your Echo.
Step 3: Tap on “Devices” in the bottom right corner
Once you’ve opened the Alexa app on your smartphone or tablet, it’s time to navigate to the “Devices” section. This section allows you to access and manage all the Alexa-enabled devices associated with your Amazon account.
To find the “Devices” section, look for the icon in the bottom right corner of the Alexa app. This icon is usually represented by three horizontal lines or dots. Tap on this icon to open the menu.
After opening the menu, you’ll see a list of options. Locate and select “Devices” from the menu, which will take you to the “Devices” section.
Once you’ve successfully tapped on “Devices,” you’ll be able to view a list of all the Alexa-enabled devices registered to your account. This includes your Echo device, which we’ll be focusing on for changing the WiFi network.
Now that you’ve found the “Devices” section and accessed the list of devices, you’re one step closer to changing the WiFi network on your Echo device. In the next step, we’ll guide you through selecting your specific Echo device to proceed with the setup.
Step 4: Select your Echo device
After tapping on the “Devices” option in the Alexa app, you will see a list of all the Alexa-enabled devices linked to your Amazon account. It’s now time to select your specific Echo device to proceed with changing the WiFi network.
Take a moment to review the list of devices displayed on the screen. Look for the name or description of your Echo device that you wish to change the WiFi network for. Once you’ve located your device, tap on it to select it.
By selecting your Echo device, you are indicating to the Alexa app that you want to perform specific actions or configurations for that particular device. This is essential for the following steps in the process of changing the WiFi network on your Echo.
Ensure that you are selecting the correct Echo device from the list. If you have multiple Echo devices registered to your account, it’s crucial to pick the one you want to change the WiFi network for. Double-check the name or description of the device to confirm its identity.
Once you’ve successfully selected your Echo device, you’re ready to move forward with the setup process. In the next step, we’ll explore how to proceed with changing the WiFi network for your Echo device.
Step 5: Tap on “Change” next to WiFi network
Now that you have selected your Echo device in the Alexa app, it’s time to proceed with changing the WiFi network. To do this, you’ll need to tap on the “Change” option next to the current WiFi network configuration.
In the Alexa app, look for the current WiFi network that your Echo device is connected to. It should be listed under the WiFi settings for your Echo. Next to the network name, you will see the “Change” option. Tap on it to initiate the process of changing the WiFi network.
By tapping on “Change,” you are indicating to the Alexa app that you want to modify the WiFi network settings for your Echo device. This action will prompt the app to guide you through the steps necessary to connect your Echo to a new WiFi network.
It’s important to note that once you tap on “Change,” your Echo device will be disconnected from the current WiFi network. Ensure that you have the necessary information to connect to the new WiFi network, such as the network name (SSID) and password.
Once you’ve successfully tapped on “Change,” you’re ready to proceed with selecting the new WiFi network for your Echo device. In the next step, we’ll guide you through choosing the desired WiFi network from the available options.
Step 6: Choose the new WiFi network from the list
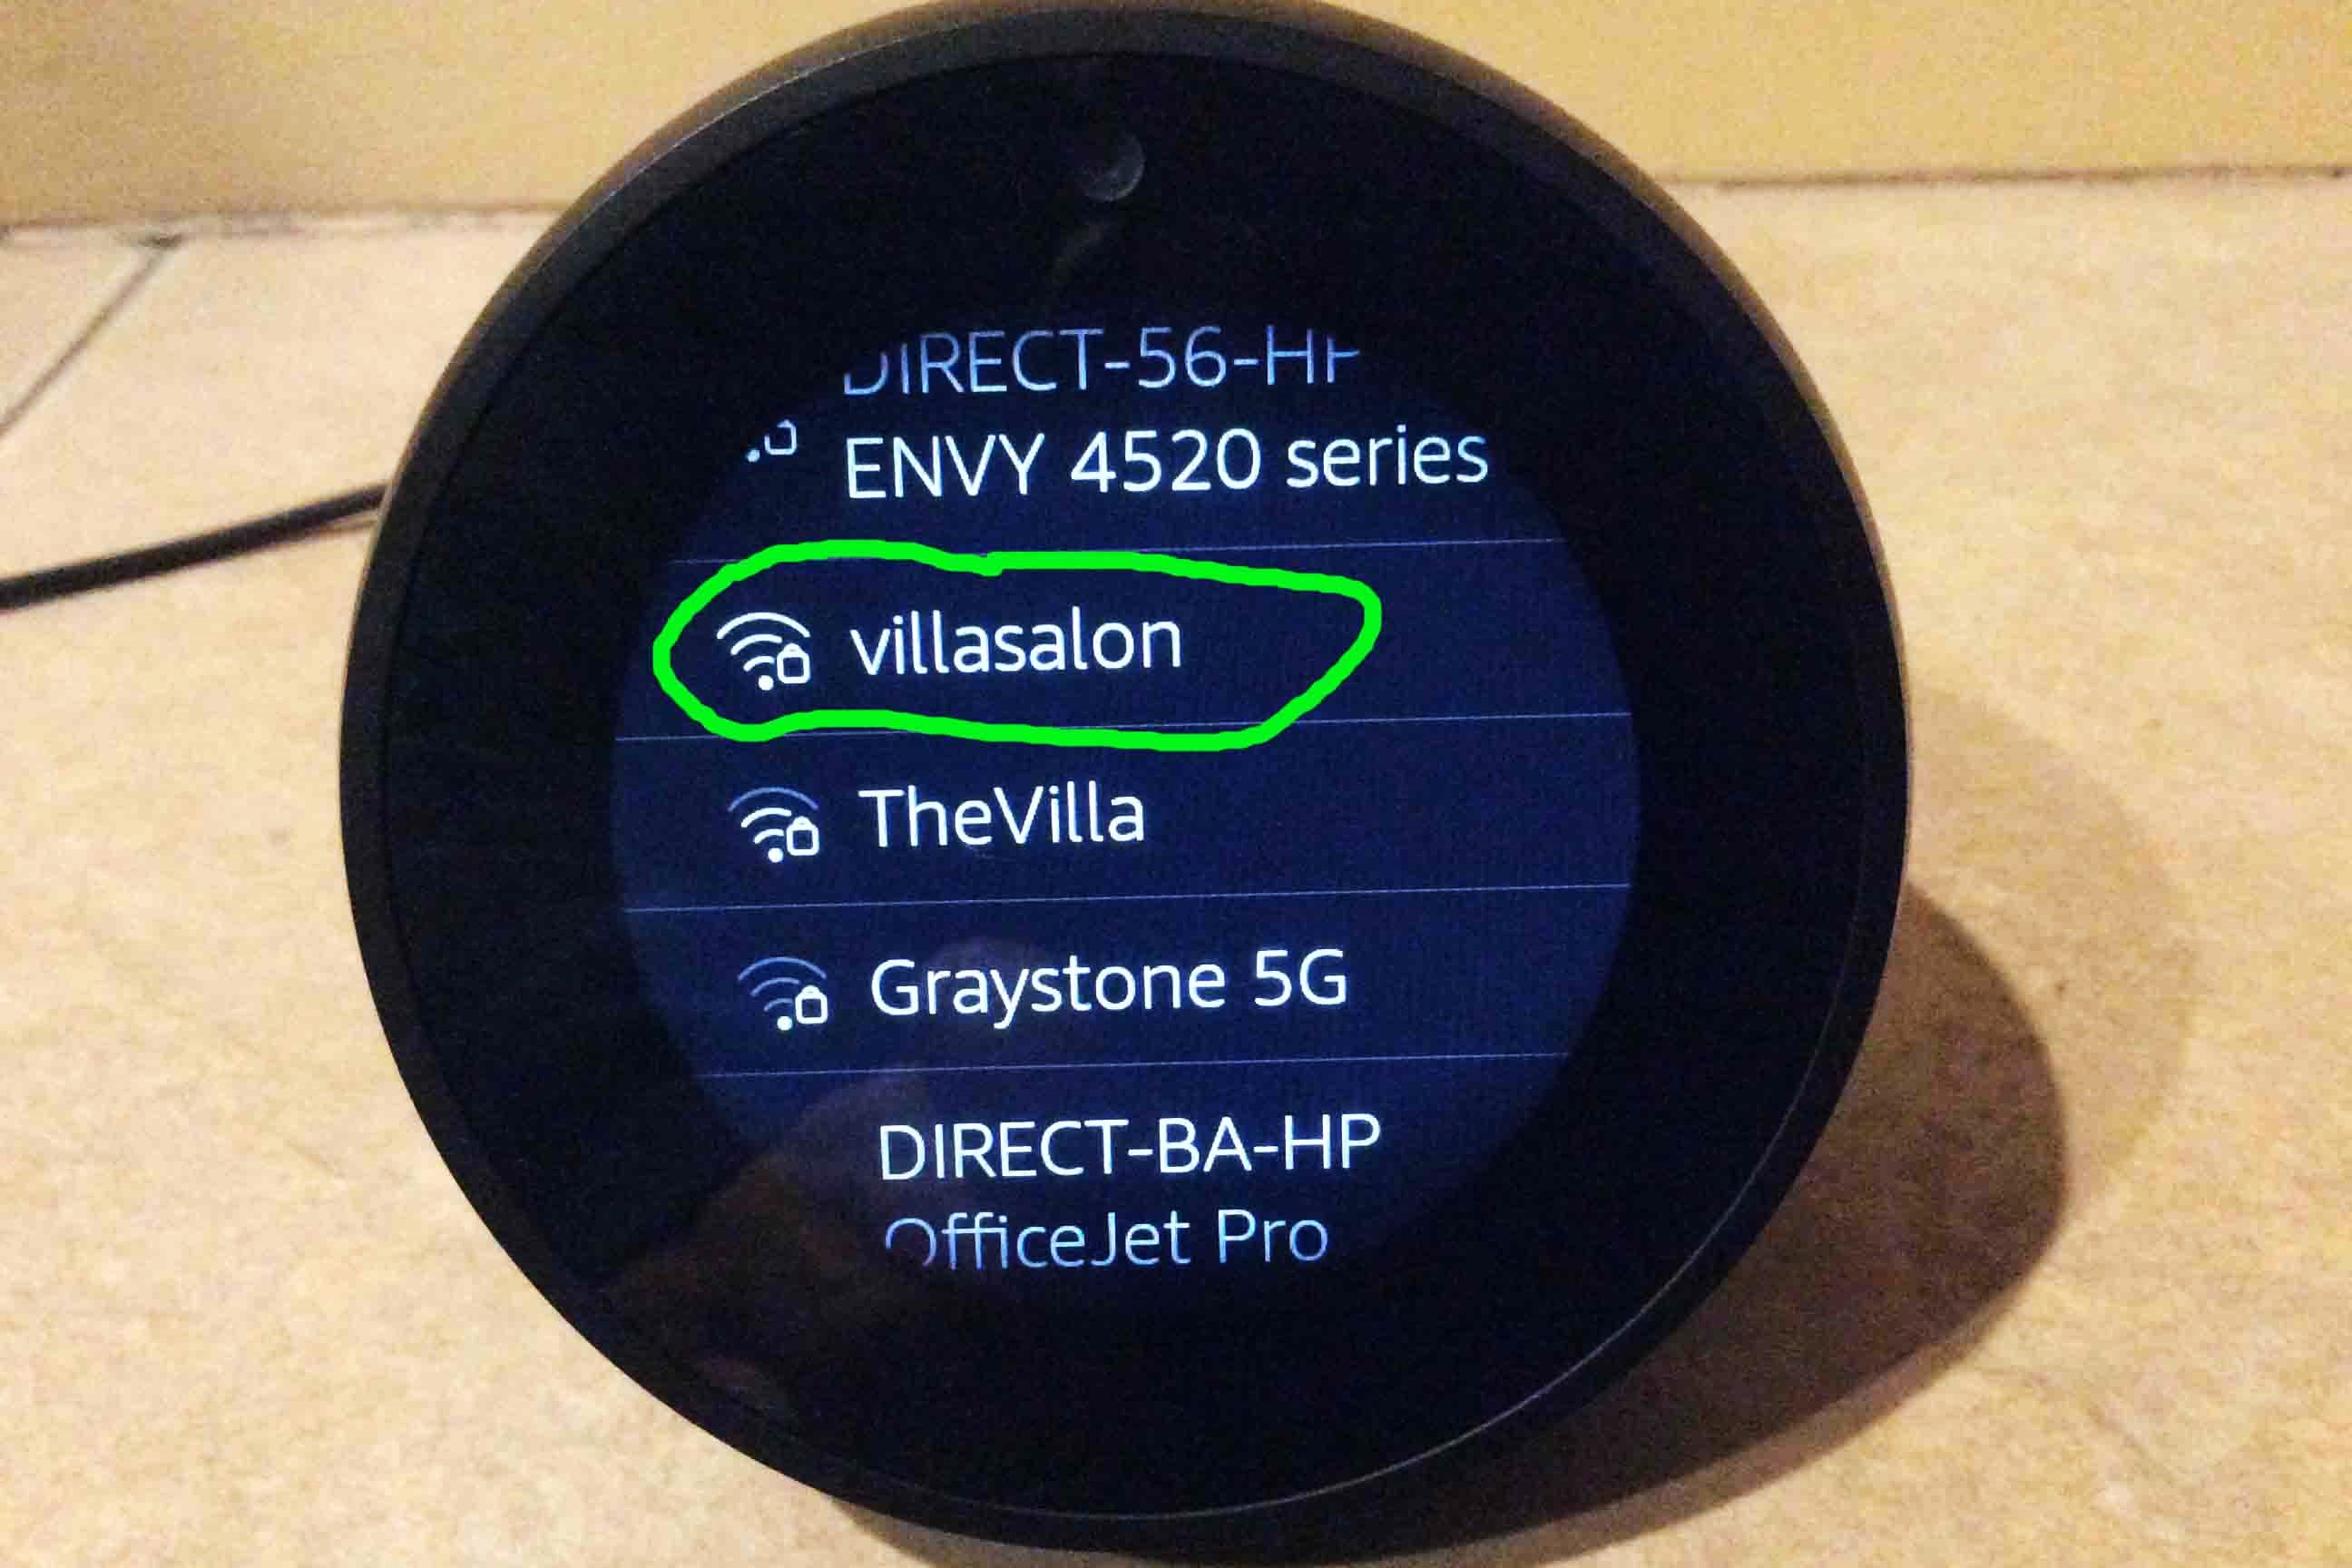
After tapping on “Change” next to the WiFi network in the Alexa app, you’ll be presented with a list of available WiFi networks to choose from. Follow these steps to select the new WiFi network for your Echo device:
- Look for the list of WiFi networks on the screen. This list consists of the available networks that your Echo device can connect to.
- Scroll through the list until you find the new WiFi network that you want to connect your Echo to.
- Tap on the name of the new WiFi network to select it. The app will then proceed to the next step of the setup process.
When choosing the new WiFi network, ensure that you select the correct network that you want to connect your Echo device to. Double-check the network name (SSID) to confirm its identity.
If you don’t see the new WiFi network in the list, make sure that the network is in range and broadcasting. You may need to move closer to the WiFi router or troubleshoot any network connectivity issues before proceeding.
Once you’ve successfully selected the new WiFi network, you’re ready to move on to the next step. In the next step, we’ll explain how to enter the password if prompted to connect to the new WiFi network.
Step 7: Enter the network password if prompted
After selecting the new WiFi network for your Echo device, you may be prompted to enter the network password to establish a connection. Follow these steps to enter the password:
- Look for a password field or prompt on the screen of the Alexa app. This is where you will enter the network password.
- Using the on-screen keyboard, type in the password for the new WiFi network. Take care to enter the password accurately to ensure a successful connection.
- Double-check the entered password before proceeding to ensure it matches the actual password for the WiFi network.
- If you make a mistake while entering the password, use the delete or backspace key on the keyboard to remove any incorrect characters.
- Once you have entered the correct password, tap on the “Connect” or “Join” button to proceed with connecting your Echo device to the new WiFi network.
If you don’t see a prompt to enter the password, it’s possible that the new WiFi network doesn’t require a password or your Echo device has previously connected to it.
Keep in mind that the network password is case-sensitive. Ensure you are entering uppercase and lowercase letters correctly. If you’re unsure about the password, you can refer to your WiFi router’s documentation or contact your internet service provider for assistance.
Once you have successfully entered the network password, your Echo device will attempt to establish a connection to the new WiFi network. In the next step, we’ll discuss what to do while waiting for the Echo to connect.
Step 8: Wait for the Echo to connect to the new WiFi network
After entering the network password in the Alexa app, your Echo device will start the process of connecting to the new WiFi network. During this step, it’s important to be patient and allow sufficient time for the connection to be established.
It may take a few moments for your Echo device to establish a connection with the new WiFi network. The time needed for the connection can vary depending on factors such as network strength and device specifications.
While waiting for the Echo to connect, you may notice that the light ring around the top of the device will change color or behavior. This is an indicator that your Echo is in the process of connecting to the new WiFi network. Refer to your Echo device’s user manual for specific details on the light ring behavior during the connection process.
Avoid interrupting or interfering with the connection process. Moving the Echo device or disrupting the WiFi signal during this time may cause connection issues and delay the setup process. It’s best to let the Echo complete the connection process undisturbed.
If the Echo fails to establish a connection to the new WiFi network, double-check that the entered password is correct and that the network is functioning properly. Restart your Echo device and repeat the steps to ensure accuracy.
Once the Echo successfully connects to the new WiFi network, you’re almost done with the setup process. In the next step, we’ll cover how to verify that the connection has been established correctly.
Step 9: Verify successful connection
After your Echo device has connected to the new WiFi network, it’s essential to verify that the connection has been established successfully. Follow these steps to ensure a successful connection:
- Observe the light ring around the top of your Echo device. A solid blue light or a light ring that turns off indicates a successful connection.
- If the light ring remains orange or displays any other color pattern, it may indicate an issue with the connection. In this case, refer to your Echo device’s user manual or troubleshoot using the Alexa app for further assistance.
- Once the light ring indicates a successful connection, try asking Alexa a question or giving a command to test if the Echo is working properly.
- If Alexa responds correctly and carries out your commands, it’s a clear indication that the connection to the new WiFi network has been established successfully.
If you’re still experiencing connectivity issues or if Alexa is not responding as expected, you can try restarting your Echo device and repeating the setup process. Ensure that the WiFi network is stable and functioning properly, and double-check the network password if necessary.
Remember, a stable WiFi connection is crucial for optimal performance of your Echo device. If you experience ongoing connectivity issues, consider troubleshooting your network or contacting your internet service provider for assistance.
Once you have verified a successful connection, you can proceed to enjoy the full functionality of your Echo device on the new WiFi network. In the next step, we’ll wrap up the setup process and conclude our guide.
Step 10: Enjoy your Echo on the new WiFi network
Congratulations! You have successfully changed the WiFi network on your Echo device. Now, you can enjoy the full range of features and capabilities that your Echo offers on the new WiFi network.
With your Echo connected to the new WiFi network, you can use voice commands to play music, control smart home devices, set reminders, ask questions, and much more. Explore the various skills and functionalities available through the Alexa app to discover new ways to enhance your Echo experience.
Keep in mind that if you ever decide to change your WiFi network again or connect the Echo to a different network, you can follow these same steps to repeat the setup process.
Remember to keep your Echo device up to date by installing the latest firmware updates released by Amazon. These updates often include bug fixes, performance improvements, and new features that can further enhance your Echo experience.
If you encounter any issues or have questions about your Echo device or its connectivity, check the Amazon support website or reach out to their customer support for assistance. They can provide guidance and solutions for any concerns you may have.
Now that you have successfully changed the WiFi network on your Echo device, take a moment to appreciate the convenience and versatility that it brings to your home. Enjoy the seamless integration of voice control into your daily routine and make the most out of the power of your Echo device.