Why Cancel a LinkedIn Premium Subscription?
LinkedIn Premium offers a range of upgraded features and benefits to enhance your professional networking experience. However, there may come a time when you decide to cancel your LinkedIn Premium subscription. There could be several reasons for this:
- Financial considerations: You may be looking to cut down on expenses and prioritize your budget differently.
- Job change: If you have recently changed jobs or are in a career transition, you may no longer require the premium features.
- Job search completed: If you have successfully landed a new role or accomplished your job search objectives, you may not see the need for premium access anymore.
- Underutilization of features: If you find that you rarely use the Premium features or they do not provide the value you expected, canceling the subscription could be a logical step.
- Preference for basic features: You may find that the basic free features of LinkedIn adequately meet your networking needs.
- Exploring other options: You may be considering trying out different networking platforms or resources that align better with your professional goals.
Ultimately, the decision to cancel your LinkedIn Premium subscription is a personal one, and it depends on your specific circumstances and requirements. It’s important to assess the value you are getting from the premium features and determine if they align with your current professional objectives and financial situation.
Step 1: Log Into Your LinkedIn Account
The first step to canceling your LinkedIn Premium subscription is to log into your LinkedIn account. Follow these simple steps:
- Open your preferred web browser and go to www.linkedin.com.
- Enter your login credentials – your email address and password – in the respective fields.
- Click on the “Sign in” button to access your LinkedIn account.
Make sure you use the correct login credentials, as entering incorrect information may prevent you from accessing your account. If you have forgotten your password, you can click on the “Forgot password?” link and follow the provided instructions to reset it.
Once you have successfully logged into your LinkedIn account, you will be ready to proceed to the next step of canceling your Premium subscription.
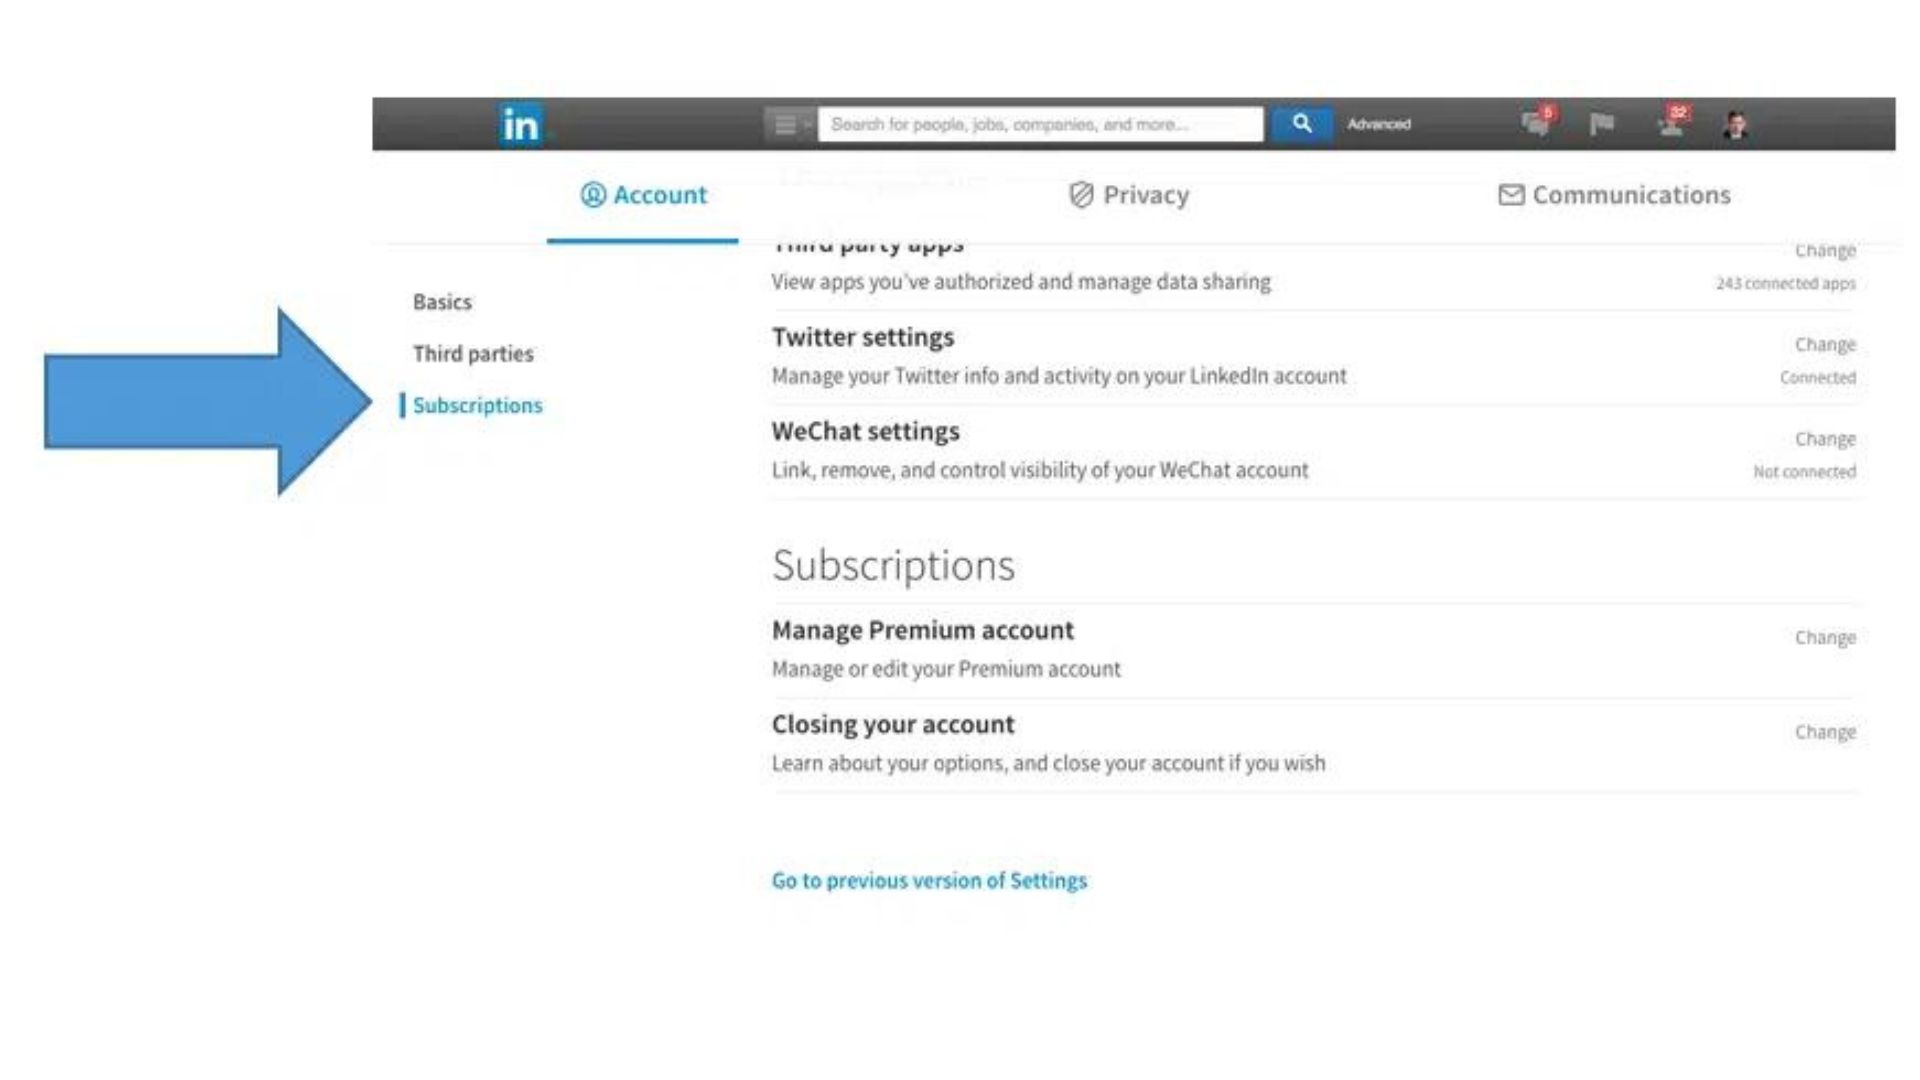
Step 2: Locate the Premium Subscription Settings
After logging into your LinkedIn account, the next step is to locate the Premium subscription settings. Follow these instructions to easily find the settings:
- On the LinkedIn homepage, look for the “Me” icon located at the top right corner of the navigation bar. It usually displays your profile picture or initials.
- Click on the “Me” icon to open a drop-down menu.
- In the drop-down menu, select “Premium Subscription Settings.” The exact wording may vary slightly, but it will be related to managing your LinkedIn Premium subscription.
Alternatively, you can navigate to the “Jobs” section or other premium features of LinkedIn. You may find a “Manage Premium account” or similar option within those sections.
By accessing the Premium subscription settings, you are one step closer to canceling your subscription. Let’s move on to the next step to continue the process.
Step 3: Review Your Premium Subscription Details
Once you have accessed the Premium subscription settings, the next step is to review your subscription details. This will provide you with valuable information about your current Premium plan and its associated features. Follow these steps to review your subscription details:
- In the Premium subscription settings page, you will see a summary of your subscription details, such as the type of Premium plan you have and the billing cycle.
- Take a moment to carefully read through the information displayed. Pay attention to the specific features and benefits you are currently enjoying as a LinkedIn Premium member.
- If you are unsure about any aspect of your subscription, you can click on the provided links or icons for more detailed information. This will help clarify the specific features and benefits associated with your Premium plan.
Reviewing your subscription details is crucial before canceling your Premium subscription. It helps you understand what you will be giving up and provides clarity on the features you may lose access to.
Take this opportunity to assess whether the features of your current Premium plan align with your professional goals and justify the expense. If you still wish to proceed with the cancellation, move on to the next step of the process.
Step 4: Cancel Your Premium Subscription
Now that you have reviewed your Premium subscription details and made the decision to cancel, it’s time to proceed with the cancellation process. Follow these steps to cancel your LinkedIn Premium subscription:
- In the Premium subscription settings page, locate the option to cancel your subscription. It is often labeled as “Cancel Subscription” or a similar phrase.
- Click on the cancellation link or button to initiate the cancellation process.
- LinkedIn may ask for additional confirmation before canceling your subscription. Read through the prompts carefully and follow the provided instructions to confirm the cancellation.
It’s important to note that canceling your Premium subscription will not affect your free LinkedIn account. You will still be able to access all the basic features and functionality of LinkedIn.
By canceling your Premium subscription, you will no longer be billed for the Premium features, and your access to those features will end at the end of your current billing cycle. Make sure to take note of any remaining time on your Premium subscription and utilize the features until the end of your billing period.
Congratulations! You have successfully canceled your LinkedIn Premium subscription. However, there are a few more steps to complete to ensure the cancellation is processed correctly and reflected in your account settings, which we will cover in the next step.
Step 5: Provide a Reason for Canceling (Optional)
When canceling your LinkedIn Premium subscription, you may have the option to provide a reason for your cancellation. While this step is typically optional, LinkedIn may request feedback to understand why users choose to cancel their Premium subscriptions. Here’s what you need to know:
- After initiating the cancellation process, LinkedIn might prompt you to select a reason for canceling from a list of options. These reasons can include financial considerations, underutilization of features, job change, or other personal preferences.
- If you wish to provide feedback, carefully consider your reason for canceling and select the most appropriate option from the provided list. LinkedIn values user input and uses it to improve their services based on user insights and feedback.
- If you prefer not to provide a reason or if the platform does not prompt you for feedback, you can simply proceed with the cancellation process without providing additional information.
Remember that sharing your reason for canceling is entirely optional. You can choose to provide feedback or not based on your comfort and the level of detail you wish to share with LinkedIn.
Once you have completed the optional step of providing a reason (or skipping it), you can move on to the next step to confirm the cancellation and ensure it is reflected in your account settings.
Step 6: Confirm Cancellation
After selecting your reason (if prompted) for canceling your LinkedIn Premium subscription, the next step is to confirm the cancellation. This step ensures that your subscription is officially canceled and your access to Premium features will end at the designated date. Follow these steps to confirm the cancellation:
- Once you have provided a reason (if applicable), LinkedIn will display a confirmation message summarizing your cancellation request.
- Read through the confirmation message carefully to ensure all the details are correct and aligned with your intention to cancel your Premium subscription.
- If you are satisfied with the information provided, click on the “Confirm Cancellation” or a similar button to proceed.
- LinkedIn may present you with a final confirmation screen, reiterating that your Premium subscription will end at the end of the current billing cycle.
Confirming the cancellation is crucial to ensure that your request is processed accurately and that your access to Premium features will cease at the appropriate time. Take a moment to double-check the details and proceed only if you are sure about canceling your subscription.
Upon confirming the cancellation, you will have successfully completed the primary steps to cancel your LinkedIn Premium subscription. However, there are a few additional steps you should take to verify and confirm the cancellation in your account settings, which we will cover in the next step.
Step 7: Verify Cancellation in Your Account Settings
After confirming the cancellation of your LinkedIn Premium subscription, the final step is to verify and confirm the cancellation in your account settings. This step ensures that your Premium subscription has been successfully canceled and that your account reflects the changes. Follow these steps to verify the cancellation:
- Navigate to your LinkedIn account settings by clicking on the “Me” icon located at the top right corner of the navigation bar.
- In the drop-down menu, select “Settings & Privacy” or a similar option. This will open the account settings page.
- Within the account settings page, locate the section related to your subscription or billing.
- Review the subscription details or billing information to confirm that the Premium subscription has been canceled.
- If the cancellation is reflected accurately, you can consider your LinkedIn Premium subscription successfully canceled.
It’s essential to verify the cancellation in your account settings to ensure that there are no discrepancies or issues. Verifying the cancellation also provides peace of mind, knowing that you will no longer be billed for the Premium features.
If you encounter any difficulties or if your account settings do not reflect the cancellation, you may need to contact LinkedIn support for further assistance.
With the confirmation of the cancellation in your account settings, you have completed all the necessary steps to cancel your LinkedIn Premium subscription successfully. Enjoy using the free features and continue building your professional network on LinkedIn!
Additional Steps for Premium Business Subscriptions
If you have a LinkedIn Premium Business subscription, there are a few additional steps you’ll need to take to ensure the cancellation is processed correctly. Follow these steps:
- Contact your LinkedIn account manager or the designated representative for your organization’s Premium Business subscription. They will be able to guide you through the cancellation process and provide any required assistance.
- Review the terms and conditions of your Premium Business subscription to understand the cancellation policies specific to your organization’s agreement with LinkedIn.
- Provide the necessary notice period, if required. Some Premium Business subscriptions may have a specific notice period that needs to be adhered to for cancellation requests.
- Work with your account manager to initiate the cancellation of your Premium Business subscription. They will assist you with the necessary steps and ensure a smooth transition.
- Verify the cancellation in your account settings, following the same steps as mentioned in the previous section. Ensure that your Premium Business subscription is accurately reflected as canceled.
Canceling a Premium Business subscription may involve additional considerations due to the nature of the agreement between LinkedIn and your organization. It’s important to communicate with your LinkedIn account manager or designated representative to ensure a seamless cancellation process.
By following these additional steps, you can effectively cancel your LinkedIn Premium Business subscription and make any necessary adjustments to your organization’s billing and usage.
Remember to stay in communication with your LinkedIn representative for any further questions or clarifications during the cancellation process.