
What is Touch Calibration?
Touch calibration is a process that allows you to adjust and optimize the accuracy of a touch-enabled display on your Windows device. Whether you’re using a laptop, tablet, or a touchscreen monitor, calibration ensures that the touch gestures and inputs are properly registered and translated by the device.
When you purchase a new device, the touch screen might not be perfectly calibrated out of the box. Factors like manufacturing variances, software updates, and wear and tear can affect the touch responsiveness. This can result in misaligned touch targets, delayed responses, or inaccurate input recognition.
By calibrating your touch screen, you can improve its overall performance and accuracy. The calibration process involves aligning the touch input with the visual elements on the display, ensuring that your taps, swipes, and other touch gestures are accurately registered by the device.
Touch calibration is particularly essential in scenarios where precise touch input is required, such as when using drawing or design applications, playing games that rely on swipe gestures, or working with on-screen keyboards. It helps eliminate frustration and enhances your overall user experience with the device.
Windows provides a built-in touch calibration tool that allows you to adjust various touch settings on your device. By following a few simple steps, you can easily calibrate your touch screen to achieve optimal sensitivity and accuracy.
In the next sections, we will explore how to access and use the touch calibration tool in Windows.
Why Calibrate your Touch Screen?
Calibrating your touch screen is crucial for several reasons. Let’s take a closer look at why you should consider calibrating your touch screen device:
1. Accuracy: Over time, your device’s touch screen may lose its accuracy due to factors like software updates, wear and tear, or even accidental screen damage. Calibrating your touch screen helps ensure that your inputs are accurately registered, enhancing your overall user experience.
2. Precision: Certain tasks require precise touch input, such as drawing, selecting small icons or text, or playing touch-based games. By calibrating your touch screen, you can fine-tune its responsiveness and achieve better precision in these tasks.
3. Responsiveness: In some cases, you may find that your touch screen is either too sensitive or not sensitive enough. This can result in unintended actions or missed inputs. Calibrating the touch screen allows you to adjust its sensitivity to your liking, making it more responsive to your touch gestures.
4. Alignment: Misalignment between the visual elements on the screen and the touch input can be frustrating. Calibrating the touch screen ensures that the touch targets are accurately aligned with the on-screen elements, preventing misinterpreting your touch inputs.
5. Eliminate Ghost Touches: Ghost touches occur when the touch screen registers false touches or inputs without any physical contact. This can be due to various factors, including dust, debris, or software glitches. Calibrating your touch screen can help minimize or eliminate these ghost touches, leading to a more reliable and accurate touch experience.
6. User Comfort: A properly calibrated touch screen improves user comfort by reducing the need to repeat touch gestures, swipe multiple times, or tap harder to get a response. It ensures that your interactions with the device are natural and effortless.
7. Optimal Performance: By calibrating your touch screen, you optimize its performance and extend its lifespan. Proper calibration helps maintain the responsiveness and accuracy of the touch screen over time, minimizing the need for frequent repairs or replacements.
How to Access the Touch Calibration Tool
To access the touch calibration tool in Windows, follow these steps:
1. Open the Control Panel: Click on the Start menu, type “Control Panel” in the search bar, and select it from the search results.
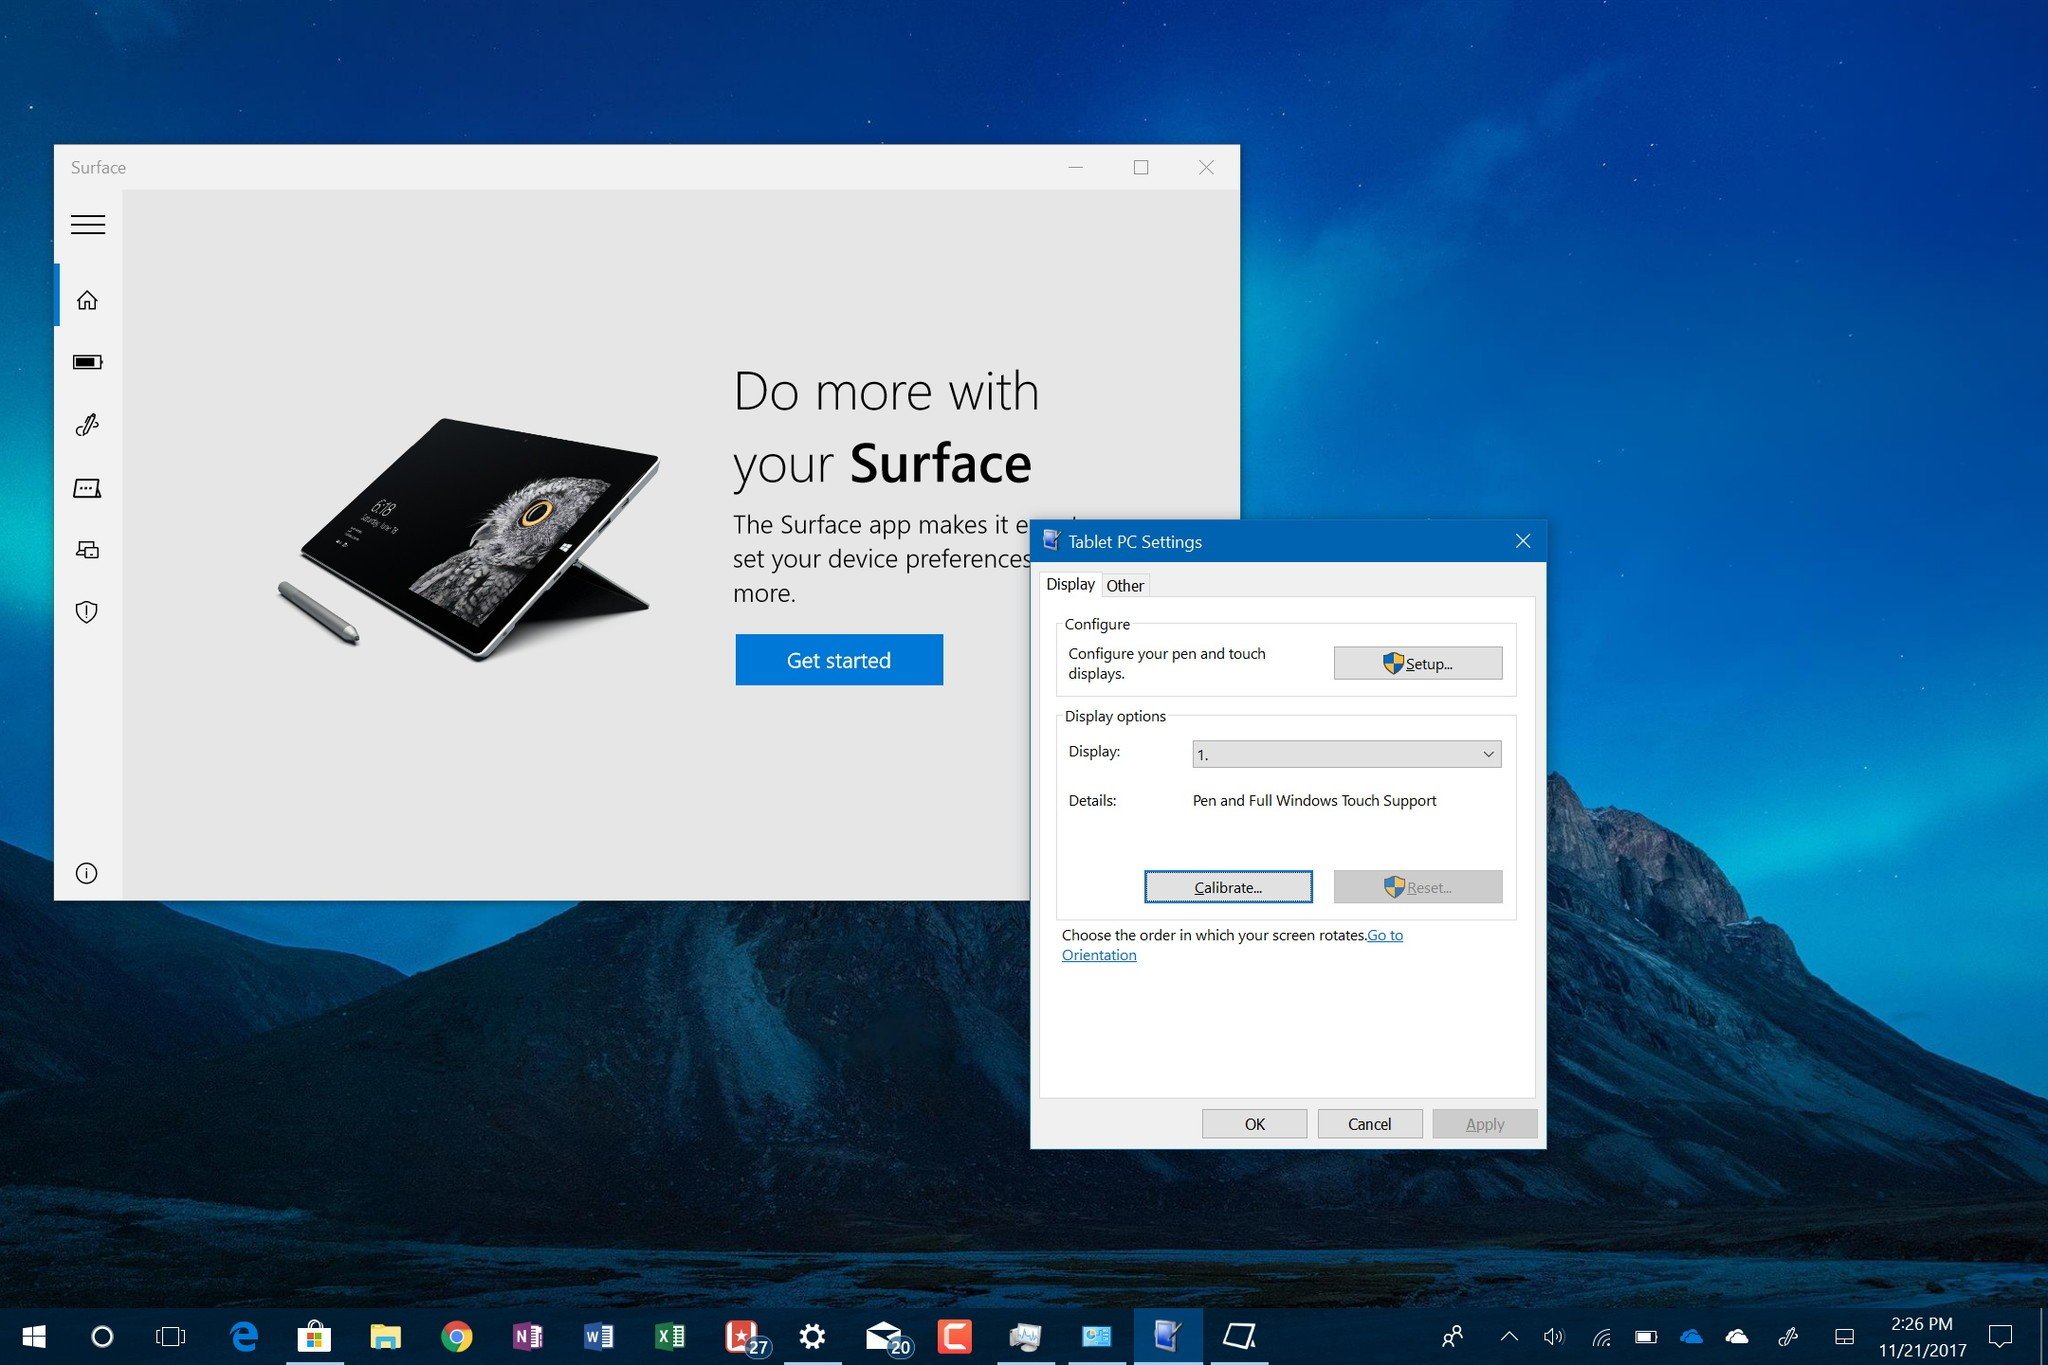
2. Navigate to the Pen and Touch Settings: In the Control Panel, locate and click on the “Hardware and Sound” category. Under this category, you will find the “Tablet PC Settings” option. Click on it to open the Tablet PC Settings window.
3. Open the Touch Calibration Tool: In the Tablet PC Settings window, you will find a “Calibrate” button under the “Setup” section. Click on this button to launch the touch calibration tool.
4. Choose the Touch Display: If you have multiple touch-enabled displays connected to your Windows device, the touch calibration tool will prompt you to choose the display you want to calibrate. Select the appropriate display by touching it or using the mouse.
5. Follow the On-Screen Instructions: Once you have selected the display, the touch calibration tool will provide on-screen instructions to guide you through the calibration process. Typically, this involves tapping specific targets or drawing lines on the screen using your finger or stylus.
6. Complete the Calibration: Follow the prompts and complete the calibration process as instructed by the tool. Once you have finished, the touch calibration settings will be applied, and your touch screen will be calibrated according to your inputs.
7. Test the Calibration: After calibrating your touch screen, it is recommended to test its accuracy and responsiveness. Open various applications or websites that require touch input and verify if the touch gestures and actions are correctly registered.
Follow these steps whenever you need to access the touch calibration tool in Windows. Keep in mind that the exact steps may vary slightly depending on the version of Windows you are using.
Calibrating the Touch Screen
Now that you’ve accessed the touch calibration tool, it’s time to calibrate your touch screen. Follow these steps to calibrate your touch screen in Windows:
1. Choose the Calibration Method: Depending on your version of Windows, you may have different calibration methods available. The most common calibration methods include tapping specific targets or drawing lines on the screen. Select the appropriate method based on the instructions provided by the touch calibration tool.
2. Follow the On-Screen Instructions: The touch calibration tool will provide on-screen instructions to guide you through the calibration process. Pay attention to these instructions and follow them carefully. Typically, you will be prompted to tap on specific targets or draw lines in specific areas of the screen.
3. Be Precise and Accurate: When calibrating your touch screen, ensure that your taps and touch inputs are precise and accurate. Take your time to align your finger or stylus with the designated targets or draw lines as smoothly as possible. This will help improve the accuracy of the calibration.
4. Repeat the Process (if necessary): In some cases, the touch calibration tool may offer the option to repeat the calibration process multiple times for better accuracy. If you’re not satisfied with the initial calibration results, consider repeating the process to fine-tune the touch screen settings.
5. Save the Calibration Settings: Once you have completed the calibration process, the touch calibration tool will save the settings automatically. These settings will be applied to your touch screen, optimizing its responsiveness and accuracy.
6. Test the Calibration: After calibrating the touch screen, it is essential to test its performance. Open applications or websites that require touch input and verify if the touch gestures, taps, and swipes are accurately registered. If you notice any issues, consider recalibrating the touch screen or adjusting the touch sensitivity settings.
By following these steps, you can calibrate your touch screen and ensure that it functions optimally, providing accurate and responsive touch input.
Adjusting the Touch Screen’s Responsiveness
In addition to calibrating the touch screen, you may also need to adjust its responsiveness to suit your preferences. Here’s how you can adjust the touch screen’s responsiveness in Windows:
1. Open the Touch Settings: Click on the Start menu and select “Settings.” In the Settings window, click on the “Devices” category, and then choose “Touchpad” or “Touch” (depending on your version of Windows).
2. Adjust the Touch Sensitivity: Look for an option or slider that allows you to adjust the touch sensitivity. Moving the slider to the left decreases the sensitivity, making the touch screen less responsive to light touches. Moving it to the right increases the sensitivity, making the touch screen more responsive to gentle touches.
3. Test the Sensitivity: After adjusting the touch sensitivity, test it by using various touch gestures and actions on your touch screen. Pay attention to how the screen responds to your inputs. If the touch screen is still too sensitive or not sensitive enough, go back to the settings and make further adjustments as needed.
4. Consider Touchpad Settings: If you’re using a device with a touchpad in addition to a touch screen, you may also find touchpad settings in the same Touch settings menu. These settings can affect the touch responsiveness as well. Explore the touchpad settings and adjust them to your liking for an optimal touch experience.
5. Test Different Gestures: Try different touch gestures, such as swiping, dragging, or pinch-to-zoom, to ensure that the touch screen responds accurately and smoothly. If you notice any issues or inconsistencies, fine-tune the touch sensitivity settings accordingly.
6. Keep Firmware and Drivers Updated: Regularly check for firmware updates and drivers for your device. Manufacturers often release updates that improve touch screen responsiveness and address common issues. Installing these updates can enhance the overall performance of your touch screen.
By adjusting the touch screen’s responsiveness, you can customize it to your liking and optimize the touch input experience on your Windows device. Experiment with different touch sensitivity settings until you find the perfect balance that suits your needs.
Additional Tips for Touch Screen Calibration
While calibrating your touch screen, consider these additional tips to ensure a successful calibration process and improve your touch screen’s performance:
1. Clean the Touch Screen: Before starting the calibration process, make sure to clean the touch screen surface to remove any dirt, oil, or smudges. A clean screen ensures better accuracy during calibration and improves touch responsiveness.
2. Use a Stylus: If your device supports it, consider using a stylus during the touch calibration. A stylus provides more precise and controlled input, allowing for more accurate calibration results.
3. Remove Screen Protectors: If you have a screen protector applied to your touch screen, temporarily remove it before performing the calibration. Screen protectors can interfere with touch sensitivity and affect the accuracy of the calibration process.
4. Perform Calibration in a Stable Environment: To achieve the best results, perform the touch screen calibration in a stable environment with minimal external factors. Avoid areas with excessive glare, strong airflow, or fluctuating temperature, as these can affect touch sensitivity.
5. Regularly Recalibrate: Over time, the touch screen’s performance may change due to various factors. Therefore, it is recommended to recalibrate the touch screen periodically or whenever you notice a decline in responsiveness.
6. Avoid Excessive Pressure: When performing the calibration, apply gentle and consistent pressure to the touch screen. Avoid pressing too hard or using excessive force, as it may lead to inaccurate calibration results or potential damage to the screen.
7. Consider Professional Calibration: If you’re experiencing persistent issues with your touch screen despite calibration attempts, it may be worth considering professional calibration or consulting the device manufacturer for assistance.
By following these additional tips, you can enhance the calibration process and optimize the touch screen performance on your Windows device. A properly calibrated touch screen ensures accurate touch input and a smooth user experience.