
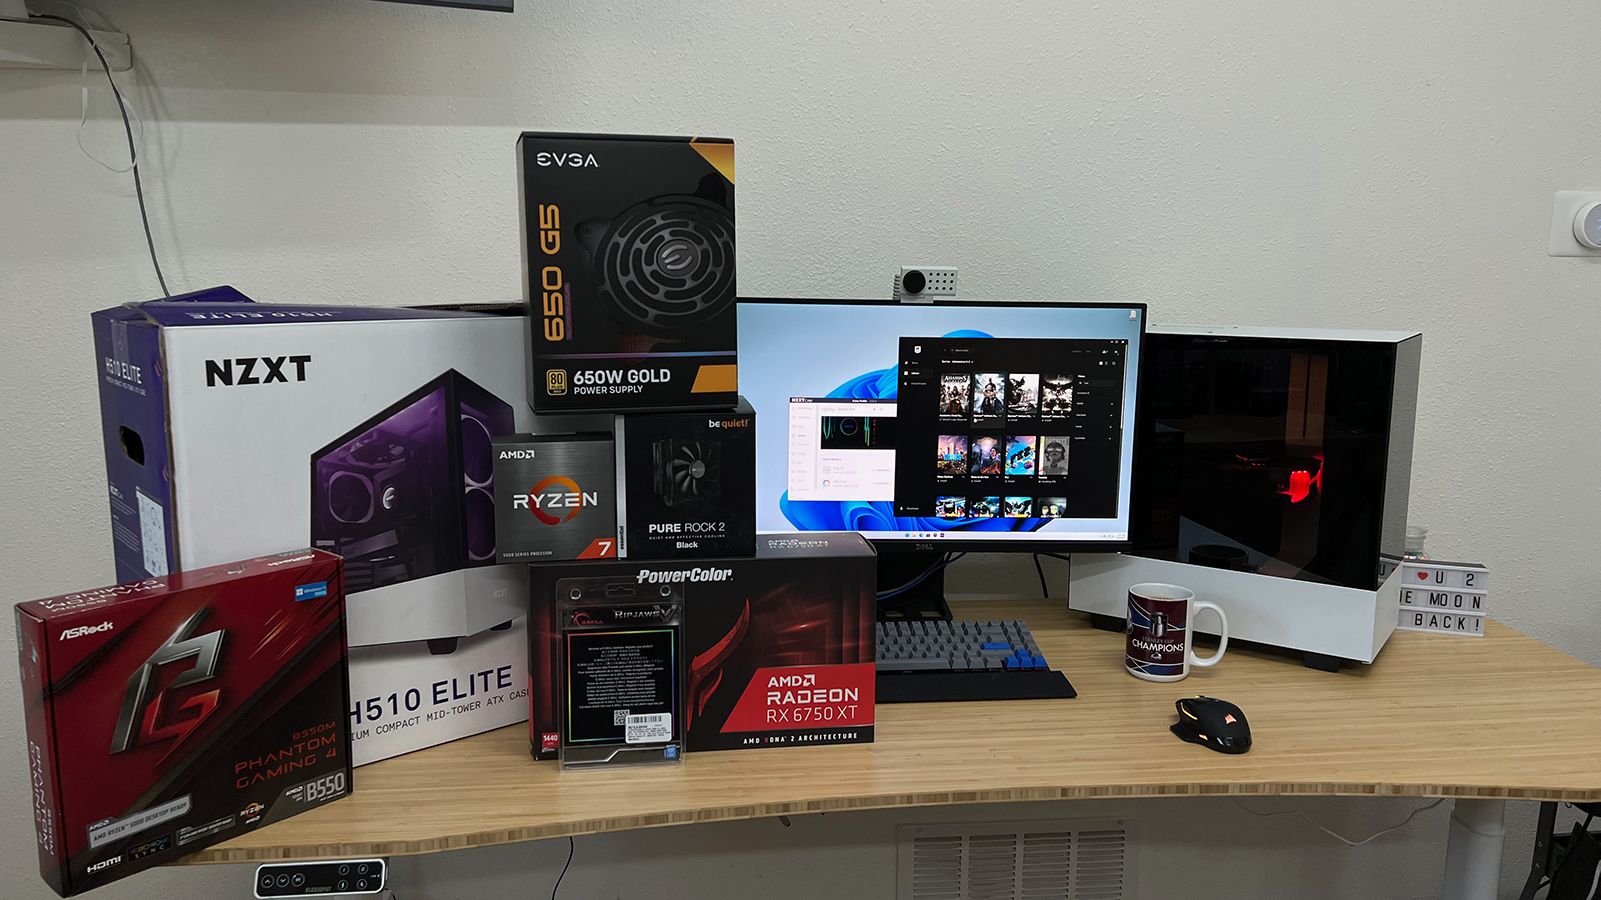
Choosing the Right Components
Building a desktop computer starts with selecting the right components. Your choices will determine the performance, functionality, and longevity of your computer. Here are the essential components to consider:
- Processor (CPU): This is the brain of your computer and determines its speed and processing power. Intel and AMD are the two main manufacturers. Consider factors such as clock speed, number of cores, and compatibility with other components.
- Motherboard: The motherboard connects and allows communication between all the components. Ensure compatibility with the processor, RAM, and other devices. Consider features such as expansion slots, USB ports, and support for overclocking.
- RAM: Random Access Memory (RAM) is used for temporary storage while running applications. Choose the type (DDR4 is the latest), capacity, and speed based on your needs, such as gaming, video editing, or multitasking.
- Storage Drives: Select a solid-state drive (SSD) for faster boot times and program loading, along with a traditional hard disk drive (HDD) for ample storage. Consider capacity, speed, and interface (SATA or NVMe).
- Graphics Card: If you plan to play games or work with graphics-intensive applications, invest in a dedicated graphics card. Look at factors like VRAM capacity, clock speed, and compatibility with your monitor.
- Power Supply Unit (PSU): Choose a PSU with sufficient wattage, efficiency rating (80 Plus Bronze or higher), and modular cables for easier cable management.
- Case: Select a case that supports your chosen motherboard form factor, offers good airflow and cable management, and has enough space for your components. Consider factors like aesthetics, expansion slots, and cooling options.
Research and compare different brands and models for each component. Take into account your budget, intended use, future upgrade options, and compatibility considerations.
Remember, choosing the right components is crucial for a well-balanced and future-proof desktop computer. Spend some time on thorough research to make informed decisions and maximize your computer’s performance.
Gathering the Required Tools
Before you begin the assembly process, it’s important to gather all the necessary tools. Having the right tools will make the process smoother and ensure that you can complete the build without any delays. Here are the tools you’ll need:
- Screwdriver set: A set of screwdrivers with different types and sizes of heads will be essential for securing components and attaching screws.
- Thermal paste: If your CPU cooler doesn’t come with pre-applied thermal paste, you’ll need to apply a small amount to ensure proper heat transfer between the processor and cooler.
- Cable ties: These handy ties will help you manage and secure cables, keeping your build clean and organized.
- Anti-static wristband: An anti-static wristband will prevent the buildup of static electricity and protect your components from potential damage caused by electrostatic discharge.
- Tweezers: Tweezers are useful for handling small screws or other tiny components that can be difficult to manipulate with your fingers.
- Flashlight: A flashlight will come in handy when working in darker areas of your case or when you need to get a better view of small connectors.
- Scissors: Scissors are useful for cutting cable ties and trimming excess cables.
- CPU socket cover: Some motherboards come with a protective cover for the CPU socket. Keep this cover in a safe place to avoid losing it.
Double-check your toolset before starting the build process to ensure you have everything you need. Having all the necessary tools at hand will save you time and frustration and make the assembly process much more enjoyable.
Installing the Motherboard
The motherboard is the foundation of your desktop computer, and properly installing it is crucial for the rest of the assembly process. Here’s a step-by-step guide on how to install the motherboard:
- Prepare the case: Start by removing the side panel of your computer case. Place the case on a flat surface with the open side facing up. Ensure that the case’s motherboard standoffs align with the screw holes on the motherboard.
- Align the motherboard: Carefully position the motherboard in the case, making sure that the I/O panel aligns with the corresponding holes or shield on the back of the case. Check that all the screw holes on the motherboard are aligned with the standoffs in the case.
- Secure the motherboard: Using the screws provided with your motherboard or included with the case, insert and tighten the screws into the standoffs. Start with the corners, and then gradually work your way around the motherboard. Avoid overtightening the screws, as this can cause damage.
- Connect cables: Connect the necessary cables to the motherboard, including the power supply cables, SATA cables for storage drives, and front panel cables (such as power button, reset button, and USB connections).
It’s important to note that each motherboard may have slight variations in terms of standoffs, screw holes, and cable connections. Refer to the motherboard’s manual to ensure proper installation and cable placement.
Once the motherboard is securely installed, you can proceed to the next steps of the building process. Make sure to handle the motherboard with care, avoiding unnecessary force or bending as it is a delicate component.
Mounting the Processor and CPU Cooler
The processor (CPU) and CPU cooler are vital components of your desktop computer that require proper installation for optimal performance and heat dissipation. Here’s how to mount the processor and CPU cooler:
- Prepare the motherboard: Carefully remove the motherboard from its anti-static packaging and place it on a clean, non-static surface. Locate the CPU socket, usually found near the center of the motherboard. Lift the retention arm to unlock the socket.
- Install the processor: Remove the CPU from its packaging, taking care to hold it by the edges without touching the pins or the sensitive contact points beneath. Align the golden triangle or corner indicator on the CPU with the corresponding triangle or indicator on the CPU socket. Gently lower the CPU straight into the socket, ensuring it sits flat. Do not apply any force or wiggle the CPU.
- Apply thermal paste: If your CPU cooler doesn’t have pre-applied thermal paste, apply a small amount (about the size of a pea) to the center of the CPU. Use a spreading tool, such as a credit card or the provided thermal paste applicator, to evenly spread a thin layer over the CPU surface.
- Mount the CPU cooler: Carefully align the cooler’s base with the CPU and gently lower it onto the processor. Ensure that the mounting brackets or screws align with the corresponding holes on the motherboard. Once aligned, secure the cooler in place using the provided screws or brackets. Tighten the screws gradually in a diagonal pattern to ensure even pressure.
- Connect the CPU cooler fan: Locate the CPU fan header on the motherboard and connect the CPU cooler fan’s power cable to it. Ensure a secure connection to provide cooling to the CPU.
It’s important to refer to the motherboard and CPU cooler’s manuals for any specific instructions or mounting techniques, as they may vary depending on the model. Take care when handling the CPU and cooler to avoid static discharge or accidental damage.
Once the processor and CPU cooler are installed, you can proceed to the next steps of the build, such as installing the RAM and storage drives.
Installing the RAM
RAM (Random Access Memory) is a crucial component for your desktop computer, as it allows for quick data access and multitasking capabilities. Here’s how you can install the RAM modules:
- Prepare the motherboard: Locate the RAM slots on the motherboard, usually positioned near the CPU socket. Unlock the RAM slots by pushing down on the latches at either end of the slots.
- Align the RAM module: Take the RAM module and align the notch on the bottom edge with the notch in the RAM slot. The module will only fit in one orientation, so make sure it’s placed correctly.
- Insert the RAM module: Once aligned, carefully insert the RAM module into the slot at a slight angle, with the gold contacts facing downward. Apply gentle and even pressure until the module is fully seated in the slot. You’ll hear a satisfying click as the latches lock the module into place.
- Repeat for additional RAM modules: If you have multiple RAM modules, repeat the process for the remaining slots, following the motherboard’s recommended installation order. It’s usually recommended to install RAM modules in alternating slots to maximize performance in dual-channel mode.
It’s essential to use the correct type and speed of RAM that is compatible with your motherboard. Consult the motherboard’s manual or manufacturer’s website to determine the supported RAM specifications and maximum capacity.
Once the RAM modules are installed, take a moment to double-check that they are securely seated in the slots. The latches should be fully engaged, and the RAM modules should not move when lightly nudged.
Please note that some high-end motherboards may require additional steps or configurations for optimal RAM performance, such as enabling XMP profiles in the BIOS. Refer to your motherboard’s manual for specific instructions if necessary.
With the RAM properly installed, you can proceed to the next steps of the build, such as installing the storage drives.
Installing the Storage Drives
Storage drives are essential for storing and accessing your data on a desktop computer. Whether you’re using traditional hard disk drives (HDDs) or solid-state drives (SSDs), here’s how to install them:
- Identify the drive bays: Locate the drive bays in your computer case. These are usually located in the front or side of the case and have mounting brackets or trays where the drives will be installed.
- Prepare the drive: If you’re using an SSD, it typically comes in a 2.5-inch form factor, while HDDs usually come in 3.5-inch form factor. Depending on your case and drive bays, you may need to use mounting brackets or adapter brackets to ensure a secure fit. If needed, screw the drive into the brackets, following the provided instructions.
- Insert the drive into the bay: Once the drive is prepared, carefully slide it into the drive bay, ensuring that the connectors or SATA interface are facing the back of the case. Align the screw holes on the drive with the holes in the drive bay and secure it in place using the provided screws.
- Connect the SATA cables: Locate the SATA data and power cables. Connect one end of the SATA data cable to the SATA port on the motherboard and the other end to the corresponding SATA port on the drive. Connect the SATA power cable from the power supply to the power connector on the drive.
- Secure the cables: Use cable ties or Velcro straps to manage the cables and ensure they are neatly organized and out of the way of other components.
Repeat the above steps for each additional storage drive you wish to install. It’s important to note that some cases may have additional drive bay configurations, such as removable drive cages or hot-swappable bays. Refer to your case’s manual for specific guidelines and configurations.
As you install the drives, ensure that they are properly connected and seated securely in the drive bays. This will prevent any unwanted movement or disconnections while the computer is in use.
With the storage drives successfully installed, you can proceed to the next steps of the build, such as installing the power supply.
Installing the Power Supply
The power supply unit (PSU) is responsible for providing the necessary electrical power to your desktop computer. Installing the PSU correctly is crucial for the overall functionality and safety of your system. Here’s how to install the power supply:
- Select the appropriate location: Determine where the power supply will be installed in your case. Most cases have a dedicated space at the top or bottom, typically with a ventilation grille and mounting screw holes.
- Position the power supply: Carefully slide the power supply into the designated area, keeping in mind that the power supply’s fan should face either downward or towards the case’s ventilation area. Ensure that the screw holes on the power supply align with the mounting holes in the case.
- Secure the power supply: Once in position, use the provided screws to secure the power supply to the case. Tighten the screws until the power supply is firmly and securely attached.
- Connect the power cables: Identify the necessary power cables required for your components, such as the motherboard, CPU, storage drives, and graphics card. Connect the appropriate cables from the power supply to the corresponding connectors on each component. Ensure a secure and proper connection, taking care not to force any cables.
- Cable management: Neatly organize the power cables within the case to improve airflow and aesthetics. Use cable ties or Velcro straps to secure and bundle the cables together, keeping them away from any fans or components that generate heat.
Double-check that all power connections are properly seated and secured. Ensure that no cables are obstructing any fans or components, and that the power supply cables are routed in a way that allows for efficient cable management.
It’s important to note that the wattage of the power supply should be sufficient to handle the power requirements of your components. Refer to the manufacturer’s recommendations and consider any future upgrades when selecting a power supply.
With the power supply installed and connected, you are one step closer to completing your desktop build. The next steps will involve connecting the front panel cables and installing other components such as the graphics card and additional PCI cards.
Connecting the Power Supply Cables
Connecting the power supply cables is a crucial step in building your desktop computer. Properly connecting the power supply cables ensures that your components receive the necessary power to operate efficiently. Follow these steps to connect the power supply cables:
- Motherboard power: Locate the main motherboard power connector called the 24-pin ATX connector. Connect this cable from the power supply to the corresponding 24-pin ATX power socket on the motherboard. Ensure a firm connection, making sure to align the notches on the connector and socket.
- CPU power: Locate the CPU power connector on the motherboard. This is usually an 8-pin or 4+4-pin connector. Connect the CPU power cable from the power supply to the CPU power socket on the motherboard. Again, ensure a secure connection and align any notches or ridges.
- Storage drives: Identify the SATA power cables from the power supply. Connect these cables to the SATA power connectors on your storage drives, such as HDDs or SSDs. Ensure a snug and secure connection, with the L-shaped connector properly aligned.
- Graphics card: If you have a dedicated graphics card, locate the PCIe power connector(s) on the card. Connect the PCIe power cable(s) from the power supply to the graphics card. Depending on the card, this may require one or more 6-pin or 8-pin connectors. Ensure a secure connection, aligning the notches on the connectors and sockets.
- Other components: If you have any additional components that require power, such as fans, RGB lighting, or other peripherals, connect the corresponding power cables from the power supply to those components as per their specific requirements.
As you connect each power cable, ensure that they are properly and securely inserted into the corresponding connectors. Take care not to use excessive force or bend the cables sharply, as this could damage the connectors or cables themselves.
Once all the power supply cables are connected, perform a visual inspection to ensure that everything is properly connected and no cables are obstructing any components or fans. Ensure that cables are neatly organized and secured with cable ties or Velcro straps to improve airflow and prevent any cable interference.
With the power supply cables properly connected, you are ready to proceed with connecting the front panel cables and installing other components of your desktop computer.
Connecting the Front Panel Cables
Connecting the front panel cables is an important step in the assembly of your desktop computer. These cables control the power button, reset button, status LEDs, USB ports, and audio jacks on the front of your case. Here’s how to connect the front panel cables:
- Refer to the motherboard manual: Consult the manual that came with your motherboard for the specific layout and labeling of the front panel connectors. The exact configuration may vary depending on the motherboard model.
- Identify the front panel connectors: Locate the front panel connectors on the bottom-right corner of the motherboard. These connectors are usually labeled with abbreviations such as PWR_SW (power switch), RST_SW (reset switch), HDD_LED (hard drive activity LED), PWR_LED (power LED), etc. Each connector typically consists of two or more pins.
- Connect the power switch: Connect the power switch cable from the front panel to the PWR_SW pins on the motherboard. It does not matter which way the connector is inserted; it will work in either orientation.
- Connect the reset switch: If your case has a reset switch, connect its cable to the RST_SW pins on the motherboard.
- Connect the LED indicators: Connect the cables for the HDD_LED and PWR_LED to their respective pins on the motherboard. Pay close attention to the polarity, usually indicated by a small arrow or “+” sign on the connector. Ensure that the positive (+) and negative (-) pins are correctly aligned.
- Connect USB and audio connectors: Connect the USB and audio cables from the front panel of the case to their corresponding headers on the motherboard. These connectors are often labeled and color-coded for easy identification.
Double-check that all front panel cables are connected securely and oriented correctly. Take extra care when connecting the LED cables to ensure proper polarity, as reversing the connections can prevent the LEDs from functioning properly.
Once the front panel cables are properly connected, you can proceed to the next steps of the build, such as installing the graphics card, additional PCI cards, or cooler fans.
Installing the Graphics Card
The graphics card is a vital component for gaming, video editing, and other graphics-intensive tasks on your desktop computer. To install your graphics card, follow these steps:
- Prepare the case: Check if there is a dedicated expansion slot available in your case for the graphics card. Remove the corresponding slot cover by unscrewing it from the case.
- Locate the PCIe slot: Find the appropriate PCIe slot on the motherboard that matches the size and type of your graphics card. Typically, the PCIe x16 slot is used for graphics cards.
- Align the graphics card: Position the graphics card above the PCIe slot, ensuring that the gold connectors on the bottom of the card align with the slot. Make sure any braces on the case or motherboard are pushed away to allow for proper insertion.
- Insert the graphics card: Carefully and firmly push the graphics card into the PCIe slot until it is fully seated. You may need to apply slight pressure, but avoid using excessive force.
- Secure the graphics card: Once the graphics card is inserted, secure it to the case. Depending on your case, you may need to screw it in using the screws provided, or latch it into place with a retention bracket.
- Connect power to the graphics card: If your graphics card requires additional power, locate the PCIe power connectors on the card. Connect the appropriate PCIe power cables from the power supply to the connectors on the graphics card. Ensure a firm and secure connection.
- Double-check connections: Ensure that the graphics card is fully seated in the PCIe slot and that all power connections are secure. Additionally, check if any cables or other components are obstructing the fan or other parts of the graphics card.
It’s important to note that some graphics cards may require an additional bracket or support to prevent sagging. Refer to the manufacturer’s instructions or your case’s manual for any specific requirements related to graphics card installation.
With the graphics card properly installed, you can proceed to install any additional PCI cards or connect the audio and USB ports as necessary.
Installing Additional PCI Cards
If you need to expand your desktop computer’s capabilities with additional PCI cards, such as a sound card, network card, or capture card, follow these steps to install them:
- Prepare the case: Check for available PCIe slots on your motherboard. Remove the appropriate slot cover(s) from the case by unscrewing them.
- Align the PCI card: Position the PCI card above the PCIe slot, making sure that the gold connectors on the bottom of the card align with the slot. Adjust any braces on the case or motherboard to allow for proper insertion.
- Insert the PCI card: Carefully and firmly push the PCI card into the PCIe slot until it is fully seated. Apply gentle pressure, but avoid using excessive force.
- Secure the PCI card: Once the card is inserted, secure it to the case by using the screws provided or latching it into place with a retention bracket, depending on your case and card.
- Connect power or data cables: If your PCI card requires additional power or data cables, connect them to the appropriate connectors on the card. Ensure a firm and secure connection.
- Double-check connections: Ensure that the PCI card is properly seated in the PCIe slot and that all power or data cables are securely connected. Verify that no cables or components are obstructing the card or any other parts of your system.
It’s important to note that different PCI cards may have specific installation requirements or recommendations. Refer to the manufacturer’s instructions or the documentation that came with the card for any additional guidelines.
Once all the additional PCI cards are installed, ensure that they are securely seated and all connections are properly made. You can then proceed to connect the audio and USB ports if necessary, or install the cooler fans for optimal cooling.
Connecting the Audio and USB Ports
Connecting the audio and USB ports is an important step in the assembly of your desktop computer. These connections allow you to utilize the audio jacks and USB ports located on the front or back panel of your case. Follow these steps to connect the audio and USB ports:
- Audio connections: Locate the HD Audio or AC’97 audio header on the motherboard. Consult the motherboard manual to determine the specific header. Connect the corresponding audio cable from the front panel of the case to the audio header on the motherboard. Ensure a secure and proper connection.
- USB connections: Identify the USB headers on the motherboard. There are usually multiple USB headers available, labeled as USB 2.0 or USB 3.0. Connect the USB cables from the front panel of the case to the corresponding USB headers on the motherboard. Note that USB 2.0 headers are typically nine pins while USB 3.0 headers have additional pins. Ensure proper alignment and connection.
When connecting the audio and USB cables, be mindful of the polarity and pin alignment. Consult the motherboard manual for the correct orientation, as improper connection may result in malfunctioning or non-functional audio and USB ports.
After connecting the audio and USB ports, test them to ensure they are functioning correctly. Connect a pair of headphones or speakers to the audio jack and test the audio output. Additionally, plug in a USB device, such as a flash drive or keyboard, into the USB port to confirm its functionality.
It’s important to note that not all cases or motherboards have the same audio and USB port configurations. Refer to the case manual and motherboard documentation for precise instructions and information regarding the audio and USB connections.
With the audio and USB ports successfully connected, you can proceed to install the cooler fans for effective heat management within your system.
Installing the Cooler Fans
Installing cooler fans is an important step in ensuring proper airflow and heat management within your desktop computer. Cooler fans help dissipate heat generated by the processor (CPU) and other components, preventing overheating and maintaining optimal performance. Here’s how to install the cooler fans:
- Identify fan mounts: Determine the available fan mounts in your case. Typically, there are fan mount locations on the front, rear, top, and side panels of the case.
- Position the fans: Decide where you want to install the fans for optimal airflow. Consider placing intake fans at the front or bottom of the case to draw in cool air, and exhaust fans at the rear or top to expel hot air. Follow your case’s airflow design and guidelines to ensure proper cooling.
- Align the fans: Position each fan so that the screw holes on the fan’s frame align with the corresponding fan mount holes in the case. Ensure that the airflow direction indicated on the fan (usually an arrow) is oriented correctly to either intake or exhaust air.
- Screw in the fans: Secure the fans in place by using the provided screws or any compatible screws that fit through the fan mount holes. Insert a screw and tighten it partially on one corner, then proceed to the diagonally opposite corner. Repeat this pattern with the remaining screws until all corners are securely fastened.
- Connect fan cables: Locate the fan headers on your motherboard. These headers provide power to the fans. Connect the fan cables to the appropriate fan headers on the motherboard. Ensure a firm and proper connection, aligning any notches or ridges on the connectors.
It’s important to note that some fans may require additional power connectors, such as Molex or SATA power connectors. In such cases, connect the necessary power cables securely from the power supply to the fan’s power connectors.
Once the fans are installed, double-check that they spin freely and are securely fastened. Ensure that no cables or obstructions block the fan blades or disrupt the airflow path.
Proper placement and installation of cooler fans contribute to improved thermal performance and prolong the lifespan of your components. With the fans installed, you can proceed to the next steps of the build, such as cable management and installing the operating system.
Cable Management
Cable management is an essential step in the assembly of your desktop computer. Properly organizing and routing the cables not only improves the aesthetics of your build but also contributes to better airflow, reduced clutter, and easier maintenance in the future. Follow these tips for effective cable management:
- Plan ahead: Before connecting any cables, consider the optimal routing paths to minimize cable length and potential obstructions. Take into account the positions of components, such as the power supply, motherboard, and storage drives.
- Use cable ties or Velcro straps: Secure the cables together using cable ties or Velcro straps. Group cables that run parallel or share the same destination, such as power cables or SATA cables. Tightly fasten the ties or straps without overtightening to avoid damaging the cables.
- Route cables behind the motherboard tray: Several modern cases have designated cable routing channels or spaces behind the motherboard tray. Utilize these areas to hide excess cables and achieve a cleaner look. Ensure that the cables are neatly arranged and do not obstruct the closing of the case panel.
- Organize fan cables: Arrange the cables from the cooler fans neatly, ensuring they are not blocking any fans or impeding airflow. Use cable ties or clips to secure the fan cables along the fan mounts or other suitable locations.
- Separate power and data cables: Differentiate power cables (such as those from the power supply) from data cables (such as SATA or USB cables). This separation helps prevent interference and confusion when upgrading or troubleshooting your system in the future.
- Utilize cable management holes: Modern cases often have dedicated holes and grommets for cable routing. Pass cables through these holes to keep them organized and hidden from view. Additionally, utilize any included cable management accessories, such as brackets, clips, or hooks, to further enhance cable management.
- Regularly inspect and readjust: After completing the cable management, carefully inspect the cables to ensure they are properly secured and arranged. Over time, vibrations and movement may cause cables to loosen or shift. Perform periodic checks and adjustments to maintain optimal cable management.
Remember, effective cable management not only enhances the overall appearance of your build but also improves airflow and makes future maintenance and upgrades much easier. Take your time during this step to achieve a clean and well-organized cable layout.
With the cables organized, you can now proceed to install the operating system and set up your desktop computer for use.
Installing the Operating System
Installing the operating system (OS) is a crucial step in setting up your desktop computer. The OS is the software that manages and controls your computer’s hardware, allowing you to interact with it and run applications. Follow these steps to install the operating system:
- Prepare the installation media: Obtain the installation media for your chosen operating system, such as a USB flash drive or a DVD. Ensure it is properly formatted or burned with the necessary files.
- Insert the installation media: Insert the installation media into the appropriate drive of your computer, whether it’s a USB port or a DVD drive.
- Access the boot menu: Restart your computer and access the boot menu by pressing the designated key. This key may vary depending on your computer’s manufacturer but is commonly Esc, F2, F12, or Del. Select the boot device that corresponds to the installation media.
- Follow the on-screen instructions: The installation process will begin, and you’ll be prompted to choose language and regional settings. Follow the on-screen instructions to proceed.
- Select the installation drive: Choose the drive on which you want to install the operating system. If necessary, format or partition the drive as per your requirements. Take caution to select the correct drive to avoid accidental data loss.
- Complete the installation: The installation process will copy the necessary files and install the operating system on the selected drive. Follow the prompts to set up user accounts, network settings, privacy preferences, and other customizable options.
- Install updates and drivers: Once the OS installation is complete, connect to the internet and install any available updates for the operating system. Additionally, install the necessary drivers for your computer’s hardware, such as the motherboard, graphics card, and network adapters. This ensures optimal compatibility and functionality.
It’s important to have a valid license key or product key for the operating system you are installing. Ensure that you have obtained the necessary license documentation to activate and validate your OS installation.
After installing the operating system, you can proceed to install any required software, personalize the settings, and begin using your desktop computer.
Installing Drivers and Updates
After installing the operating system (OS) on your desktop computer, it is crucial to install the necessary drivers and updates to ensure optimal hardware functionality and security. Here’s how to install drivers and updates:
- Connect to the internet: Ensure that your computer is connected to the internet, either through an Ethernet cable or a Wi-Fi connection. This allows you to download the latest drivers and updates.
- Windows Update: If you are using Windows as your operating system, open the Windows Update settings. Windows usually automatically detects and installs the latest drivers for most hardware components. Check for updates and follow the prompts to download and install any available updates.
- Vendor websites: Visit the official websites of your computer’s hardware manufacturers to obtain the latest drivers for specific components. Start with the motherboard manufacturer’s website and proceed to other manufacturers, such as those for the graphics card, networking components, and peripherals.
- Driver installation: Download the necessary drivers from the manufacturer’s website. Locate the downloaded files and run the installation programs. Follow the on-screen instructions to install the drivers. Restart your computer if prompted.
- Graphics drivers: Graphics card manufacturers, such as NVIDIA or AMD, offer specific driver software for their GPUs. Download the latest graphics driver from the manufacturer’s website and install it to ensure optimal graphics performance in games and applications.
- Peripherals and accessories: Install drivers for any additional peripherals or accessories you have connected to your computer, such as printers, scanners, game controllers, or external storage devices. Visit the respective manufacturer’s website to acquire the latest drivers.
- Monitor and audio drivers: Download and install drivers for your monitor and audio devices, if necessary. Manufacturers often provide specific drivers to unlock additional features or to enhance performance.
- Check for firmware updates: For certain devices, such as the motherboard or external storage devices, it may be necessary to check for firmware updates. Consult the manufacturer’s website or the relevant documentation to determine if any firmware updates are available.
- Repeat updates periodically: Hardware manufacturers release new drivers and firmware updates from time to time to address bug fixes, compatibility issues, and performance improvements. Check for updates periodically and install them to keep your system up to date.
Ensure that you have a reliable internet connection and download drivers and updates from trusted sources to avoid compatibility issues or malware. Following these steps will ensure that your computer is running with the latest drivers, providing optimal performance and stability.
At this point, your desktop computer is equipped with the necessary drivers and updates. You can proceed to the next steps, such as testing and troubleshooting, optimizing performance, and finalizing the build.
Testing and Troubleshooting
After completing the installation of drivers and updates on your desktop computer, it’s essential to test the system’s functionality and address any potential issues. Performing thorough testing and troubleshooting ensures that your computer is running smoothly and can help identify and resolve any problems. Here are some steps to follow:
- Review device manager: Open the device manager from the control panel or search bar and check for any devices with warning symbols or exclamation marks. Address any missing or improperly installed drivers by reinstalling or updating them as necessary.
- Run hardware diagnostics: Many computer manufacturers provide diagnostic tools that can help identify hardware issues. These tools assess the performance and functionality of various components, such as the CPU, RAM, and storage drives. Run these diagnostics to pinpoint any potential hardware problems.
- Test components individually: If you suspect a specific hardware component is causing issues, perform individual tests. For example, you can use stress-testing software to evaluate the stability and temperature of your CPU and GPU. Run memory diagnostic tools to check the integrity of your RAM.
- Check for software conflicts: Troubleshoot software-related issues by examining recently installed software or driver updates. Uninstall any recently installed programs that may be causing conflicts or instability. If the issue persists, try booting your computer into safe mode to determine if the problem is caused by a specific software application or driver.
- Monitor system temperatures: Use temperature-monitoring software to keep an eye on the temperatures of your CPU and GPU. Overheating can cause system instability and performance problems. Ensure that your cooling system is functioning properly and that airflow within the case is unobstructed.
- Update BIOS firmware: If you encounter persistent hardware issues, such as compatibility problems or system instability, check for BIOS updates on your motherboard manufacturer’s website. Updating the BIOS can resolve many compatibility issues and provide additional functionality.
- Research and seek support: If troubleshooting steps do not resolve the issue, consult online forums, manufacturer support websites, or community resources for assistance. Describe the problem and provide details of your hardware and software configuration. Others may have encountered similar issues and can offer helpful insights or potential solutions.
- Keep records: Document any troubleshooting steps you have taken, including error messages, tests performed, and changes made. Having detailed records can aid in future troubleshooting and help support personnel if further assistance becomes necessary.
Remember, troubleshooting can be a process of elimination, and patience is key. By methodically testing and addressing potential issues, you can ensure a stable and reliable desktop computer experience.
Once you have resolved any issues and confirmed that your system is functioning properly, you can move on to optimizing performance and finalizing your build in preparation for regular use.
Optimizing Performance
After setting up your desktop computer, you can take steps to optimize its performance for a smoother and more efficient experience. By implementing the following optimization techniques, you can enhance overall system responsiveness and maximize the capabilities of your hardware:
- Update software: Ensure that all installed software, including the operating system and applications, are up to date. Regular updates often include bug fixes, security patches, and performance improvements.
- Remove unwanted programs: Uninstall any unnecessary or unused programs from your computer. These programs can consume system resources and slow down performance. Use the built-in uninstallation tool or third-party software to remove them completely.
- Manage startup programs: Review the list of programs that start automatically when your computer boots up. Disable any unnecessary programs from starting up to reduce system startup time and free up resources for other applications.
- Optimize storage drives: If you have a traditional hard disk drive (HDD), defragment it regularly to improve file access speed. For solid-state drives (SSDs), enable TRIM and avoid defragmentation, as it can degrade the lifespan of SSDs.
- Adjust visual effects: Modify the visual effects settings to strike a balance between aesthetics and performance. In the System Properties, select the “Adjust for best performance” option or manually disable specific visual effects to reduce the strain on system resources.
- Allocate virtual memory: Adjust the virtual memory (page file) settings to optimize performance. Set the initial and maximum size of the page file based on your system’s RAM and storage capacity. Allocating an appropriate amount of virtual memory can prevent system slowdowns and crashes.
- Manage power settings: Adjust the power settings to meet your priorities. If performance is crucial, select the “High Performance” power plan to ensure maximum system performance. However, keep in mind that this can lead to increased power consumption.
- Keep drivers up to date: Update drivers regularly to ensure compatibility, stability, and performance improvements. Visit the manufacturer’s websites periodically to download and install the latest drivers for your hardware components, such as the graphics card, motherboard, and network adapter.
- Scan for malware: Regularly scan your computer for malware or viruses using reliable antivirus software. Malware can significantly impact system performance and compromise security.
- Monitor system resources: Utilize task manager or system monitoring software to keep track of system resource usage. Identify any resource-intensive processes or applications that may be causing performance issues. Closing or optimizing these processes can free up system resources.
- Consider hardware upgrades: Evaluate your system’s performance and identify any areas that may benefit from hardware upgrades. Additional RAM, a faster storage drive, or a more powerful graphics card can significantly enhance overall system performance.
Remember to regularly maintain your optimized system by performing necessary updates, scans, and cleanups. Optimization is an ongoing process that ensures your desktop computer continues to perform at its best.
Once you have optimized the performance of your computer, you can fully enjoy its capabilities. Finalize the build by organizing any remaining cables and ensuring proper airflow to keep your system operating efficiently.
Finalizing the Build
Finalizing the build of your desktop computer involves a few important steps to ensure its stability, functionality, and longevity. By following these final tasks, you’ll have a fully operational and well-optimized system ready for use:
- Cable management: Take the time to organize and secure any remaining cables in your case. Utilize cable ties, Velcro straps, or cable management accessories to ensure clean and unobstructed airflow within the case. This improves aesthetics and prevents potential interference with components.
- Check and secure connections: Verify that all connections, including power cables, data cables, and components, are securely seated and firmly connected. Loose connections can cause system instability or performance issues.
- Perform a thorough cleaning: Use compressed air or an anti-static brush to remove any dust or debris that may have accumulated during the building process. Clean the case, fans, heatsinks, and other components to improve cooling and prevent heat buildup.
- Check cooling system performance: Monitor the temperatures of your CPU and GPU while running intensive tasks or playing games. Ensure that the cooling fans are functioning properly, and that the heatsinks and radiators are free from dust or obstructions. Adjust fan speeds as necessary.
- Backup your system: Create a backup of your operating system, important files, and any custom configurations. Regular backups are essential for safeguarding your data in case of system failures or accidents.
- Set up antivirus and firewall: Install reliable antivirus software and enable the built-in firewall in your operating system. Regularly update and run scans to protect your computer from malware, viruses, and other security threats.
- Configure system settings: Customize your operating system settings according to your preferences. Adjust display settings, privacy settings, notification preferences, and any additional options that enhance your user experience.
- Install necessary software: Install essential software such as web browsers, productivity suites, media players, and other applications you require for your daily tasks. Be mindful of the source and legitimacy of the software you install.
- Test system stability: Run stress tests, benchmarking software, or stability tests to ensure that your system is functioning properly under demanding conditions. Monitor temperature levels, system resource usage, and performance to identify any potential issues.
- Create system recovery media: Prepare a system recovery media, such as a USB drive or DVD, that allows you to restore your operating system in case of critical failures. This ensures you have a fallback option in case your system becomes unbootable.
By completing these final tasks, you can rest assured that your desktop computer is optimized, secure, and ready for use. Regular maintenance and periodic updates will help keep your system running smoothly in the long run.
Now, enjoy your newly built desktop computer and make the most of its capabilities!