
Method 1: Adjusting Your Privacy Settings
Protecting your privacy on Facebook starts with adjusting your privacy settings. By customizing these settings, you can control who can search for and find your profile. Follow these steps to adjust your privacy settings:
- Log in to your Facebook account and click on the down arrow icon in the top right corner of the page. Select “Settings & Privacy” from the dropdown menu.
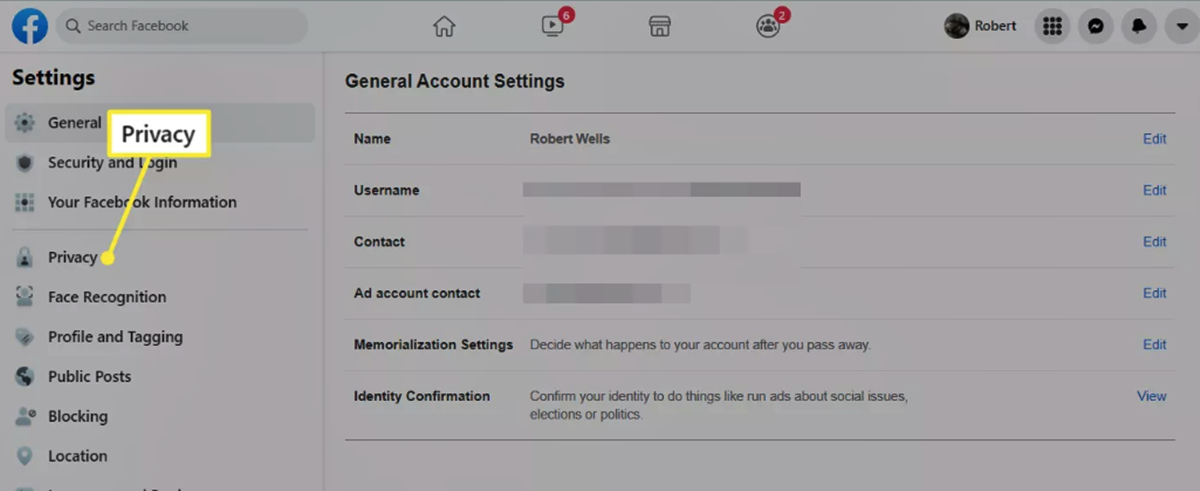
- In the menu on the left-hand side, click on “Privacy”. This will take you to the privacy settings page.
- Under the “How People Find and Contact You” section, you will find the option “Who can look you up using the email address or phone number you provided?” Click on “Edit” next to this option.
- A dropdown menu will appear, giving you the option to choose who can search for you using your email or phone number. You can select either “Everyone”, “Friends of Friends”, or “Friends” based on your preference. Choose the desired option.
- Next, return to the privacy settings page and locate the “How People Find and Contact You” section again. This time, click on “Edit” next to the option “Who can send you friend requests?”.
- Similarly, a dropdown menu will appear, allowing you to select who can send you friend requests. Choose the appropriate option based on your comfort level.
- Remember to click on “Save Changes” to apply the new privacy settings.
By adjusting these settings, you can limit the visibility of your profile to either everyone, friends of friends, or just your friends. This helps control who can find and connect with you on Facebook.
Method 2: Limiting Who Can Search for You
In addition to adjusting your privacy settings, you can further limit who can search for you on Facebook. Follow these steps to limit the visibility of your profile:
- Go to your Facebook account’s privacy settings page as mentioned in Method 1.
- Under the “How People Find and Contact You” section, look for the option “Do you want search engines outside of Facebook to link to your profile?” Click on “Edit” next to this option.
- Uncheck the box that says “Allow search engines outside of Facebook to link to your profile”. This will prevent search engines like Google from displaying your Facebook profile in search results.
- Return to the privacy settings page and scroll down to the “How People Find and Contact You” section once again.
- Find the option “Who can send you friend requests?” and click on “Edit”.
- A dropdown menu will appear, giving you the option to choose who can send you friend requests. Select “Friends of Friends” or “Friends” to limit friend requests to people within your Facebook network.
- Remember to click on “Save Changes” to apply the new settings.
By limiting who can search for you, you ensure that only people within your Facebook network or friends of friends can find your profile. This provides an additional layer of privacy and control over your online presence.
Method 3: Restricting Search Engines from Indexing Your Profile
If you want to take further steps to protect your privacy on Facebook, you can restrict search engines from indexing your profile. Follow these steps to prevent search engines from crawling and displaying your Facebook profile in search results:
- Access your Facebook account’s privacy settings page, as mentioned in Method 1.
- Scroll down to the “How People Find and Contact You” section.
- Under this section, you will find the option “Allow search engines outside of Facebook to link to your profile”. Click on “Edit”.
- Ensure that the box next to “Allow search engines outside of Facebook to link to your profile” is unchecked.
- By unchecking this box, you are preventing search engines from indexing your profile.
- Click on “Save Changes” to apply the new settings.
By restricting search engines from indexing your profile, you are adding an extra layer of privacy to your Facebook account. This means that your profile won’t be displayed in search engine results, keeping your information more secure and minimizing the chances of unwanted individuals finding your profile.
Method 4: Blocking Specific Users from Finding Your Profile
If there are specific individuals you want to prevent from finding your Facebook profile, you can use the blocking feature. Follow these steps to block specific users:
- Open Facebook and navigate to the profile of the user you want to block.
- Click on the three dots icon on their profile cover photo.
- In the dropdown menu, click on “Block” to initiate the blocking process.
- A confirmation window will appear asking if you are sure you want to block the user. Click on “Block” again to confirm.
- Once blocked, the user will no longer be able to see your profile or search for you on Facebook.
Please note that blocking a user prevents them from interacting with you on Facebook, including sending you messages and accessing your profile. Additionally, they will be removed from your friends list if you were previously connected.
If you want to unblock a user in the future, you can do so by visiting the “Settings & Privacy” menu, selecting “Blocking”, and then finding the user in the “Block Users” section. From there, you can click on “Unblock” to remove the block.
Blocking specific users allows you to have more control over who can find and interact with your Facebook profile. It is an effective method to maintain your privacy and ensure that unwanted individuals cannot access your personal information.
Method 5: Changing Your Profile Name or URL
If you want to further protect your privacy on Facebook, you can consider changing your profile name or URL. Here’s how you can do it:
- Log in to your Facebook account and click on the down arrow icon in the top right corner of the page. Select “Settings & Privacy” from the dropdown menu.
- In the menu on the left-hand side, click on “General”.
- Under the “General Account Settings” section, you will find the option to edit your name. Click on “Edit” next to your name.
- Make the desired changes to your name. You can choose to display a different first or last name, or even use a nickname or pseudonym for added privacy.
- Remember to click on “Review Change” to ensure that your name change complies with Facebook’s policies. Once reviewed, click on “Save Changes” to apply the new name.
- If you want to change your Facebook profile URL, go to your profile and click on the three dots icon below your cover photo.
- In the dropdown menu, select “Edit Profile”.
- Scroll down to the “Username” section and click on “Edit”.
- Enter a new username of your choice. Keep in mind that this will also become part of your profile URL.
- Click on “Save Changes” to update your username and profile URL.
Changing your profile name or URL can help enhance your privacy on Facebook by making it harder for others to find your profile through searches. However, it’s important to note that constantly changing your name or URL may affect your online presence and the ability of your friends to find you.
Make sure to choose a name or username that you are comfortable with, and be mindful of any potential impact it may have on your connections or social interactions on the platform.
Method 6: Reporting and Blocking Inappropriate Searches
If you come across any inappropriate or unwanted searches related to your Facebook profile, it’s important to take immediate action to protect your privacy. Follow these steps to report and block such searches:
- If you encounter an inappropriate search, take a screenshot or note down the details as evidence.
- Go to the Facebook Help Center and click on the “Report Something” button.
- Choose the “Something Isn’t Working” option.
- In the dropdown menu, select “I have an issue with search results”.
- Describe the situation in detail and attach any evidence you have, such as the screenshot or notes.
- Click on “Send” to submit your report to Facebook.
- In addition to reporting the issue, you can also block the person who conducted the inappropriate search.
- Open Facebook and navigate to the profile of the person you want to block.
- Click on the three dots icon on their profile cover photo.
- In the dropdown menu, click on “Block”.
- Confirm the block by clicking on “Block” again.
By reporting and blocking inappropriate searches, you are taking a proactive step in maintaining your privacy and ensuring a safer online experience on Facebook. Facebook’s team will review your report and take appropriate action against any violation of their terms and policies.
Remember to always stay vigilant and report any suspicious or concerning activity on the platform to protect yourself and others in the community.
Method 7: Temporarily Deactivating Your Facebook Account
If you want to take a break from Facebook or temporarily remove your profile from the platform, you have the option to deactivate your account. Deactivating your account will hide your profile from search results and prevent others from accessing your information. Here’s how you can temporarily deactivate your Facebook account:
- Log in to your Facebook account.
- Click on the down arrow icon in the top right corner of the page and select “Settings & Privacy” from the dropdown menu.
- In the menu on the left-hand side, click on “Your Facebook Information”.
- Click on “Deactivation and Deletion”.
- Select “Deactivate Account” and follow the on-screen instructions.
- You may be prompted to provide a reason for deactivating your account. Select the appropriate option or choose “Other” if none of the provided options apply.
- Click on “Deactivate” to confirm the deactivation of your account.
During the deactivation period, your account and profile will be temporarily hidden from others on Facebook. However, keep in mind that your information, such as messages you’ve exchanged with others, may still be visible to those you have interacted with prior to deactivating your account.
If you decide to reactivate your account in the future, simply log in with your credentials, and your profile will be restored along with your connections and previous activity.
Deactivating your account can provide a temporary respite from Facebook and grant you greater control over your online presence. It can be a valuable option if you need time away or want to reassess your privacy settings before returning to the platform.