Why Do You Need to Block or Delete Google Update Files?
Google Update is a service that is installed on Windows operating systems by default when you install Google applications such as Google Chrome, Google Drive, or Google Earth. Its main purpose is to keep these applications up-to-date by automatically downloading and installing updates. While this may seem like a convenient feature, there are several reasons why you might want to block or delete Google Update files:
Firstly, Google Update can consume a significant amount of system resources as it constantly runs in the background, checking for updates and downloading them. This can slow down your computer and affect its overall performance, especially if you have multiple Google applications installed.
Secondly, if you have limited internet bandwidth or a slow internet connection, the automatic downloading of updates by Google Update can eat up your precious data. This can be especially frustrating if you are on a limited data plan or if you rely on a satellite or mobile internet connection.
Another reason to block or delete Google Update files is privacy concerns. Some users may be uncomfortable with the idea of a service constantly communicating with Google servers and collecting information about their computer and the applications installed. While Google has stated that the data collected is anonymous and used solely for the purpose of improving their software, some users prefer to have more control over their privacy.
Furthermore, if you are a system administrator in a corporate environment, you may need to block Google Update files to prevent automatic updates that could potentially disrupt your network infrastructure. By taking control of the update process, you can ensure that updates are tested and deployed at a time that is convenient for your organization.
Overall, whether it’s to optimize system resources, manage bandwidth usage, protect privacy, or maintain control over software updates, blocking or deleting Google Update files can be a viable solution for many users. In the following sections, we will explore various methods to achieve this, both manually and through the use of third-party software.
Manual Method 1: Stop Google Update Service
If you want to temporarily disable Google Update and prevent it from running in the background, you can stop the Google Update Service. Here’s how:
1. Press the Windows Key + R to open the Run dialog box.
2. Type “services.msc” (without quotes) and press Enter. This will open the Services window.
3. In the Services window, scroll down to find the “Google Update Service” or “gupdate” service.
4. Right-click on the service and select “Properties” from the context menu.
5. In the Properties window, under the “General” tab, change the “Startup type” to “Disabled.”
6. Click on the “Stop” button to immediately stop the service if it is currently running.
7. Click “Apply” and then “OK” to save the changes.
By stopping the Google Update Service, you effectively prevent it from automatically checking for updates and downloading them. However, keep in mind that this method only disables the service temporarily. If you restart your computer or initiate an update check manually, the Google Update Service will start running again.
This method can be useful if you want to conserve system resources or if you need to temporarily prevent updates from being installed. However, if you want a more permanent solution, consider using one of the other methods outlined in the following sections.
Manual Method 2: Delete Google Update Task
Another way to disable Google Update is to delete the scheduled task that is responsible for checking for updates. Follow these steps to delete the Google Update task:
1. Open the Task Scheduler by pressing the Windows Key + R to open the Run dialog box, then type “taskschd.msc” (without quotes) and press Enter.
2. In the Task Scheduler window, expand the folder tree on the left-hand side until you reach “Task Scheduler Library” and click on it.
3. Locate the task named “GoogleUpdateTaskMachine” or “GoogleUpdateTaskUser” (depending on whether the update task runs for all users or only the currently logged-in user).
4. Right-click on the task and select “Delete” from the context menu.
5. A confirmation dialog will appear. Click “Yes” to confirm the deletion of the task.
By deleting the Google Update task, you effectively remove the automated process that checks for updates. This means that the Google Update service will not be able to download and install updates automatically.
Remember that this method only disables the scheduled task. If you manually initiate an update check or restart your computer, a new update task may be created. If you want a more permanent solution, consider using one of the other methods described in the subsequent sections.
Manual Method 3: Remove Google Update Plugin from Chrome
If you primarily want to disable Google Update for Google Chrome specifically, you can remove the Google Update plugin from the browser. Here’s how:
1. Launch Google Chrome on your computer.
2. In the address bar, type “chrome://plugins” (without quotes) and press Enter.
3. On the Chrome plugins page, locate the “Google Update” plugin.
4. Click on the “Disable” button next to the Google Update plugin to deactivate it.
5. You can also click on the “Details” link on the top-right corner of the page to expand the plugin details.
6. Scroll down to find the “Google Update” plugin and click on the “Disable” button.
7. Close and reopen Chrome for the changes to take effect.
By removing the Google Update plugin from Chrome, you prevent the browser from automatically updating itself. This method specifically targets the auto-update feature of Chrome, allowing you to have more control over when and how updates are installed.
Note that this method only applies to Google Chrome and does not affect other Google applications or the Google Update Service running in the background. If you want to disable Google Update across all applications, consider implementing one of the other manual methods discussed in the forthcoming sections.
Manual Method 4: Disable Google Update in Registry Editor
If you want to disable Google Update system-wide and prevent it from running for all Google applications, you can make changes in the Windows Registry. Here’s how:
1. Press the Windows Key + R to open the Run dialog box, then type “regedit” (without quotes) and press Enter to open the Registry Editor.
2. In the Registry Editor, navigate to the following key: HKEY_LOCAL_MACHINE\SOFTWARE\Policies\Google\Update (If the “Google” or “Update” keys do not exist, you may need to create them).
3. Right-click on the “Update” key and select “New” > “DWORD (32-bit) Value” from the context menu.
4. Name the new value as “DisableAutoUpdateChecksOut” (without quotes).
5. Double-click on the newly created value and set its data to “1”.
6. Close the Registry Editor.
By adding and configuring this registry entry, you effectively disable the automatic update checks for all Google applications on your computer. This method ensures that Google Update does not initiate any update processes.
Remember that modifying the Windows Registry can have serious consequences if done incorrectly. It is essential to follow the steps carefully and make sure to back up the registry before making any changes. If you are uncomfortable with editing the registry, consider using one of the other manual methods discussed in the subsequent sections.
Manual Method 5: Block Google Update URLs in Hosts File
If you want to block Google Update at the network level and prevent any communication with Google servers, you can add specific URLs to the hosts file on your computer. Here’s how:
1. Open File Explorer on your computer.
2. Navigate to the following directory: C:\Windows\System32\drivers\etc.
3. Open the “hosts” file using a text editor such as Notepad.
4. At the end of the file, add the following lines:
# Block Google Update
127.0.0.1 tools.google.com
127.0.0.1 dl.google.com
127.0.0.1 update.googleapis.com
127.0.0.1 www.google.com
127.0.0.1 www.gstatic.com
5. Save the changes to the hosts file and close the text editor.
By adding these entries to the hosts file, you redirect the specified Google Update URLs to the local loopback address (127.0.0.1), effectively blocking any communication with Google servers. This prevents Google Update from checking for updates or downloading them.
Keep in mind that modifying the hosts file requires administrative privileges, and any mistakes in the file can cause issues with your system. Therefore, it is advisable to create a backup of the hosts file before making any changes. If you encounter any problems after modifying the hosts file, you can restore the backup.
This method is effective in blocking Google Update, but it only applies to the specific URLs mentioned. If you want a more comprehensive solution or need to disable Google Update for specific applications, consider using one of the other manual methods discussed in the subsequent sections.
Manual Method 6: Disable Google Update Scheduled Tasks
Google Update creates scheduled tasks to check for and install updates automatically. By disabling these scheduled tasks, you can effectively prevent Google Update from performing its automatic update checks. Here’s how:
1. Press the Windows Key + R to open the Run dialog box, then type “taskschd.msc” (without quotes) and press Enter to open the Task Scheduler.
2. In the Task Scheduler window, expand the folder tree on the left-hand side until you reach “Task Scheduler Library” and click on it.
3. Look for tasks with names starting with “GoogleUpdateTask” or “GoogleUpdateTaskMachine”.
4. Right-click on each of these tasks and select “Disable” from the context menu.
5. Repeat this process for all Google Update tasks you find in the Task Scheduler.
By disabling the Google Update scheduled tasks, you prevent them from running automatically. This means that Google Update will not check for updates or download them without your intervention.
It’s worth noting that disabling the scheduled tasks does not remove them from the Task Scheduler entirely. If you want a more permanent solution or prefer to remove the tasks completely, you can delete them using the “Delete” option in the Task Scheduler.
This method is particularly useful if you want to stop Google Update from running in the background and conserve system resources. However, if you want to disable Google Update for specific applications or implement a more comprehensive solution, consider using one of the other manual methods discussed in the subsequent sections.
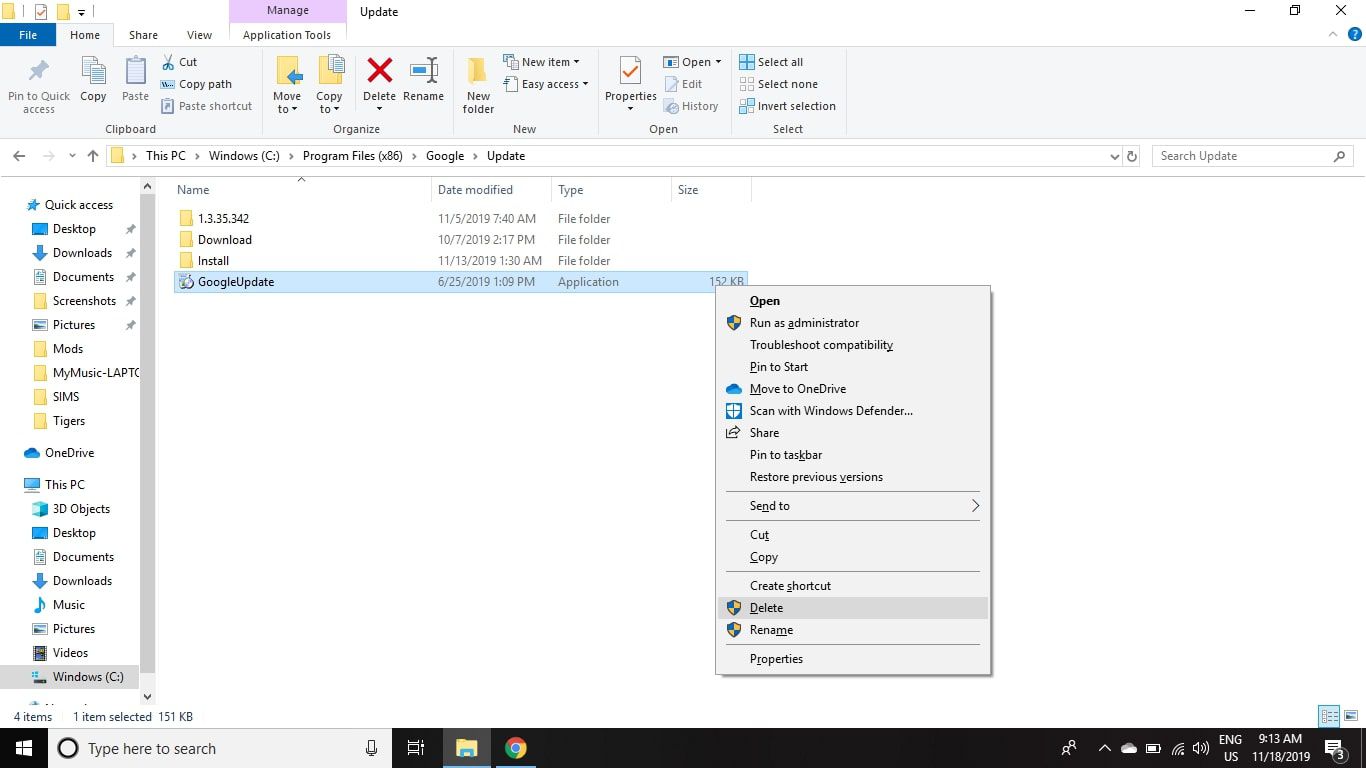
Manual Method 7: Delete Google Update Files from the AppData Folder
If you want to remove Google Update files from your computer entirely, you can delete them from the AppData folder. Here’s how:
1. Press the Windows Key + R to open the Run dialog box, then type “%appdata%” (without quotes) and press Enter. This will open the AppData folder.
2. In the AppData folder, navigate to the “Local” subfolder.
3. Look for a folder named “Google” and open it.
4. Inside the Google folder, locate the “Update” folder.
5. Right-click on the “Update” folder and select “Delete” from the context menu.
6. A confirmation dialog will appear. Click “Yes” to confirm the deletion of the folder.
7. Repeat steps 2-6 in the “Roaming” subfolder of the AppData folder if the “Update” folder exists there as well.
By deleting the Google Update files from the AppData folder, you remove any remnants of Google Update on your computer. This ensures that the update service and associated files are completely removed.
Keep in mind that deleting the Google Update files may affect the functionality of certain Google applications, as they rely on the update service to keep them up to date. If you want to continue using Google applications without automatic updates, consider using one of the other manual methods discussed in the subsequent sections.
This method provides a more comprehensive solution for removing Google Update files, but it is important to exercise caution when deleting files from system folders. Make sure to back up any important data and verify that you are deleting the correct files.
Automatic Method: Using a Third-Party Software to Block or Delete Google Update Files
If you prefer a more convenient and automated approach, you can use third-party software to block or delete Google Update files. These software tools are specifically designed to manage and control software updates on your computer. Here’s how you can use them:
1. Research and select a reliable third-party software that offers features for blocking or deleting Google Update files. Some popular options include “Revo Uninstaller,” “CCleaner,” and “O&O AppBuster.”
2. Download and install the chosen software onto your computer following the provided instructions.
3. Launch the software and navigate to the section or feature that allows you to manage software updates.
4. Locate Google Update or the specific Google applications you want to manage, and select the appropriate action (e.g., disable, block, uninstall).
5. Follow the prompts and confirm the action to let the software block or delete the Google Update files.
6. Optionally, configure any additional settings or preferences related to software updates as desired.
Using third-party software provides a user-friendly and efficient way to block or delete Google Update files, as these tools often have built-in features specifically targeting software updates. They can help you gain more control over the update process and manage it according to your preferences.
However, it’s important to choose a reputable software tool from a trusted source to ensure its effectiveness and avoid potential security risks. Additionally, be mindful of any limitations or compatibility issues that may arise with certain software versions or system configurations.
This automatic method offers a time-saving alternative to manually implementing the previous methods and can be particularly beneficial for those who prefer a simpler and streamlined approach to managing Google Update files.