
How to Access the VIP Senders List
To manage your VIP senders in iOS Mail, you first need to access the VIP Senders List. This list allows you to add important contacts whose emails you don’t want to miss and customize their notifications.
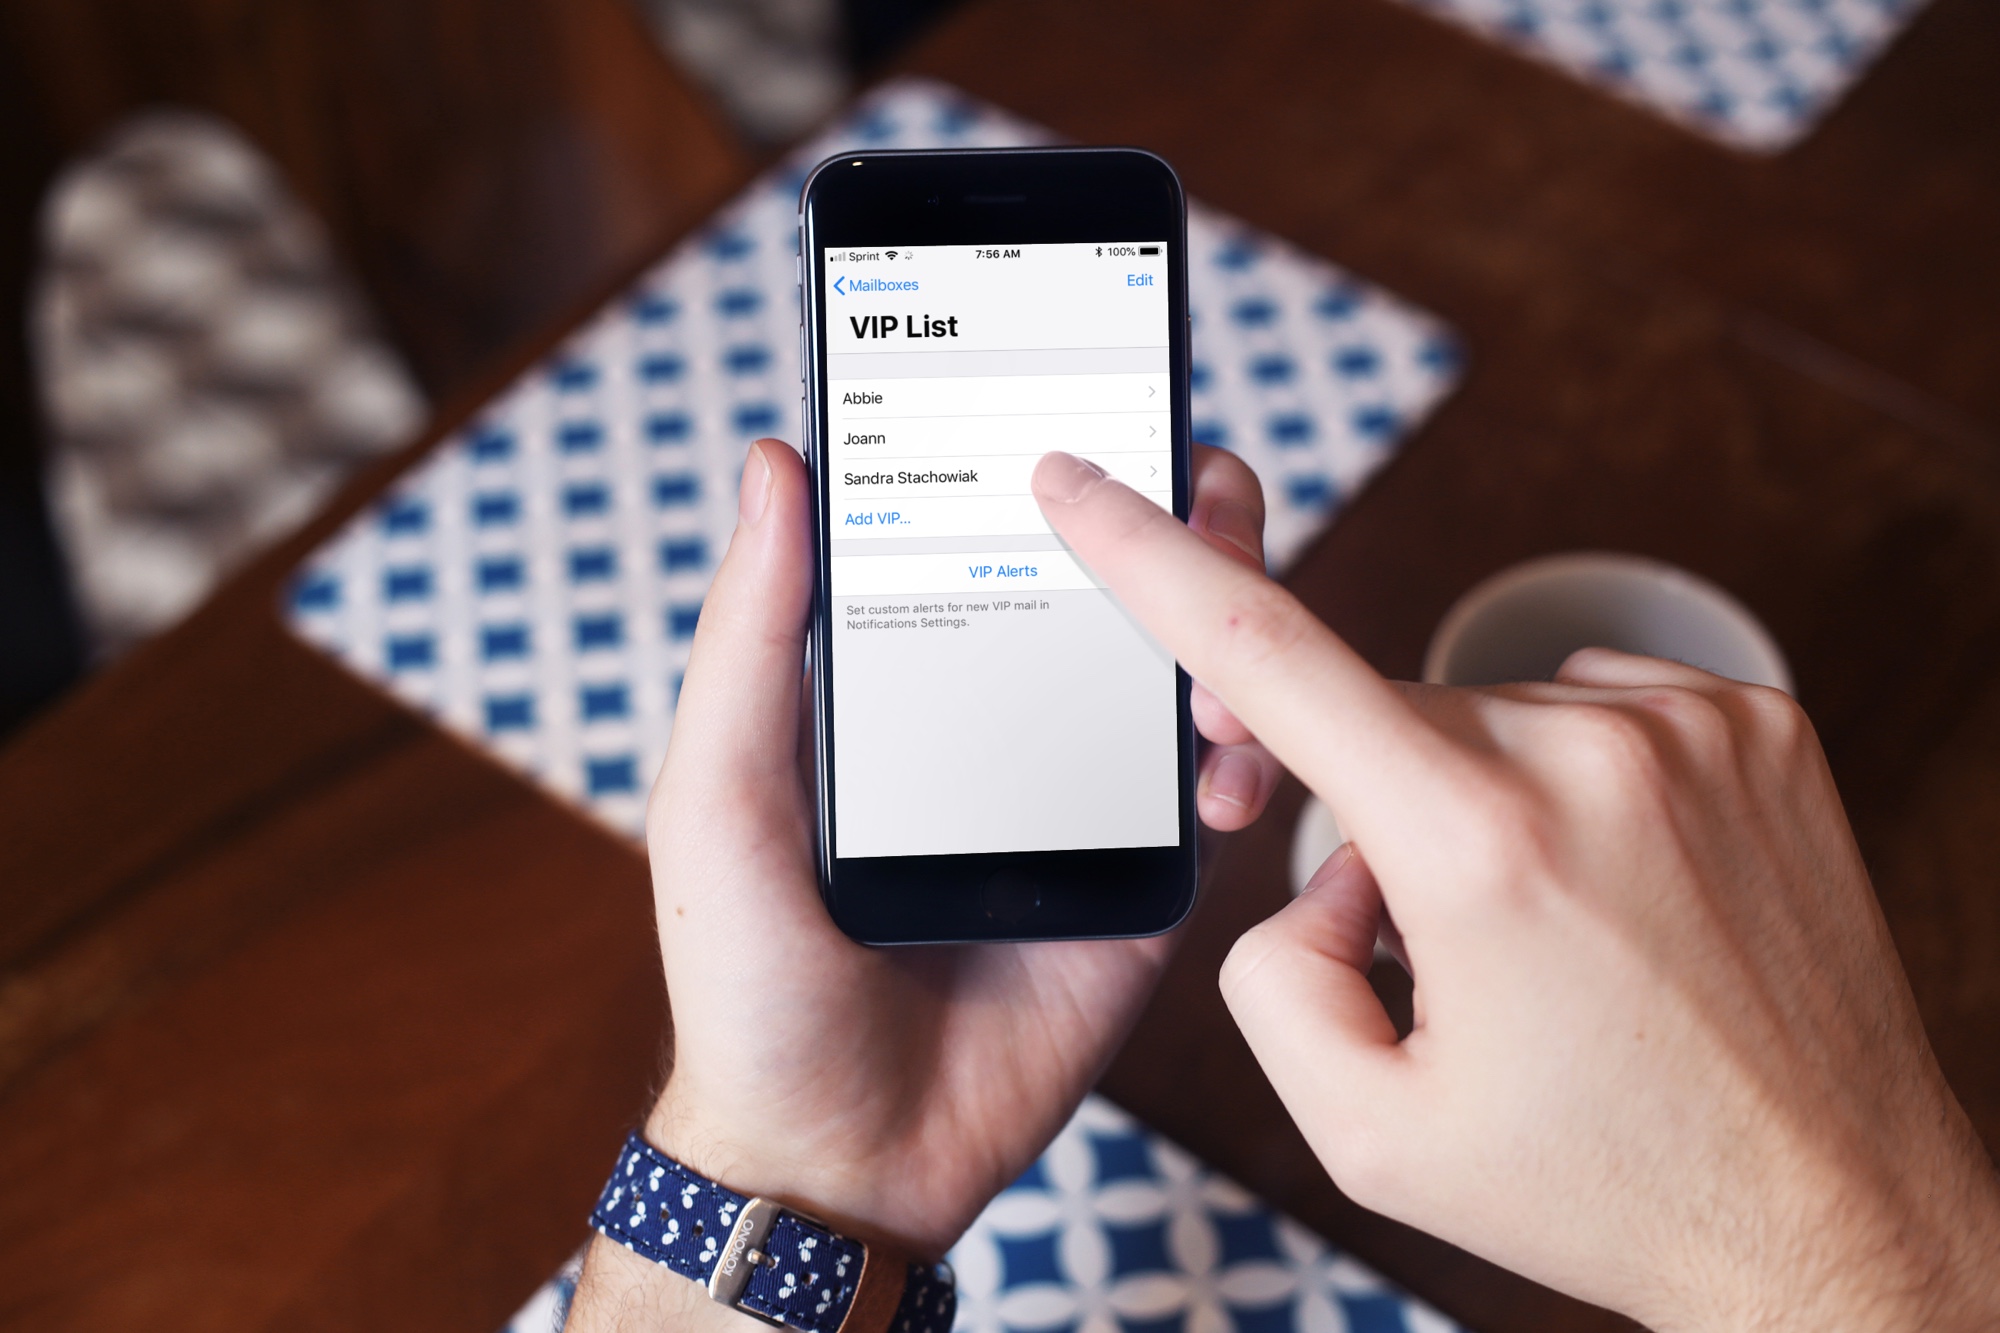
Here is how to access the VIP Senders List:
- Launch the Mail app on your iOS device.
- In the bottom navigation menu, tap on the “Mailboxes” icon to go to the Mailboxes view.
- Scroll down and look for the “VIP” mailbox. Tap on it to open the VIP mailbox.
By accessing the VIP mailbox, you will be able to see all the emails from your VIP senders in one place. Any emails received from the contacts you have marked as VIP will automatically appear here, making it convenient to prioritize and respond to their messages.
Once you have accessed the VIP Senders List, you can begin adding or removing VIP senders based on your preferences. This feature allows you to stay connected with the most important people in your inbox and focus on their emails without being overwhelmed by the rest.
How to Add VIP Senders
In iOS Mail, adding VIP senders is a simple process that allows you to prioritize emails from specific contacts. By designating certain individuals as VIPs, you ensure that their messages stand out in your inbox and receive special attention. Here’s how you can add VIP senders:
- Open the Mail app on your iOS device.
- Access the VIP Senders List by tapping on the “Mailboxes” icon in the bottom navigation menu.
- Scroll down to the “VIP” mailbox and tap on it to open the VIP mailbox.
- In the top-right corner of the screen, you will see a “+” symbol. Tap on it.
- Select the contact or contacts from your address book whom you want to designate as VIPs. You can search for a specific contact by typing their name in the search bar.
- Once you have selected the contacts, tap on “Done” to add them to your VIP Senders List.
When you add a sender to your VIP list, their emails will be highlighted with a special indicator in your inbox and be easily accessible in the VIP mailbox. Additionally, you can customize notifications for emails from VIP senders, ensuring that you receive alerts for important messages from these contacts.
It’s important to note that you can add multiple VIP senders to your list, enabling you to prioritize emails from various individuals who hold significance in your professional or personal life. By adding VIP senders, you streamline your email management and ensure that you never miss important messages from your most valued contacts.
How to Remove VIP Senders
If you no longer want certain contacts to be designated as VIP senders in iOS Mail, you have the option to easily remove them from your VIP Senders List. Removing VIP status from a sender will restore their emails to regular inbox visibility. Here’s how to remove VIP senders:
- Launch the Mail app on your iOS device.
- Access the VIP Senders List by tapping on the “Mailboxes” icon in the bottom navigation menu.
- Scroll down to the “VIP” mailbox and tap on it to open the VIP mailbox.
- Find the sender you wish to remove from the VIP list. You can either scroll through the list or use the search bar to locate them.
- Swipe left on their name or email address to reveal the “Remove” option.
- Tap “Remove” to remove the sender from your VIP Senders List.
Once you have removed a sender from the VIP list, their emails will no longer be designated as VIP and will be displayed in your regular inbox along with other non-VIP emails. The removal process is quick and straightforward, allowing you to customize your VIP list based on your changing priorities and preferences.
By removing VIP status from a sender, you can ensure that their emails no longer receive special highlighting or separate notifications. This can be useful when the sender’s emails no longer hold the same level of priority or importance in your inbox.
Managing VIP Contacts in iCloud
One of the advantages of using iOS Mail is that you can sync your VIP contacts across multiple devices through iCloud. This feature allows you to manage your VIP list seamlessly and ensures consistency in your email experience. Here’s how to manage VIP contacts in iCloud:
- On your iOS device, go to the “Settings” app and tap on your Apple ID at the top of the screen.
- Select “iCloud” from the list of options.
- Make sure that the “Mail” toggle switch is enabled. This ensures that VIP contacts are synced across your devices.
By enabling iCloud sync for Mail, any changes you make to your VIP Senders List on one device will automatically be reflected on all your other devices linked to the same iCloud account.
For example, if you add a new contact as a VIP sender on your iPhone, that contact will also be added to your VIP Senders List on your iPad or Mac if they are connected to the same iCloud account. Similarly, if you remove a VIP sender on one device, they will be removed from the VIP list on all synced devices.
This seamless synchronization ensures that you have consistent access to your VIP contacts and a unified email experience across all your devices. Whether you’re managing your VIP list on your iPhone, iPad, or Mac, the changes will be reflected across the board, saving you time and effort.
It’s important to note that changes you make to your VIP Senders List will only be synced through iCloud if you have enabled the Mail sync option specifically. If you prefer to manage VIP contacts separately on each device, you can disable the Mail sync option in iCloud settings.
Turning Off VIP Notifications
While receiving notifications for emails from VIP senders can be beneficial for staying on top of important messages, there may be times when you prefer to disable these notifications. Fortunately, iOS Mail allows you to easily turn off VIP notifications if you find them to be distracting or overwhelming. Here’s how you can do it:
- Open the Settings app on your iOS device.
- Scroll down and select “Mail” from the list of options.
- Tap on “Notifications” to access the notification settings for the Mail app.
- Scroll down and locate “VIP” under the “MAIL” section.
- Tap on “VIP” to customize the notification settings for VIP emails.
- To turn off VIP notifications completely, toggle off the “Allow Notifications” switch.
Once you have turned off VIP notifications, you will no longer receive alerts for emails from VIP senders. Instead, these emails will appear in your inbox without any special indication or separate notification sound.
If you still want to receive notifications for regular emails but don’t want VIP emails to disrupt your workflow, you can keep the “Allow Notifications” switch on and customize other notification settings, such as changing the alert style or selecting a different sound for VIP emails.
Keep in mind that turning off VIP notifications does not remove the VIP status from the senders or remove them from your VIP Senders List. It only affects the way notifications are delivered for emails from VIP contacts.
By having control over VIP notifications, you can tailor your email experience according to your preferences and minimize distractions while staying connected with your most important contacts.
Customizing VIP Mailbox Appearance
In addition to managing VIP contacts and notifications, iOS Mail also provides options to customize the appearance of your VIP mailbox. This allows you to personalize the way your VIP emails are displayed, making it easier for you to identify and manage them. Here’s how you can customize the VIP mailbox appearance:
- Open the Mail app on your iOS device.
- Go to the Mailboxes view by tapping on the “Mailboxes” icon in the bottom navigation menu.
- Scroll down and find the “VIP” mailbox. Tap on the (i) icon next to it.
- In the VIP Mailbox settings, you will see various customization options:
- Show in Dock: Toggle this switch to display the VIP mailbox in the Dock area, making it easily accessible from the Home screen.
- Organize by Thread: Toggle this switch to group emails from VIP senders into threads, enabling you to view related conversations more efficiently.
- Sort by: Choose how you want the VIP mailbox to be sorted – either by Date, Subject, or Flagged status.
- VIP Alerts: Customize the style and sound of notifications for VIP emails. You can choose from Banners, Alerts, or None, and select a different sound.
By customizing these appearance settings, you can personalize your VIP mailbox to suit your preferences and workflow. Whether you want to prioritize certain contacts or organize your VIP emails in a particular way, these options allow you to tailor the mailbox to your liking.
It’s worth noting that customizing the VIP mailbox appearance does not affect the actual VIP status of the senders or their presence in your VIP Senders List. It simply alters the way the VIP mailbox is displayed and how notifications are delivered for VIP emails.
With the ability to customize the VIP mailbox appearance, you can create a unique email experience that aligns with your needs and enhances productivity as you manage your VIP contacts.
Managing VIP Senders on Multiple Devices
If you use multiple iOS devices, such as an iPhone and an iPad, you may wonder how to manage VIP senders consistently across all your devices. Fortunately, iOS Mail ensures that changes made to your VIP Senders List on one device are synchronized and reflected on all your other devices connected to the same iCloud account. Here’s how you can manage VIP senders on multiple devices:
- Open the Mail app on your first iOS device.
- Access the VIP Senders List as mentioned in the earlier sections.
- Add or remove VIP senders on this device by following the appropriate steps.
- Changes made to the VIP Senders List on this device will automatically sync to your iCloud account.
- Open the Mail app on your second iOS device, which is also connected to the same iCloud account.
- Access the VIP Senders List on this device, and you will see that the changes you made on the first device have been synchronized.
- The list of VIP senders will be consistent across all your iOS devices.
This seamless synchronization ensures that you can manage your VIP senders without the need for manual updates on each device. Whether you add or remove VIP senders, the changes are propagated across all your iOS devices, saving you time and effort.
It’s important to note that to ensure synchronization, you need to have iCloud enabled for Mail on all your devices. If you have explicitly disabled iCloud sync for Mail on a particular device, the changes made to the VIP Senders List on other devices will not be reflected on that device.
By managing VIP senders on multiple devices, you can maintain consistency in your email experience and access your most important contacts effortlessly, regardless of which iOS device you are using.
Troubleshooting Common Issues with VIP Senders in iOS Mail
While the VIP Senders feature in iOS Mail is a convenient way to prioritize and manage important contacts, there may be some common issues that you can encounter. Here are some troubleshooting steps to resolve these issues:
1. Missing VIP Senders: If you notice that some of your VIP senders are missing from the VIP mailbox or their emails are not being categorized correctly, try the following:
- Check if you have accidentally removed the sender from the VIP Senders List. If so, add them back using the steps described in the “How to Add VIP Senders” section.
- Ensure that the sender’s email address is saved correctly in your contacts and matches the email address from which they send you emails.
- Restart your iOS device to refresh the Mail app and sync any changes made to your VIP Senders List.
2. VIP Contacts Not Syncing: If you’re using multiple iOS devices and notice that your VIP contacts are not syncing properly, try the following:
- Make sure that you are signed in to the same iCloud account on all your devices and have enabled Mail sync for each device.
- Verify that you have an active internet connection on all devices to allow for iCloud synchronization.
- Restart each device to initiate a fresh sync and resolve any synchronization issues.
3. VIP Notifications Not Working: If you’re not receiving notifications for VIP emails, try the following troubleshooting steps:
- Check if you have accidentally disabled notifications for VIP emails. Go to the Mail settings and ensure that “Allow Notifications” is toggled on for VIP emails.
- Verify that you have enabled the desired notification settings, such as the alert style and sound, specifically for VIP emails.
- Restart your iOS device to refresh the notification settings and restore any potential issues with notifications.
If the above troubleshooting steps do not resolve your issues with VIP Senders in iOS Mail, you may consider updating your iOS version or contacting Apple Support for further assistance.
By troubleshooting common issues with VIP senders, you can ensure that you can effectively manage your VIP contacts and receive notifications for their important emails in iOS Mail.