
Installing the Trezor Wallet
Installing the Trezor Wallet is the first step towards securing your cryptocurrencies. The Trezor Wallet is a software interface that allows you to manage and store your digital assets on your Trezor hardware wallet device. Here’s a step-by-step guide on how to install the Trezor Wallet:
- Connect your Trezor device: Begin by connecting your Trezor device to your computer using the provided USB cable. Ensure that your Trezor is turned on.
- Visit the official Trezor website: Open your web browser and go to the official Trezor website at https://trezor.io/.
- Download the Trezor Bridge: On the Trezor website, navigate to the “Downloads” section and download the Trezor Bridge that corresponds to your operating system (Windows, macOS, or Linux). The Trezor Bridge is a communication tool that allows the Trezor Wallet to interact with your Trezor device.
- Install the Trezor Bridge: Once the Trezor Bridge is downloaded, open the installer file and follow the on-screen instructions to complete the installation process.
- Access the Trezor Wallet: After installing the Trezor Bridge, refresh the Trezor website and click on the “Start” button. You will be redirected to the Trezor Wallet interface.
- Create a new wallet: On the Trezor Wallet interface, select the option to create a new wallet. Follow the prompts to choose a strong, unique password and note down your recovery seed phrase. This seed phrase is crucial for recovering your wallet in case of device loss or damage.
Once these steps are completed, you have successfully installed the Trezor Wallet and set up your initial wallet configuration. You can now proceed to add and manage your desired cryptocurrencies using your Trezor device.
Setting Up Your Trezor Device
Setting up your Trezor device is a crucial step in ensuring the security and integrity of your cryptocurrencies. Here’s a step-by-step guide on how to set up your Trezor device:
- Connect your Trezor to a trusted computer: Use the provided USB cable to connect your Trezor device to a computer that you trust. Avoid using public or shared computers, as they may compromise the security of your device.
- Visit the Trezor website: Open your web browser and go to the official Trezor website at https://trezor.io/.
- Install the Trezor Bridge: If you haven’t already done so, follow the instructions in the “Installing the Trezor Wallet” section to download and install the Trezor Bridge.
- Access the Trezor Wallet: After installing the Trezor Bridge, refresh the Trezor website and click on the “Start” button. You will be redirected to the Trezor Wallet interface.
- Connect your Trezor device: On the Trezor Wallet interface, click on the “Connect Trezor” button and follow the on-screen instructions. Make sure to verify the connection on your Trezor device’s screen.
- Create a PIN: Once your Trezor is connected, you will be prompted to create a PIN. Use the device’s touchscreen to set a secure PIN that you will remember. Be cautious of potential surveillance during this process.
- Backup your recovery seed: To ensure the safety of your funds, you must write down and safely store your recovery seed. Follow the instructions on the Trezor Wallet interface to write down the seed words in the correct order.
- Confirm your recovery seed: After writing down your recovery seed, enter the words in the correct order on the Trezor device’s screen to confirm that you have correctly recorded the seed. This step ensures that you have an accurate backup in case of loss or damage to your device.
- Set a passphrase (optional): If desired, you can set an additional passphrase for added security. This passphrase acts as an extra layer of protection for your wallet. Remember to store this passphrase securely and separately from your recovery seed.
Once you have completed these steps, your Trezor device is set up and ready to securely store your cryptocurrencies. It is essential to keep your device and recovery seed safe and confidential. With your Trezor device set up, you can now proceed to access and manage your coins using the Trezor Wallet interface.
Accessing the Trezor Wallet
Once you have installed the Trezor Wallet and set up your Trezor device, you can easily access your wallet to manage your cryptocurrencies. Here’s a step-by-step guide on how to access your Trezor Wallet:
- Connect your Trezor device: Start by connecting your Trezor device to your computer using the USB cable provided. Ensure that your device is turned on.
- Visit the Trezor website: Open your web browser and go to the official Trezor website at https://trezor.io/.
- Open the Trezor Wallet: On the Trezor website, click on the “Start” button to open the Trezor Wallet interface. This will launch the connection wizard that guides you through the process of accessing your wallet.
- Connect your Trezor device: Click on the “Connect Trezor” button on the wallet interface. Make sure your Trezor device is still connected to your computer via the USB cable.
- Verify the connection: Check the Trezor device’s screen to see if it displays the Trezor logo and prompts you to confirm the connection. Verify that the displayed information matches the Trezor Wallet interface.
- Enter your PIN: Use the device’s touchscreen to enter your PIN. Make sure to enter it correctly to access your wallet securely. If you have forgotten your PIN, refer to the Trezor device’s manual for further instructions.
- Unlock your wallet: After successfully entering your PIN, the Trezor Wallet interface will display your account balances and transactions. Your wallet is now unlocked and ready to use.
It’s important to note that every time you want to access your Trezor Wallet, you need to repeat these steps to establish a secure connection between your device and the wallet interface. By following these steps, you can access and manage your cryptocurrencies with peace of mind, knowing that your private keys are stored securely on your Trezor device.
Choosing the Right Coin to Add
Choosing which cryptocurrencies to add to your Trezor Wallet is an important decision that depends on your investment strategy and personal preferences. Here are some factors to consider when selecting the coins to add:
- Research and due diligence: Before adding any cryptocurrency to your Trezor Wallet, conduct thorough research on the coin’s background, technology, team, and market performance. Consider factors such as the coin’s purpose, utility, and its potential for long-term growth.
- Diversification: It’s generally recommended to have a diversified portfolio of cryptocurrencies. This means adding a mix of established cryptocurrencies like Bitcoin (BTC) and Ethereum (ETH), as well as promising altcoins with potential for growth. Diversification helps to spread the risk and balance potential gains and losses.
- Stability and market liquidity: Consider the stability and liquidity of a coin’s market. Highly liquid and stable coins are less volatile and easier to trade. These coins are also more widely accepted for various services and transactions.
- Developer and community support: Evaluate the level of developer activity and community support behind a coin. Active developer communities indicate ongoing updates and improvements to the coin’s technology. Community support adds to the coin’s longevity and potential for adoption.
- Security and privacy features: If privacy is a priority to you, consider coins that offer enhanced privacy features such as Monero (XMR) or Zcash (ZEC). Keep in mind that some privacy-focused coins may require additional setup or configuration.
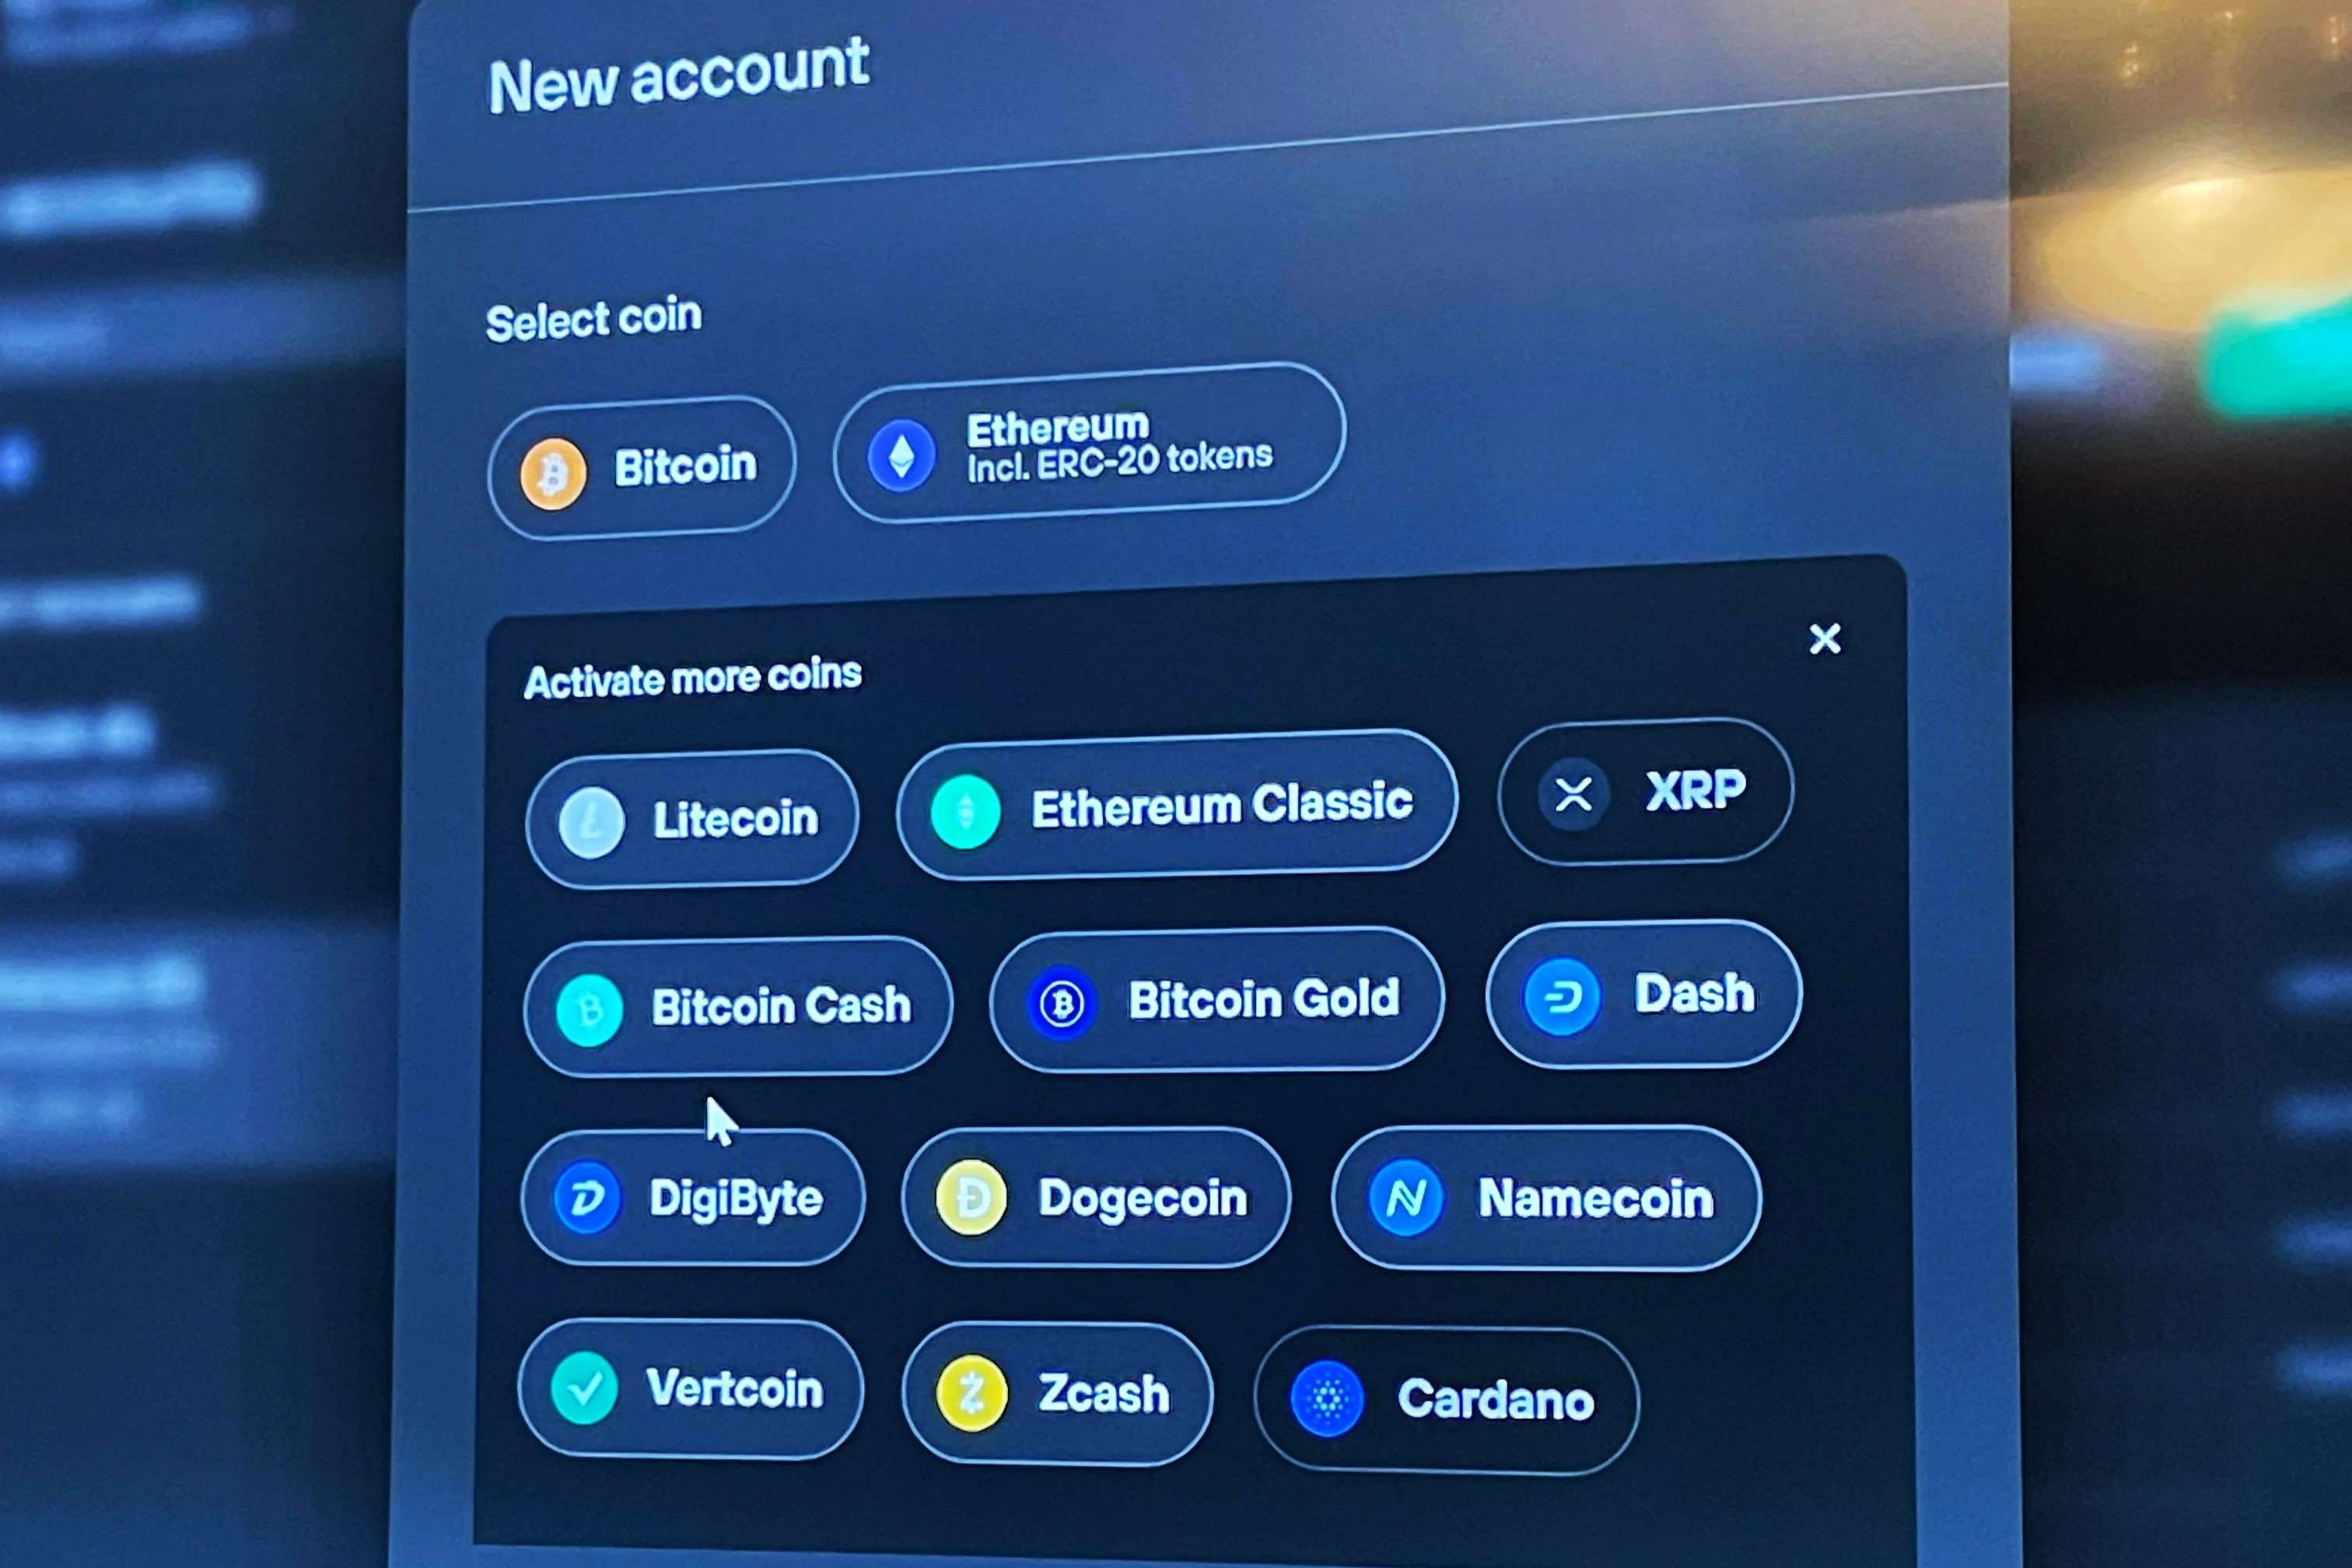
- Compatibility with Trezor Wallet: Ensure that the coin you wish to add is supported by the Trezor Wallet. The Trezor Wallet currently supports a wide range of popular cryptocurrencies, including Bitcoin, Ethereum, Litecoin, and many others. Check the official Trezor website or the Trezor Wallet interface for the full list of supported coins.
It’s essential to carefully consider these factors when choosing the coins to add to your Trezor Wallet. Remember to assess your risk tolerance, investment goals, and keep up to date with the latest information and market trends in the cryptocurrency space. By making informed decisions, you can confidently manage and secure your chosen cryptocurrencies using your Trezor hardware wallet.
Transferring Coins to the Trezor Wallet
Once you have chosen the cryptocurrencies you want to store in your Trezor Wallet, the next step is to transfer your coins from their current storage location to your Trezor device. Here is a step-by-step guide on how to transfer coins to the Trezor Wallet:
- Access your existing wallet or exchange account: Log in to the wallet or exchange that currently holds your desired coins. Make sure you have the necessary login credentials and two-factor authentication codes, if applicable.
- Find the withdrawal or send feature: Navigate to the “Withdrawal” or “Send” section of your wallet or exchange account. This is typically located in the account settings or on the main dashboard.
- Enter the recipient address: In your Trezor Wallet, click on the account or coin you want to receive the coins. Copy the receiving address from your Trezor Wallet interface.
- Paste the recipient address: In the withdrawal or send form of your wallet or exchange, paste the Trezor Wallet’s recipient address into the designated field. Double-check to ensure that the address is copied accurately.
- Specify the amount: Enter the amount of coins you want to transfer to your Trezor Wallet. Ensure that the amount is within the available balance of your existing account.
- Review the transaction details: Carefully review the transaction details, including the recipient address and the amount you are transferring. Verify that everything is correct before proceeding.
- Confirm and complete the transaction: Follow the instructions provided by your wallet or exchange to confirm and complete the transaction. This may involve confirming the transaction via email or entering a verification code.
- Wait for the transaction to complete: Depending on the blockchain network and congestion, the transaction may take some time to be confirmed. Monitor the transaction status on the blockchain explorer or your wallet interface.
- Verify the coins in your Trezor Wallet: Once the transaction is confirmed, check your Trezor Wallet interface to ensure that the transferred coins appear in your account balance. The coins are now securely stored on your Trezor device.
It’s important to note that the process and terminology may vary slightly depending on the wallet or exchange you are using. Always double-check the instructions and validation process specific to your chosen platform. By following these steps, you can safely transfer your coins to your Trezor Wallet, knowing that they are now under the secure protection of your Trezor hardware wallet.
Configuring the Wallet’s Coin Settings
After transferring coins to your Trezor Wallet, it’s essential to configure the coin settings to ensure optimal management and security. Here’s a step-by-step guide on how to configure the wallet’s coin settings:
- Access the Trezor Wallet interface: Connect your Trezor device to your computer and go to the Trezor Wallet interface by visiting the official Trezor website. Make sure the Trezor device is unlocked and connected.
- Select the desired coin: From the list of supported coins, click on the coin you want to configure. The interface will display the account(s) associated with that particular coin.
- Choose an account: If you have multiple accounts for the same coin, select the desired account from the list. Each account in the Trezor Wallet represents a separate storage for the selected coin.
- Review the account details: Take a moment to review the account details, including the account balance, transaction history, and any pending transactions. Ensure that everything appears as expected.
- Adjust the coin settings: In the account settings or options, you may find various configuration options specific to the selected coin. These settings can include features like transaction speed, display unit (e.g., BTC or SAT), privacy settings, or other coin-specific functionalities.
- Explore additional features: Depending on the coin, you may have access to additional features within the Trezor Wallet interface. These can include options for staking, delegating, or interacting with decentralized applications (dApps) associated with the selected coin.
- Save the changes: Once you have adjusted the desired coin settings, make sure to save the changes. The Trezor Wallet interface will typically provide a button or option to confirm and save the updated settings.
- Repeat for other coins or accounts: If you have multiple coins or accounts in your Trezor Wallet, follow the same process to configure the settings for each one individually.
By configuring the wallet’s coin settings, you can personalize your Trezor Wallet experience and optimize the management of your coins according to your preferences. It is recommended to regularly review and update the settings as needed, especially when new features or updates are released for the supported coins.
Adding Ethereum-based Tokens
In addition to major cryptocurrencies like Bitcoin and Ethereum, the Trezor Wallet also supports a wide range of ERC-20 tokens, which are tokens built on the Ethereum blockchain. Here’s a guide on how to add Ethereum-based tokens to your Trezor Wallet:
- Access the Trezor Wallet interface: Connect your Trezor device to your computer and open the Trezor Wallet interface through the official Trezor website.
- Select Ethereum as the coin: From the list of supported coins, choose Ethereum (ETH) as the selected coin. This will display your ETH account(s).
- Click on the “Add Account” button: In the ETH account section, look for the “Add Account” button and click on it. This will prompt the Trezor Wallet to search for any new addresses associated with your Ethereum account.
- Synchronize the token list: After adding the new account, you may need to synchronize the token list to see your added tokens. Look for the “Synchronize” or “Refresh” button and click on it. The Trezor Wallet will update the token list accordingly.
- Verify the token balance: Once the token list is refreshed, you should see the added tokens along with their respective balances. Verify that the tokens and their balances are correctly displayed.
- Customize token visibility: By default, the Trezor Wallet displays a limited number of tokens. If you hold additional ERC-20 tokens that are not listed, you can customize the token visibility by clicking on the “Show All Tokens” button or manually adding the token contract address.
- Send or receive tokens: With the added tokens in your Trezor Wallet, you can now send and receive them just like you would with other cryptocurrencies. Use the “Send” or “Receive” feature within the Trezor Wallet interface, selecting the desired token and following the on-screen instructions.
- Keep your Trezor firmware updated: To ensure compatibility with new tokens and security enhancements, it’s crucial to regularly update your Trezor device’s firmware. Check the official Trezor website or Trezor Wallet interface for firmware update instructions.
Adding Ethereum-based tokens to your Trezor Wallet expands your ability to manage a variety of digital assets securely. Keep in mind that not all ERC-20 tokens are supported by the Trezor Wallet, so it’s essential to verify the list of compatible tokens on the official Trezor website. By following these steps, you can securely store, send, and receive your Ethereum-based tokens on your Trezor device.
Managing Your Coins in the Trezor Wallet
Once you have added your coins to the Trezor Wallet, it’s important to understand how to effectively manage and organize them. Here are some key steps and features for managing your coins in the Trezor Wallet:
- Viewing your coin balances: In the Trezor Wallet interface, you can easily view the balances of your stored coins. Each coin will have its own account or address, representing the amount of that particular cryptocurrency you hold.
- Organizing your accounts: If you have multiple coins or want to separate different holdings, you can create multiple accounts within the Trezor Wallet for each specific coin. This allows for better organization and tracking of your different cryptocurrency balances.
- Labeling your accounts: To make it easier to identify your accounts, the Trezor Wallet offers a labeling feature. You can assign custom names or labels to each account, such as “Savings,” “Trading,” or specific project names.
- Managing transaction history: The Trezor Wallet interface shows a detailed transaction history for each coin and account. You can review past transactions, including date, amount, and sender/receiver details, providing a comprehensive overview of your transaction activity.
- Sorting and filtering transactions: To keep track of specific transactions or search for particular entries, you can sort and filter your transaction history based on parameters like date, amount, or transaction type. This makes it easier to locate and review specific transactions.
- Exporting transaction data: If needed, you can export your transaction history in various formats, such as CSV or PDF. This can be useful for accounting purposes, tax reporting, or for keeping personal records of your coin transactions.
- Tracking portfolio performance: The Trezor Wallet may offer features or integrations that allow you to track the overall performance of your portfolio. This can include graphical representations of your asset allocation and historical price charts to monitor the value of your holdings over time.
- Regular security checks: As part of managing your coins in the Trezor Wallet, it’s important to regularly review your security settings and device firmware. Make sure your Trezor device has the latest firmware updates and follow best practices for keeping your recovery seed secure.
- Staying informed: Stay updated with news and developments related to the cryptocurrencies you hold in your Trezor Wallet. Follow reputable sources, join community forums, and remain vigilant about potential security risks or protocol updates that may affect your assets.
By effectively managing your coins in the Trezor Wallet, you can maintain control over your cryptocurrency holdings and ensure their security and accessibility. Use the available features and customization options within the Trezor Wallet interface to tailor your experience and keep track of your assets with ease.
Checking Your Coin Balances
One of the essential tasks in managing your cryptocurrencies is regularly checking your coin balances to stay informed about the value of your holdings. Here is a guide on how to check your coin balances in the Trezor Wallet:
- Access the Trezor Wallet interface: Connect your Trezor device to your computer and open the Trezor Wallet interface through the official Trezor website.
- Select the coin you want to check: From the list of supported coins, click on the specific coin you wish to view the balance for. This will display the associated account(s) and their current balances.
- Review the account balance: Within the selected coin’s account, you will see the current balance displayed. This balance represents the total amount of that specific cryptocurrency stored in your Trezor device.
- Check for additional accounts: If you have multiple accounts for the same coin, navigate through the different accounts to view their respective balances. It allows you to manage your different investments or holdings individually.
- Monitor the balance trend: Keep track of how your coin balance changes over time. The Trezor Wallet might provide features or integrations that offer graphical representations of your balance trend or insights into the market performance of your coins.
- Consider fiat conversion: Some wallet interfaces allow you to convert the displayed coin balance into a fiat currency value, providing an estimate of your holdings’ worth in your preferred currency. This can be helpful for tracking portfolio value.
- Refresh or sync your balances: If you suspect that your balance is not up to date, you can manually refresh or sync the balances within the Trezor Wallet interface. Look for a “Refresh” or “Sync” button to update the displayed information.
- Keep an eye on transaction history: While checking your coin balances, it’s good practice to review the transaction history associated with the selected coin. This allows you to monitor the inflows and outflows and verify the accuracy of the balances.
- Consider using portfolio management tools: If you want more advanced portfolio tracking and analysis, consider utilizing external portfolio management tools or services. These tools often integrate with the Trezor Wallet or provide API connections for monitoring your balances and performance.
Regularly checking your coin balances in the Trezor Wallet helps you stay informed about the value of your cryptocurrencies and track their performance. It’s an essential step for managing and tracking your investments effectively. Whether you are monitoring the balance of a single coin or multiple accounts, the Trezor Wallet provides a user-friendly interface to keep you updated on your cryptocurrency holdings.
Sending Coins from the Trezor Wallet
Transferring your cryptocurrencies from the Trezor Wallet to another wallet or exchange is a straightforward process. Here’s a step-by-step guide on how to send coins from the Trezor Wallet:
- Access the Trezor Wallet interface: Connect your Trezor device to your computer and open the Trezor Wallet interface through the official Trezor website.
- Select the coin you want to send: From the list of supported coins, click on the specific coin you wish to send. This will display the associated accounts and their current balances.
- Choose the account to send from: If you have multiple accounts for the selected coin, select the account that holds the coins you want to send. Ensure that the account has a sufficient balance to cover the transaction amount and any associated fees.
- Click on the “Send” button: In the selected account, locate and click on the “Send” button. This will take you to the send form where you can enter the recipient’s address and other transaction details.
- Enter the recipient’s address: Copy and paste the recipient’s wallet address into the designated field. Double-check the address to ensure its accuracy, as sending to an incorrect address can result in permanent loss of funds.
- Specify the amount to send: Enter the amount of coins you want to send to the recipient. Ensure that you enter the correct amount, taking into account any transaction fees that may be incurred.
- Set the transaction fee: Depending on the wallet interface and coin, you may have the option to set the transaction fee. Consider the current network congestion and your desired transaction speed when selecting the fee.
- Review the transaction details: Before proceeding, carefully review all the transaction details, including the recipient address, the amount, and the transaction fee. Verify that the information is accurate.
- Confirm and sign the transaction: Once you are satisfied with the transaction details, follow the instructions provided by the Trezor Wallet to confirm and sign the transaction using your Trezor device. Confirm the transaction on the device’s screen.
- Wait for transaction confirmation: After confirming the transaction, it will be broadcasted to the blockchain network. Wait for sufficient network confirmations to ensure the transaction has been successfully processed.
- Monitor transaction status: You can monitor the transaction status by checking the transaction ID (TXID) on a blockchain explorer or within the Trezor Wallet interface. This allows you to track the progress of the transaction until it is confirmed.
By following these steps, you can confidently send coins from your Trezor Wallet to another recipient address. Always double-check the recipient address and transaction details to avoid any mistakes. The Trezor Wallet ensures the security and integrity of your transactions by validating them on the device itself before signing and broadcasting them to the blockchain network.
Verifying Coin Transactions on the Trezor Device
Verifying coin transactions on the Trezor device adds an extra layer of security and ensures that you have full control over your cryptocurrency transfers. Here’s a step-by-step guide on how to verify coin transactions on the Trezor device:
- Access the Trezor Wallet interface: Connect your Trezor device to your computer and open the Trezor Wallet interface through the official Trezor website.
- Check transaction details: Whenever you initiate a transaction in the Trezor Wallet, the transaction details will be displayed on your computer screen. Take a moment to review the recipient address, amount, and transaction fee.
- Confirm transaction on the Trezor device: Once you have checked the transaction details on your computer screen, click the “Confirm” button or similar prompt on the Trezor Wallet interface. The transaction details will then be sent to your Trezor device for verification.
- Verify recipient address: On the Trezor device’s screen, carefully review the recipient address displayed. Confirm that it matches the address you intended to send the coins to. Use the device’s touchscreen to navigate and verify the address.
- Verify transaction amount: Next, check the transaction amount displayed on the Trezor device’s screen. Make sure it matches the amount you intended to send. Use the device’s touchscreen to review and confirm the transaction amount.
- Approve or reject the transaction: After reviewing the recipient address and transaction amount, you will have the option to approve or reject the transaction on the Trezor device. If the details are correct, press the corresponding button to approve the transaction. If any details are incorrect, reject the transaction.
- Enter PIN or passphrase: Depending on the security settings of your Trezor device, you may be prompted to enter your device’s PIN or passphrase to provide an additional layer of verification before approving the transaction. Follow the on-screen instructions to complete this step.
- Transaction confirmation: Once you have approved the transaction on the Trezor device and entered any required PIN or passphrase, the device will sign the transaction and send it back to the Trezor Wallet interface on your computer. The signed transaction will then be broadcasted to the blockchain network.
- Monitor transaction status: After the transaction is confirmed, you can monitor its status by checking the transaction ID (TXID) on a blockchain explorer or within the Trezor Wallet interface. This allows you to track the progress of the transaction until it is confirmed by the network.
- Keep your Trezor firmware up to date: To ensure the latest security features and enhancements, regularly update your Trezor device’s firmware. Refer to the official Trezor website or the Trezor Wallet interface for instructions on updating the firmware.
By verifying coin transactions on the Trezor device, you can have peace of mind knowing that you have personally reviewed and authorized each transaction before it is finalized. This added layer of verification helps protect your funds from unauthorized transfers and ensures the integrity of your cryptocurrency transactions.
Troubleshooting Common Issues
While using the Trezor Wallet, you may encounter occasional issues that can be resolved with some troubleshooting. Here are some common issues and solutions to help you address them:
- Device not recognized: If your Trezor device is not being recognized by the computer, try using a different USB cable or port. Ensure that you have installed the necessary drivers or the Trezor Bridge software. You can also try restarting your computer or using a different computer to isolate the issue.
- Connection issues: If you’re having trouble connecting your Trezor device to the Trezor Wallet interface, make sure your device is unlocked and properly plugged in. Refresh the wallet interface or restart the Trezor Bridge software. Disconnect and reconnect the device if necessary.
- Incorrect PIN: If you have forgotten your Trezor device’s PIN, refer to the device’s manual or Trezor’s official documentation for instructions on PIN recovery. Keep in mind that entering an incorrect PIN too many times can trigger a self-destruct mode and permanently erase the device’s contents.
- Recovery seed issues: If you’ve lost your recovery seed or are having trouble recovering your wallet using the seed, contact Trezor support immediately. Remember, the recovery seed is essential for restoring your wallet in case of device loss, damage, or PIN lockout.
- Transaction not confirming: If your transaction is not confirming on the blockchain network, ensure that you’ve included an appropriate transaction fee. Network congestion can also cause delays, so consider increasing the transaction fee or waiting for network conditions to improve. Check the transaction status on a blockchain explorer for more information.
- Missing or incorrect balance: If your coin balance is not displaying correctly, try refreshing the wallet interface or synchronization. Ensure that you’re using the latest firmware version for your Trezor device. If the issue persists, reach out to Trezor support for further assistance.
- Unsupported coin: If you’re trying to add or manage a coin that is not supported by the Trezor Wallet, check the official Trezor website for the list of supported coins. Consider using a different wallet that supports the specific coin you want to manage.
- Software compatibility issues: If you’re experiencing compatibility issues with the Trezor Wallet software, ensure that you’re using a supported browser and that your browser extensions or add-ons are not interfering with the wallet’s functionality. Keeping your browser and software up to date can also help resolve compatibility issues.
- Unusual behavior or errors: If you come across any unusual behavior, error messages, or unexpected issues, restart your Trezor device and the wallet interface. Ensure that your device’s firmware and software are up to date. If the problem persists, consult the official Trezor documentation or contact their support team for assistance.
Remember, it’s important to exercise caution and follow best practices when troubleshooting issues with your Trezor device and the Trezor Wallet. If unsure, it’s always recommended to consult the official documentation and seek assistance from Trezor support for prompt and accurate troubleshooting guidance.
Keeping Your Trezor and Coins Secure
Ensuring the security of your Trezor device and the cryptocurrencies stored within it is of utmost importance. Here are some essential measures to follow for maintaining optimal security:
- Protect your recovery seed: Safeguard your recovery seed and store it in a safe and separate location from your Trezor device. Ensure the seed is kept offline and protected from physical damage, theft, or unauthorized access.
- Enable PIN and passphrase: Set a strong PIN on your Trezor device and consider using an additional passphrase for added security. Use a unique and complex PIN or passphrase that is not easily guessable.
- Regularly update firmware: Keep your Trezor device’s firmware up to date to benefit from the latest security features, bug fixes, and compatibility improvements. Check the official Trezor website for firmware updates and follow the recommended update procedures.
- Verify wallet integrity: Before entering your PIN or recovery seed, ensure that the Trezor device screen displays matching information. Always cross-verify any information on the device’s screen to prevent phishing attacks or unauthorized manipulations.
- Use official channels: Only access the Trezor Wallet interface through the official Trezor website. Beware of phishing attempts or malicious websites that mimic the Trezor Wallet interface to steal your sensitive information.
- Be cautious of public Wi-Fi: When connecting your Trezor device to a computer, avoid using public or unsecured Wi-Fi networks. Public networks may be vulnerable to eavesdropping or other security risks that compromise the privacy of your transactions.
- Double-check addresses: When sending or receiving coins, thoroughly verify the recipient’s address to avoid sending coins to incorrect or malicious addresses. Cross-check the address on multiple platforms or use copy-paste methods to prevent manual entry errors.
- Keep software and antivirus updated: Ensure that your computer’s operating system, web browser, and antivirus software are up to date. Regular updates help protect against known vulnerabilities and security threats.
- Use hardware wallets for significant sums: Consider using a hardware wallet like Trezor for storing large amounts of cryptocurrencies. Hardware wallets provide an offline, secure environment for managing and storing private keys.
- Practice discretion with sensitive information: Be cautious about sharing information related to your Trezor device, such as recovery seed, PIN, or passphrase. Avoid sharing this information online or with unknown individuals or entities.
- Educate yourself: Stay informed about the latest trends, best practices, and security threats in the cryptocurrency world. Regularly review the official Trezor documentation and follow reliable sources to ensure you are up to date with current security recommendations.
Following these security measures will help safeguard both your Trezor device and your valuable cryptocurrencies. Remember, your own diligence plays a crucial role in maintaining the security of your digital assets. By adopting robust security practices, you can confidently protect your Trezor and enjoy peace of mind while managing and storing your coins securely.