
Setting Up Your Trezor Wallet
If you’ve recently purchased a Trezor hardware wallet to securely store your cryptocurrencies, the first step is to set up your wallet. The process is straightforward and can be completed in a few simple steps. Let’s walk through the process together.
The first thing you’ll need to do is connect your Trezor device to your computer or mobile device using the provided USB cable. Once connected, you’ll be directed to the Trezor website or the Trezor Wallet interface.
In the setup process, you’ll be prompted to choose a PIN for your device. Make sure to choose a strong PIN that is not easily guessable and confirm it on your Trezor device. This PIN will be required every time you access your wallet.
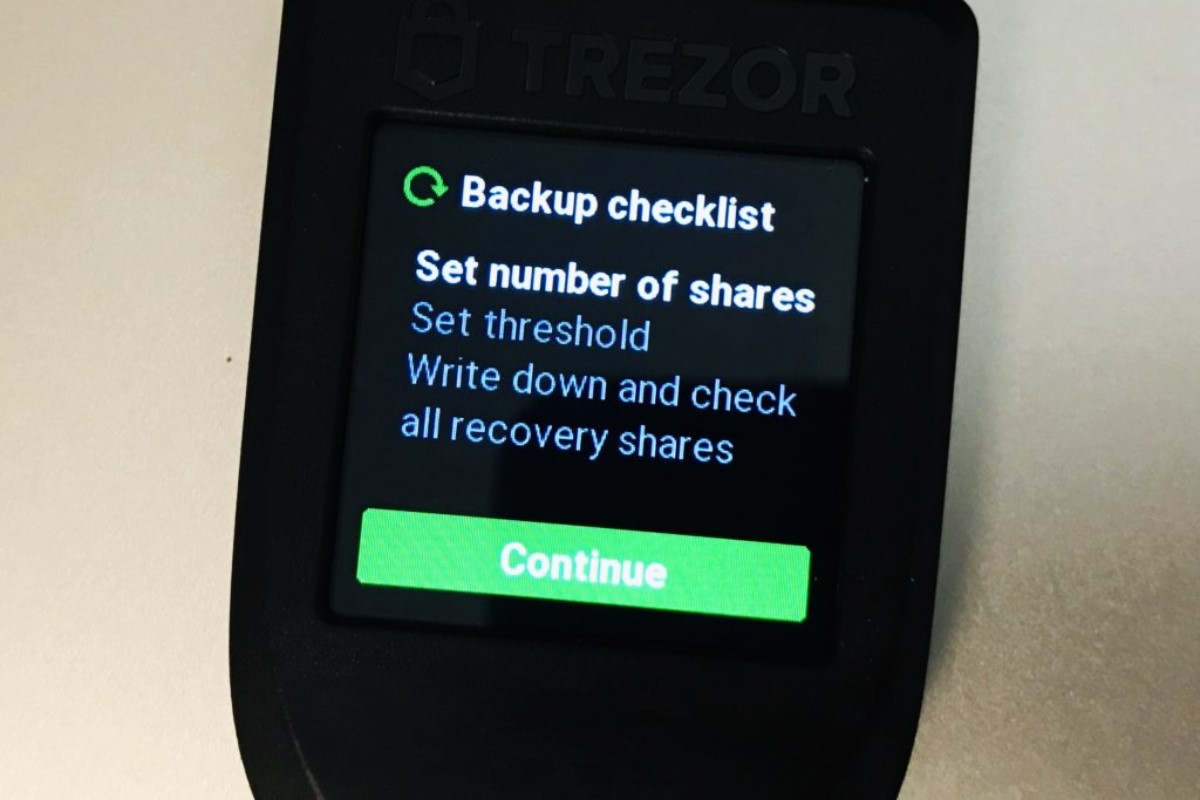
After setting up your PIN, you’ll be prompted to write down the recovery seed. This is a crucial step as it will be the only way to recover your wallet if you ever lose access to your device. Make sure to write down the seed on the provided recovery sheet and keep it in a safe place, away from prying eyes.
Once you’ve completed the setup process, you can start adding cryptocurrencies to your Trezor wallet. Simply navigate to the coin-specific wallet on the Trezor interface or use a compatible wallet application.
To add a cryptocurrency, you’ll need the receiving address from your Trezor wallet. The address can be found under the “Receive” or “Receiving” section of the wallet interface. Copy the address and use it to receive funds from exchanges or other wallets.
It’s important to note that your Trezor wallet can support multiple cryptocurrencies. You can easily switch between different coin wallets on the interface, making it convenient for managing your diverse crypto assets.
Now that you’ve set up your Trezor wallet and familiarized yourself with the basic functions, you’re ready to securely store and manage your cryptocurrencies with ease. Remember to always keep your device and recovery seed safe to protect your funds.
Understanding the Balance Tab
Once you have set up your Trezor wallet and added cryptocurrencies to it, you can start exploring the various features it offers. One important feature is the Balance tab, which provides an overview of the balances and transaction history for each supported cryptocurrency. Let’s dive into the details of how to use and interpret the Balance tab.
When you open the Balance tab on your Trezor wallet interface, you will see a list of all the cryptocurrencies you have added to your wallet. Each cryptocurrency will be displayed along with its current balance, presented in the respective coin’s unit.
Next to the balance, you may notice additional information such as the value of the coins in a chosen fiat currency and the percentage change in value over a selected time period. This feature can be particularly useful for keeping track of your investments and monitoring market fluctuations.
By clicking on a specific cryptocurrency in the Balance tab, you can access more detailed information about that particular coin. This includes the transaction history, which provides a chronological list of all incoming and outgoing transactions associated with that coin.
Furthermore, the Balance tab offers convenient filtering options to help you navigate through your transaction history. You can search for specific transactions by entering relevant keywords or filter them based on criteria such as transaction type, amount, or date.
Another important aspect of the Balance tab is the ability to distinguish between confirmed and unconfirmed transactions. Confirmed transactions are those that have been validated and added to the blockchain, while unconfirmed transactions are still pending verification. This information can be helpful in ensuring the security and accuracy of your transaction history.
For enhanced privacy and security, the Balance tab also allows you to generate new receiving addresses for each transaction. This helps to protect your anonymity and prevent others from easily associating your transactions with you.
Viewing Your Transaction History
The transaction history is an important aspect of your cryptocurrency management, allowing you to track and review all the transactions associated with your Trezor wallet. By accessing the Transaction History tab, you can view a detailed record of both incoming and outgoing transactions for each supported cryptocurrency. Let’s explore how you can easily view and understand your transaction history.
When you navigate to the Transaction History tab on your Trezor wallet interface, you will be presented with a list of all the transactions associated with the selected cryptocurrency. The transactions are displayed in reverse chronological order, with the most recent ones appearing at the top of the list.
Each transaction entry provides key information, such as the transaction date and time, the transaction amount, the sending and receiving addresses, and the transaction status. This information enables you to track and verify the flow of funds into and out of your wallet.
It’s worth noting that each transaction also has a unique transaction ID, known as a hash, which can be used to lookup detailed information on various blockchain explorers. This can be particularly helpful if you need to share transaction details with others or if you want to investigate further into a specific transaction.
In addition to the basic transaction details, you may also find additional information depending on the cryptocurrency. Some cryptocurrencies provide features such as transaction memos or tags, which allow you to add notes or labels to your transactions for better organization and reference.
Filtering options are available within the Transaction History tab to help you navigate through your transaction records more efficiently. You can search for specific transactions by entering keywords or filter transactions based on different criteria, such as transaction type, date range, or transaction amount.
By leveraging the transaction history, you can gain valuable insights into your past transactions and monitor the movement of funds within your Trezor wallet. It’s essential to review your transaction history regularly to ensure the accuracy of your records and detect any unauthorized or suspicious activity.
Overall, the Transaction History tab provides a comprehensive and user-friendly overview of all your cryptocurrency transactions, enabling you to keep track of your financial activities and ensure the security of your funds.
Sending Cryptocurrency from Your Trezor
Sending cryptocurrency from your Trezor wallet is a straightforward process that allows you to transfer your digital assets to other wallets or exchanges. Whether you want to make a payment or simply move your funds, the Trezor interface provides a user-friendly way to initiate and complete the transaction. Here’s a step-by-step guide on how to send cryptocurrency from your Trezor wallet.
1. Connect your Trezor device to your computer or mobile device using the provided USB cable and access your Trezor wallet interface.
2. From the main screen, select the wallet for the cryptocurrency you wish to send. For example, if you want to send Bitcoin, choose the Bitcoin wallet.
3. In the wallet interface, look for the “Send” or “Send coins” button and click on it to initiate the sending process.
4. Enter the recipient’s wallet address in the designated field. It’s crucial to double-check the address to ensure accuracy, as cryptocurrency transactions are irreversible and sending funds to an incorrect address may result in permanent loss.
5. Specify the amount you want to send. You can enter the amount in the cryptocurrency’s native unit or its equivalent value in your preferred fiat currency.
6. Depending on the wallet interface, you may have additional options to customize the transaction, such as setting the transaction fee or adding a note. These options can vary based on the cryptocurrency you’re sending.
7. Review the transaction details to ensure everything is correct, including the recipient address and the amount being sent.
8. Once you’re satisfied with the transaction details, confirm the transaction on your Trezor device by following the prompts on the screen. This additional layer of security ensures that only you have control over authorizing the transaction.
9. After confirming the transaction, your Trezor device will sign the transaction using your private key, and the transaction will be broadcasted to the network for verification and inclusion in the blockchain.
10. Wait for the transaction to be confirmed, which usually takes some time depending on the network congestion and the cryptocurrency you’re sending. Once confirmed, the recipient will receive the funds in their wallet.
By following these steps, you can easily and securely send cryptocurrency from your Trezor wallet. Remember to always double-check the recipient address and transaction details to avoid any mistakes that could lead to loss or irreversible transactions.
Receiving Cryptocurrency to Your Trezor
Receiving cryptocurrency to your Trezor wallet is a straightforward process that allows you to securely receive funds from other wallets or exchanges. Each supported cryptocurrency on your Trezor has its unique receiving address, which serves as the destination for incoming transactions. Here’s a step-by-step guide on how to receive cryptocurrency to your Trezor wallet.
1. Connect your Trezor device to your computer or mobile device using the provided USB cable and access your Trezor wallet interface.
2. From the main screen, select the wallet for the cryptocurrency you wish to receive. For example, if you want to receive Ethereum, choose the Ethereum wallet.
3. In the wallet interface, look for the “Receive” or “Receive coins” button and click on it to generate a new receiving address.
4. A unique receiving address will be generated for that specific cryptocurrency. You can either copy the address or display a QR code that contains the address.
5. Share the generated receiving address with the sender. This address is what they will use to send the cryptocurrency to your Trezor wallet.
6. It’s important to note that each receiving address generated by your Trezor wallet is intended for one-time use only. This practice enhances privacy and security by preventing others from associating different transactions with the same address.
7. Once the sender initiates the transaction and sends the funds to your Trezor’s receiving address, you can monitor the transaction’s progress in the respective wallet interface or through blockchain explorers.
8. After the transaction is confirmed and added to the blockchain, the received funds will be reflected in your Trezor wallet’s balance for that specific cryptocurrency.
9. It’s recommended to generate a new receiving address for each transaction to maintain the privacy and security of your transactions.
By following these steps, you can easily receive cryptocurrency to your Trezor wallet. Remember to always provide the correct receiving address and double-check the address to ensure accuracy. Receiving cryptocurrency to your Trezor wallet provides an added layer of security, as your private keys are stored securely on the device, away from potential online threats.
Tracking Your Balance on Different Blockchains
One of the advantages of using a Trezor wallet is its ability to support multiple cryptocurrencies across various blockchains. Each blockchain has its own native coin or token, and it’s essential to track your balances on these different blockchains. With your Trezor wallet, you can conveniently monitor your balances and stay updated on the status of your digital assets. Let’s explore how you can track your balance on different blockchains with your Trezor wallet.
When you access your Trezor wallet interface, you’ll see a list of the cryptocurrencies you have added to your wallet. Each cryptocurrency will have its own respective wallet, representing the specific blockchain it operates on.
To track the balance for a particular blockchain, choose the corresponding wallet for that cryptocurrency. For example, if you want to track your Bitcoin balance, select the Bitcoin wallet.
In the wallet interface, you’ll find information about your balance, including the current amount of the cryptocurrency held in your Trezor wallet. This balance is specific to the selected blockchain and represents the total quantity of coins or tokens associated with that blockchain.
It’s important to note that tracking your balance on different blockchains does not provide an aggregated view of your overall portfolio. Each blockchain operates independently, and the balances are segregated based on the specific wallet chosen.
By switching between different wallets in the Trezor interface, you can easily monitor the balances on different blockchains without the need for multiple wallets or accounts.
Furthermore, the Trezor wallet interface provides additional information, such as the value of your holdings in a chosen fiat currency and the percentage change in value over time. This feature helps you gauge the performance of your investments on different blockchains.
Remember, the balance displayed on your Trezor wallet interface is a snapshot of your holdings at that particular moment. The balance can fluctuate as new transactions are confirmed or as the value of the coins changes in the market.
To maintain accurate balance tracking, it’s important to keep your Trezor wallet connected to the internet and regularly synchronize it with the blockchain. This ensures that your balance is up to date and reflects the latest transactions and activity on the respective blockchains.
By effectively tracking your balances on different blockchains, you can manage your digital assets more efficiently and stay informed about the value of your holdings across various cryptocurrencies and blockchains.
Handling Multiple Accounts on Your Trezor
If you hold multiple accounts or addresses for the same cryptocurrency, managing them can become cumbersome and confusing. Fortunately, with your Trezor wallet, you can easily handle multiple accounts within the same interface, streamlining your cryptocurrency management. Let’s explore how you can efficiently manage multiple accounts on your Trezor wallet.
1. Access your Trezor wallet interface using your computer or mobile device.
2. Select the wallet for the cryptocurrency that you have multiple accounts for. For example, if you have multiple Bitcoin accounts, choose the Bitcoin wallet.
3. In the wallet interface, you’ll notice that you have the option to create new accounts. Click on the “Add New Account” or “Create Account” button.
4. Each newly created account will have its unique receiving address and transaction history, providing a segregated space for managing specific funds or transactions.
5. You can easily switch between different accounts by selecting the desired account from the account dropdown menu within the wallet interface.
6. Each account operates independently within the same wallet, allowing you to keep track of balances and transactions for different accounts without the need for multiple wallets or devices.
7. It’s important to note that each account has its own unique receiving address. You can share these addresses with others to receive funds specifically for that account.
8. By using multiple accounts, you can better organize and categorize your cryptocurrency holdings. For example, you can create separate accounts for personal funds, business funds, or different investment strategies.
9. The Trezor wallet interface also provides the ability to customize the account labels. This feature can be helpful to add more context or descriptions to each account, making it easier to identify and manage your funds.
10. Additionally, you can generate new receiving addresses for each account to enhance privacy and security. This practice ensures that each transaction is associated with a different address, making it more challenging for others to trace and link your transactions.
By effectively handling multiple accounts on your Trezor wallet, you can streamline your cryptocurrency management and keep your digital assets organized. The intuitive interface and segregated accounts allow for easy switching and tracking, providing a convenient solution for those with diverse cryptocurrency holdings.
Checking the Status of Unconfirmed Transactions
Unconfirmed transactions refer to transactions that have been initiated but have not yet been added to the blockchain. The confirmation process involves validating the transaction and including it in a block, making it a permanent and irreversible part of the blockchain. If you have sent a transaction from your Trezor wallet and it remains unconfirmed, it’s important to check its status to ensure its progress in the network. Let’s explore how you can check the status of unconfirmed transactions with your Trezor wallet.
1. Open your Trezor wallet interface using your computer or mobile device.
2. Navigate to the transaction history or specific wallet interface from which the transaction was sent.
3. Locate the unconfirmed transaction in the transaction history. The transaction may be marked as “Pending” or “Unconfirmed.”
4. Click on the transaction to access more details about it, such as the transaction ID or hash.
5. Copy the transaction ID or hash and use it to search for the transaction status on a blockchain explorer. A blockchain explorer is a web tool that allows you to view detailed information about transactions on the blockchain.
6. Open a trusted blockchain explorer in your web browser and paste the transaction ID or hash into the search bar.
7. The blockchain explorer will display information about the transaction, including its confirmation status, the number of confirmations it has received, and its position in the transaction queue.
8. The confirmation status indicates whether the transaction is still unconfirmed, pending, or has been confirmed. The number of confirmations represents the number of blocks that have been added to the blockchain since the transaction was initiated. Generally, the more confirmations a transaction has, the more secure and finalized it is.
9. Keep in mind that the time it takes for a transaction to be confirmed can vary depending on network congestion, the transaction fee you’ve set, and the specific cryptocurrency you’re using.
10. If the transaction remains unconfirmed for an extended period or if there are any concerns, you can try accelerating its confirmation by increasing the transaction fee. Most wallets, including Trezor, allow you to set the transaction fee to prioritize its inclusion in the next block.
Monitoring the status of unconfirmed transactions is essential to ensure the smooth processing of your transactions and the security of your funds. By using the transaction ID or hash and a blockchain explorer, you can easily track the progress and confirmation status of your transactions, providing peace of mind and visibility into the transaction process.
Using the Balance Checker Tool
The balance checker tool is a useful feature provided by Trezor to help you easily verify the balance of your cryptocurrencies without the need to access your wallet interface. This tool comes in handy when you want to quickly check the balance of a specific cryptocurrency or verify that your funds are still intact. Let’s explore how you can use the balance checker tool with your Trezor wallet.
1. Ensure that your Trezor device is connected to your computer or mobile device, and the Trezor wallet interface is accessible.
2. Open a web browser and navigate to the Trezor balance checker tool. It is usually available on the official Trezor website or other trusted platforms.
3. Select the cryptocurrency for which you want to check the balance from the available options provided by the balance checker tool.
4. Connect your Trezor device to the computer or mobile device using the provided USB cable.
5. Follow the instructions on the balance checker tool to authorize the connection and access your device’s information securely.
6. Once the connection is established, the balance checker tool will display the balance of the selected cryptocurrency associated with your Trezor wallet.
7. The balance is usually presented in the cryptocurrency’s native unit, making it easy for you to verify the accuracy of your holdings.
8. The balance checker tool may also provide additional information, such as the value of your holdings in a chosen fiat currency or the percentage change in value over a specified time period. These features can be helpful for tracking the performance of your investments.
9. The balance checker tool does not require you to enter your Trezor PIN or seed, ensuring the security of your funds. It simply retrieves the balance information from the blockchain using the device’s public address.
10. By using the balance checker tool, you can quickly verify your cryptocurrency holdings, ensuring that your Trezor wallet balance matches the blockchain’s records.
The balance checker tool is a convenient way to keep track of your cryptocurrency balances without needing to access your wallet interface. It provides a secure and efficient method to verify your holdings, giving you peace of mind regarding the safety of your funds stored on your Trezor device.
Troubleshooting Balance Discrepancies
While using your Trezor wallet, you may encounter balance discrepancies between what is displayed on your wallet interface and the actual balance on the blockchain. This can be concerning, but there are several steps you can take to troubleshoot and resolve any balance discrepancies. Let’s explore some troubleshooting methods to help you reconcile balance discrepancies with your Trezor wallet.
1. Double-check the blockchain: Cross-verify the balance shown on your wallet interface with the blockchain explorer for the respective cryptocurrency. The blockchain explorer provides the most accurate and up-to-date information regarding your actual balance.
2. Update your wallet: Ensure that you are using the latest firmware and software versions for both your Trezor device and wallet interface. Outdated versions can sometimes lead to display issues or inaccuracies in the balance.
3. Refresh the wallet interface: Refresh the wallet interface to ensure that it is displaying the most recent data. Simply refreshing the page or reconnecting your Trezor device can help refresh the balance and resolve any temporary discrepancies.
4. Check for synchronization issues: If you have recently made transactions, there might be a delay in the synchronization of your wallet with the blockchain. Wait for some time and check your balance again to allow for proper synchronization.
5. Verify the receiving addresses: Ensure that you are providing the correct receiving address for each transaction. Sending funds to an incorrect address can result in a mismatch between the displayed balance and the actual balance.
6. Review transaction history: Check your transaction history on the blockchain explorer to verify incoming and outgoing transactions. Ensure that all transactions are accurately reflected and confirm that no unauthorized or unknown transactions have taken place.
7. Check for transaction confirmations: If you have recently sent a transaction, ensure that it has been confirmed on the blockchain. Unconfirmed transactions can temporarily affect the balance displayed on your wallet interface.
8. Contact support: If you have gone through the above steps and are still experiencing balance discrepancies, it may be beneficial to reach out to Trezor support or consult the Trezor community for assistance. They can provide guidance and help resolve any persistent issues.
Remember to exercise caution and ensure that you are following proper security practices while troubleshooting balance discrepancies. Always double-check addresses, verify official sources, and be mindful of potential phishing attempts or scams.
By utilizing these troubleshooting methods, you can often identify and resolve balance discrepancies with your Trezor wallet, ensuring the accuracy and integrity of your cryptocurrency holdings.