
Types of Sensors for Oculus Rift
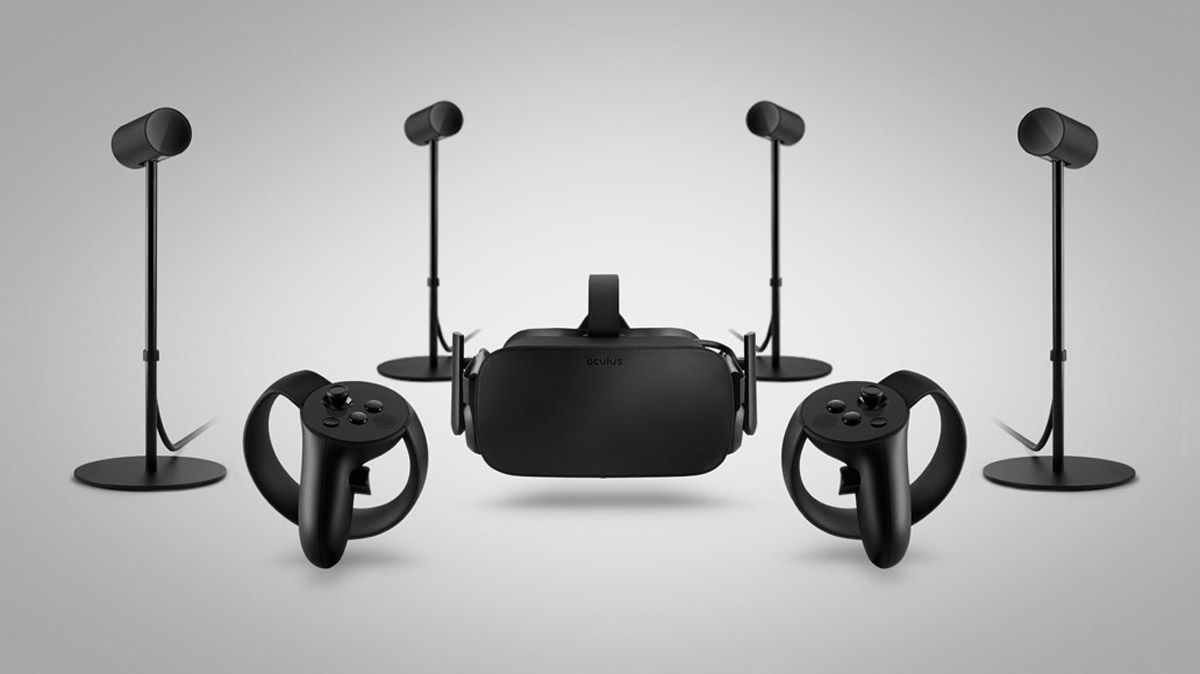
Oculus Rift, the popular virtual reality (VR) headset, relies on sensor technology to provide an immersive and interactive experience. There are two main types of sensors that are essential for the functioning of the Oculus Rift: the headset sensor and the tracking sensor.
The headset sensor, also known as the positional sensor, is located inside the Oculus Rift headset. It tracks the orientation and movement of the user’s head, allowing for a 360-degree view in the virtual environment. This sensor is crucial for the overall VR experience, as it ensures that the visuals align with the user’s head movements, creating a seamless and realistic simulation.
The tracking sensor, on the other hand, is an external device that tracks the position and movement of the Oculus Rift in physical space. It uses infrared cameras to detect and interpret the signals emitted by infrared LED lights placed on the headset, as well as any additional accessories such as controllers or body trackers. The tracking sensor is responsible for accurately translating the user’s physical movements into the virtual world, enabling them to interact with the virtual environment in a more natural and intuitive way.
Initially, the Oculus Rift came with a single tracking sensor, which limited the user to a sitting or standing VR experience within a small area. However, as technology advanced and user demands grew, Oculus introduced the concept of room-scale VR, which requires the use of multiple sensors.
With room-scale VR, users can freely move around within a designated VR space, allowing for a more immersive and dynamic experience. To achieve this, a minimum of two tracking sensors are required, ideally positioned in opposite corners of the play area. This configuration allows for accurate and reliable tracking of the user’s movements in 3D space.
It’s worth noting that the number of sensors needed also depends on the Oculus Rift model. The original Oculus Rift CV1 requires the use of three sensors to fully support room-scale VR, while the newer Oculus Rift S and Oculus Quest models provide room-scale VR capabilities with just two sensors.
How Sensors Work in Oculus Rift
The sensors in the Oculus Rift play a crucial role in tracking the user’s movements and translating them into the virtual world. Understanding how these sensors work provides insight into the immersive VR experience that the Oculus Rift offers.
The headset sensor, also known as the positional sensor, uses a combination of accelerometer, gyroscope, and magnetometer to track the orientation and movement of the user’s head. The accelerometer measures linear acceleration, the gyroscope tracks angular velocity, and the magnetometer detects the Earth’s magnetic field, which helps with magnetic alignment. By combining data from these sensors, the headset sensor provides real-time updates on the user’s head movements, allowing for a seamless and responsive VR experience.
The tracking sensor, on the other hand, utilizes infrared camera technology to track the position and movement of the Oculus Rift and any accessories in physical space. The sensors built into the tracking sensor detect the infrared light emitted by the LED lights on the headset and accessories, allowing for precise positional tracking. By constantly capturing and analyzing these infrared signals, the tracking sensor can accurately determine the location and orientation of the Oculus Rift within the VR environment.
The data captured by both the headset sensor and the tracking sensor is then sent to the computer, where it is processed and used to update the virtual world accordingly. This seamless integration between the sensors and the computer ensures that the user’s movements and actions are accurately reflected in the virtual environment, providing a highly immersive and realistic experience.
It is important to note that the sensors require a clear line of sight between the headset and the tracking sensor to ensure optimal tracking accuracy. This means that obstacles or objects that obstruct the infrared signals may lead to tracking errors or limited tracking range. Proper set-up and placement of the sensors, as well as ensuring a clutter-free play area, can help optimize the tracking performance.
Overall, the sensors in the Oculus Rift work in tandem to deliver a lifelike VR experience. From tracking head movements to accurately mapping the user’s position in physical space, these sensors are at the core of the Oculus Rift’s ability to transport users into a virtual world.
Minimum Number of Sensors for Oculus Rift
The minimum number of sensors required for the Oculus Rift largely depends on the user’s desired VR experience and the specific model of the Oculus Rift they are using. Initially, the Oculus Rift CV1, the first consumer model released by Oculus, came with a single tracking sensor. This single sensor allowed for a seated or standing VR experience where the user’s movements were limited to a small area.
With the introduction of room-scale VR, which provides users with the freedom to move around within a designated VR space, multiple sensors became necessary. For the Oculus Rift CV1, a minimum of two additional sensors was recommended to fully support room-scale VR. Ideally, these sensors should be positioned in opposite corners of the play area to ensure accurate and reliable tracking of the user’s movements in 3D space.
However, the newer models of the Oculus Rift, such as the Oculus Rift S and Oculus Quest, have made advancements in sensor technology. These models provide room-scale VR capabilities with just two sensors, eliminating the need for an additional third sensor.
The two-sensor configuration for room-scale VR is made possible by improvements in the tracking algorithms and the design of the sensors themselves. These advancements enable more robust tracking and a wider tracking range, allowing users to enjoy a greater level of movement and immersion within their VR environment.
It’s important to note that while the minimum requirement for room-scale VR is two sensors, for the best possible experience, some users may choose to add a third sensor to further enhance tracking accuracy and minimize any occlusion issues. This is especially beneficial for larger play areas or when using accessories such as Oculus Touch controllers that require precise positional tracking.
Optimal Number of Sensors for Oculus Rift
The optimal number of sensors for the Oculus Rift depends on various factors, including the user’s VR setup, desired level of immersion, and the specific Oculus Rift model being used. While the minimum requirement for room-scale VR is typically two sensors, adding additional sensors can enhance the overall tracking performance and reduce the likelihood of occlusion issues.
For most users, two sensors positioned in opposite corners of the play area provide a satisfactory room-scale VR experience. This configuration allows for accurate tracking of the user’s movements and provides a wide tracking range. It is recommended to place the sensors at equal heights and angle them slightly downward for optimal coverage.
However, some users may find that adding a third sensor further improves tracking accuracy, especially in larger play areas or for activities that require precise hand tracking. With three sensors, the tracking coverage becomes more comprehensive, reducing the chances of occlusion and ensuring a more seamless VR experience.
Adding a fourth sensor is generally considered unnecessary for most users. While it may provide marginal improvements in tracking precision, the benefit may not be significant enough to justify the additional cost and setup requirements. Four sensors are more commonly used in setups with extremely large play areas or for advanced applications that require the highest level of tracking accuracy.
It’s important to note that the tracking capabilities of the Oculus Rift have improved significantly with each model iteration. The newer models, such as the Oculus Rift S and Oculus Quest, feature enhanced sensor technology and improved tracking algorithms, allowing for more accurate and robust tracking with fewer sensors.
Ultimately, determining the optimal number of sensors for your Oculus Rift depends on your specific needs and preferences. If you have a small to medium-sized play area and primarily engage in standard VR experiences, two sensors should be sufficient. However, if you have a larger play area or require precise hand tracking, adding a third sensor can provide noticeable improvements in tracking accuracy. Experimenting with different sensor configurations and adjusting their placement can help you find the optimal setup for your VR needs.
Additional Benefits of Having Multiple Sensors
Having multiple sensors for your Oculus Rift setup offers several additional benefits beyond the basic tracking capabilities. While the minimum requirement for room-scale VR is typically two sensors, adding more sensors can enhance the overall VR experience and provide several advantages.
1. Improved Tracking Accuracy: With multiple sensors, the tracking accuracy is significantly enhanced. The sensors work in tandem to triangulate the position and movement of the Oculus Rift in physical space, resulting in more precise and responsive tracking. This is particularly beneficial for activities that require precise hand movements or when using accessories like Oculus Touch controllers.
2. Reduced Occlusion Issues: Occlusion occurs when an object obstructs the line of sight between the Oculus Rift and the sensors, leading to tracking errors. By strategically placing multiple sensors in different corners of the play area, the coverage and tracking range are expanded, reducing the chances of occlusion. This allows for a more seamless and uninterrupted VR experience.
3. Wider Tracking Range: Multiple sensors enable a wider tracking range, allowing users to move about more freely within their designated VR space. This is especially useful for room-scale VR experiences, where users can explore and interact with the virtual environment without feeling restricted.
4. Enhanced Immersion: The presence of multiple sensors adds to the immersion factor in VR. By accurately tracking the user’s movements and actions, the virtual world becomes more realistic and responsive. This heightened sense of immersion enhances the overall experience, making users feel more engaged and connected to the virtual environment.
5. Multiplayer and Social VR: Multiple sensors are particularly beneficial for multiplayer and social VR experiences. With each player having their own designated sensors, the system can track multiple users simultaneously, allowing for collaborative and interactive gameplay. This opens up possibilities for social VR experiences, where users can interact with each other in the virtual space, further enhancing the sense of presence and shared experiences.
While the additional sensors do come with certain requirements in terms of setup and calibration, the benefits they provide greatly outweigh the extra effort. They contribute to a more accurate, immersive, and enjoyable VR experience, allowing users to fully immerse themselves in the virtual world.
Set-Up and Placement of Sensors for Oculus Rift
Proper set-up and placement of the sensors is crucial to ensure optimal tracking performance and a smooth VR experience with your Oculus Rift. Here are some guidelines to follow when setting up and positioning the sensors:
1. Sensor Placement: For a standard two-sensor setup, position the sensors in opposite corners of the play area. Ideally, place them at equal heights, around 6-7 feet above the ground, and angle them slightly downward. This angle helps maximize the tracking coverage and minimize occlusion issues.
2. Clear Line of Sight: Ensure that there is a clear line of sight between the sensors and the Oculus Rift headset. Avoid placing the sensors behind obstacles, furniture, or other objects that may obstruct the infrared signals. Clear the play area of any potential obstructions to maintain uninterrupted tracking.
3. USB Connections: Connect the sensors to the USB ports on your computer. Use USB extension cables if necessary to reach the desired positions. It is recommended to use USB 3.0 ports for optimal data transfer and tracking performance.
4. Sensor Angles: Angle the sensors slightly inward towards the center of the play area. This helps improve the tracking accuracy, especially for activities that require hand tracking or precise movements.
5. Sensor Distance: Try to maintain an equal distance between the sensors and the play area. This helps ensure consistent tracking across the entire space and minimizes tracking discrepancies.
6. Calibration: Follow the calibration instructions provided by the Oculus software. This involves mapping out the play area and validating the sensor positions. Proper calibration helps fine-tune the tracking accuracy and ensures accurate scaling within the virtual environment.
7. Experiment and Adjust: Don’t hesitate to experiment with sensor placement and angles to find the optimal configuration for your specific play area. Adjust the sensor positions based on the size, shape, and layout of your space to achieve the best tracking coverage.
By carefully setting up and positioning the sensors, you can optimize the tracking performance of your Oculus Rift. Remember to run sensor tests and calibrate the system regularly to maintain accurate tracking and an immersive VR experience.
Common Issues with Sensor Set-Up and Solutions
While setting up the sensors for your Oculus Rift, you may encounter certain issues that can affect the tracking performance and, consequently, your VR experience. Here are some common issues with sensor set-up and their solutions:
1. Tracking Interruptions: If you experience intermittent tracking interruptions or loss of tracking altogether, check for any objects or obstacles that may be blocking the line of sight between the sensors and the Oculus Rift headset. Rearrange or remove any obstructions to ensure a clear line of sight for reliable tracking.
2. Reflections and Interference: Reflective surfaces and bright lights can interfere with the infrared signals used by the sensors. Avoid placing the sensors near windows or mirrors and minimize bright light sources within the play area. Covering reflective surfaces or using curtains can also help reduce interference.
3. USB Bandwidth Issues: Insufficient USB bandwidth can cause tracking lag or erratic behavior. Ensure that the sensors are connected to USB 3.0 ports on your computer and avoid using USB hubs or extension cables that may lower the bandwidth. If necessary, use separate USB controllers or consider adding a USB expansion card to improve bandwidth.
4. Sensor Drift: Sensor drift occurs when the headset gradually shifts away from its original position over time. This can be caused by external magnetic interference or calibration issues. Ensure that the play area is free from strong magnetic sources and recalibrate the sensors regularly to minimize drift.
5. Sensor Connectivity Problems: If the sensors are not being recognized or are disconnecting frequently, try connecting them to different USB ports. Sometimes, USB power management settings can cause connectivity issues. Adjust the power management settings to prevent USB ports from entering sleep mode or turning off during usage.
6. Erratic Controllers: If you are experiencing tracking issues specifically with the Oculus Touch controllers, ensure that the sensors are properly positioned to cover the entire play area and have a clear line of sight to the controllers. If problems persist, replace the batteries in the controllers and make sure they are fully charged.
7. Firmware and Software Updates: Oculus regularly releases firmware and software updates to improve performance and address known issues. Make sure to keep your Oculus software and sensors up to date by installing the latest updates from the Oculus app or website. These updates often include bug fixes and enhancements to enhance tracking performance.
By addressing these common issues and implementing the recommended solutions, you can optimize the set-up of your Oculus Rift sensors and enjoy a smoother and more immersive VR experience.
How to Test and Calibrate Sensors for Oculus Rift
Proper testing and calibration of the sensors for your Oculus Rift is essential to ensure accurate tracking and optimal performance. Here are the steps to test and calibrate the sensors:
1. Sensor Detection: Connect all the sensors to your computer using USB cables. Launch the Oculus app and navigate to the Devices section. Check if all the sensors are detected and listed in the sensor setup screen. If any sensor is not recognized, try reconnecting it to a different USB port or restarting your computer.
2. Sensor Alignment: With the sensors mounted in their intended positions, check the sensor alignment. The sensors should be angled toward the center of the play area and positioned at equal heights. Adjust the sensors as necessary to ensure proper alignment and coverage of the play area.
3. Sensor Testing: In the Oculus app, go to the Devices section and select the Sensors tab. Click on “Test All” to initiate the sensor test. Follow the on-screen instructions to move around in the play area, facing different directions, and raising your hands. This test helps ensure that the sensors are tracking your movements accurately without any issues.
4. Calibration: Oculus provides a calibration process to fine-tune the tracking accuracy. In the Oculus app, go to the Devices section and select the Sensors tab. Click on “Calibrate Floor Level” to set the floor height based on your physical environment. Follow the instructions to place the controller on the floor and trigger the calibration process. This helps align the virtual floor with the real-world floor, providing a more immersive experience.
5. Recalibration: If you notice any tracking issues or drift over time, you can recalibrate the sensors. Oculus provides an option to reset the positional tracking, which allows the sensors to recalibrate themselves. In the Oculus app, go to the Devices section and select the Sensors tab. Click on “Reset Default View” or “Reset Sensor Tracking” to initiate the recalibration process.
6. Tracking Environment: Ensure that the play area is well-lit and free from any reflective surfaces or strong sources of infrared light. Remove any objects or furniture that may obstruct the line of sight between the sensors and the Oculus Rift headset.
7. Regular Maintenance: It is recommended to regularly check for firmware and software updates for your Oculus Rift. Install the updates to ensure you have the latest enhancements and bug fixes for the sensors and overall system performance.
By following these steps to test and calibrate your Oculus Rift sensors, you can optimize the tracking accuracy and enjoy a more immersive VR experience. Regularly testing and recalibrating will help maintain the optimal performance of your sensors over time.
How Many Sensors Do You Need for Room-Scale VR?
Room-scale VR allows users to move freely within a designated VR space, creating a more immersive and interactive experience. The number of sensors required for room-scale VR depends on the specific model of the Oculus Rift you are using.
For the original Oculus Rift CV1, a minimum of two additional sensors is recommended for room-scale VR. These sensors should be positioned in opposite corners of the play area to provide accurate tracking of the user’s movements in 3D space. This two-sensor configuration allows for a satisfying room-scale VR experience with a wide tracking range.
However, with advancements in technology and sensor design, newer models have made room-scale VR more accessible with fewer sensors. The Oculus Rift S and Oculus Quest models provide room-scale VR capabilities with just two sensors, eliminating the need for an additional third sensor.
This improvement is made possible through enhancements in tracking algorithms and improvements in the sensor hardware. With the two-sensor setup, users can enjoy a full room-scale VR experience, exploring and interacting with the virtual environment in a more immersive and natural way.
It’s important to note that the positioning and placement of the sensors play a crucial role in ensuring accurate tracking. For optimal performance, position the sensors in opposite corners of the play area, at equal heights, and angle them slightly downward. This configuration helps maximize the tracking coverage and minimize occlusion issues.
While two sensors are typically sufficient for most room-scale VR experiences, some users may choose to add a third sensor to further enhance tracking accuracy and minimize any occlusion issues. This is particularly beneficial for larger play areas or when using accessories such as Oculus Touch controllers that require precise positional tracking.
Ultimately, the number of sensors required for room-scale VR depends on the specific model of the Oculus Rift and the user’s desired VR setup. Whether using two or three sensors, the goal is to create an immersive VR experience that allows for natural movement and interaction within the virtual environment.
Comparison of Sensor Requirements for Different Oculus Rift Models
When it comes to the sensor requirements for room-scale VR with the Oculus Rift, different models have varying needs. Let’s compare the sensor requirements for different Oculus Rift models:
1. Oculus Rift CV1: The original Oculus Rift CV1 requires a minimum of two additional sensors for room-scale VR. These sensors should be positioned in opposite corners of the play area to provide accurate tracking of movements in 3D space. Optionally, a third sensor can be added for better tracking coverage, especially in larger play areas. This model offers a highly immersive room-scale VR experience with the appropriate sensor setup.
2. Oculus Rift S: The Oculus Rift S takes a slightly different approach. It provides room-scale VR capabilities with just two sensors, eliminating the need for an additional third sensor. This improved sensor technology and tracking algorithms allow for a more streamlined setup while still delivering a satisfying room-scale experience. The sensors should still be positioned in opposite corners of the play area with equal heights and downward angles to maximize tracking coverage.
3. Oculus Quest: The Oculus Quest also offers room-scale VR with just two sensors, similarly to the Oculus Rift S. The difference with the Oculus Quest is that the sensors are built directly into the headset itself, eliminating the need for external tracking sensors. This feature provides greater flexibility and portability, as no additional sensor setup is required. The tracking capabilities of the Oculus Quest rely on inside-out tracking, utilizing cameras on the headset to track the user’s movements within the VR environment.
It’s important to note that while the Oculus Rift CV1, Oculus Rift S, and Oculus Quest have different sensor requirements, they all aim to provide an immersive room-scale VR experience. Depending on the specific model, the number and placement of sensors may vary, but the goal remains the same: to accurately track user movements and create an engaging VR environment.
As technology continues to advance, future Oculus Rift models may introduce further improvements in sensor technology, tracking algorithms, and the overall VR experience. It’s always recommended to refer to the official Oculus documentation and guidelines for the specific model you own to ensure you have the correct setup and sensor requirements for the optimal VR experience.