
Setting Up Your Digital Wallet
Setting up your digital wallet is a simple process that can be done in just a few steps. Here’s a guide to help you get started:
1. Download the App: Begin by downloading the digital wallet app from the relevant app store for your device. Ensure that you choose a reputable app with good user reviews.
2. Create an Account: Once the app is installed, open it and follow the prompts to create an account. You’ll typically be asked to provide your name, email address, and create a secure password. Make sure you choose a password that is unique and hard to guess.
3. Add Payment Method: To utilize your digital wallet for purchases, you’ll need to link it to a payment method. The most common option is to add your credit or debit card. Tap on the “Add Card” button and enter the required details, including card number, expiration date, and CVV code. Some digital wallets also offer the option to link to a bank account or other payment methods.
4. Verify Your Identity: For added security, you may be required to verify your identity. This could involve providing additional information or completing a verification process, such as entering a one-time password (OTP) sent to your registered mobile number or email.
5. Set a Passcode or Biometric Authentication: To protect your digital wallet from unauthorized access, it’s recommended to set a passcode or enable biometric authentication, such as fingerprint or facial recognition, if your device supports it. This ensures that only you can access your digital wallet.
6. Explore Additional Features: Once your digital wallet is set up, take some time to explore the additional features it offers. Some digital wallets allow you to store digital versions of your loyalty cards, boarding passes, or tickets, making it convenient to access them when needed.
By following these steps, you’ll have successfully set up your digital wallet and can begin using it for various transactions. Remember to keep your digital wallet app up to date and regularly check for any security updates to ensure optimal performance and protection.
Adding Credit Cards to Your Digital Wallet
Adding your credit cards to your digital wallet is a convenient way to make secure and contactless payments. Here’s how you can easily add your credit cards:
1. Open the App: Launch your digital wallet app on your device and navigate to the settings or payment methods section.
2. Tap on “Add Card”: Look for the “Add Card” or similar option and tap on it to begin the process.
3. Manual Entry or Scan: You’ll have two options to add your credit card details. The first option is to manually enter the information, which includes the card number, expiration date, and CVV code. The second option, available on some apps, allows you to scan your card with the device’s camera, which automatically populates the information fields.
4. Verify Card Details: Once you’ve entered or scanned the card details, review them carefully to ensure accuracy. Even a small mistake can cause issues during transactions.
5. Confirm Your Identity: For security purposes, you may be required to verify your identity. This can be done using methods like fingerprint or facial recognition or by entering a verification code sent to your registered email or phone number.
6. Accept Terms and Conditions: Read through the terms and conditions presented on the screen and accept them to proceed with adding your credit card to the digital wallet.
7. Enjoy Secure Payments: Once the credit card is successfully added, you’re ready to make secure payments using your digital wallet. Simply select the credit card you wish to use during a transaction and authenticate the payment using your passcode, biometric authentication, or any other security feature provided by the digital wallet.
It’s important to note that not all credit cards are compatible with every digital wallet. Ensure that the digital wallet you’re using supports your credit card provider before attempting to add it. Additionally, make sure you have the necessary funds or credit limit available on the card to complete transactions successfully.
By adding your credit cards to your digital wallet, you can enjoy the convenience of making contactless payments with just a few taps on your device. It’s a secure and efficient way to manage your finances and streamline your payment experience.
Adding Bank Accounts to Your Digital Wallet
In addition to credit cards, you can also add your bank accounts to your digital wallet for seamless and efficient transactions. Here’s how to go about adding your bank accounts:
1. Open the App: Launch your digital wallet app on your device and access the settings or payment methods section.
2. Look for the Option: Find the option to add a bank account within the app. This may be labeled as “Add Bank Account,” “Link Bank,” or something similar.
3. Select Your Bank: You’ll typically be presented with a list of popular banks. Locate your bank from the list and tap on it to proceed.
4. Sign in or Provide Information: Depending on your bank and the app’s integration, you may need to sign in to your bank account using your online banking credentials. Alternatively, you may be asked to provide relevant details such as your account number and routing number.
5. Consent and Authorization: In order to link your bank account to the digital wallet, you’ll usually need to provide consent and authorization for the app to access your account details. This step ensures that the digital wallet can securely retrieve account information and facilitate transactions.
6. Verify Account Linkage: Once you’ve completed the necessary steps, the app will typically verify the linkage of your bank account. This may involve sending a verification code to your registered email or phone number or requiring you to make a small transaction to verify account ownership.
7. Confirmation and Activation: Once your bank account is successfully added to the digital wallet, you’ll receive a confirmation message. At this point, you can start using your bank account for transactions within the digital wallet app.
Adding your bank account to your digital wallet provides you with the flexibility to transfer funds, make payments, and even receive money directly into your bank account. It eliminates the need to manually enter account details during transactions and simplifies the overall payment process.
It’s important to note that not all banks may be supported by every digital wallet app. Therefore, ensure that your bank is compatible with the digital wallet before attempting to link your account. Additionally, make sure you have the necessary funds and appropriate permissions to perform transactions from your bank account.
Adding Loyalty Cards to Your Digital Wallet
One of the convenient features offered by many digital wallet apps is the ability to store and manage your loyalty cards digitally. This eliminates the need to carry physical cards and allows you to easily earn and redeem rewards. Here’s how you can add loyalty cards to your digital wallet:
1. Open the App: Launch your digital wallet app and navigate to the section for adding and managing loyalty cards.
2. Look for the Option: Locate the option to add a loyalty card. This may be labeled as “Add Card,” “Add Loyalty Program,” or similar.
3. Scan the Barcode: Many digital wallet apps offer the ability to scan the barcode on your physical loyalty card using your device’s camera. This automatically captures and stores the card’s information in the digital wallet app.
4. Manual Entry: If your loyalty card does not have a barcode or cannot be scanned, you can manually enter the necessary details. This typically includes the card number, your name, and any additional information required.
5. Verify and Confirm: Once you’ve added the loyalty card details, double-check them to ensure accuracy. It’s important to enter the correct information to avoid any issues when trying to earn or redeem rewards.
6. Personalize or Organize: Some digital wallet apps allow you to personalize or organize your loyalty cards for easy access. You may be able to add a custom name or label to each card, arrange them in a preferred order, or categorize them into groups based on the type of loyalty program.
7. Enjoy Convenient Rewards: With your loyalty cards stored in your digital wallet, you can now enjoy the convenience of earning and redeeming rewards seamlessly. Simply open the digital wallet app, select the desired loyalty card, and have it scanned or enter the loyalty card details as requested during your transaction.
By adding your loyalty cards to your digital wallet, you can declutter your physical wallet, save time at checkout, and never miss out on earning valuable rewards. Plus, the digital wallet app may also offer bonus features such as personalized offers and notifications about upcoming promotions from your favorite retailers.
Keep in mind that not all loyalty programs may be compatible with every digital wallet app. Therefore, check if your preferred loyalty programs are supported before attempting to add them to your digital wallet. Additionally, remember to inform store associates that you will be using your loyalty card digitally, as some may not be familiar with this method of redemption.
Making Purchases with Your Digital Wallet
Making secure and hassle-free purchases with your digital wallet is a straightforward process. Whether you’re shopping online or at a physical store, here’s how you can use your digital wallet to complete transactions:
1. Online Purchases:
- Browse and select the items you wish to purchase on the website or mobile app of the online store.
- Proceed to the checkout page where you typically find different payment options.
- Select your digital wallet as the payment method. The available options may include the name of your preferred digital wallet app.
- Authenticate the transaction using your passcode, fingerprint, facial recognition, or any other security feature provided by your digital wallet app.
- Review the transaction details and confirm your purchase. The digital wallet app will generate a payment confirmation that you can save for reference.
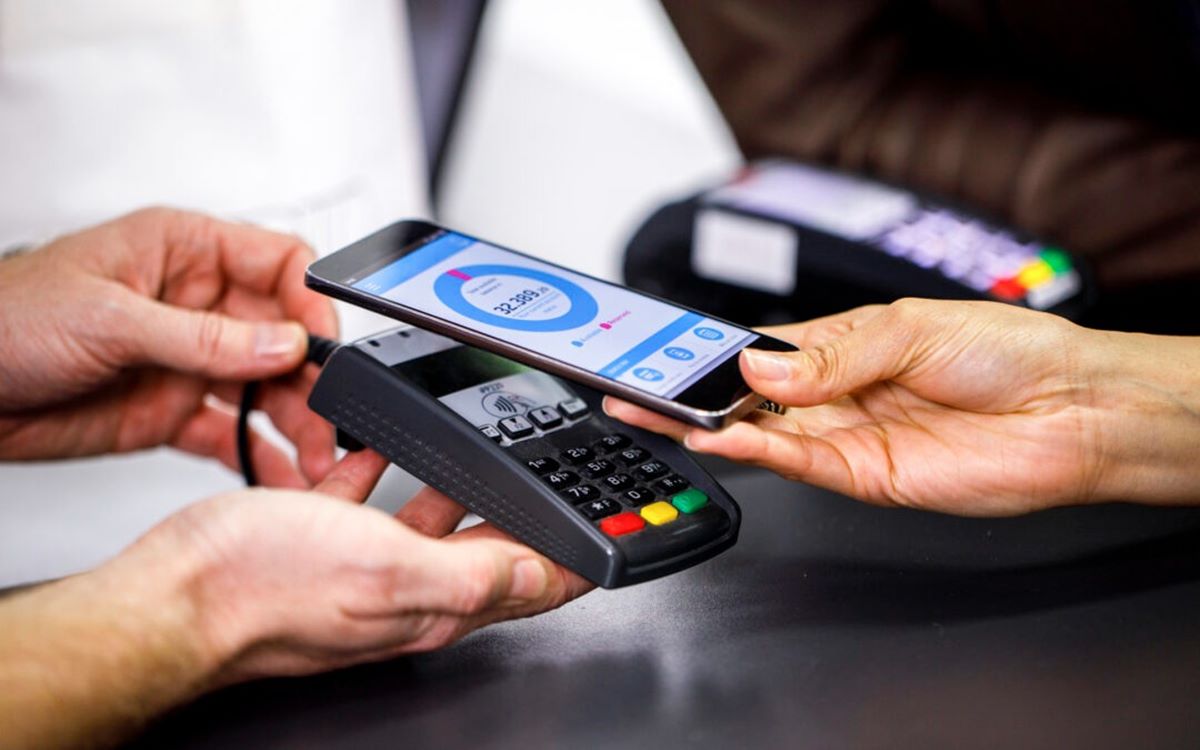
2. In-Store Purchases:
- When making a purchase at a physical store, ensure that the store accepts contactless payments or displays the accepted payment logos for digital wallet transactions.
- Proceed to the checkout counter or point-of-sale terminal.
- If prompted, inform the cashier or salesperson that you will be paying with your digital wallet.
- Unlock your phone and open your digital wallet app.
- Select the desired payment card or method from your digital wallet.
- Hold your phone or device near the card reader or payment terminal to initiate the transaction.
- Authenticate the payment by following the prompts on your digital wallet app. This may require entering your passcode, using biometric authentication, or using other security features.
- Wait for the payment to be approved, and once completed, you will receive a payment confirmation on your device.
Using your digital wallet for purchases offers security, convenience, and often faster checkout times. Additionally, some digital wallet apps allow you to view transaction history and track spending, providing insights into your financial habits.
Remember to keep your digital wallet app up to date to benefit from the latest security enhancements and features. Also, regularly check your transaction history and bank statements to verify the accuracy of your purchases.
However, it’s essential to ensure that your digital wallet app is compatible with the payment systems or merchants you plan to use it with. Not all stores may accept every digital wallet, so it’s a good idea to check before making a purchase.
Transferring Funds with Your Digital Wallet
Transferring funds using your digital wallet is a convenient way to send money to friends, family, or even make payments to businesses or service providers. Here’s a guide on how to efficiently transfer funds using your digital wallet:
1. Open the App: Launch your digital wallet app on your device and navigate to the section for transferring funds or making payments.
2. Choose the Recipient: Enter the details of the person or business you want to transfer funds to. This may include their name, email address, phone number, or any other identifier linked to their digital wallet or payment account.
3. Enter the Amount: Specify the amount you wish to transfer. Double-check the amount to ensure accuracy, as some transactions may not be reversible once completed.
4. Add a Note or Reference: In some cases, you may have the option to include a note or reference along with the transfer. This can help the recipient identify the transaction or provide any necessary information.
5. Verify and Confirm: Review the information you’ve entered to make sure it is correct. Once you’ve verified the details, confirm the transfer to initiate the transaction.
6. Authenticate the Transfer: Depending on your digital wallet app, you may be required to authenticate the transfer using a passcode, biometric authentication, or other security features provided by the app.
7. Confirmation and Notification: After the transaction is completed, you’ll receive a confirmation message or notification indicating the success of the transfer. The recipient will also be notified of the received funds.
It’s vital to note that the process and fees associated with transferring funds may vary depending on your digital wallet app and the specific transfer method chosen. Some digital wallet apps allow for instant transfers, while others may take a few business days for the funds to be delivered.
In addition to person-to-person transfers, some digital wallets may also support other payment options, such as bill payments, online purchases, or donations to charities.
When it comes to transferring funds, it’s crucial to ensure that you have sufficient balance or available credit in your digital wallet or linked payment account. Additionally, verify the accuracy of the recipient’s details to avoid any transfer errors or sending funds to the wrong individual.
By using your digital wallet to transfer funds, you can simplify financial transactions, eliminate the need for physical cash or checks, and enjoy the convenience of instant payments with just a few taps on your device.
Managing Your Digital Wallet Settings
Managing your digital wallet settings allows you to customize your preferences, enhance security, and optimize your overall experience. Here are some key settings to consider when managing your digital wallet:
1. Security and Authentication:
- Set a strong and unique passcode or PIN to protect your digital wallet from unauthorized access. Avoid using easily guessable codes and update them regularly.
- Enable biometric authentication, such as fingerprint or facial recognition, if supported by your device. This adds an extra layer of security and convenience.
- Consider enabling two-factor authentication (2FA) for added security. This requires a second verification step, such as a one-time password (OTP) sent to your registered email or phone number.
2. Notifications and Alerts:
- Customize your notification preferences to receive alerts about transactions, account activity, security updates, and promotional offers.
- Review and adjust your notification settings to ensure you stay informed while managing the frequency and types of notifications you receive.
3. Transaction History:
- Regularly review your transaction history within the digital wallet app. This allows you to monitor your spending, track payments, and identify any unauthorized transactions.
- Take advantage of filtering and search options available to quickly find specific transactions or view transactions within a specified timeframe.
4. Privacy and Data Sharing:
- Review the privacy policy of your digital wallet app and understand how your personal information is collected, stored, and shared.
- Explore your privacy settings to control what information is shared with the app provider or third-party services linked to your digital wallet.
5. Backup and Recovery:
- Regularly backup your digital wallet data, such as account information and card details, so that you can recover your information in case of device loss or data corruption.
- Follow the recommended backup procedures provided by your digital wallet app to ensure that your information is safely saved and easily recoverable.
6. App Updates and Security Patches:
- Keep your digital wallet app up to date by installing the latest updates and security patches. This helps ensure that you have the latest features, bug fixes, and security enhancements.
- Enable automatic updates if available to ensure that you receive the latest app versions without manual intervention.
By actively managing your digital wallet settings, you can personalize your experience, improve security, and have greater control over your financial transactions. Stay informed about the features and options offered by your digital wallet app to make the most out of its capabilities.
Ensuring Security for Your Digital Wallet
Ensuring the security of your digital wallet is of utmost importance to protect your personal and financial information. By following these best practices, you can enhance the security of your digital wallet:
1. Set Strong Passwords and PINs:
- Create strong and unique passwords or PINs for your digital wallet app and associated accounts. Avoid using common or easily guessable passwords.
- Consider using a password manager to generate complex passwords and securely store them.
2. Enable Biometric Authentication:
- Take advantage of biometric authentication, such as fingerprint or facial recognition, if your device supports it. Biometrics add an extra layer of security by ensuring only authorized users can access the digital wallet.
- Ensure that only your registered fingerprints or facial data are stored on your device and avoid registering someone else’s biometrics.
3. Keep Your Device Secure:
- Set a passcode or pattern lock on your device to prevent unauthorized access.
- Regularly install software updates for your device’s operating system, as they often include security patches.
- Avoid jailbreaking or rooting your device, as it can weaken its security defenses.
4. Be Cautious of Suspicious Apps:
- Download digital wallet apps only from official app stores and reputable sources.
- Read user reviews and check the ratings of the app before downloading.
- Be cautious of phishing attempts, such as fake emails or messages asking for your digital wallet login credentials. Avoid clicking on suspicious links and never share your personal information with unauthorized individuals.
5. Regularly Monitor Transactions:
- Regularly review your transaction history within the digital wallet app to ensure all transactions are legitimate and authorized.
- If you notice any suspicious transactions, report them immediately to your digital wallet provider and your bank or credit card company.
6. Secure Network Connections:
- Avoid using public Wi-Fi networks for sensitive transactions as they may not be secure. Instead, use a trusted and secure network connection when accessing your digital wallet.
- Consider using a virtual private network (VPN) when connecting to the internet to encrypt your data and enhance your privacy.
By implementing these security measures and staying vigilant, you can protect your digital wallet and reduce the risk of unauthorized access or fraudulent activities. Remember that your digital wallet’s security is a shared responsibility between you and the digital wallet provider, so stay informed about security updates and follow best practices for a secure digital wallet experience.
Troubleshooting Common Issues with Your Digital Wallet
While using a digital wallet can simplify your financial transactions, encountering issues and glitches can occasionally happen. Here are some common issues you may encounter with your digital wallet and troubleshooting steps to resolve them:
1. Payment Declined:
- Ensure that you have sufficient funds or available credit on the linked payment method.
- Verify that your payment details, including card number, expiration date, and CVV code, are entered correctly.
- If the issue persists, contact your bank or credit card company to troubleshoot any potential card-related issues.
2. Authentication Problems:
- Double-check that you are entering the correct passcode, PIN, or biometric authentication when prompted by your digital wallet.
- Ensure that your device’s biometric features are enabled and properly registered.
- Try restarting your device and relaunching the digital wallet app to resolve any temporary authentication glitches.
3. App Crashes or Freezes:
- Close the app completely and relaunch it. This can help resolve minor temporary issues.
- Check if there are any available updates for your digital wallet app and install them, as updates often contain bug fixes and performance enhancements.
- If the problem persists, try uninstalling and reinstalling the app to ensure a clean installation.
4. Syncing Issues:
- Ensure that your device is connected to a stable internet connection, as syncing issues can occur due to poor connectivity.
- Try manually triggering a sync within the digital wallet settings to refresh the data and resolve any sync problems.
- If you have multiple devices linked to your digital wallet, verify that they are all using the same account and settings.
5. Card or Account Removal:
- If you’re having trouble removing a card or unlinking a bank account from your digital wallet, ensure that there are no pending transactions or unresolved issues associated with that card or account.
- Contact the customer support team of your digital wallet app for assistance if you’re unable to remove a card or unlink an account.
6. Lost or Stolen Device:
- If your device with the digital wallet app is lost or stolen, immediately contact your digital wallet provider to report the incident and ask for assistance in disabling or securing your digital wallet account.
- Change your passwords for your digital wallet account and associated email accounts to prevent unauthorized access.
If you encounter persistent issues with your digital wallet that cannot be resolved through the troubleshooting steps mentioned, it is recommended to reach out to your digital wallet provider’s customer support for further assistance.
Remember to keep your digital wallet app up to date and regularly check for any available updates. Additionally, ensure that you are using a compatible device and that the digital wallet app is compatible with your operating system version to avoid any compatibility issues.
By staying informed and proactive with troubleshooting common issues, you can optimize your digital wallet experience and enjoy the convenience and security it offers.