
Tools You Will Need
Replacing a car stereo may sound daunting, but with the right tools and a little patience, it can be a relatively straightforward process. Before you begin, gather the following tools:
- A set of screwdrivers (both Phillips and flathead) – These will be essential for removing screws and fasteners.
- A trim removal tool – This handy tool will help you pry off trim panels without damaging them.
- A socket wrench set – You will likely need various sizes of sockets to remove bolts and connectors.
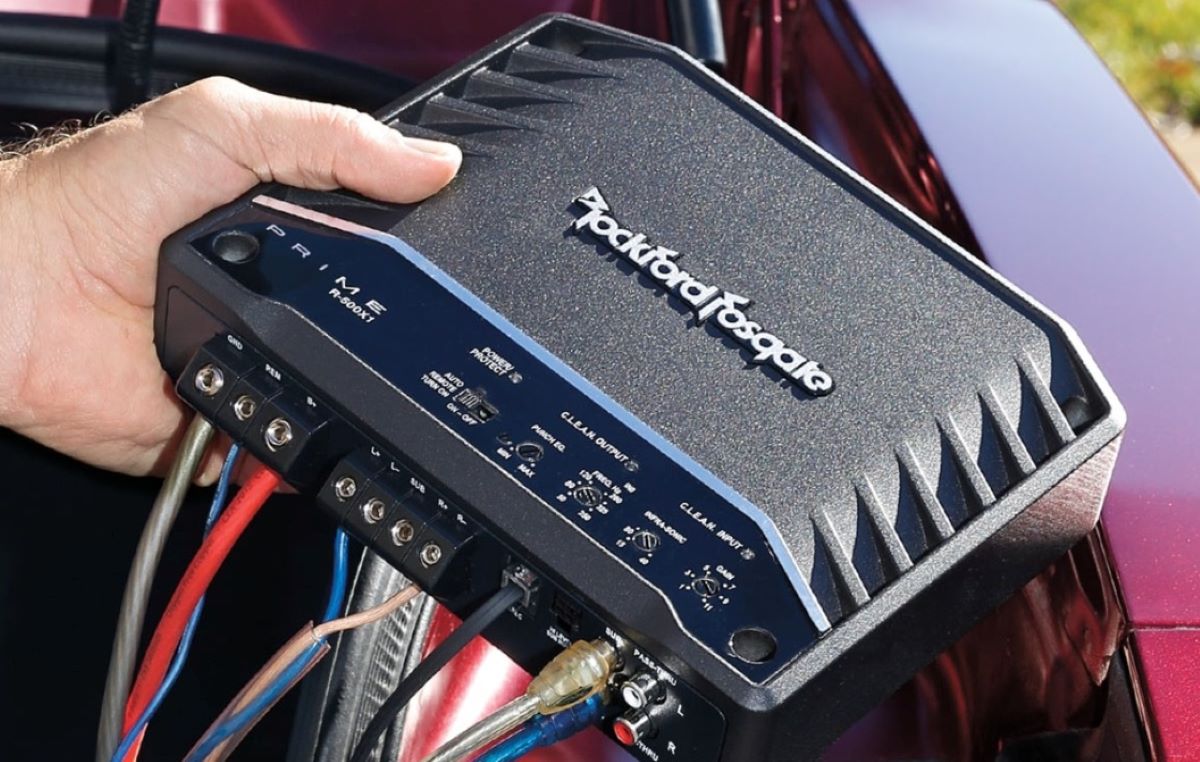
- A wire cutter/stripper – This tool is crucial for cutting and stripping wires to connect the new stereo.
- A panel removal tool – Depending on your car model, you may need a specific tool to remove certain panels.
- An optional multimeter – While not essential, a multimeter can help you test the electrical connections.
Having these tools ready before you start will save you time and frustration. Make sure they are easily accessible so you won’t have to search for them while working on your car stereo.
It’s important to note that the specific tools needed may vary depending on the make and model of your car. It’s always a good idea to consult your car’s user manual or an online guide specific to your vehicle to ensure you have the correct tools for the job.
With the proper tools at your disposal, you’ll be well-prepared to tackle the process of replacing your car stereo.
Step 1: Disconnect the Battery
Before you begin the process of replacing your car stereo, it is crucial to disconnect the battery to ensure your safety and prevent any electrical mishaps. Follow these steps:
- Locate the car’s battery in the engine bay or trunk. The battery is usually a rectangular-shaped box with cables connected to it.
- Identify the negative terminal, marked with a “-“, and the positive terminal, marked with a “+”.
- Using an appropriate-sized wrench or socket, loosen the nut on the negative terminal.
- Carefully remove the negative cable from the terminal and place it aside. Make sure it does not come into contact with any metal surface.
- Repeat the process with the positive terminal, loosening the nut and removing the positive cable.
- Once both the negative and positive cables are disconnected, double-check that they are securely away from the battery terminals to avoid any accidental contact.
By disconnecting the battery, you eliminate the risk of electrical sparks or short-circuits while working on your car stereo. It also ensures that you won’t accidentally trigger any warning lights or damage any electrical components during the installation process.
Remember that some cars may have additional steps or precautions regarding battery disconnecting, so it’s always a good idea to refer to your vehicle’s user manual for specific instructions.
Now that you have successfully disconnected the battery, you can proceed with confidence to the next step in replacing your car stereo.
Step 2: Remove the Trim and Panels
Now that the battery is safely disconnected, you can start removing the trim and panels to gain access to the car stereo. Follow these steps:
- Take a trim removal tool and gently pry off the trim surrounding the stereo. Start from one corner and work your way around, being careful not to apply too much force to avoid damaging the trim or panels.
- Once the trim is removed, you may need to unscrew any screws or bolts holding the panel in place. Use the appropriate screwdriver or socket wrench to remove them.
- For panels that are secured with clips, gently pull the panel away from the dashboard or console. If needed, use a panel removal tool to help disengage the clips without causing any damage.
- Continue removing any additional panels or trim pieces that obstruct access to the stereo. Take your time and be mindful of any hidden screws or fasteners.
During this step, it’s crucial to be patient and gentle to prevent any damage to the trim or panels. If you encounter any resistance while removing a panel, double-check for any missed screws or clips that may still be securing it.
Keep in mind that the process of removing trim and panels may vary depending on the car’s make and model. Therefore, consulting your car’s user manual or referring to online resources specific to your vehicle can provide additional guidance.
With the trim and panels successfully removed, you are one step closer to replacing your car stereo. The next step involves removing the old stereo unit itself.
Step 3: Remove the Old Stereo
With the trim and panels out of the way, it’s time to remove the old car stereo from its housing. Follow these steps:
- Identify the screws or bolts securing the stereo unit to the dashboard or console. Use the appropriate screwdriver or socket wrench to remove them.
- Gently pull the stereo unit forward to expose the wiring harness and antenna cable connected to the back of the unit.
- Depending on the type of connector, you may need to press a release tab or gently wiggle the connector to disconnect it from the stereo. Take care not to pull on the wires themselves as it can damage the connectors or the wiring.
- Once all the cables are disconnected, you can fully remove the old stereo unit from its housing.
It’s important to note that some cars may have additional security measures in place, such as stereo mounting brackets or security bolts. Refer to your car’s manual or online resources specific to your vehicle to determine if any additional steps are required for removing the stereo.
During this step, it’s crucial to handle the stereo unit with care and avoid excessive force to prevent any damage. If you encounter any resistance while removing the unit, double-check for any missed screws or connections that may still be holding it in place.
Now that the old car stereo is successfully removed, you can proceed to the next step of installing the new stereo in your vehicle.
Step 4: Install the New Stereo
Now that the old car stereo is removed, it’s time to install the new stereo unit. Follow these steps:
- Take the new stereo unit and carefully align it with the opening in the dashboard or console.
- Connect the wiring harness and antenna cable to the corresponding ports on the back of the new stereo unit. Ensure that the connections are secure and properly seated.
- Gently slide the stereo unit into the housing, making sure it is flush with the surrounding trim.
- If your new stereo comes with mounting brackets, follow the manufacturer’s instructions to attach them securely to the unit and the dashboard or console.
- Double-check that all cables are properly connected and that there is no loose wiring. This will ensure proper functionality and prevent any electrical issues.
It’s important to note that different types of stereo units may require specific installation steps. Refer to the instruction manual provided with your new stereo unit for any additional steps or specific requirements.
During this step, pay attention to the alignment and positioning of the new stereo unit. Take your time to ensure a proper fit and avoid any forceful movements that could damage the unit or the surrounding components.
With the new stereo unit installed, you are one step closer to enjoying an enhanced audio experience in your car. The next step involves connecting the wires to ensure proper functionality.
Step 5: Connect the Wires
With the new car stereo unit in place, it’s time to connect the wires to ensure proper functionality. Follow these steps:
- Refer to the wiring diagram specific to your vehicle and the new stereo unit to identify the correct wire connections.
- Strip the insulation from the ends of the wires using a wire cutter/stripper, exposing a small section of bare wire.
- Connect the corresponding wires from the wiring harness of your vehicle to the appropriate wires on the new stereo unit. Twist the ends of the wires together and secure them with electrical tape or wire connectors.
- For the antenna cable, simply connect it to the designated port on the back of the new stereo unit.
It’s important to ensure proper wire connections to prevent any electrical issues or malfunctioning of the new car stereo. Take your time and double-check that each wire is securely connected and that there are no loose connections.
If needed, you can use a multimeter to test the connections and confirm that they are properly transmitting the electrical signals. This step helps ensure the best audio quality and overall performance of your new car stereo.
Each car model and stereo unit may have specific wire connections, so it’s essential to consult the manuals provided with your car and stereo unit, as well as any accompanying wiring diagrams, for accurate guidance.
With the wires connected, you’re almost ready to enjoy your new car stereo. However, before powering it up, it’s important to test its functionality.
Step 6: Test the New Stereo
After connecting the wires, it’s crucial to test the functionality of your new car stereo system to ensure everything is working properly. Follow these steps:
- Reconnect the negative and positive cables to the corresponding terminals on the car battery.
- Turn on the ignition key to power up the car’s electrical system.
- Test the basic functions of the new stereo, such as powering it on/off, adjusting the volume, and tuning the radio.
- If applicable, test any additional features of the stereo, such as Bluetooth connectivity, USB input, or CD player functionality.
- Check all speakers to ensure they are producing sound and that there are no balance or fade issues.
- If any issues are detected during the testing phase, double-check the wire connections and consult the instruction manual to troubleshoot and resolve the problem.
It’s important to note that due to the complexity of some car audio systems, you may need to make additional adjustments or programming to fully integrate the new stereo unit with your car’s electronics. Refer to the user manual or consult with a professional if needed.
By thoroughly testing the new car stereo, you can identify any potential issues early on and address them before finalizing the installation. This step ensures that you can enjoy optimal audio performance and functionality in your vehicle.
Once you’re satisfied with the testing phase and everything is functioning correctly, it’s time to proceed with the final steps of the installation process.
Step 7: Replace the Trim and Panels
With the new car stereo functioning properly, it’s time to replace the trim and panels to give your car’s interior a clean and finished look. Follow these steps:
- Take the trim pieces that were removed earlier and carefully align them with their respective positions on the dashboard or console.
- Gently press the trim pieces into place, ensuring they are securely attached and properly aligned with adjoining panels.
- If there were any screws or bolts that were removed, reinsert them and tighten them as necessary.
- Continue reattaching any additional panels or trim pieces that were removed during the initial disassembly.
- Double-check that all trim pieces are securely in place and there are no loose or misaligned sections.
During this step, be cautious not to force any trim pieces into place, as this can lead to damage. Instead, apply gentle pressure and ensure a proper fit without any gaps or misalignments.
It’s worth noting that different car models may have unique trim removal and attachment methods, so consult your car’s user manual or specific online resources if you encounter any difficulties during this step.
With the trim and panels successfully replaced, your car’s interior will look as good as new. The final step involves reconnecting the car battery to complete the installation process.
Step 8: Reconnect the Battery
Now that all the components are in place and the trim is securely attached, it’s time to reconnect the car battery to finalize the installation of your new car stereo. Follow these steps:
- Locate the negative and positive terminals on the car battery.
- Take the negative cable and position it above the negative terminal.
- Slide the negative cable’s terminal onto the negative terminal of the battery.
- Tighten the nut on the negative terminal to secure the connection. Make sure it is snug but not overly tightened.
- Repeat the process with the positive cable, ensuring it is properly connected to the positive terminal of the battery.
- Double-check that both connections are secure and there is no visible movement or play in the cables.
Reconnecting the car battery allows the electrical system to power up again and ensures that your new car stereo can function properly. It’s an essential step that should not be overlooked.
Before starting your car, take a moment to verify that all electrical components, such as lights, power windows, and mirrors, are working correctly. If you notice any issues, double-check the wire connections and consult your car’s user manual or a professional if necessary.
Congratulations! You have successfully replaced your car stereo and restored the electrical power. Now you can enjoy a refreshed audio experience while driving.