Checking Compatibility
Before attempting to insert a SIM card into your Apple Watch, it’s crucial to ensure that your device is compatible with this feature. Not all Apple Watch models support cellular connectivity, so it’s essential to verify this before proceeding.
Here are the steps to check the compatibility of your Apple Watch:
- Open the Apple Watch app on your iPhone.
- Tap on the “My Watch” tab at the bottom of the screen.
- Select “Cellular” from the list of options.
- If you see a “Set Up Cellular” option, your Apple Watch is compatible with a cellular connection.
If the “Set Up Cellular” option is not available, it means that your Apple Watch does not support cellular connectivity and, therefore, does not have a SIM card slot. In this case, attempting to insert a SIM card would be futile and could potentially damage the device.
It’s important to note that not all cellular providers are compatible with Apple Watch cellular plans. Therefore, even if your Apple Watch is technically capable of supporting a SIM card, it’s essential to check with your cellular provider to ensure that they offer compatible plans for your specific Apple Watch model.
By confirming the compatibility of your Apple Watch and your cellular provider’s offerings, you can proceed with confidence in the next steps of inserting and activating a SIM card in your device.
Power Off the Apple Watch
Before handling the SIM card and accessing the internal components of your Apple Watch, it’s essential to power off the device to prevent any potential damage and ensure a safe and smooth process. Here’s how to power off your Apple Watch:
- Ensure that your Apple Watch is unlocked and on the watch face.
- Press and hold the side button until the power off slider appears on the screen.
- Drag the power off slider to the right, and your Apple Watch will begin to power down.
- Wait for the device to completely power off before proceeding to the next steps.
Powering off your Apple Watch eliminates the risk of any electrical mishaps and allows you to handle the device without the concern of accidental activation. This precautionary measure sets the stage for a seamless SIM card insertion process, safeguarding both the device and the SIM card itself from any potential harm.
By following these steps to power off your Apple Watch, you’re taking a proactive approach to ensure a smooth and safe experience as you prepare to access the SIM card slot and insert the SIM card.
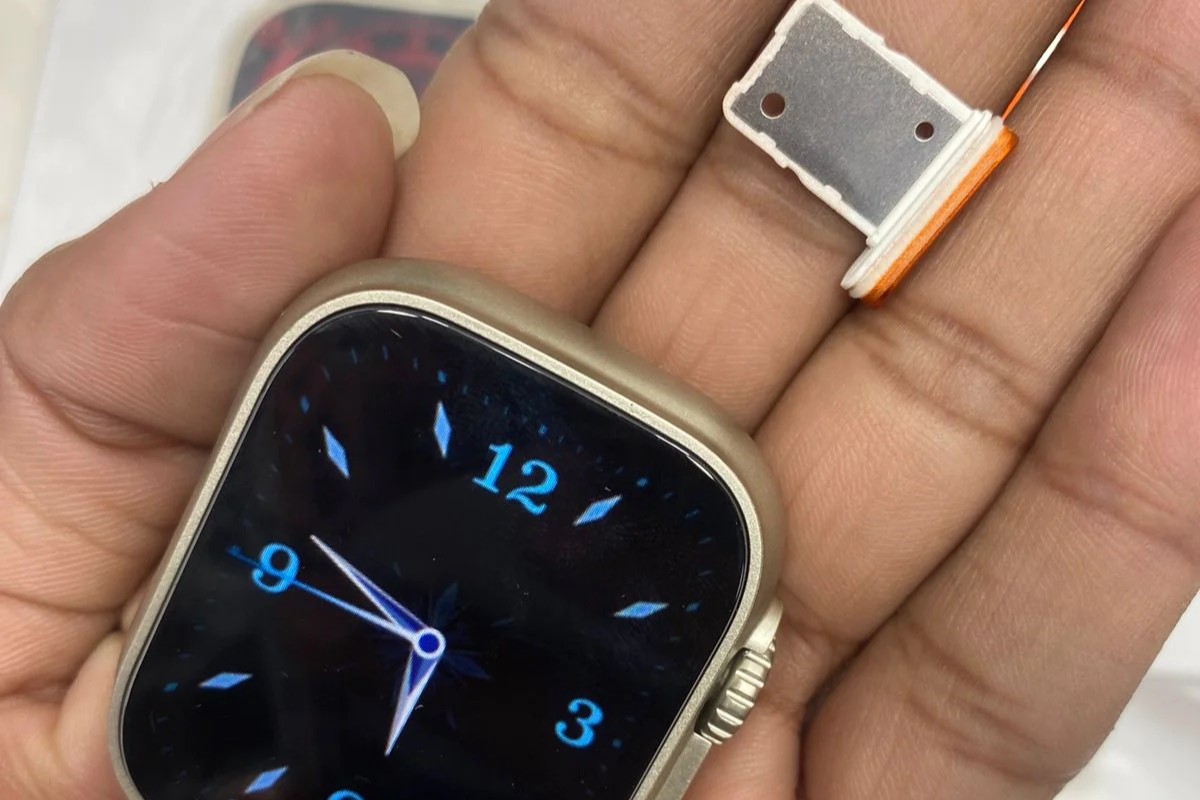
Locate the SIM Card Slot
Once your Apple Watch is powered off, the next step is to locate the SIM card slot. The SIM card slot in an Apple Watch is typically found on the side of the device, and its precise location may vary based on the model of the watch. Here’s how to locate the SIM card slot in your Apple Watch:
- Examine the sides of your Apple Watch to identify the small slot with a pinhole or a removable cover.
- Using a SIM eject tool or a small paperclip, gently press into the pinhole or use the tool to lift the cover, revealing the SIM card slot.
- Once located, take note of the orientation of the SIM card slot to ensure that the SIM card is inserted correctly.
It’s important to handle the Apple Watch with care during this process, as the SIM card slot is a delicate component of the device. By locating the SIM card slot with precision, you set the stage for a smooth and successful insertion of the SIM card, minimizing the risk of any damage to the device or the SIM card.
By following these steps to locate the SIM card slot in your Apple Watch, you’re positioning yourself for a seamless SIM card insertion process, ensuring that the next steps are carried out with precision and care.
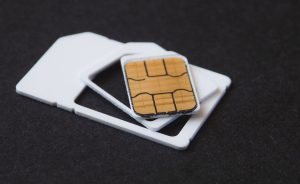
Inserting the SIM Card
With the SIM card slot located and the Apple Watch powered off, you’re now ready to insert the SIM card. Follow these steps to ensure a smooth and successful insertion:
- Hold the Apple Watch securely to avoid any accidental drops or damage during the SIM card insertion process.
- Take the SIM card and ensure that it is oriented correctly. Most SIM cards have a corner cut off, which aligns with the SIM card slot in the Apple Watch.
- Gently insert the SIM card into the slot, ensuring that it fits snugly and securely without using excessive force. The SIM card should slide in smoothly without any resistance.
- Once the SIM card is inserted, carefully close the SIM card slot cover or gently remove the SIM eject tool from the pinhole, ensuring that the SIM card remains in place.
It’s crucial to handle the SIM card with care during this process, as any damage to the SIM card can affect its functionality and connectivity. By following these steps with precision and attention to detail, you can ensure that the SIM card is inserted correctly, minimizing the risk of any issues with connectivity or device functionality.
By successfully inserting the SIM card into your Apple Watch, you’re one step closer to enjoying the benefits of cellular connectivity and enhanced functionality on your device. This seamless process sets the stage for the next steps of powering on the Apple Watch and activating the SIM card.
Power On the Apple Watch
After successfully inserting the SIM card into your Apple Watch, the next step is to power on the device. Here’s how to power on your Apple Watch:
- Press and hold the side button until the Apple logo appears on the screen.
- Release the side button, and the Apple Watch will begin to power on.
- Wait for the device to complete the boot-up process.
- Once the Apple Watch is powered on, you’ll be prompted to set up cellular connectivity if it’s not already configured.
Powering on your Apple Watch after inserting the SIM card allows the device to recognize and initialize the new connectivity options. This step is essential to ensure that the SIM card is recognized and that the Apple Watch is ready to utilize the cellular capabilities provided by the SIM card.
By following these steps to power on your Apple Watch, you’re initiating the process of integrating the SIM card’s functionality with the device, setting the stage for a seamless and uninterrupted cellular connectivity experience.
Activating the SIM Card
Once the SIM card is inserted and the Apple Watch is powered on, the final step is to activate the SIM card for cellular connectivity. Here’s how to activate the SIM card in your Apple Watch:
- On your iPhone, open the Apple Watch app.
- Tap on the “My Watch” tab at the bottom of the screen.
- Select “Cellular” and follow the on-screen prompts to set up cellular connectivity for your Apple Watch.
- During the setup process, you may be required to contact your cellular provider to activate the SIM card and configure the cellular plan for your Apple Watch.
- Once the activation process is complete, your Apple Watch will be ready to use with cellular connectivity, allowing you to make calls, send messages, and access data without being tethered to your iPhone.
Activating the SIM card ensures that your Apple Watch is fully equipped to utilize its cellular capabilities, providing you with the freedom and flexibility to stay connected even when your iPhone is out of reach.
By following these steps to activate the SIM card in your Apple Watch, you’re ensuring that the device is seamlessly integrated with your cellular plan, allowing you to enjoy the full range of features and benefits that come with cellular connectivity on your Apple Watch.