
Preparing Your Redmi Phone
Before diving into the world of custom ROMs and rooting, it’s crucial to prepare your Redmi phone for the journey ahead. This involves taking several essential steps to ensure a smooth and successful customization process.
Backing Up Your Data
First and foremost, safeguard your precious data by creating a comprehensive backup. This includes your contacts, messages, photos, videos, and any other important files stored on your device. You can utilize the built-in backup feature on your Redmi phone or opt for third-party backup solutions available on the Google Play Store. By doing so, you can rest assured that your data remains safe and easily recoverable in case of any unforeseen issues during the customization process.
Enabling Developer Options
To unlock the full potential of your Redmi phone and access advanced customization settings, you need to enable the Developer Options. This can be done by navigating to the "About Phone" section in your device’s settings and tapping the "Build Number" multiple times until you see a message confirming that Developer Options have been enabled.
Enabling USB Debugging
Once Developer Options are accessible, it’s time to enable USB debugging. This allows your phone to communicate with your computer when performing advanced operations such as unlocking the bootloader and flashing custom ROMs. Simply navigate to the Developer Options menu, locate the USB debugging option, and toggle it on.
Checking Battery and Storage
Before embarking on the customization journey, ensure that your Redmi phone has an ample battery charge to avoid any interruptions during the process. Additionally, check that you have sufficient storage space available to accommodate the custom ROM and related files that will be flashed onto your device.
Verifying Compatibility
Lastly, it’s important to verify the compatibility of the custom ROM and other software with your specific Redmi device model. This can be done by visiting reputable online forums and communities where fellow enthusiasts share their experiences and recommendations regarding customizations for Redmi phones.
By diligently preparing your Redmi phone for customization, you set the stage for a seamless and rewarding experience as you unlock its full potential and explore the exciting world of custom ROMs and rooting.
Unlocking the Bootloader
Unlocking the bootloader is a pivotal step in the process of customizing your Redmi phone. It grants you the freedom to install custom recoveries and flash custom ROMs, thus unlocking the true potential of your device. However, it’s essential to understand that unlocking the bootloader will wipe all the data on your device, so it’s crucial to have a backup of your important files before proceeding.
The first step in unlocking the bootloader of your Redmi phone is to ensure that you have enabled Developer Options and USB debugging, as discussed in the previous section. Once these settings are in place, you can proceed to the next steps:
-
Obtaining Unlock Permission: Xiaomi, the parent company of Redmi, requires users to obtain official permission to unlock the bootloader. This process involves visiting the official Xiaomi website, logging in with your Mi account, and submitting a request for bootloader unlocking. Upon approval, you will receive an authorization code that is essential for the unlocking process.
-
Using Mi Unlock Tool: Xiaomi provides the Mi Unlock Tool, a software application designed to facilitate the bootloader unlocking process. After downloading and installing the tool on your computer, you can connect your Redmi phone in fastboot mode and proceed to unlock the bootloader using the authorization code obtained earlier.
-
Following On-Screen Instructions: The Mi Unlock Tool provides clear on-screen instructions to guide you through the bootloader unlocking process. It’s important to carefully follow these instructions and exercise patience as the tool completes the unlocking procedure.
-
Completing the Unlocking Process: Upon successful completion of the unlocking process, your Redmi phone’s bootloader will be unlocked, paving the way for advanced customization options such as installing custom recoveries and flashing custom ROMs.
Unlocking the bootloader of your Redmi phone is a significant milestone that empowers you to take full control of your device’s software and explore a myriad of customization possibilities. It’s important to approach this process with caution and attention to detail, ensuring that you follow the manufacturer’s guidelines and recommendations to unlock the bootloader safely and effectively. Once this step is accomplished, you are one step closer to unleashing the full potential of your Redmi phone through custom ROMs and rooting.
Installing Custom Recovery
Installing a custom recovery on your Redmi phone is a pivotal step in the customization journey, as it opens up a world of possibilities for advanced system management and customization. A custom recovery essentially replaces the stock recovery software that comes pre-installed on Android devices, offering a range of powerful features and tools for performing essential tasks such as flashing custom ROMs, creating and restoring backups, and clearing device caches.
The most popular custom recovery for Android devices, including Redmi phones, is TWRP (Team Win Recovery Project). TWRP provides an intuitive and user-friendly interface, making it accessible to both seasoned enthusiasts and newcomers to the world of custom Android software.
To install TWRP or any other custom recovery on your Redmi phone, you will typically follow these general steps:
Preparing Your Computer
Before proceeding with the installation of a custom recovery, it’s essential to ensure that your computer is equipped with the necessary tools and drivers. This includes installing the Android SDK (Software Development Kit) and ADB (Android Debug Bridge) drivers. These tools enable communication between your computer and your Redmi phone, allowing you to execute commands and transfer files during the installation process.
Downloading the Custom Recovery Image
The next step involves downloading the specific TWRP or custom recovery image designed for your Redmi phone model. It’s crucial to obtain the correct recovery image to ensure compatibility and a successful installation. The official TWRP website is a reliable source for downloading the latest recovery images for a wide range of Android devices, including Redmi phones.
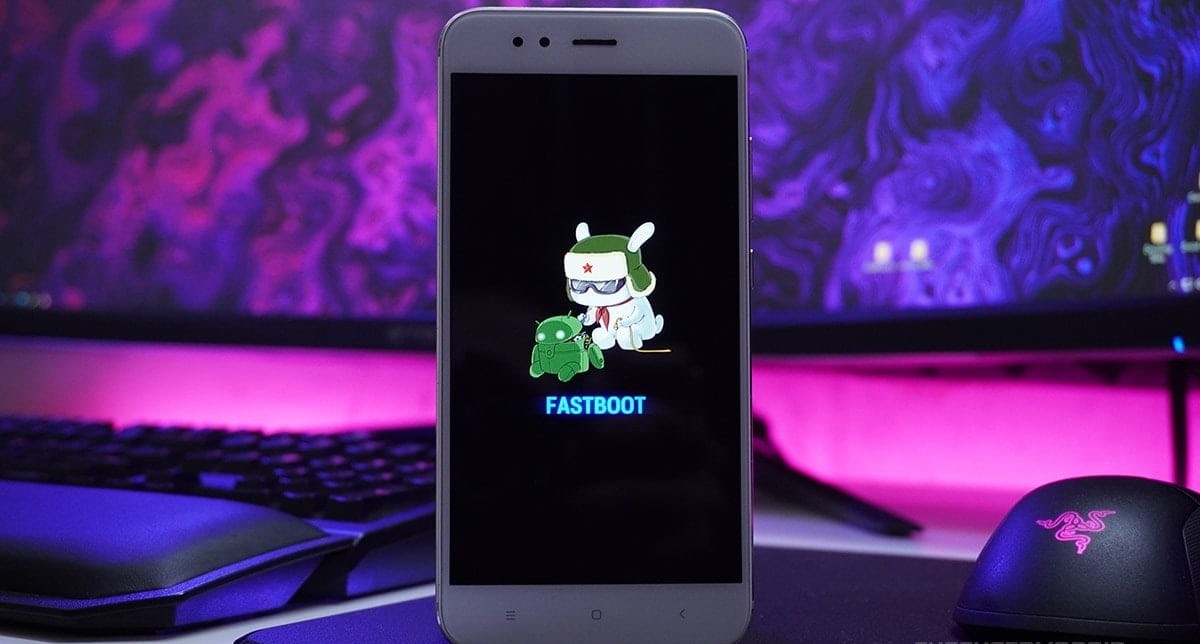
Booting into Fastboot Mode
With the custom recovery image downloaded to your computer, you will need to boot your Redmi phone into fastboot mode. This can be achieved by powering off the device and then booting it into fastboot mode using a combination of hardware buttons or by executing a command on your computer through ADB.
Flashing the Custom Recovery Image
Once your Redmi phone is in fastboot mode, you can proceed to flash the custom recovery image using the fastboot command on your computer. This process involves executing a series of commands to transfer the custom recovery image from your computer to your device and then installing it on the recovery partition. It’s essential to carefully follow the instructions provided by the custom recovery developers to ensure a smooth and successful installation.
Verifying the Installation
After flashing the custom recovery image, it’s crucial to verify that the installation was successful. This can be done by rebooting your Redmi phone into recovery mode, where you should be greeted by the interface of the newly installed custom recovery. At this stage, you can explore the various features and options offered by the custom recovery, confirming that it has been installed correctly and is ready for use.
By following these steps, you can successfully install a custom recovery such as TWRP on your Redmi phone, unlocking a plethora of advanced customization options and functionalities. With a custom recovery in place, you are well-equipped to delve into the exciting realm of custom ROMs, rooting, and other advanced system modifications, further enhancing the capabilities and personalization of your Redmi device.
Flashing Custom ROM
Flashing a custom ROM onto your Redmi phone is a transformative process that allows you to replace the stock operating system with a customized version of Android. This opens up a realm of possibilities, including enhanced performance, additional features, and a personalized user experience tailored to your preferences. Before proceeding with the flashing process, it’s crucial to select a custom ROM that is compatible with your specific Redmi device model and meets your desired specifications and preferences.
The process of flashing a custom ROM typically involves the following key steps:
Researching and Selecting a Custom ROM
Begin by researching and selecting a custom ROM that aligns with your preferences and requirements. There are numerous custom ROMs available for Redmi phones, each offering unique features, performance enhancements, and visual customizations. Popular custom ROMs such as LineageOS, Pixel Experience, and Resurrection Remix are known for their stability, performance, and extensive feature sets. Additionally, community forums and online communities dedicated to Redmi devices often provide valuable insights and recommendations regarding the best custom ROMs for specific device models.
Downloading the Custom ROM and GApps
Once you have chosen a custom ROM, download the corresponding ROM package and, if necessary, the GApps (Google Apps) package. The GApps package includes essential Google services and applications such as the Play Store, Gmail, and Google Maps, which are not typically included in custom ROMs due to licensing restrictions. It’s important to ensure that you download the correct versions of the custom ROM and GApps for your specific Redmi device model to guarantee compatibility and a successful flashing process.
Booting into Custom Recovery
After downloading the custom ROM and GApps packages, boot your Redmi phone into custom recovery mode. This is typically done by powering off the device and then booting into recovery mode using a specific key combination or by executing a command through ADB on your computer. Custom recoveries such as TWRP provide an intuitive interface for performing advanced system operations, including flashing custom ROMs and GApps.
Flashing the Custom ROM and GApps
Within the custom recovery interface, navigate to the option for installing or flashing zip packages. Select the custom ROM package that you downloaded and proceed to flash it onto your device. Once the custom ROM has been successfully flashed, repeat the same process for the GApps package if it is required for the custom ROM you have chosen. It’s important to carefully follow the on-screen instructions and ensure that the flashing process is completed without errors.
Rebooting and Verifying the Custom ROM
After flashing the custom ROM and GApps packages, reboot your Redmi phone to complete the installation process. Upon rebooting, you should be greeted by the new custom ROM, featuring its unique interface, features, and optimizations. It’s advisable to explore the settings and features of the custom ROM to ensure that it meets your expectations and functions as intended. Additionally, you can verify the successful installation of the custom ROM by checking the device information within the settings to confirm that the new ROM is active and running.
By following these steps, you can effectively flash a custom ROM onto your Redmi phone, unlocking a world of customization and personalization. Custom ROMs offer a compelling alternative to stock Android, providing a tailored user experience and the freedom to explore a diverse range of features and optimizations. Whether you seek performance enhancements, visual customizations, or unique functionalities, flashing a custom ROM empowers you to transform your Redmi device according to your preferences and needs.
Rooting Your Redmi Phone
Rooting your Redmi phone is a significant step that grants you elevated privileges and access to the deepest layers of the Android operating system. This process enables you to overcome certain limitations imposed by the device manufacturer and unleash the full potential of your Redmi phone. However, it's important to approach rooting with caution, as it involves modifying system files and can potentially void the device's warranty.
The benefits of rooting your Redmi phone are multifaceted. By gaining root access, you can customize the device's software at a fundamental level, allowing for advanced system modifications, performance optimizations, and the installation of powerful root-specific applications. Additionally, rooting opens the door to a variety of customization options, including the ability to remove bloatware, tweak system settings, and utilize powerful automation tools to enhance productivity and user experience.
The process of rooting a Redmi phone typically involves the following key steps:
-
Unlocking the Bootloader: As discussed earlier, unlocking the bootloader is a prerequisite for many advanced customizations, including rooting. This step allows you to install custom recoveries and flash the necessary files to gain root access.
-
Installing Magisk: Magisk is a popular and versatile tool for rooting Android devices, including Redmi phones. It provides a systemless root method, which means that it doesn't alter the system partition, allowing for seamless integration with OTA (over-the-air) updates and maintaining the device's integrity. Installing Magisk involves flashing the Magisk zip file through a custom recovery, such as TWRP.
-
Verifying Root Access: Upon successfully flashing Magisk and rebooting your Redmi phone, you can verify root access using root checker applications available on the Google Play Store. These apps confirm whether the rooting process was completed successfully and whether your device now has root privileges.
It's important to note that rooting your Redmi phone carries certain risks, including the potential for bricking the device if the process is not executed carefully. Moreover, rooting may compromise the security and stability of the device if not managed responsibly. Therefore, it's essential to thoroughly research the rooting process, follow reliable guides, and exercise caution to ensure a smooth and safe rooting experience.
By rooting your Redmi phone, you gain the freedom to personalize and optimize your device to a greater extent, unlocking a new realm of possibilities for customization and system management. Whether you seek enhanced performance, advanced customization, or the ability to utilize powerful root-specific applications, rooting empowers you to harness the full potential of your Redmi phone according to your preferences and needs.