
Check if Your iPhone 13 Supports Flash
Before you start using the flash on your iPhone 13 camera, it's essential to ensure that your device supports this feature. The iPhone 13 comes equipped with a powerful camera system, but not all models have the same capabilities when it comes to using the flash. Here's how you can check if your iPhone 13 supports flash:
-
Model Compatibility: First, determine the specific model of your iPhone 13. The iPhone 13 lineup includes the iPhone 13, iPhone 13 mini, iPhone 13 Pro, and iPhone 13 Pro Max. It's important to note that each model may have different camera features, including flash capabilities.
-
Camera App: Open the Camera app on your iPhone 13. Look for the flash icon, typically located in the top-left or top-right corner of the screen, depending on the camera mode you're using. If you see the flash icon, it indicates that your iPhone 13 supports flash functionality.
-
Flash Options: Tap on the flash icon to access the flash settings. If your iPhone 13 supports flash, you should see options such as "Auto," "On," and "Off." This indicates that you can control the flash based on your photography needs.
By following these steps, you can quickly determine if your iPhone 13 supports flash. If you encounter any difficulties or if the flash option is not available, it's recommended to refer to the user manual or contact Apple support for further assistance.
Update Your iPhone 13 to the Latest iOS Version
Keeping your iPhone 13 updated with the latest iOS version is crucial for ensuring optimal performance and accessing new features, including camera enhancements and bug fixes. Here's a detailed guide on how to update your iPhone 13 to the latest iOS version:
1. Connect to Wi-Fi and Power Source
Before initiating the update process, ensure that your iPhone 13 is connected to a stable Wi-Fi network. Additionally, it's advisable to connect your device to a power source or ensure that the battery level is sufficiently high to prevent any interruptions during the update.
2. Access Settings
Navigate to the "Settings" app on your iPhone 13. This can be found on the home screen, typically represented by a gear icon. Tap on "Settings" to proceed to the next step.
3. Select General
Within the Settings menu, scroll down and select "General." This section houses various system-related settings, including software updates.
4. Tap on Software Update
Under the "General" settings, tap on "Software Update." Your iPhone 13 will then check for available updates. If a new iOS version is available, you will be prompted to download and install it.
5. Download and Install
If an update is available, tap "Download and Install." The download process will commence, and once completed, your iPhone 13 will automatically begin the installation process. It's important to ensure that your device remains connected to Wi-Fi and power throughout the download and installation.
6. Enter Passcode
During the installation, your iPhone 13 may prompt you to enter your device passcode. This is a security measure to authenticate the installation process.
7. Wait for Completion
The installation process may take some time, depending on the size of the update and the speed of your internet connection. It's essential to be patient and avoid interrupting the process to prevent any potential issues with the update.
8. Verify Update
Once the installation is complete, your iPhone 13 will restart, and the latest iOS version will be successfully installed. To verify the update, you can revisit the "Settings" app, navigate to "General," and tap on "Software Update" to ensure that your device is now running the latest iOS version.
By following these steps, you can ensure that your iPhone 13 is running on the latest iOS version, providing you with the most up-to-date features and improvements, including advancements in camera functionality. Regularly updating your device is essential for experiencing the full potential of your iPhone 13 and enjoying a seamless photography experience.
Enable Flash on iPhone 13 Camera
Enabling the flash on your iPhone 13 camera can significantly enhance your photography experience, especially in low-light conditions. Whether you're capturing memorable moments indoors or in dimly lit environments, the flash feature can help illuminate your subjects and produce stunning, well-lit images. Here's a comprehensive guide on how to enable the flash on your iPhone 13 camera:
-
Access the Camera App: Begin by unlocking your iPhone 13 and locating the Camera app on the home screen. Tap on the Camera icon to launch the application.
-
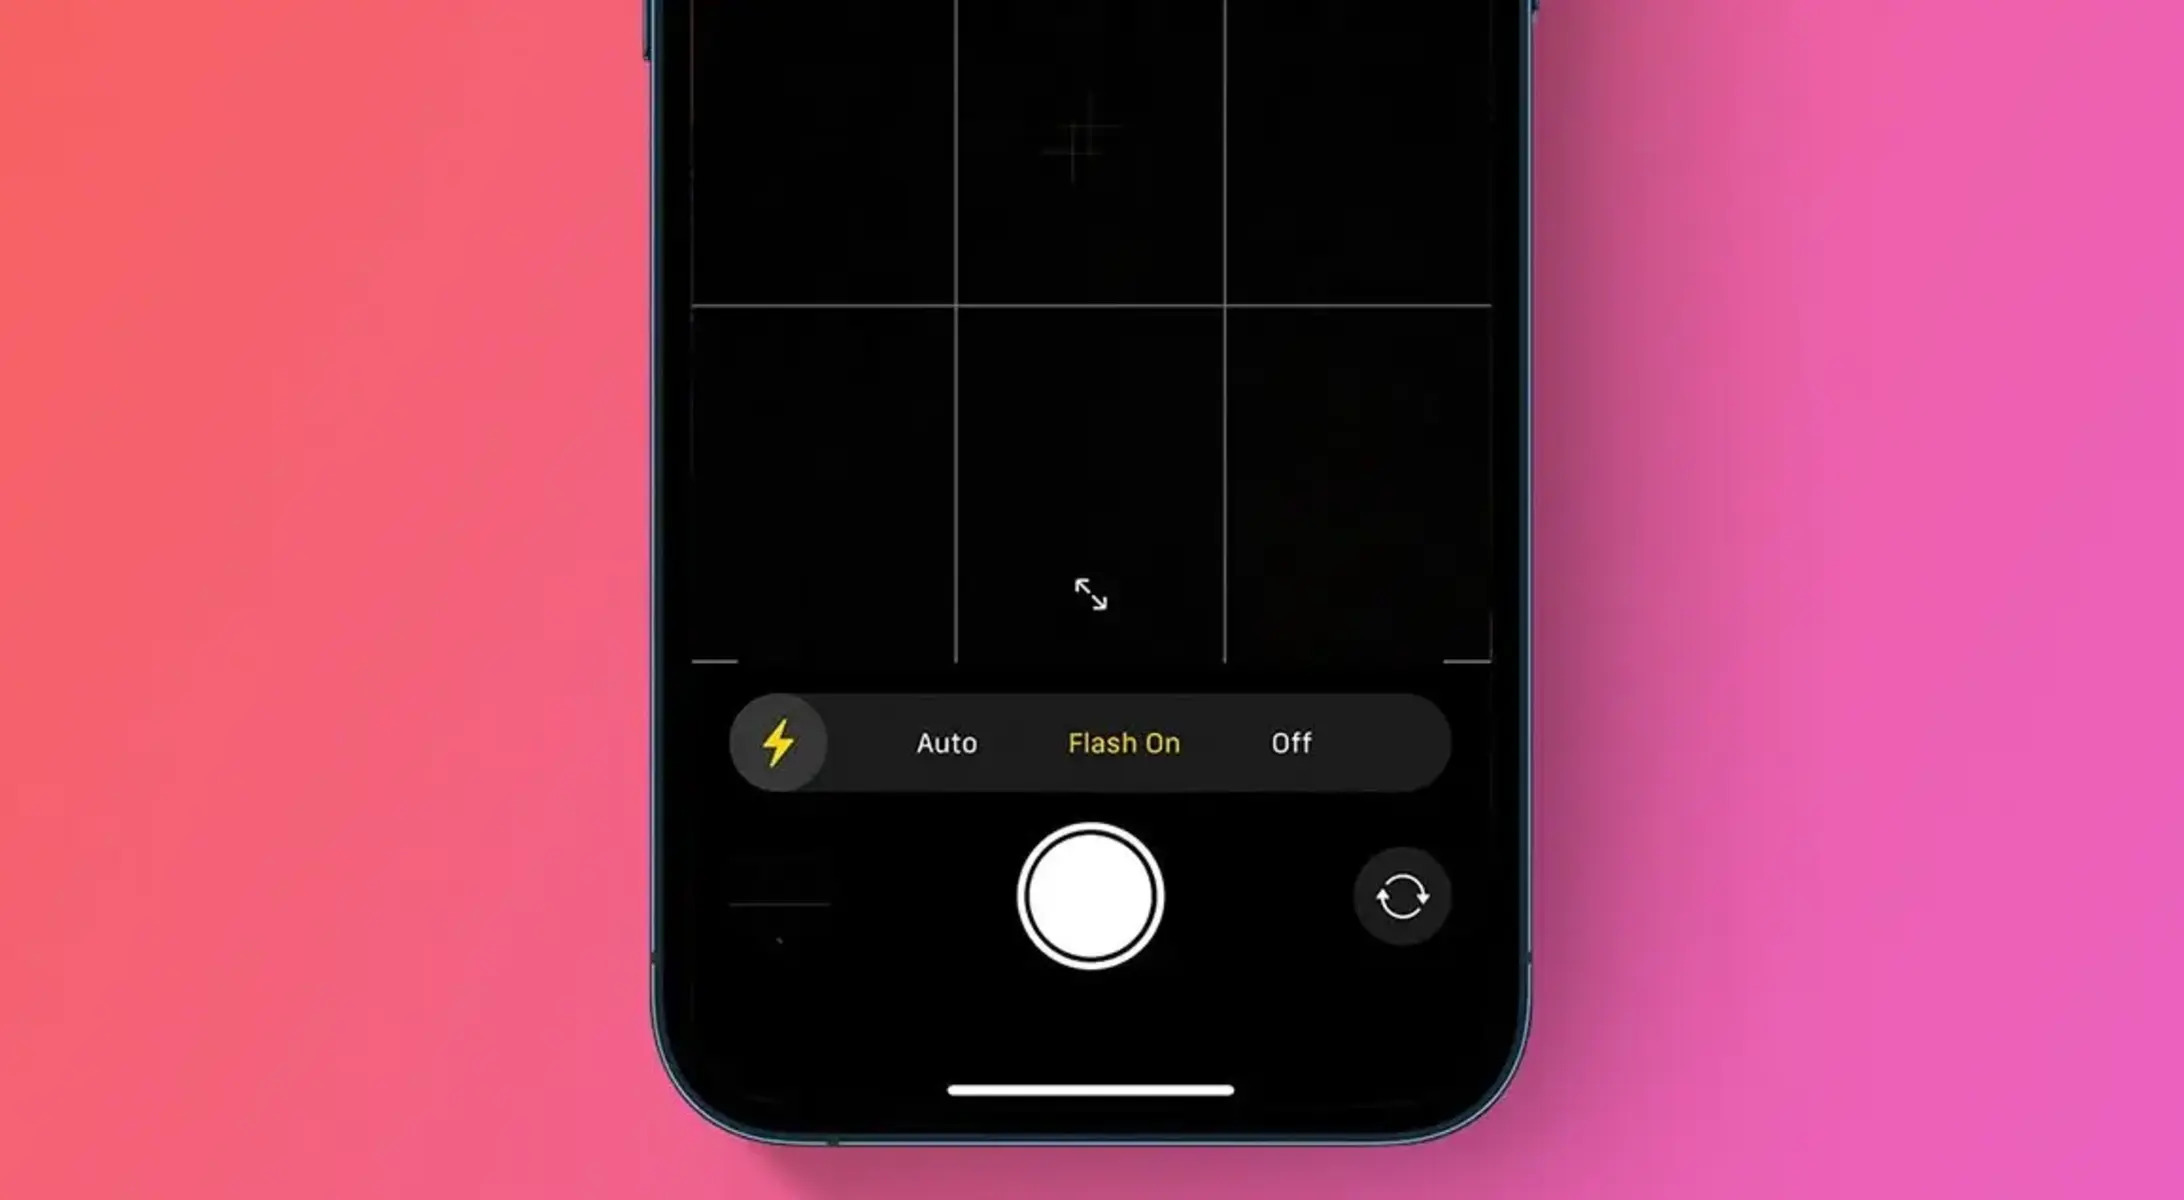
Select the Flash Icon: Once the Camera app is open, you'll notice the flash icon located in the top-left or top-right corner of the screen, depending on the camera mode you're using. The flash icon typically resembles a lightning bolt symbol.
-
Enable the Flash: Tap on the flash icon to reveal the flash settings menu. You will be presented with several options, including "Auto," "On," and "Off." To enable the flash, select the "On" option. This ensures that the flash will activate whenever you capture a photo, providing additional light to your subjects.
-
Test the Flash: After enabling the flash, it's beneficial to test its functionality in different lighting conditions. Experiment with capturing photos in low-light environments to observe the impact of the flash on your images. This allows you to familiarize yourself with the flash performance and make adjustments as needed.
-
Customize Flash Settings: Depending on your photography preferences, you can customize the flash settings to suit specific scenarios. For instance, the "Auto" mode allows the iPhone 13 to automatically determine when to use the flash based on the ambient lighting conditions. On the other hand, the "On" mode keeps the flash continuously active, while the "Off" mode disables the flash altogether.
By following these steps, you can seamlessly enable the flash on your iPhone 13 camera, empowering you to capture high-quality photos in various lighting environments. Whether you're preserving precious memories or expressing your creativity through photography, the flash feature on your iPhone 13 enhances your ability to produce visually captivating images.
Remember, the flash can significantly impact the overall look and feel of your photos, so it's essential to leverage this feature thoughtfully to achieve the desired results. With the flash enabled, you can elevate your photography skills and expand your creative possibilities with the powerful camera capabilities of the iPhone 13.
Adjust Flash Settings for Different Camera Modes
The iPhone 13 offers a range of camera modes, each tailored to specific photography scenarios, from capturing vibrant landscapes to focusing on intricate details in close-up shots. Understanding how to adjust the flash settings for different camera modes empowers you to optimize your photography experience and achieve exceptional results across various environments. Here's a comprehensive exploration of how you can tailor the flash settings for different camera modes on your iPhone 13:
1. Portrait Mode
When using the Portrait mode on your iPhone 13, the flash can be a valuable tool for enhancing the subject's features and creating striking, well-lit portraits. By default, the iPhone 13's Portrait mode intelligently utilizes the flash to achieve optimal lighting for portrait shots. However, you have the flexibility to manually adjust the flash settings based on the specific lighting conditions and desired artistic effects. Experiment with the flash options to achieve the perfect balance of illumination and shadow in your portrait compositions.
2. Night Mode
In low-light or nighttime settings, the Night mode on the iPhone 13 leverages advanced computational photography to capture stunning, detailed images with enhanced brightness and reduced noise. When using the flash in Night mode, consider utilizing the "Auto" flash setting to allow the iPhone 13 to intelligently determine when to activate the flash based on the ambient lighting. This ensures that your night-time photos maintain a natural appearance while benefiting from the supplementary illumination provided by the flash.
3. Macro Mode
Macro photography, which focuses on capturing intricate details at close range, can be further enhanced by strategically adjusting the flash settings on your iPhone 13. When engaging the Macro mode, consider utilizing the "On" flash setting to ensure consistent, well-defined lighting for your close-up subjects. This approach enables you to highlight intricate textures and subtle details, resulting in captivating macro compositions with enhanced visual impact.
4. Video Mode
In addition to capturing still images, the iPhone 13's camera excels in recording high-quality videos across diverse settings. When recording videos in environments with challenging lighting conditions, such as dimly lit interiors or evening scenes, the flash can be utilized to improve the overall video quality. Experiment with the flash settings in Video mode to determine the most effective approach for achieving well-lit, visually engaging video content.
By understanding and customizing the flash settings for different camera modes on your iPhone 13, you can elevate your photography and videography endeavors, ensuring that each capture reflects your artistic vision with precision and impact. Whether you're exploring the nuances of portrait photography, delving into the captivating world of macro compositions, or documenting memorable moments through videos, the ability to adjust flash settings empowers you to unleash the full potential of the iPhone 13's remarkable camera system.