
Adding a New Contact
Adding a new contact to your Samsung S20 is a simple and essential task that allows you to keep your contacts organized and readily accessible. Whether it's a friend's new number, a business associate's email, or a family member's address, having their information at your fingertips can be incredibly convenient. Here's how you can easily add a new contact to your Samsung S20:
-
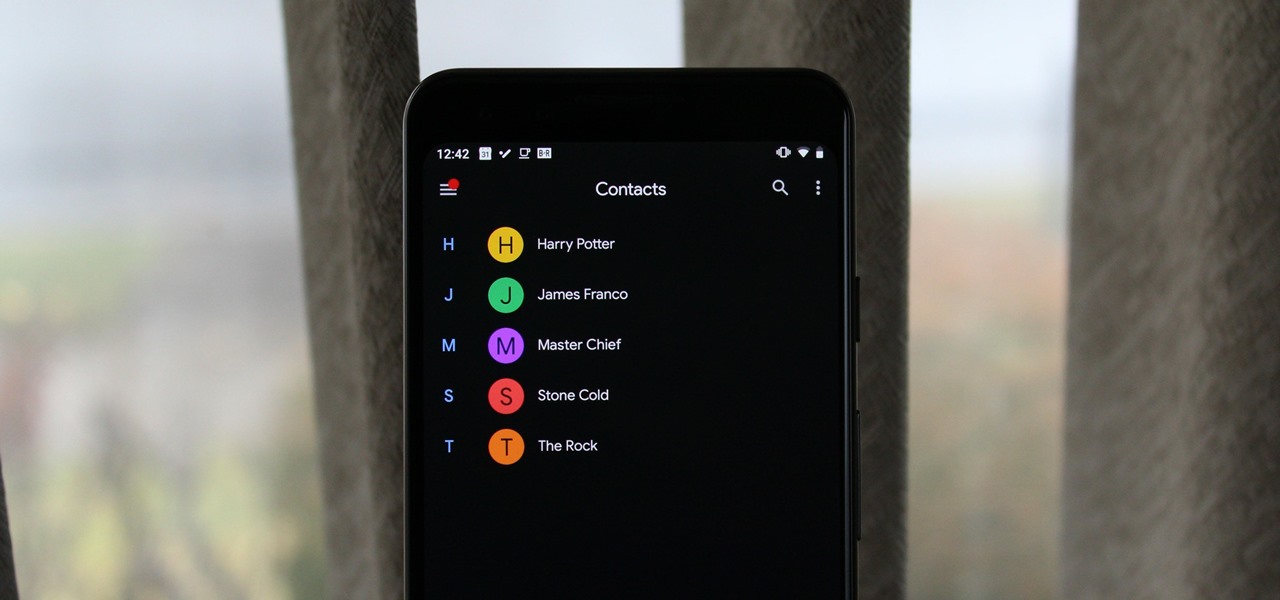
Open the Contacts App: To begin, unlock your Samsung S20 and locate the Contacts app on your home screen or in the app drawer. Tap on the app to open it.
-
Select "Add": Once you're in the Contacts app, look for the "Add" button, usually represented by a plus (+) sign. Tap on this button to initiate the contact creation process.
-
Enter Contact Details: You will be presented with a form where you can input the contact's details. Start by entering the person's name in the appropriate field. You can also add their phone number, email address, physical address, and any other relevant information. Additionally, you can assign the contact to a specific group, such as "Friends" or "Work," to help with organization.
-
Save the Contact: After entering the necessary details, look for the "Save" button, typically located at the top or bottom of the screen. Tap "Save" to store the new contact in your Samsung S20.
-
Verify the Contact: Once saved, it's a good practice to double-check the contact details to ensure accuracy. This helps avoid any potential communication errors down the line.
By following these simple steps, you can effortlessly add a new contact to your Samsung S20, ensuring that you have all the important information at your fingertips whenever you need it. Whether it's for personal or professional purposes, having a well-organized contacts list can greatly streamline your communication and enhance your overall mobile experience.
Editing an Existing Contact
Editing an existing contact on your Samsung S20 allows you to keep your contact list updated with the most accurate and relevant information. Whether it's correcting a phone number, adding an email address, or updating a contact's photo, the process is straightforward and can be accomplished in just a few simple steps. Here's how you can efficiently edit an existing contact on your Samsung S20:
-
Access the Contacts App: Begin by unlocking your Samsung S20 and locating the Contacts app on your home screen or in the app drawer. Once you've found the app, tap to open it. This will display your list of contacts, making it easy to locate the specific contact you wish to edit.
-
Locate and Select the Contact: Scroll through your contacts or use the search feature to find the contact you want to edit. Once you've located the contact, tap on their name to open their contact details.
-
Initiate the Editing Process: Within the contact details, look for the "Edit" button or icon. This is typically represented by a pencil or the word "Edit." Tap on this option to enter the editing mode for the contact.
-
Update Contact Information: Once in the editing mode, you can make the necessary changes to the contact's information. This may include updating their phone number, adding or modifying an email address, or editing any other relevant details. You can also change the contact's assigned group or add additional notes as needed.
-
Save the Changes: After making the desired edits, look for the "Save" button, typically located at the top or bottom of the screen. Tap "Save" to confirm the changes and update the contact's information.
-
Verify the Edits: It's advisable to review the contact's details after saving the changes to ensure that the updates were applied accurately. This helps to confirm that the contact's information is now up to date and correct.
By following these steps, you can efficiently edit an existing contact on your Samsung S20, ensuring that your contact list remains current and accurate. Whether it's a minor correction or a significant update, having the ability to easily modify contact information directly on your device provides a convenient way to manage your contacts effectively.
Deleting a Contact
Deleting a contact from your Samsung S20 can help you maintain a streamlined and updated contacts list, ensuring that you only have the most relevant and current information at your fingertips. Whether it's removing an outdated number, cleaning up duplicate entries, or decluttering your contacts, the process of deleting a contact is simple and can be completed in just a few steps. Here's how you can efficiently delete a contact from your Samsung S20:
-
Access the Contacts App: To begin, unlock your Samsung S20 and locate the Contacts app on your home screen or in the app drawer. Tap on the app to open it, granting you access to your list of contacts.
-
Locate the Contact: Scroll through your contacts or use the search feature to find the specific contact you want to delete. Once you've located the contact, tap on their name to view their contact details.
-
Initiate the Deletion Process: Within the contact details, look for the option to delete the contact. This is typically represented by a trash can icon or the word "Delete." Tap on this option to confirm that you want to remove the contact from your list.
-
Confirm Deletion: After selecting the delete option, a confirmation prompt may appear, asking you to verify that you want to delete the contact. This additional step helps prevent accidental deletions. Confirm the deletion to proceed.
-
Review Contacts List: Once the contact has been deleted, take a moment to review your contacts list to ensure that the intended contact has been successfully removed. This helps confirm that the contact list reflects the most accurate and relevant information.
By following these straightforward steps, you can efficiently delete a contact from your Samsung S20, helping you maintain a well-organized and up-to-date contacts list. Whether it's to declutter your contacts or remove outdated information, the ability to easily delete contacts directly from your device provides a convenient way to manage your contacts effectively.
Grouping Contacts
Grouping contacts on your Samsung S20 provides a practical way to organize and categorize your contacts based on specific criteria, such as family, friends, work, or any custom categories you may need. This feature enables you to efficiently manage and access your contacts, making it easier to communicate with specific groups of people. Whether you want to send a group message, share updates with colleagues, or reach out to family members, grouping contacts can streamline your communication efforts.
To begin grouping your contacts on the Samsung S20:
-
Access the Contacts App: Start by unlocking your Samsung S20 and locating the Contacts app. Tap on the app to open it, granting you access to your list of contacts.
-
Select and Group Contacts: Within the Contacts app, look for the option to select multiple contacts. This can typically be done by tapping and holding on a contact to activate the selection mode, allowing you to choose multiple contacts at once. Once you've selected the desired contacts, look for an option to add them to a group.
-
Create New Groups: If you don't have existing groups that suit your needs, you can create custom groups to categorize your contacts more effectively. This allows you to tailor the groups to fit your specific requirements, such as creating groups for project teams, social clubs, or event attendees.
-
Assign Contacts to Groups: Once you have your groups set up, assign the selected contacts to the appropriate groups. This ensures that each contact is organized based on your chosen criteria, making it easier to locate and communicate with specific groups when needed.
-
Utilize Group Functions: After grouping your contacts, take advantage of the functionalities that come with it. For instance, you can send group messages or emails, share updates, or initiate group calls directly from the grouped contacts list. This streamlines your communication process and saves time when reaching out to specific groups of people.
By effectively grouping your contacts on the Samsung S20, you can enhance your overall communication experience and efficiently manage your contacts based on your unique needs. Whether for personal or professional use, the ability to categorize and access contacts by groups provides a convenient way to stay connected and organized.
Importing and Exporting Contacts
Importing and exporting contacts on your Samsung S20 allows you to seamlessly transfer your contact list between devices or backup your valuable contacts for safekeeping. Whether you're switching to a new phone, backing up your data, or simply sharing contacts with others, the ability to import and export contacts provides flexibility and convenience. Here's a comprehensive guide on how to efficiently manage the importing and exporting of contacts on your Samsung S20:
Exporting Contacts
Exporting contacts from your Samsung S20 enables you to create a backup of your contact list, ensuring that your valuable information is safeguarded and easily transferable. To export your contacts:
- Access the Contacts App: Begin by opening the Contacts app on your Samsung S20.
- Open Contact Settings: Look for the settings or options menu within the Contacts app, typically represented by three vertical dots or a gear icon. Tap on this menu to access additional contact management features.
- Select "Export Contacts": Within the contact settings, look for the option to export contacts. Tap on this option to initiate the export process.
- Choose Export Destination: You may be prompted to select the export destination, such as the device's internal storage, a microSD card, or the cloud. Choose the desired location for the exported contacts.
- Confirm and Export: After selecting the export destination, confirm the export process to begin exporting your contacts. Depending on the size of your contact list, this process may take a few moments to complete.
By following these steps, you can efficiently export your contacts from the Samsung S20, creating a backup that can be easily transferred to another device or stored for safekeeping.
Importing Contacts
Importing contacts to your Samsung S20 allows you to transfer contact information from external sources, such as another device or a backup file, directly into your device's contact list. To import contacts:
- Access the Contacts App: Open the Contacts app on your Samsung S20.
- Open Contact Settings: Navigate to the settings or options menu within the Contacts app.
- Select "Import Contacts": Look for the option to import contacts and tap on it to initiate the import process.
- Choose Import Source: Depending on the available options, select the source from which you want to import contacts. This may include the device's internal storage, a microSD card, or a cloud storage service.
- Select Contacts File: If importing from a file, browse and select the specific contacts file you want to import into your Samsung S20.
- Confirm and Import: After selecting the contacts file, confirm the import process to begin importing the contacts into your device.
By following these steps, you can efficiently import contacts to your Samsung S20, allowing you to transfer contact information from external sources and integrate it seamlessly into your device's contact list.
Managing Contacts with Ease
By mastering the process of importing and exporting contacts on your Samsung S20, you gain the flexibility to manage your contact list with ease. Whether it's creating backups, transferring contacts between devices, or consolidating contact information from various sources, the ability to import and export contacts empowers you to maintain a well-organized and accessible contact list, ultimately enhancing your overall mobile communication experience.