
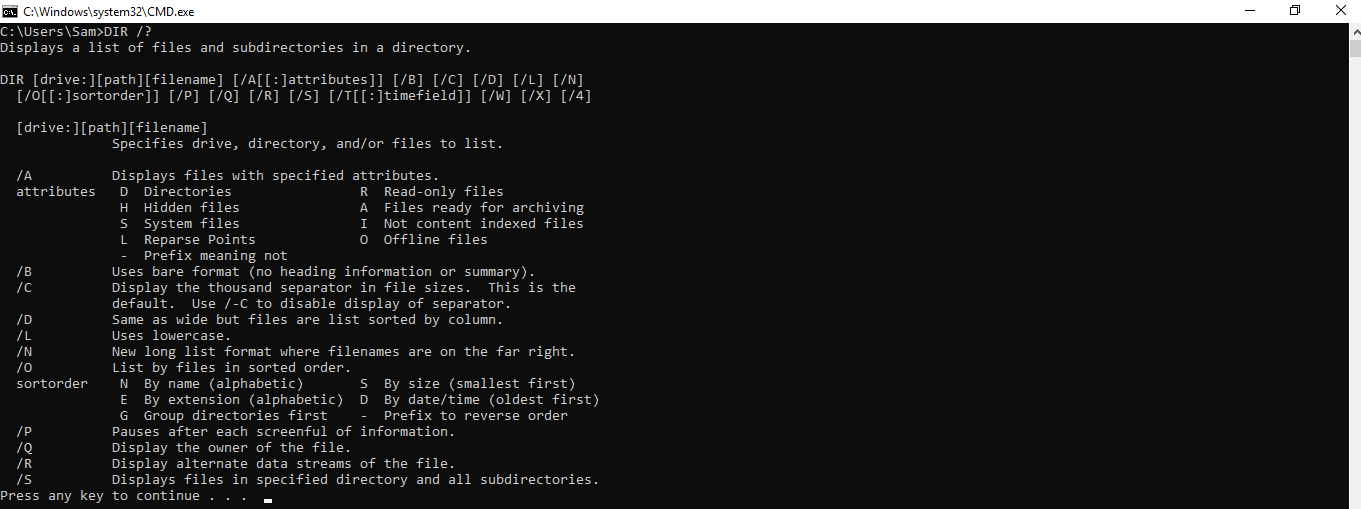
Examples of Using the Dir Command
The dir command is a powerful tool in the Windows command prompt that allows you to view the contents of a directory. With various options and switches, the dir command can provide a wealth of information and help you navigate and manage your files effectively. Here are some examples of how to use the dir command:
1. Basic directory listing: To simply view the contents of a directory, use the following command: dir. This will display a list of files and directories, including their names, sizes, and modification dates.
2. Sorting files by name: If you want to sort the files alphabetically, you can add the /on switch to the dir command. For example, dir /on will display the files in ascending order based on their names.
3. Displaying hidden files: By default, the dir command doesn’t show hidden files. To include hidden files in the listing, use the /ah switch. For example, dir /ah will display all files, including hidden ones.
4. Filtering files by extension: If you only want to see files with a specific extension, you can use the /s switch followed by the file extension. For example, dir /s .txt will display all files with the .txt extension within the current directory and its subdirectories.
5. Getting detailed file information: To obtain more detailed information about each file, you can use the /w switch. This will display the file attributes, size, and modification date in a wide format. For example, dir /w will provide a more extensive listing of the files.
These are just a few examples of how you can use the dir command to navigate and manage your files in the Windows command prompt. Experiment with different options and switches to suit your specific needs and make the most out of this versatile command.
Basic Options for the Dir Command
The dir command in the Windows command prompt provides several basic options that allow you to customize the way file and directory information is displayed. These options can help you find specific files, sort the output, and control the level of detail provided. Here are some of the basic options for the dir command:
/B: This option displays only the bare file and directory names without any additional information. It is useful when you need a simple listing of files in a directory.
/S: The /S option is used to display files in the specified directory and all its subdirectories. This option is handy when you need to search for files recursively.
/A: By default, the dir command does not display hidden files and directories. However, using the /A option, you can show hidden files by using the /AH switch or show both hidden files and directories with the /AHD switch.
/O: The /O option allows you to sort the displayed files by specific criteria. You can specify the sorting criteria using the following switches:
/ON: Sorts the files by name in alphabetical order./OE: Sorts the files by extension in alphabetical order./OS: Sorts the files by size, from smallest to largest./OD: Sorts the files by date and time, from oldest to newest.
/P: This option allows you to pause the display after each screenful of information, allowing you to scroll through long listings easily.
/W: The /W option provides a wide format display, which shows file names, sizes, and modification dates in a more detailed and organized manner.
By using these basic options, you can tailor the dir command to your specific requirements, making it easier to find files, sort them, and display relevant information. Experiment with these options to improve your productivity when working with the Windows command prompt.
Additional Options and Switches for the Dir Command
In addition to the basic options, the dir command in the Windows command prompt offers a range of additional options and switches to further customize and enhance the way you view and interact with file and directory information. Here are some of the useful additional options and switches for the dir command:
/Q: The /Q option includes the file owner’s username in the output. This is particularly helpful when you need to identify the owner of specific files or when dealing with permissions and security considerations.
/C: Using the /C option with the dir command will display the thousands separator in file sizes. This can make it easier to read and understand the sizes of files, especially when dealing with large numbers.
/L: The /L option forces the dir command to display file names in lowercase. This can be useful if you want to standardize the display of file names or when working with scripts that require lowercase filenames.
/T: The /T option allows you to specify the order in which files are sorted by their timestamps. You can use the following switches with the /T option:
/TA: Sorts by the time of last file access./TC: Sorts by the time of file creation./TW: Sorts by the time of last file write.
/E: The /E option displays the file and folder names in the long format, which includes additional information such as file attributes, size, and timestamps, all in a detailed and comprehensive manner.
/R: This option enables you to display the contents of subdirectories in an expanded and recursive manner. It can be useful when you need to investigate the structure of files and folders within a directory hierarchy.
/X: The /X option displays the short 8.3 file names in addition to the long file names. This can be beneficial when working with legacy software or when you need to reference files by their shorter names.
These additional options and switches expand the functionality of the dir command, giving you more control over how file and directory information is displayed. Experiment with these options to improve your workflow and efficiency when working with the Windows command prompt.
Filtering and Sorting Files with the Dir Command
The dir command in the Windows command prompt provides various options to filter and sort the files displayed, allowing you to quickly find specific files and organize them in a preferred order. Here are some techniques for filtering and sorting files using the dir command:
Filtering by file extension: If you want to view files with a specific extension, you can include the file extension after the dir command. For example, dir *.txt will display only files with the .txt extension. You can also use wildcards, such as dir image*.*, to display files with names starting with “image”.
Sorting files by name or date: To sort files by name in alphabetical order, use the /ON switch with the dir command. For example, dir /ON will display files in ascending order based on their names. If you prefer to sort the files by date, use the /OD switch to display them from oldest to newest.
Filtering by file size: Use the /A switch followed by the greater than (>) or less than (<) symbol to filter files by their size. For example, dir /A:>10MB will display files larger than 10 megabytes, while dir /A:<1KB will show files smaller than 1 kilobyte.
Displaying hidden and system files: By default, the dir command does not display hidden or system files. However, you can include the /A:H switch to display hidden files, and /A:S to display system files. If you want to see both hidden and system files, combine the switches as /A:HS.
Sorting files by attributes: Use the /A switch followed by the desired attribute to sort files based on their attributes. For example, dir /A:D will sort files by directories first, followed by files, while dir /A:H will display hidden files at the beginning of the list.
These techniques allow you to filter and sort files based on various criteria, enabling you to quickly locate specific files or organize them in a desired order. Experiment with different options and combinations to meet your specific requirements when working with the dir command in the Windows command prompt.
Obtaining Detailed File Information with the Dir Command
The dir command in the Windows command prompt not only allows you to list the files in a directory but also provides detailed information about each file. By using various options and switches, you can obtain comprehensive details about file attributes, sizes, timestamps, and more. Here’s how you can use the dir command to obtain detailed file information:
/A: The /A switch displays the file attributes associated with each file. Attributes such as read-only, hidden, system, and archive can provide useful insights into the file’s properties and usage.
/S: If you include the /S switch with the dir command, it will display file information for the specified directory and all its subdirectories. This recursive approach can help you obtain detailed file information across an entire directory structure.
/Q: By adding the /Q switch to the dir command, you can retrieve the owner’s username associated with each file. This can be valuable for security purposes or when identifying files belonging to specific users.
/T: Using the /T option, you can choose to sort files based on different timestamps. The /T:C, /T:A, and /T:W switches allow you to sort files by creation time, access time, and write time respectively. This information can be crucial when analyzing files based on chronological order.
/SIZES: The /SIZES switch provides detailed information about the file sizes. It displays the size of each file along with the allocation size and the number of allocated sectors. This can be helpful for analyzing storage utilization and optimizing file systems.
/O: The /O option enables you to specify the order in which files are sorted. Using the /ON, /OE, /OS, and /OD switches, you can sort files by name, extension, size, or date respectively. Sorting files can help you identify specific files or arrange them in a meaningful order.
By utilizing these options and switches, you can obtain a deeper understanding of the files within a directory, including their attributes, sizes, timestamps, and ownership. This detailed file information can assist you in performing file management tasks, troubleshooting issues, and gaining insights into the composition of your file system.
Redirecting the Output of the Dir Command
The dir command in the Windows command prompt not only allows you to view file and directory information, but it also provides the capability to redirect the output to a file or another command. This useful feature allows you to save or manipulate the results of the dir command in different ways. Here are some common methods for redirecting the output of the dir command:
Redirecting to a File: You can save the output of the dir command to a text file by using the greater than (>) symbol. For example, dir > files.txt will save the directory listing to a file named “files.txt”. You can then open or manipulate the file as needed.
Appending to a File: If you want to add the output of the dir command to an existing file, instead of overwriting it, use double greater than (>>). For example, dir >> files.txt will append the directory listing to the end of the “files.txt” file.
Redirecting to Null: If you don’t want to save the output of the dir command, you can redirect it to null by using the NUL keyword. For example, dir > NUL will discard the output and not save it to a file.
Piping to Another Command: You can also redirect the output of the dir command to another command using the pipe symbol (|). This allows you to perform additional operations on the output. For example, dir | find "file.txt" will display only the lines containing “file.txt” in the directory listing.
Combining Output and Errors: To redirect both the output and error messages to a file or another command, use the ampersand (&) symbol. For example, dir & find "error" > output.txt will search for the keyword “error” in the directory listing and save both the output and error messages to “output.txt”.
Redirecting the output of the dir command provides flexibility and control over how you handle the results. Whether you need to save the output to a file, filter it with other commands, or discard it completely, understanding these redirection techniques can enhance your productivity and streamline your workflow in the Windows command prompt.
Customizing the Format of the Dir Command Output
The dir command in the Windows command prompt provides various options to customize the format of the output, allowing you to tailor the display of file and directory information according to your preferences. These customization options help you organize and present the data more efficiently. Here are some techniques for customizing the format of the dir command output:
/B: The /B option displays a bare format, showing only the file and directory names without any additional information. This minimalistic format can be useful when you want a simple and concise listing of files and directories.
/W: The /W option provides a wide format display, which presents the file and directory information in a more detailed and organized manner. It includes attributes, size, and modification timestamp in separate columns, making it easier to read and analyze the data.
/-W: Using the /-W option, you can disable the wide format display and revert to the default column-based list format. This can be helpful if you prefer the traditional view of the dir command output.
/C: The /C option enables you to use a comma as the thousands separator for file sizes, improving readability and making it easier to interpret the sizes of files. This can be particularly useful when dealing with large file sizes.
/K: By including the /K option, the dir command displays file sizes in kilobytes instead of the default format, which is based on bytes. This can be advantageous when you want to quickly assess the relative sizes of files.
/L: The /L option forces the dir command to display file names in lowercase. This can be beneficial when you prefer a standardized format for file names or are working with scripts that require lowercase filenames.
/O: The /O option allows you to sort the displayed files by various criteria. By choosing the appropriate switch (/ON, /OE, /OS, or /OD), you can sort files by name, extension, size, or date respectively. Sorting files helps you arrange the output in a desired order and locate specific files more easily.
By utilizing these customization options, you can adapt the format of the dir command output to suit your preferences and improve readability. Experiment with these techniques to optimize your file and directory listing experience in the Windows command prompt.
Performing Recursive Directory Searches with the Dir Command
The dir command in the Windows command prompt provides the ability to perform recursive directory searches, allowing you to search for files in a specified directory and all its subdirectories. This powerful feature enables you to quickly locate files within an entire directory structure. Here is how you can perform recursive directory searches using the dir command:
/S: Including the /S switch with the dir command instructs it to search for files not only in the specified directory but also in all its subdirectories. For example, dir /S will search for files in the current directory and all subdirectories beneath it.
/B: The /B option in combination with the /S switch will display the file names without any additional information or directory structure. This allows for a clean and streamlined output of the search results, displaying only the file names.
/A: Using the /A switch, you can filter the search results based on file attributes. For example, dir /S /A:H will search for files marked as hidden within the specified directory and its subdirectories.
/C: Including the /C switch will display the number of occurrences of each matching file in the search results. This can be useful to quickly identify the files with multiple occurrences.
/ON: The /ON switch in combination with the /S switch allows you to sort the search results by file names in alphabetical order. This facilitates easier navigation and helps identify files with similar names.
/P: To pause the display after each screenful of information during the search, the /P switch can be used. This way, you can scroll through the search results at your own pace.
By leveraging these options and switches, you can perform efficient and comprehensive recursive directory searches with the dir command. Whether you are searching for specific files, filtering based on attributes, or sorting the results, the dir command provides the flexibility to meet your search needs in the Windows command prompt.
Using Wildcards with the Dir Command
The dir command in the Windows command prompt supports the use of wildcards, allowing you to search for files and directories that match specific patterns or criteria. Wildcards are special characters that represent a range of characters, making it easier to perform broad or specific searches. Here’s how you can utilize wildcards with the dir command:
Asterisk (*): The asterisk symbol (*) represents any number of characters. By placing the asterisk before or after a specific pattern, you can search for files or directories that match that pattern. For example, dir *.txt will display all files with the .txt extension, while dir file* will list all files with names starting with “file”.
Question mark (?): The question mark symbol (?) represents a single character. By using the question mark as a placeholder for a specific character, you can search for files or directories with names that match a certain pattern, but where the character in that position can vary. For example, dir file?.txt will display files with names like “file1.txt”, “fileA.txt”, etc., where the single character can be any alphanumeric character.
Brackets ([]): Brackets can be used to specify a range or a set of characters to match. For example, dir [abc]* will display files or directories with names that start with either “a”, “b”, or “c”. You can also use a range within the brackets, such as dir [a-z]* to display files or directories with names that start with any lowercase letter.
Combining Wildcards: You can combine multiple wildcards to perform more complex searches. For instance, dir f??e*.txt will show files with names that start with “f”, followed by any two characters, followed by “e”, and end with “.txt”.
Using Quotes: If a search pattern contains spaces, it is essential to enclose the pattern in quotes. For example, dir "file *" will list all files with names that start with “file ” (including the space).
By using wildcards, you can enhance the versatility and flexibility of the dir command, allowing you to perform specific and efficient searches based on patterns and criteria. Experiment with different wildcard combinations to refine your search results in the Windows command prompt.
Finding Specific File Types with the Dir Command
The dir command in the Windows command prompt provides a convenient way to find specific file types within a directory or a directory hierarchy. By using various options and switches, you can filter the search results to display only files with certain file extensions or types. Here’s how you can use the dir command to find specific file types:
Filtering by File Extension: The simplest way to find specific file types is by filtering files based on their file extensions. For example, dir *.txt will display all files with the .txt extension, while dir *.docx will only show files with the .docx extension.
Combining File Extensions: You can also combine multiple file extensions using the wildcard (*) symbol and the /S switch to search for matching files within a directory structure. For instance, dir /S *.txt *.docx will display all .txt and .docx files in the specified directory and its subdirectories.
Searching for All Files of a Type: To find all files of a specific type, regardless of the file extension, use the /A switch followed by the desired file attribute and the /S switch. For example, dir /S /A:D will display all directories, while dir /S /A:-D will display all non-directory files.
Combining Attributes with Extensions: You can combine file attributes with specific file extensions to narrow down your search results further. For instance, dir /S /A:H *.txt will display all hidden .txt files within the specified directory and its subdirectories.
Using Quotes: When using file extensions with spaces, enclose the pattern in quotes. For example, dir "*.txt files" will search for files with names containing the phrase “txt files” (with the space).
These techniques allow you to efficiently locate specific file types using the dir command in the Windows command prompt. Whether you need to find files based on well-defined extensions or want to perform more advanced searches combining attributes and extensions, the dir command offers versatile options for narrowing down your search results.
Limiting the Depth of Recursive Searches with the Dir Command
The dir command in the Windows command prompt allows you to perform recursive searches, searching for files and directories in the specified directory and its subdirectories. However, there may be situations where you want to limit the depth of your search to a specific level. The dir command provides options to control the depth of recursive searches, ensuring that only the desired levels of subdirectories are included. Here’s how you can limit the depth of recursive searches using the dir command:
/S: The /S switch without any additional parameters performs a recursive search, including all subdirectories. This is the default behavior of the dir command.
/S:n: By specifying a numeric value n after the /S: switch, you can limit the depth of recursion to n levels. For example, dir /S:2 will perform a recursive search up to two levels deep, including the specified directory and its immediate subdirectories.
/A:d: The /A:d switch, where d represents a numeric value, limits the depth of recursion by the number of directories traversed. For example, dir /A:1 will restrict the search to the current directory and its immediate subdirectories only.
Using Wildcards: Another way to limit the depth of a recursive search is by specifying wildcard criteria. For example, dir /S /B /AD *subdir* will search for directories with names containing “subdir” only in the specified directory and its immediate subdirectories.
Combining Options: You can combine the aforementioned options with other dir command switches to perform more specific searches. For instance, using the /A: switch along with an attribute like /A:-D will limit the depth of search to files only, excluding directories.
By utilizing these options, you can customize the depth of recursive searches performed by the dir command in the Windows command prompt. This flexibility allows you to focus your search within specific levels of subdirectories, providing more control and efficiency in file and directory search operations.
Excluding Specific Files or Directories with the Dir Command
The dir command in the Windows command prompt provides options to exclude specific files or directories from the search results, allowing you to fine-tune and refine your searches. This can be particularly useful when you want to exclude certain files or directories that are not relevant to your search criteria. Here’s how you can exclude specific files or directories using the dir command:
/A:-D: The /A:-D switch filters the search results to exclude directories. Using this option, the dir command will display only files and exclude directories from the search results. For example, dir /A:-D will show a listing of files without any directories.
/A:-attributes: You can also exclude files and directories based on specific attributes. By appending a hyphen symbol (-) before the attribute name, you can exclude files or directories with those attributes from being displayed. For example, dir /A:-H will exclude hidden files from the search results, and dir /A:-R will exclude read-only files.
/B /S: Combining the /B and /S options, you can exclude specific directories from the recursive search results. For instance, dir /B /S /AD ^| findstr /V /I "excluded_directory" will exclude the directory with the name “excluded_directory” from the search.
/X: The /X option displays the short 8.3 file names in addition to the long file names. You can use this option to identify and exclude files or directories based on their short names. For instance, dir /X /A:D /B ^| findstr /V /I "EXCLUD~1" will exclude the directory with a short name of “EXCLUD~1” from the search results.
Using Quotes: In case of file or directory names containing spaces, enclose the names in quotes. For example, dir /B /S ^| findstr /V /I "excluded directory" will exclude the directory with the name “excluded directory” from the search.
By employing these techniques, you can effectively exclude specific files or directories from the search results generated by the dir command in the Windows command prompt. This allows for more precise and refined search operations that focus on the relevant files and directories for your specific needs.
Displaying File Sizes with the Dir Command
The dir command in the Windows command prompt allows you to display file sizes, providing helpful information about the space occupied by files. This feature is useful when you need to assess storage utilization, identify large files, or determine the size of a specific file. Here’s how you can display file sizes using the dir command:
/A: The /A switch displays file attributes along with the file sizes when used with the dir command. It provides a comprehensive listing that includes the file attributes, size, modification date, and time. For example, dir /A will display the file sizes alongside other file information.
/S: Including the /S switch with the dir command allows you to view file sizes for the specified directory and all its subdirectories. With this option, you will get a recursive listing of file sizes, making it easy to identify which files are occupying the most space. For example, dir /S will display file sizes in a directory hierarchy.
/B: The /B option, when used in combination with other switches like /S or /A, displays file sizes in a bare format. It eliminates additional information and presents only the file sizes. For instance, dir /S /B will display the file sizes in a simple, vertical list format.
/-C: The /-C option suppresses the display of file sizes in the dir command output. This can be useful when you prioritize other information such as file names or attributes and don’t need to see the sizes. For example, dir /-C will provide a more concise listing without file sizes.
By utilizing these options and switches, you can easily retrieve and view file sizes using the dir command in the Windows command prompt. Whether you need a comprehensive or simplified presentation of file sizes, the dir command provides flexible options to fulfill your requirements.
Sorting Files by Size or Date with the Dir Command
The dir command in the Windows command prompt allows you to sort files based on their size or date, providing greater control over how file information is organized and displayed. Sorting files can be helpful when you want to identify the largest or newest files, or when you need to arrange files in a specific order. Here’s how you can sort files by size or date using the dir command:
/OS: The /OS switch with the dir command sorts files in order of size, from smallest to largest. This allows you to quickly identify files that occupy the most space on your storage device. For example, dir /OS will display files starting with the smallest file size.
/OD: Including the /OD switch with the dir command sorts files by date, placing the newest files at the top of the list. This is helpful when you need to identify the most recently modified or created files in a directory or folder. For example, dir /OD will display files starting with the most recent modification or creation date.
/OGN: The /OGN switch combines sorting by size and then by name. This sorts the files based on size, with files of equal size organized alphabetically. It helps when you want to group files of similar size together while maintaining alphabetical ordering within each group. For example, dir /OS /OGN will list files starting with the smallest file size and then sort files of the same size alphabetically.
/ON: The /ON switch sorts files by name in alphabetical order. This is the default sorting method when no other switch is specified. For example, dir /ON will list files alphabetically by their names.
By utilizing these sorting options and switches, you can easily organize and rearrange files based on their size or date using the dir command in the Windows command prompt. Whether you need to identify large files or display files in a specific chronological order, the dir command offers versatile sorting capabilities to meet your needs.
Finding the Newest or Oldest Files with the Dir Command
The dir command in the Windows command prompt provides the capability to find the newest or oldest files present in a directory or its subdirectories. Whether you need to identify the most recently created or modified files or locate files that have not been accessed for a long time, the dir command offers sorting options to help you find the newest or oldest files. Here’s how you can accomplish this:
/OD: The /OD switch with the dir command sorts files based on their date and time, with the newest files appearing first in the list. Utilizing this switch, dir /OD will display the files in descending order of their modification or creation dates.
/TA: By using the /TA switch, the dir command sorts files based on the date and time of the last access. Including this switch with the dir command will display files in descending order of their last access dates. For example, dir /TA will list the files starting with the most recently accessed ones.
/TC: The /TC switch in combination with the dir command sorts files based on their creation dates. This option allows you to identify the files based on when they were originally created. For instance, dir /TC will display the files starting with the oldest ones.
/TT: The /TT switch with the dir command sorts files based on the time and date of their last modification. By utilizing this switch, dir /TT will list the files starting with the most recently modified files.
By utilizing these sorting options provided by the dir command, you can easily find the newest or oldest files within a directory or its subdirectories. Whether it is to track recent changes, identify outdated files, or perform administrative tasks, the dir command in the Windows command prompt offers the necessary tools to support your file management needs.
Navigating Between Directories with the Dir Command
The dir command in the Windows command prompt not only allows you to view the contents of a specific directory but also enables you to navigate between different directories. This navigation capability is essential when you need to switch between directories to access specific files or perform operations in different locations on your system. Here are some techniques for navigating between directories using the dir command:
Changing the Current Directory: To switch to a different directory, use the cd command followed by the path of the desired directory. For example, cd C:\Windows will change the current directory to the “Windows” directory located on the C: drive.
Viewing the Contents of a Different Directory: If you want to view the contents of a directory without changing the current directory, you can specify the path of the desired directory along with the dir command. For example, dir C:\Program Files will display the files and folders within the “Program Files” directory located on the C: drive, without changing the current directory.
Navigating to a Parent Directory: You can navigate to the parent directory of the current directory by using the “..” notation. For example, cd .. will move up one level in the directory hierarchy. You can use this technique repeatedly to move up multiple levels.
Navigating to a Specific Drive: To navigate to a specific drive, simply type the drive letter followed by a colon. For example, D: will switch to the D: drive.
Using Tabs or Auto-Completion: To navigate between directories more efficiently, you can take advantage of the tab key for auto-completion. Typing a few characters of a directory name and pressing the tab key will auto-complete the directory name, making it quicker to switch between directories.
By utilizing these techniques, you can effectively navigate through different directories using the dir command in the Windows command prompt. Whether you need to change directories or view the contents of a specific directory, these commands will facilitate smooth navigation and help you perform tasks within different locations on your system.
Displaying Hidden Files and System Files with the Dir Command
The dir command in the Windows command prompt provides the flexibility to display hidden files and system files, allowing you to view and manage all types of files on your system. By default, the dir command does not show hidden files or system files. However, you can use specific options and switches to include them in the directory listing. Here’s how you can display hidden files and system files using the dir command:
/A:H: The /A:H switch with the dir command displays hidden files in the directory listing. By including this switch, you can reveal any hidden files present in the directory. For example, dir /A:H will show all hidden files in the current directory.
/A:S: The /A:S switch includes system files in the directory listing. Using this switch, you can display files that are marked as system files. For example, dir /A:S will show all system files in the current directory.
/AH: If you want to view both hidden files and system files, you can use the /AH switch. This switch combines the options to display both hidden files and system files in the directory listing. For example, dir /AH will show all hidden and system files in the current directory.
/AS: Similarly, the /AS switch allows you to display both hidden and system files in the directory listing. Using this switch provides an alternative way to include both types of files in the output. For example, dir /AS will show all hidden and system files in the current directory.
With these options and switches available, you can easily display hidden files and system files using the dir command in the Windows command prompt. This allows you to have a comprehensive view of all files on your system and perform necessary management tasks.
Compressing File Lists with the Dir Command
The dir command in the Windows command prompt provides options to compress or shorten the output of file lists, making them more manageable and easier to read. This can be especially useful when working with directories that contain a large number of files. Here are some techniques for compressing file lists using the dir command:
/W: The /W switch with the dir command displays the file list in a wide format, presenting the file names in separate columns. This option can help compress the file list by organizing the information in a more compact manner.
/B: Including the /B switch along with other options like /S or /A simplifies the output by displaying only the bare file and directory names. This option compresses the file list significantly by removing additional information such as sizes or attributes.
/ON /B: Combining the /ON and /B switches shortens the output by displaying only the file names in alphabetical order. This option compresses the file list further by removing any details or additional columns.
/4: The /4 switch limits the output to display a maximum of four entries per line. This option helps compress larger file lists by displaying the names in a more condensed, multi-column format.
/-C: Including the /-C switch omits the file sizes from the dir command output. This option can significantly compress the file list by removing the information related to file sizes, making the output more concise.
By utilizing these compression techniques, you can manage and view file lists more efficiently with the dir command in the Windows command prompt. Whether you need a more organized format, a simplified output, or condensed columns, these options provide flexibility and improve readability for file lists in various scenarios.
Combining Multiple Dir Commands for Advanced Searches
The dir command in the Windows command prompt allows you to combine multiple commands to perform advanced searches and obtain more specific search results. By combining multiple dir commands with different options and switches, you can customize the search criteria and refine the output. Here are some techniques for combining multiple dir commands:
Using Pipes: Pipe the output of one dir command to another command using the pipe symbol (|). This technique allows you to filter or further process the output of the first dir command. For example, dir /S | findstr "file.txt" will search for the keyword “file.txt” in the output of a recursive dir command.
Using Multiple Commands in a Single Line: Combine multiple dir commands in a single line using the ampersand symbol (&). This allows you to execute multiple dir commands sequentially. For example, dir /A:H & dir /A:S will display the hidden files, followed by the system files without the need to run separate commands.
Using Wildcards: Utilize the power of wildcards to combine multiple dir commands without explicitly specifying each directory. For instance, dir C:\Projects\*\file.txt will search for files named “file.txt” in all subdirectories inside the “Projects” directory on the C: drive.
Using Different Options: Run multiple dir commands with different options or switches to perform parallel searches with varying criteria. For example, dir /A:H will display hidden files, while dir /A:-D will display non-directory files, allowing you to simultaneously search for both.
By combining multiple dir commands, you can customize your search operations in the Windows command prompt, enabling more advanced and tailored searches. With the ability to pipe output, execute commands in a single line, utilize wildcards, or run multiple commands with different options, you can extract precise information and perform intricate file management tasks efficiently.
Common Issues and Troubleshooting Tips with the Dir Command
The dir command in the Windows command prompt is a reliable tool for managing and navigating files. However, you may encounter certain issues or face challenges when using the command. Here are some common issues and troubleshooting tips to help you overcome potential problems:
Error: “File Not Found”: If you receive a “File Not Found” error while using the dir command, ensure that you have provided the correct path to the directory. Check for typos or missing characters in the path and make sure you are referencing the correct drive if applicable.
Access Denied: When you encounter an “Access Denied” error message, it typically means that you do not have the necessary permissions to view the contents of a directory. Ensure that you are executing the command with administrative privileges or have the appropriate permissions assigned to your user account.
Invalid Switch: If you receive an “Invalid Switch” error, double-check the spelling and syntax of the switches you are using with the dir command. Make sure the switches are correctly placed and that there are no unnecessary spaces or special characters.
No Output: If the dir command does not provide any output, verify that the directory you are searching contains files. Also, confirm that you have used the correct syntax for the command and any required switches.
Slow Execution: If the dir command is running slowly, it may be due to a large number of files or a slow storage medium. To improve performance, narrow down the search criteria by using specific file extensions or filters to reduce the number of files that need to be processed.
Unresponsive Command Prompt: In some cases, the dir command can cause the command prompt window to become unresponsive, particularly when searching in large directories. Patience is key in such situations, as it may take some time for the command to complete its task. Avoid interrupting the process to prevent any data corruption or loss.
Escaping Special Characters: If you need to include special characters in your search criteria, such as “*”, “?”, or “|”, you may need to escape them using the caret symbol (^) before the character. This tells the command prompt to treat it as a literal character instead of a wildcard or other special function.
By understanding these common issues and following the troubleshooting tips, you can overcome potential obstacles and maximize the effectiveness of the dir command in the Windows command prompt. These techniques will help you navigate and manage files with more confidence and efficiency.