
Why Deep Clean Your Phone Case?
Your phone case goes through a lot with you. It gets exposed to various surfaces, accumulates dirt, and even comes into contact with your hands, which can transfer oils and bacteria. Over time, this can lead to a buildup of grime and germs on your phone case. Regularly cleaning your phone case is essential not only for hygiene but also for the longevity of your device. Here are a few reasons why deep cleaning your phone case is important:
-
Hygiene: Your phone case can harbor bacteria, viruses, and other pathogens, especially if you frequently place your phone on different surfaces or handle it with unwashed hands. Regularly cleaning your phone case helps eliminate these harmful germs, reducing the risk of transferring them to your hands or face.
-
Device Longevity: A clean phone case helps protect your phone from scratches, dust, and other debris that could potentially damage it. By keeping your phone case clean, you're also safeguarding your phone from unnecessary wear and tear.
-
Aesthetics: A dirty phone case can detract from the overall appearance of your phone. Regular cleaning not only keeps your case looking fresh but also maintains the sleek and stylish look of your device.
-
Odor Control: Oils, sweat, and other residues can accumulate on your phone case, leading to unpleasant odors. Deep cleaning your phone case helps eliminate these odors, ensuring that your phone remains a pleasure to use.
By understanding the importance of keeping your phone case clean, you can ensure that your device remains in good condition and that you minimize the risk of exposure to harmful bacteria and germs. Regular maintenance of your phone case can go a long way in preserving both the hygiene and aesthetics of your device.
Materials Needed
Before you embark on deep cleaning your phone case, it’s essential to gather the necessary materials. Here’s a list of items you’ll need to effectively clean and disinfect your phone case:
-
Mild liquid soap or dish detergent: Choose a gentle, non-abrasive soap to avoid damaging the phone case material. Avoid using harsh chemicals or solvents that could potentially harm the case.
-
Soft microfiber cloth: This will be used to wipe down the exterior of the phone case, ensuring that it’s free from dust, fingerprints, and other surface debris.
-
Cotton swabs or soft-bristled brush: These tools will help you clean the nooks and crevices of the phone case, especially the areas around the camera lens and ports.
-
Isopropyl alcohol (70% concentration or higher): This will serve as a disinfectant to eliminate germs and bacteria from the phone case’s surface. Ensure that the alcohol is at least 70% concentration for effective disinfection.
-
Warm water: You’ll need this for rinsing the phone case and for creating a soapy cleaning solution.
-
Soft toothbrush: If your phone case has textured or grooved surfaces, a soft toothbrush can help remove dirt and grime from these areas.
-
Drying cloth or paper towels: After cleaning and disinfecting the phone case, you’ll need a soft, absorbent cloth or paper towels to dry it thoroughly.
By having these materials on hand, you’ll be well-equipped to carry out a thorough deep cleaning of your phone case, ensuring that it remains free from dirt, germs, and unsightly blemishes.
Step 1: Remove the Phone Case
Before you begin the cleaning process, it’s crucial to remove the phone case from your device. This step ensures that you can clean the case thoroughly without risking any damage to your phone. Here’s how to safely remove your phone case:
-
Power Off Your Phone: To prevent any accidental button presses or screen interactions, power off your phone before removing the case. This will also allow you to handle the phone and case more securely.
-
Inspect the Case: Take a moment to inspect the phone case for any debris or particles that may have accumulated between the case and the phone. Gently shake or tap the case to dislodge any loose dirt or debris.
-
Start at a Corner: Depending on the type of case, locate a corner or edge where you can begin separating the case from the phone. Carefully pry the case away from the phone, ensuring that you exert gentle pressure to avoid bending or damaging the case.
-
Work Around the Edges: Once you’ve successfully loosened one corner, gradually work your way around the edges, gently detaching the case from the phone. Take your time and exercise patience to prevent any abrupt or forceful movements that could cause damage.
-
Remove the Case: Once the case is detached from the phone, carefully lift it away, ensuring that no parts of the phone, such as buttons or ports, are caught or snagged on the case.
By following these steps, you can safely remove your phone case, preparing it for a thorough cleaning process. Taking the time to remove the case properly sets the stage for effective cleaning and ensures that your phone remains protected throughout the process.
Step 2: Wipe Down the Exterior
Once you’ve removed the phone case, it’s time to focus on cleaning the exterior surface. This step involves removing dust, fingerprints, and other surface debris that may have accumulated on the case. Here’s how to effectively wipe down the exterior of your phone case:
-
Use a Microfiber Cloth: Begin by taking a soft microfiber cloth and gently wiping the exterior of the phone case. The microfiber material is ideal for picking up dust and smudges without leaving lint or scratches on the surface.
-
Apply Gentle Pressure: When wiping the case, apply light pressure to ensure that you’re effectively removing any surface grime. Avoid using excessive force, as this could potentially scratch or damage the case, especially if it’s made of delicate materials.
-
Focus on Edges and Grooves: Pay special attention to the edges, corners, and any grooved or textured areas of the case. These areas are prone to accumulating dirt and require thorough cleaning. Use a gentle, circular motion to clean these intricate areas.
-
Inspect for Lingering Debris: After wiping down the entire exterior, inspect the case for any lingering debris or stubborn marks. If necessary, repeat the wiping process in targeted areas to ensure that the entire surface is clean and free from blemishes.
By meticulously wiping down the exterior of your phone case, you can restore its appearance and ensure that it’s free from surface contaminants. This step sets the stage for a more comprehensive cleaning process, allowing you to maintain the visual appeal of your phone case.
Step 3: Clean the Interior
While the exterior of your phone case may be the most visible part, it’s equally important to pay attention to the interior, especially the areas that come into direct contact with your phone. Cleaning the interior of your phone case helps eliminate accumulated dirt, oils, and residues that may have built up over time. Here’s how to effectively clean the interior of your phone case:
-
Remove Any Loose Debris: Before cleaning the interior, inspect the inside of the case for any loose debris or particles. Gently shake the case to dislodge any dirt or debris that may have accumulated.
-
Use a Soft Brush or Cotton Swab: For hard-to-reach areas or textured surfaces inside the case, use a soft-bristled brush or cotton swab to gently dislodge and remove dirt. Pay close attention to areas around the edges and corners.
-
Wipe Down the Interior Surface: Take a soft microfiber cloth and gently wipe the interior surface of the case. This will help remove any remaining dust, oils, or residues, leaving the interior clean and ready for disinfection.
-
Inspect for Lingering Debris: After cleaning the interior, inspect the case to ensure that no debris or marks remain. If necessary, repeat the cleaning process in targeted areas to ensure that the entire interior surface is free from contaminants.
By thoroughly cleaning the interior of your phone case, you can ensure that it remains free from dirt and residues that could potentially transfer to your phone. This step not only contributes to the overall cleanliness of your device but also helps maintain the integrity of the phone case itself.
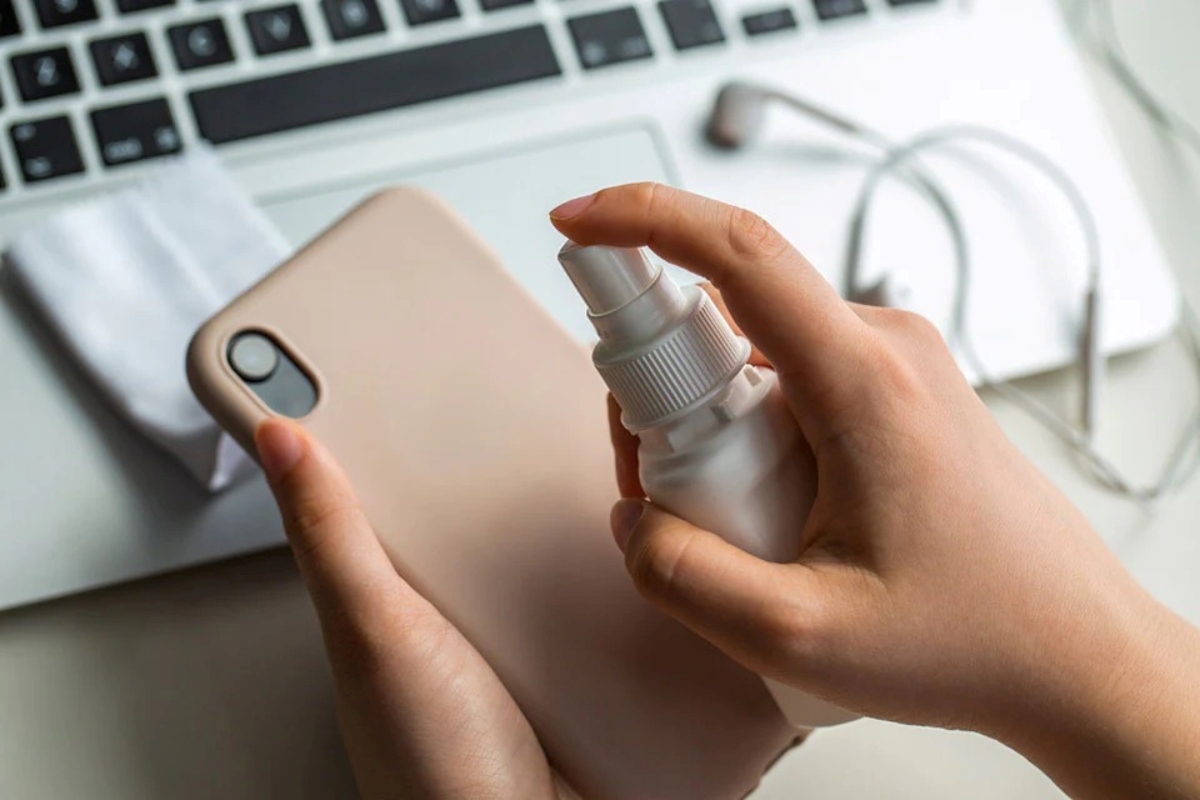
Step 4: Disinfect the Phone Case
Disinfecting your phone case is a critical step in maintaining hygiene and minimizing the presence of harmful germs and bacteria. By effectively disinfecting the case, you can ensure that it remains a clean and safe accessory for your phone. Here’s how to disinfect your phone case:
-
Prepare Isopropyl Alcohol Solution: In a small container, mix isopropyl alcohol with a small amount of water to create a diluted alcohol solution. It’s important to use alcohol with a concentration of 70% or higher for effective disinfection.
-
Dampen a Cloth or Cotton Pad: Moisten a soft cloth or cotton pad with the prepared alcohol solution. Ensure that the cloth is not dripping wet, as excessive moisture could potentially damage the phone case, especially if it’s made of sensitive materials.
-
Wipe Down the Exterior and Interior: Gently wipe down the entire exterior and interior surfaces of the phone case with the alcohol-moistened cloth. Pay particular attention to areas that come into frequent contact with your hands, such as the edges and corners.
-
Focused Application on High-Touch Areas: For added precaution, concentrate on disinfecting the areas of the case that are frequently touched, such as the buttons, ports, and any textured surfaces. Ensure thorough coverage to effectively eliminate germs and bacteria.
-
Allow for Drying Time: After disinfecting the phone case, allow it to air dry completely before reattaching it to your phone. This ensures that any residual alcohol evaporates, leaving the case clean and ready for use.
By following these steps, you can effectively disinfect your phone case, reducing the presence of harmful pathogens and ensuring that it remains a clean and hygienic accessory for your device. This proactive measure contributes to a healthier and more sanitary interaction with your phone.
Step 5: Let the Phone Case Dry
After cleaning and disinfecting your phone case, it’s crucial to allow it to dry thoroughly before reattaching it to your device. Proper drying ensures that the case is free from moisture, preventing potential damage to your phone and maintaining the cleanliness of the case. Here’s how to effectively dry your phone case:
-
Air Drying: Place the phone case in a well-ventilated area, away from direct sunlight and heat sources. Allowing air to circulate around the case facilitates the evaporation of any residual moisture, ensuring that it dries evenly.
-
Patience is Key: Depending on the material of the phone case and the level of moisture present, drying times may vary. Exercise patience and allow sufficient time for the case to dry completely before considering reattachment.
-
Check for Dryness: After a few hours, gently touch the case to assess its dryness. Ensure that no dampness or cool spots remain, indicating that the case is still drying. If needed, allow for additional drying time.
-
Inspect for Residue: Once the case is dry, inspect it for any residual marks, streaks, or signs of moisture. If necessary, use a dry, soft cloth to gently buff the surface and ensure that it’s free from any remaining traces of moisture.
By allowing your phone case to dry thoroughly, you’re not only preserving the integrity of the case but also ensuring that it’s ready to be reattached to your phone in a clean and pristine condition. This step is essential for maintaining the hygiene and functionality of your phone case.
Step 6: Reattach the Phone Case
Once your phone case is thoroughly cleaned, disinfected, and dried, it’s time to reattach it to your device. Proper reattachment ensures that the case fits securely and functions as intended, providing the necessary protection for your phone. Here’s how to reattach your phone case:
-
Inspect the Case and Phone: Before reattachment, inspect both the phone case and your device for any residual debris, dust, or moisture. Ensure that the phone is clean and free from any potential contaminants that could affect the case.
-
Align the Case Properly: Position the phone case over your device, aligning it carefully with the corresponding buttons, ports, and camera lens. Take your time to ensure that the case fits snugly and aligns accurately with the phone’s features.
-
Gently Snap or Slide the Case into Place: Depending on the type of case, gently snap or slide it onto the phone, ensuring that you apply even pressure to all sides. Avoid forcing the case into place, as this could potentially cause damage to the case or phone.
-
Double-Check the Fit: After reattaching the case, double-check that it sits securely and evenly on the phone. Ensure that all edges and corners are properly aligned, and there are no gaps or misalignments that could compromise the fit.
By following these steps, you can confidently reattach your phone case, knowing that it’s securely in place and providing the necessary protection for your device. Proper reattachment ensures that your phone case continues to serve its purpose effectively while maintaining the cleanliness and hygiene of your device.
Tips for Maintaining a Clean Phone Case
Keeping your phone case clean is an ongoing process that requires regular attention and care. By implementing these tips, you can maintain the cleanliness and hygiene of your phone case, ensuring that it remains a reliable and visually appealing accessory for your device:
-
Regular Cleaning Routine: Incorporate phone case cleaning into your regular device maintenance schedule. By cleaning the case frequently, you can prevent the buildup of dirt and grime, making the cleaning process more manageable.
-
Use Mild Cleaning Agents: When cleaning your phone case, opt for mild liquid soap, gentle dish detergent, or isopropyl alcohol. Avoid harsh chemicals or abrasive cleaners that could potentially damage the case’s material or finish.
-
Thorough Drying After Cleaning: Ensure that your phone case is completely dry before reattaching it to your device. Proper drying prevents moisture-related issues and maintains the cleanliness of the case.
-
Regular Inspection: Periodically inspect your phone case for signs of wear, damage, or accumulated debris. Addressing any issues promptly can prevent them from worsening and maintain the overall condition of the case.
-
Rotate Multiple Cases: If you use multiple phone cases, consider rotating them periodically. This allows each case to air out and reduces the likelihood of moisture or odor buildup.
-
Avoid Contact with Harsh Substances: Be mindful of the surfaces and substances your phone case comes into contact with. Avoid placing it on abrasive or dirty surfaces and minimize exposure to substances that could stain or damage the case.
-
Regular Hand Hygiene: Maintain clean hands when handling your phone and phone case. Regular handwashing reduces the transfer of oils, dirt, and germs to the case, contributing to its cleanliness.
By incorporating these tips into your phone case care routine, you can prolong the cleanliness, functionality, and visual appeal of your phone case. Consistent maintenance not only enhances the hygiene of your device but also ensures that your phone case remains a durable and attractive accessory.