
Materials Needed
To embark on this DIY project, you will need a few essential materials to craft your very own Altoids USB charger. Here's a comprehensive list of items required to get started:
-
Altoids Tin: The quintessential component of this project, the Altoids tin will serve as the sturdy and compact housing for your USB charger. It's readily available and can be repurposed for this innovative project.
-
USB Charger Module: This crucial component will form the heart of your Altoids USB charger. It typically consists of a small circuit board with USB ports and the necessary components for charging devices. Ensure that it is compatible with the power source you intend to use.
-
Power Source: You will need a power source to supply the necessary energy to your USB charger. This could be a set of rechargeable batteries, a power bank, or a solar panel, depending on your preference and the intended use of the charger.
-
Soldering Iron and Solder: These tools are essential for connecting the components and wiring within the Altoids tin. A soldering iron with a fine tip and high-quality solder will ensure secure and reliable connections.
-
Wire Cutters and Strippers: These tools will be indispensable for preparing the wires and ensuring precise connections within the USB charger.
-
Electrical Tape: It will be used to insulate and secure the wired connections, providing an added layer of safety and stability to the internal components.
-
Hot Glue Gun: This versatile tool will aid in securing the components within the Altoids tin, preventing any movement or damage during use.
-
Multimeter: A multimeter will be essential for testing and troubleshooting the connections and ensuring that the USB charger functions as intended.
-
Optional Extras: Depending on your preferences and intended use, you may consider including additional features such as an on/off switch, LED indicators, or a voltage regulator to enhance the functionality of your Altoids USB charger.
Gathering these materials will set the stage for an engaging and rewarding DIY project, allowing you to craft a functional and portable USB charger housed within an iconic Altoids tin. With the necessary components in hand, you're ready to delve into the step-by-step process of assembling your very own Altoids USB charger.
Step 1: Disassembling the Altoids Tin
The first step in crafting your Altoids USB charger involves carefully disassembling the Altoids tin to prepare it for housing the USB charger components. Follow these detailed instructions to disassemble the tin with precision:
-
Empty the Tin: Begin by removing any remaining mints or contents from the Altoids tin. This will provide a clean and spacious interior for accommodating the USB charger components.
-
Inspect the Hinges and Latch: Examine the hinges and latch of the tin to identify any securing mechanisms. Some Altoids tins feature a hinged lid, while others may have a sliding or removable lid. Understanding the opening mechanism will guide you in safely accessing the interior of the tin.
-
Disengage the Lid: Carefully disengage the lid of the Altoids tin according to the type of closure mechanism it employs. If it is hinged, gently open the lid to reveal the interior. For sliding or removable lids, proceed to detach the lid with caution, ensuring that it remains intact for reassembly.
-
Remove Inner Components: Once the lid is open, inspect the interior of the tin and remove any inner components, such as paper inserts or protective padding. Clearing the interior space will provide a clean canvas for mounting the USB charger components.
-
Clean the Interior: Take a moment to clean the interior of the Altoids tin, removing any residual adhesive or debris that may hinder the installation of the USB charger components. A clean interior will facilitate seamless mounting and wiring of the components.
By meticulously disassembling the Altoids tin, you will prepare the foundation for housing the USB charger components, ensuring a well-organized and secure arrangement within the iconic tin enclosure. With the tin now primed for assembly, you are ready to proceed to the next step of this engaging DIY project.
Step 2: Preparing the USB Charger Components
With the Altoids tin disassembled, the next crucial step in crafting your DIY Altoids USB charger involves preparing the essential components that will bring the charger to life. Follow these detailed instructions to meticulously prepare the USB charger components:
-
Inspect the USB Charger Module: Begin by carefully inspecting the USB charger module to familiarize yourself with its layout and components. Identify the input and output ports, as well as any additional features or indicators present on the module.
-
Review the Power Source: If you have chosen a power source for the USB charger, whether it’s rechargeable batteries, a power bank, or a solar panel, ensure that it is fully charged and ready for testing once the components are assembled.
-
Prepare the Wiring: Cut and strip the necessary lengths of wire to facilitate the connections between the USB charger module, power source, and any additional components. Ensure that the wires are prepared with precision, allowing for secure and reliable connections.
-
Identify Additional Components: If you have opted to include extra features such as an on/off switch, LED indicators, or a voltage regulator, familiarize yourself with their functionality and prepare them for integration into the USB charger assembly.
-
Gather Tools and Supplies: Ensure that you have all the required tools and supplies at hand, including the soldering iron, solder, wire cutters, strippers, electrical tape, and any specific components or accessories needed for the USB charger assembly.
By meticulously preparing the USB charger components, you will establish a solid foundation for the seamless integration of the module, power source, and any additional features into the Altoids tin. With the components ready for assembly, you are poised to embark on the next phase of this captivating DIY project, bringing your Altoids USB charger closer to fruition.
Step 3: Mounting the USB Charger Components
As you progress with your DIY Altoids USB charger project, the meticulous mounting of the USB charger components within the Altoids tin is a pivotal step in bringing your creation to life. Follow these detailed instructions to effectively mount the USB charger components:
-
Position the USB Charger Module: Carefully position the USB charger module within the Altoids tin, considering the layout and orientation that will best utilize the available space while allowing for convenient access to the input and output ports.
-
Secure the Power Source: If you have chosen a power source for the USB charger, securely position it within the tin, ensuring that it is stably anchored and that the necessary connections to the USB charger module can be established without strain or interference.
-
Integrate Additional Components: If you have opted to include extra features such as an on/off switch, LED indicators, or a voltage regulator, carefully integrate them into the layout, ensuring that they complement the USB charger module and power source without overcrowding the interior space.
-
Optimize Component Placement: Arrange the components within the Altoids tin with precision, optimizing the layout to facilitate efficient wiring and secure connections while allowing for potential future maintenance or modifications.
-
Utilize the Hot Glue Gun: Employ a hot glue gun to secure the mounted components in place, preventing any movement or displacement during use while providing a reliable and durable attachment within the Altoids tin.
By methodically mounting the USB charger components within the Altoids tin, you will establish a cohesive and well-organized arrangement that optimizes the functionality and accessibility of the charger. With the components securely positioned, you are poised to transition to the next phase of this engaging DIY project, bringing your Altoids USB charger closer to completion.
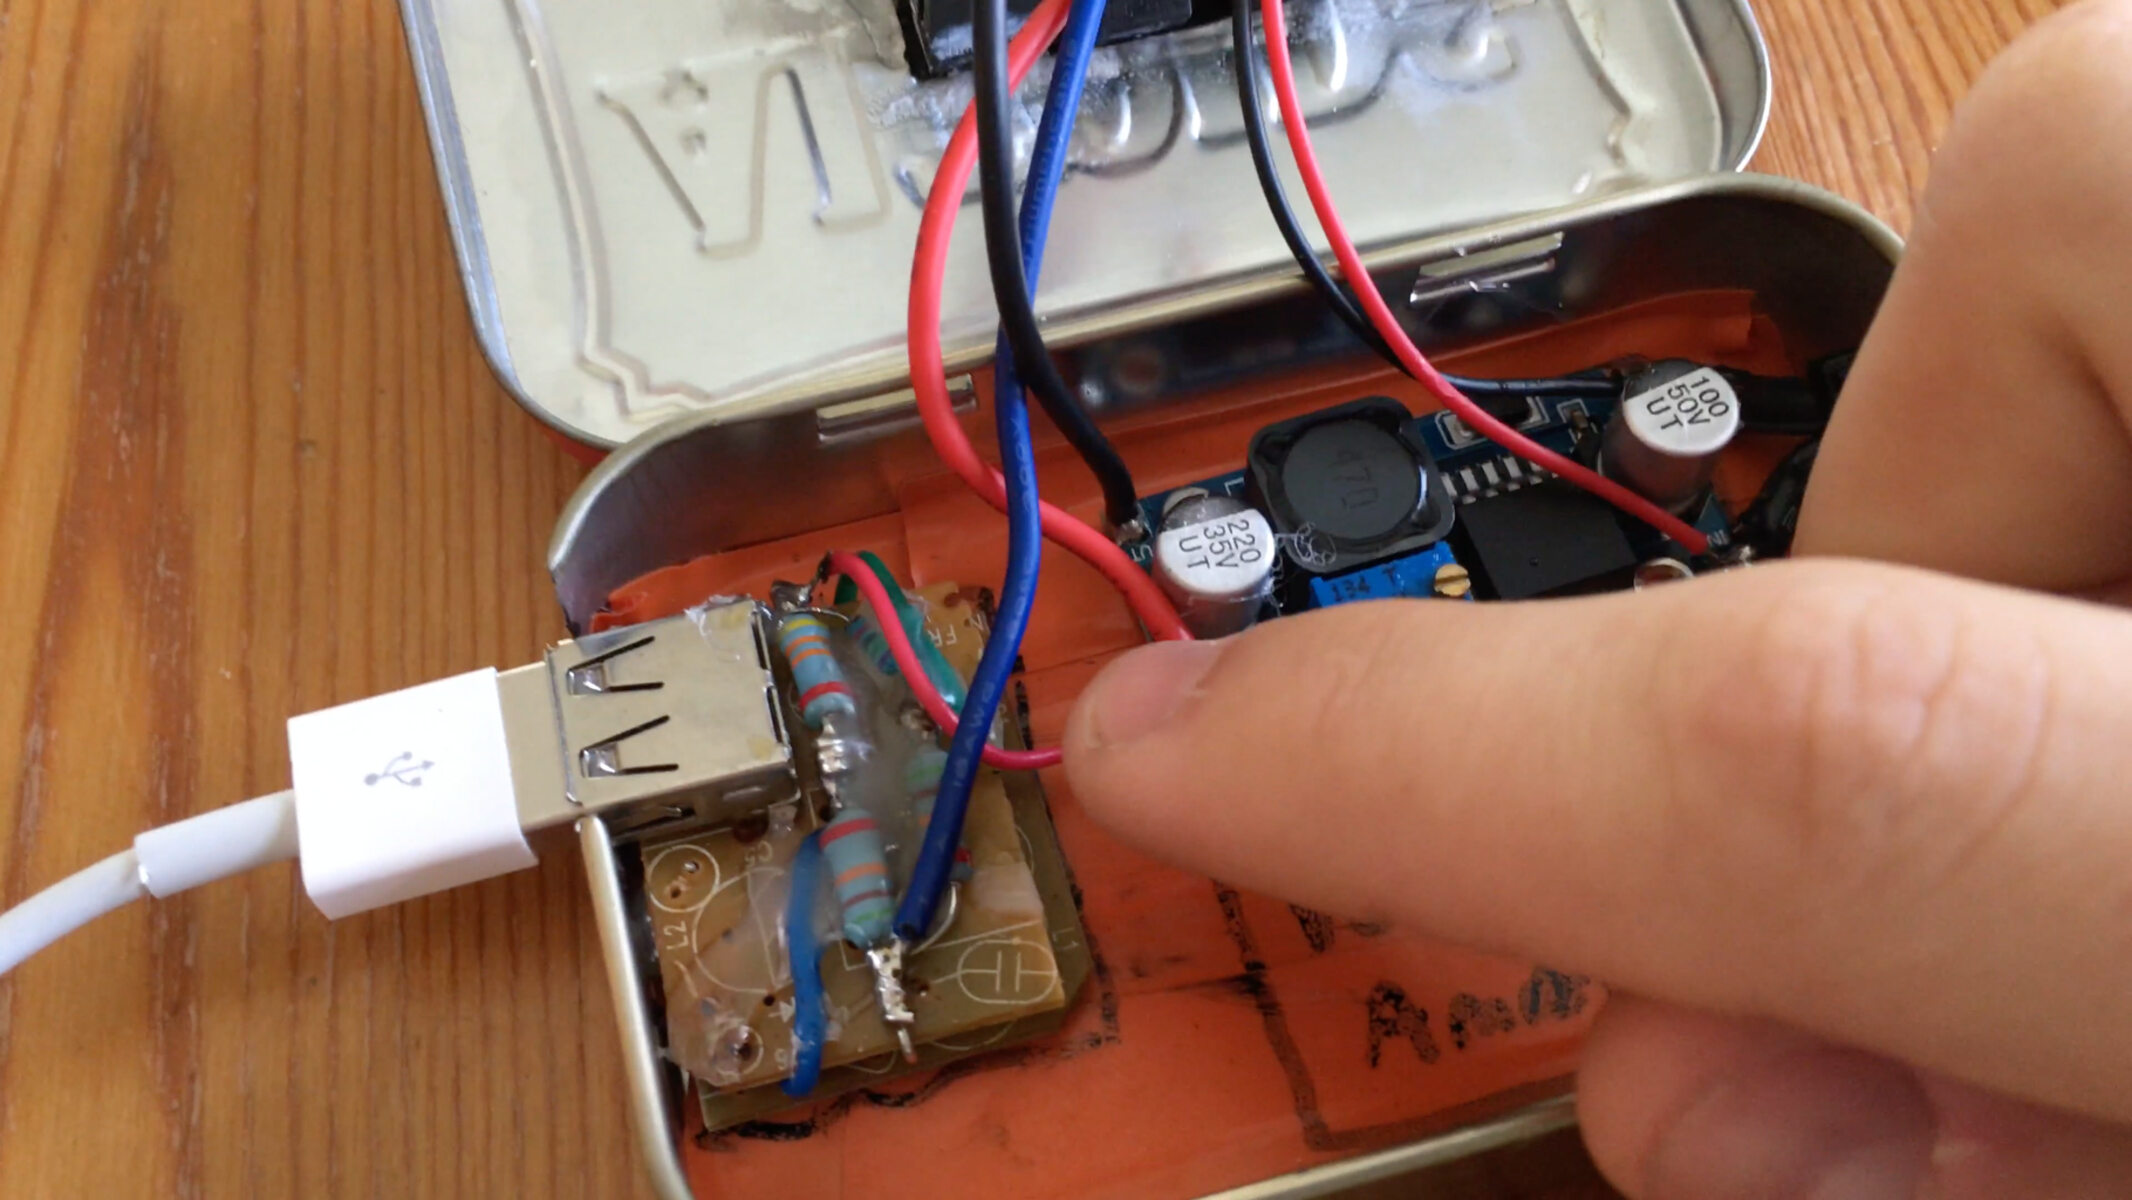
Step 4: Wiring the USB Charger
The meticulous wiring of the USB charger components is a critical phase in the construction of your DIY Altoids USB charger. Follow these detailed instructions to effectively wire the USB charger, ensuring reliable connections and optimal functionality:
-
Connect the Power Source: Begin by establishing the necessary connections between the power source and the input terminals of the USB charger module. Ensure that the polarity is observed and that the connections are secure, utilizing solder and heat shrink tubing for added insulation and durability.
-
Link the Output Terminals: Connect the output terminals of the USB charger module to the corresponding ports, ensuring that the wiring is meticulously arranged to prevent strain or interference with the other components within the Altoids tin.
-
Integrate Additional Components: If you have included extra features such as an on/off switch, LED indicators, or a voltage regulator, wire them into the circuit with precision, ensuring that they seamlessly complement the USB charger module and power source.
-
Insulate and Secure the Connections: Utilize electrical tape or heat shrink tubing to insulate and secure the wired connections, safeguarding against short circuits and ensuring the longevity of the USB charger assembly.
-
Test the Connections: Prior to finalizing the wiring, conduct a thorough inspection of the connections and use a multimeter to verify the continuity and integrity of the circuit. Address any discrepancies or irregularities to ensure a robust and reliable USB charger assembly.
By meticulously wiring the USB charger components, you will establish a secure and efficient electrical circuit that powers the USB charger module while integrating any additional features seamlessly. With the wiring meticulously completed, you are poised to proceed to the final phase of this captivating DIY project, bringing your Altoids USB charger closer to fruition.
Step 5: Testing the Altoids USB Charger
As you approach the culmination of your DIY Altoids USB charger project, thoroughly testing the functionality and performance of the charger is a pivotal step to ensure its reliability. Follow these detailed instructions to effectively test the Altoids USB charger:
-
Power Up the Charger: Connect the power source to the USB charger module and ensure that the connections are secure. If you are using rechargeable batteries, insert them into the power source compartment and activate the charger.
-
Verify Charging Capability: Connect a compatible device, such as a smartphone or a small electronic gadget, to the USB output port of the charger. Verify that the device recognizes the charger and initiates the charging process, indicating that the USB charger is functioning as intended.
-
Monitor Charging Progress: Observe the charging progress of the connected device, ensuring that the USB charger maintains a stable and consistent charging output. Monitor the temperature of the charger and the connected device to safeguard against overheating or irregularities.
-
Test Additional Features: If your Altoids USB charger includes extra features such as an on/off switch or LED indicators, test their functionality to ensure that they operate seamlessly and enhance the user experience.
-
Conduct Longevity Testing: Allow the USB charger to operate for an extended period, monitoring its performance and the stability of the connections. This longevity testing will validate the durability and reliability of the charger under sustained usage.
By thoroughly testing the Altoids USB charger, you will affirm its functionality, charging capability, and the seamless operation of any additional features integrated into the assembly. With the charger successfully tested and proven to deliver reliable performance, you have accomplished a remarkable feat in creating a functional and portable USB charger housed within the iconic Altoids tin.