
Materials Needed
To embark on this DIY project, you'll need a handful of materials to bring your solar-powered USB charger to life. Here's a list of essential items to get started:
-
Solar Panels: Look for a 6-volt or 12-volt solar panel, depending on the power output you desire. You can find these at hardware stores or online retailers. Ensure the panel is equipped with a USB port for convenient charging.
-
USB Charger: Choose a USB charger that's compatible with your electronic devices. Opt for a high-quality, durable charger to ensure efficient power transfer and longevity.
-
Battery Pack: A rechargeable battery pack is necessary to store the solar energy. Look for a pack with a capacity suitable for your charging needs.
-
Wires and Connectors: Gather various wires and connectors to link the solar panels, USB charger, and battery pack. Ensure the wires are of sufficient length to allow flexibility in positioning the components.
-
Soldering Iron and Solder: These tools are essential for securely connecting the wires and components. A soldering iron with a fine tip and high-quality solder will facilitate precise and reliable connections.
-
Mounting Hardware: Depending on your preference, you may need mounting hardware such as brackets, adhesive tape, or Velcro to secure the solar panels and other components in place.
-
Protective Enclosure: Consider a weatherproof and durable enclosure to house the electronic components, safeguarding them from environmental elements.
-
Multimeter: A multimeter will be handy for testing and troubleshooting electrical connections and ensuring the proper functioning of the charger.
Gathering these materials will set the stage for the exciting process of assembling your very own solar-powered USB charger. With these components in hand, you're ready to move on to the next step in this engaging DIY project.
Step 1: Gathering the Solar Panels and USB Charger
The initial step in constructing a solar-powered USB charger involves gathering the primary components: the solar panels and the USB charger. This step sets the foundation for the project and ensures that you have the essential elements to proceed.
When selecting solar panels, consider the power output you require. A 6-volt or 12-volt solar panel is typically suitable for charging small electronic devices. These panels are readily available at hardware stores or through online retailers. It’s important to choose a panel equipped with a USB port to facilitate convenient charging of your devices.
Next, choose a USB charger that is compatible with the electronic devices you intend to charge. Opt for a high-quality charger to ensure efficient power transfer and durability. Consider the charging capacity and the number of USB ports the charger offers, as this will determine its versatility and utility for your specific needs.
By carefully selecting the solar panels and USB charger, you’re laying the groundwork for a successful DIY project. These components form the backbone of the solar-powered USB charger, and their selection is crucial to the functionality and performance of the final product.
With the solar panels and USB charger in hand, you’re ready to move on to the next step in this exciting journey: assembling the solar panels to harness the power of the sun and convert it into usable electrical energy.
Step 2: Assembling the Solar Panels
Assembling the solar panels is a pivotal phase in creating your solar-powered USB charger. This step involves harnessing the sun’s energy and converting it into electrical power to charge your devices. Here’s a guide to help you through the assembly process:
1. Positioning the Solar Panels: Select an optimal location to place the solar panels. Ensure they receive ample sunlight throughout the day. If using multiple panels, position them in a way that maximizes their exposure to sunlight.
2. Connecting the Panels: Link the solar panels together in a series or parallel configuration, depending on the voltage and current requirements of your USB charger and battery pack. Follow the manufacturer’s guidelines for proper panel connection.
3. Securing the Panels: Once connected, secure the panels in place using mounting hardware such as brackets, adhesive tape, or Velcro. Ensure they are firmly positioned and angled to capture the maximum amount of sunlight.
4. Testing the Connection: Use a multimeter to verify the electrical connections and ensure that the solar panels are generating the expected voltage and current. This step is crucial for confirming the functionality of the panels before proceeding to connect the USB charger.
By following these steps, you’ll effectively assemble the solar panels and lay the groundwork for harnessing solar energy to power your USB charger. This pivotal phase brings you one step closer to creating a sustainable and eco-friendly charging solution.
Step 3: Connecting the USB Charger
Connecting the USB charger is a crucial stage in the construction of your solar-powered USB charger. This step involves integrating the USB charger with the solar panels to enable the conversion of solar energy into usable electrical power for charging electronic devices. Here’s a detailed guide to help you through this process:
1. Identifying the Input: Locate the input port on the USB charger, typically a micro-USB or USB-C port, where the electrical power will be supplied from the solar panels and battery pack.
2. Connecting the Wires: Use appropriate wires and connectors to link the output of the solar panels to the input of the USB charger. Ensure the connections are secure and that the polarity is correct to prevent damage to the charger.
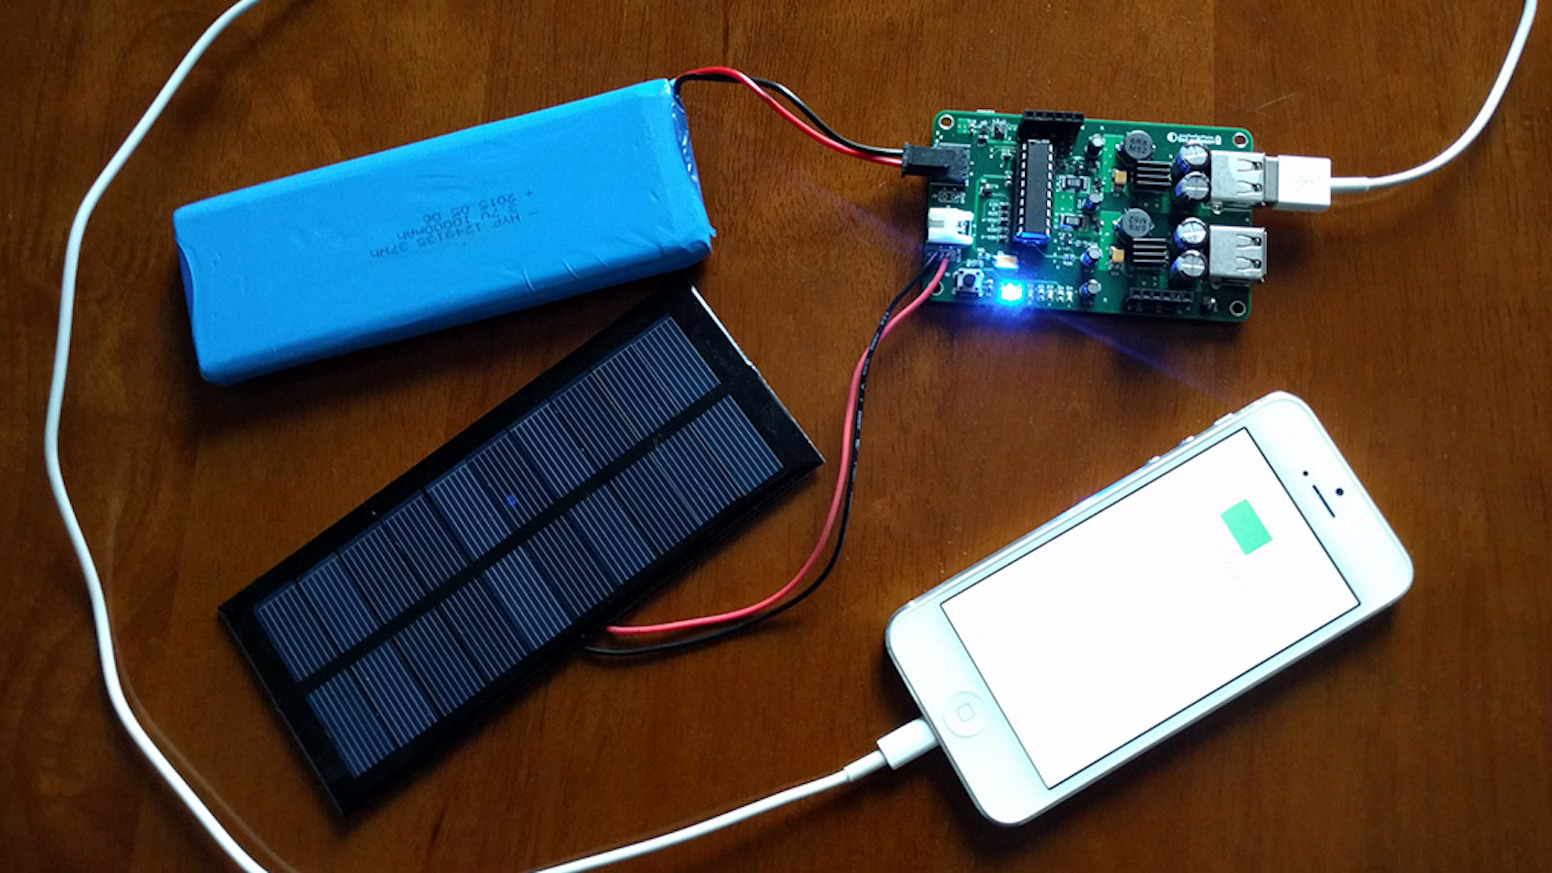
3. Integrating the Battery Pack: If using a battery pack to store the solar energy, connect the output of the solar panels to the input of the battery pack. Then, connect the output of the battery pack to the input of the USB charger. This configuration allows the battery pack to store excess energy for charging devices when sunlight is insufficient.
4. Verifying the Connections: Use a multimeter to check the voltage and current at various points in the circuit to ensure that the connections are secure and that the electrical parameters are within the expected range. This step is essential for confirming the proper functioning of the USB charger in conjunction with the solar panels and battery pack.
By following these steps, you’ll successfully integrate the USB charger into the solar-powered system, enabling the conversion of solar energy into electrical power for charging your devices. This pivotal phase brings you one step closer to harnessing sustainable and renewable energy to meet your charging needs.
Step 4: Testing the Solar-Powered USB Charger
Testing the solar-powered USB charger is a critical phase in the DIY project, as it allows you to verify the functionality and performance of the system before regular use. Here’s a comprehensive guide to help you test the charger and ensure its effectiveness:
1. Sunlight Exposure Test: Place the solar panels in direct sunlight and observe the charging indicator on the USB charger. Ensure that the panels are generating sufficient power to initiate the charging process.
2. Device Compatibility Test: Connect a compatible electronic device to the USB charger and monitor the charging process. Verify that the device is receiving a stable and consistent charge from the solar-powered system.
3. Battery Pack Test: If utilizing a battery pack, assess its performance by charging the pack using the solar panels. Confirm that the pack stores the solar energy effectively and can subsequently charge electronic devices when needed.
4. Charging Efficiency Test: Measure the charging time for various devices and compare it to conventional charging methods. Evaluate the efficiency of the solar-powered charger in replenishing the device’s battery to determine its practicality and effectiveness.
5. Low-Light Conditions Test: Test the charger’s performance under low-light conditions or partial sunlight to gauge its ability to function in varying weather conditions. Ensure that the system can still generate a charge when sunlight is limited.
By conducting these tests, you’ll gain valuable insights into the functionality and reliability of your solar-powered USB charger. This phase is essential for identifying any potential issues and optimizing the performance of the charger to meet your charging needs effectively.
Step 5: Mounting and Using the Charger
Mounting and using the solar-powered USB charger marks the final phase of your DIY project, allowing you to deploy the charger for practical use while ensuring its stability and functionality. Here’s a detailed guide to help you through this phase:
1. Selecting the Mounting Location: Choose a strategic location for mounting the solar panels to maximize sunlight exposure. Consider areas with minimal shading and easy access to electronic devices requiring charging.
2. Securing the Panels: Use the chosen mounting hardware, such as brackets or adhesive tape, to secure the solar panels in the selected location. Ensure they are firmly positioned and angled to capture the maximum amount of sunlight throughout the day.
3. Positioning the Charger: Place the USB charger in a convenient and accessible location, ensuring that it is protected from environmental elements and positioned close to the electronic devices requiring charging.
4. Connecting Electronic Devices: Begin using the solar-powered USB charger by connecting your electronic devices to the charger’s output port. Verify that the devices are charging effectively and monitor their charging progress as needed.
5. Monitoring and Maintenance: Regularly monitor the charger’s performance and ensure that the solar panels remain clean and free of debris to optimize their efficiency. Periodically check the connections and components for any signs of wear or damage, and address any maintenance needs promptly.
6. Enjoying Sustainable Charging: Embrace the benefits of your solar-powered USB charger by enjoying sustainable and eco-friendly charging for your electronic devices. Revel in the satisfaction of harnessing solar energy to meet your charging needs while reducing your environmental impact.
By following these steps, you’ll successfully mount and utilize your solar-powered USB charger, integrating it seamlessly into your daily routine and embracing the advantages of renewable energy for powering your electronic devices.