
Choosing the Right Wood
When crafting a wood cell phone case, the selection of wood is crucial. Different woods offer varying levels of durability, aesthetics, and workability. Here are some popular choices:
- Maple: Known for its durability and light color, maple is a popular choice for woodworking projects. It can be easily shaped and finished to achieve a smooth, polished look.
- Walnut: With its rich, dark color and natural luster, walnut is prized for its elegance. It is a sturdy wood that can withstand everyday use, making it an excellent option for crafting a protective cell phone case.
- Cherry: Cherry wood boasts a warm, reddish tone and a fine, straight grain. It is relatively lightweight and easy to work with, making it suitable for creating intricate designs.
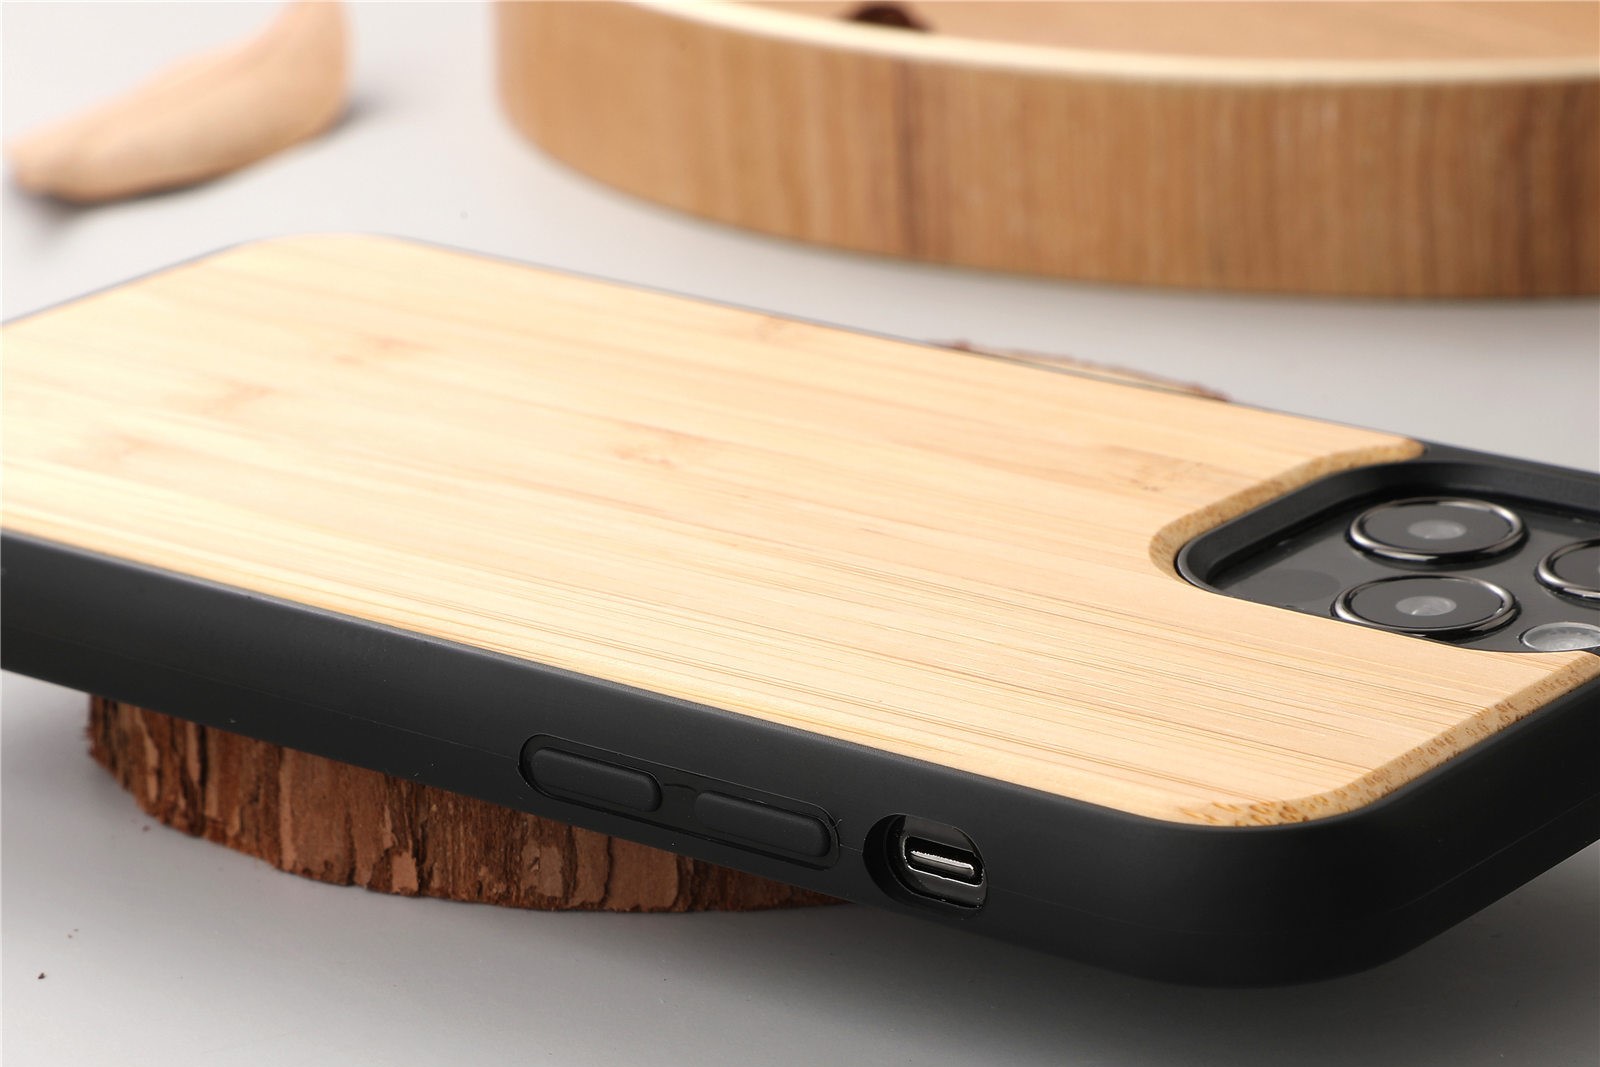
- Bamboo: As an eco-friendly option, bamboo is not only sustainable but also exceptionally durable. Its unique grain pattern and light weight make it an attractive choice for a distinctive cell phone case.
Consider the aesthetic appeal, strength, and workability of each wood type before making your selection. Additionally, ensure that the chosen wood is free from defects and has been properly dried to prevent warping or cracking over time.
Furthermore, take into account the environmental impact of the wood. Opting for sustainably sourced or reclaimed wood can align with eco-conscious values and contribute to a more environmentally friendly crafting process.
By carefully choosing the right wood, you can set the foundation for a well-crafted and visually appealing cell phone case that aligns with your preferences and values.
Measuring and Cutting the Wood
Once you have selected the appropriate wood for your cell phone case, the next step is to measure and cut it to the desired dimensions. Precision is key in this stage of the crafting process.
Begin by measuring your phone to determine the exact dimensions needed for the case. Use a reliable measuring tool, such as a ruler or calipers, to ensure accurate measurements. Take into consideration the thickness of the wood and the additional space required for the phone to fit comfortably within the case.
After obtaining the precise measurements, transfer them onto the selected wood using a pencil or marking tool. Double-check the markings to avoid errors before proceeding to the cutting phase. Utilize a high-quality saw or a precision cutting tool, such as a table saw or a bandsaw, to carefully cut the wood along the marked lines. Exercise caution and adhere to safety guidelines when operating cutting tools to prevent accidents and achieve clean, straight cuts.
It is advisable to cut the wood slightly larger than the measured dimensions initially. This allows for any necessary adjustments during the shaping and sanding stages, ensuring a snug and precise fit for the phone within the case.
Throughout the cutting process, prioritize accuracy and patience to achieve clean and uniform pieces of wood. Remember that the precision of the cuts will significantly impact the overall quality and functionality of the finished cell phone case.
By meticulously measuring and cutting the wood, you establish the groundwork for a well-fitted and professionally crafted cell phone case that reflects your attention to detail and dedication to precision.
Sanding and Shaping the Wood
After cutting the wood to the desired dimensions, the next crucial step in crafting a wood cell phone case is sanding and shaping the wood to achieve a smooth and aesthetically pleasing finish. This process involves refining the edges, corners, and surfaces of the wood to prepare it for the subsequent stages of construction.
Begin by using coarse-grit sandpaper to remove any rough edges and imperfections from the cut wood pieces. This initial sanding phase sets the foundation for the subsequent shaping and refinement. Gradually transition to finer-grit sandpaper to smoothen the surfaces and achieve a uniform texture. Pay close attention to detail, ensuring that all edges are rounded and surfaces are free from blemishes.
Shaping the wood is an opportunity to add unique design elements and personalized touches to the cell phone case. Consider incorporating beveled edges, curved contours, or intricate patterns to enhance the visual appeal of the case. Utilize woodworking tools such as chisels, rasps, and sanding blocks to carve and shape the wood according to your envisioned design.
Throughout the sanding and shaping process, prioritize consistency and attention to detail to create a refined and professional-looking result. Regularly inspect the wood for any imperfections and address them promptly to ensure a high-quality finish.
Remember that the tactile and visual qualities of the wood are as important as its structural integrity. A well-sanded and precisely shaped wood surface not only enhances the overall aesthetics of the cell phone case but also contributes to a comfortable and enjoyable user experience.
By dedicating time and effort to sanding and shaping the wood, you elevate the craftsmanship of the cell phone case, resulting in a visually appealing and meticulously finished product that reflects your dedication to quality woodworking.
Making Cutouts for Buttons and Ports
When crafting a wood cell phone case, it is essential to accommodate the phone’s buttons, ports, and camera lens by creating precise cutouts in the wood. This meticulous process ensures that the case not only provides protection but also allows seamless access to the phone’s features and functionalities.
Begin by carefully marking the locations of the phone’s buttons, including the volume controls, power button, and any additional functional buttons specific to the device. Use precise measurements and marking tools to accurately transfer the button locations onto the wood.
For the ports, such as the charging port and headphone jack, it is crucial to determine their exact positions and dimensions to create appropriately sized cutouts. Take into account the depth of the ports to ensure that the wood is carved to the correct thickness, allowing unobstructed access to the ports when the phone is housed in the case.
Utilize sharp woodworking tools, such as chisels and small saws, to carefully carve out the marked areas on the wood. Exercise caution and proceed gradually, frequently checking the fit of the phone within the case to ensure that the cutouts align perfectly with the phone’s buttons and ports.
When creating a cutout for the camera lens, precision is paramount. Measure the dimensions of the lens and carefully carve out a recessed area in the wood to accommodate the lens without obstructing the camera’s field of view. This meticulous approach ensures that the camera operates unhindered while the phone is secured within the case.
Throughout the process of making cutouts for buttons and ports, prioritize accuracy and patience to achieve clean and precise results. Regularly test the fit of the phone within the case to verify that the cutouts align perfectly with the phone’s features.
By meticulously creating cutouts for the phone’s buttons, ports, and camera lens, you ensure that the wood cell phone case not only provides protection but also seamlessly integrates with the phone’s functionality, resulting in a well-crafted and user-friendly accessory.
Applying a Finish
Applying a finish to the wood cell phone case is a critical step that enhances the aesthetics, durability, and protection of the final product. The chosen finish not only adds a layer of visual appeal but also serves to safeguard the wood from environmental elements and everyday wear and tear.
Before applying the finish, ensure that the wood surface is thoroughly sanded and free from any dust or debris. This preparatory step is essential for achieving a smooth and uniform finish. Consider the following popular finishes:
- Wood Stain: Wood stain enhances the natural grain and color of the wood, providing a rich and lustrous appearance. Choose a stain that complements the chosen wood type and apply it evenly using a brush or cloth. Multiple coats may be applied to achieve the desired depth of color.
- Clear Varnish or Polyurethane: Clear varnish or polyurethane adds a protective layer to the wood, shielding it from moisture, scratches, and UV damage. Apply the varnish in thin, even coats, allowing each layer to dry before applying the next. Sand lightly between coats for a smooth finish.
- Wood Oil: Wood oils, such as tung oil or linseed oil, penetrate the wood to enhance its natural beauty while providing a protective finish. Apply the oil liberally, allowing it to soak into the wood, and wipe off any excess to achieve a lustrous and durable finish.
Regardless of the chosen finish, it is essential to follow the manufacturer’s instructions and apply the finish in a well-ventilated area. Take care to achieve an even and consistent application, paying special attention to the edges and corners of the wood cell phone case.
Once the finish has been applied, allow ample time for it to dry and cure according to the product’s specifications. This curing period is crucial for the finish to harden and provide the intended protection and visual appeal.
By applying a suitable finish to the wood cell phone case, you not only enhance its natural beauty but also ensure its longevity and resilience, resulting in a stunning and durable accessory for your phone.
Attaching a Phone Holder
Integrating a phone holder into the wood cell phone case provides a convenient and secure way to keep the device in place while offering hands-free usability. Whether opting for a simple slot or a more intricate mechanism, attaching a phone holder requires careful consideration of functionality and aesthetics.
Begin by determining the placement of the phone holder on the interior of the case. Consider the phone’s dimensions and the most ergonomic position for accessing the screen and buttons. Mark the precise location for the holder, ensuring that it aligns with the phone’s center of gravity to prevent imbalance.
Depending on the chosen design, the phone holder can be crafted from the same wood used for the case or from complementary materials, such as metal or plastic. Precision is essential when shaping and assembling the holder to ensure a snug fit for the phone and seamless integration with the case.
If opting for a slot-style holder, carefully carve out a recess in the wood to accommodate the phone. Test the fit regularly to ensure that the phone slides in and out smoothly while remaining securely in place. For more complex holders, such as spring-loaded mechanisms or adjustable grips, follow the manufacturer’s instructions for assembly and integration.
Once the phone holder is securely in place, thoroughly inspect its functionality and stability. Verify that the phone fits comfortably and securely within the holder, and test the case for any potential movement or instability. Prioritize the user experience, ensuring that the phone can be easily inserted and removed from the holder while maintaining a secure grip.
By thoughtfully attaching a phone holder to the wood cell phone case, you enhance the practicality and usability of the accessory, providing a seamless and reliable solution for holding the phone in place while adding a touch of innovation to the overall design.
Final Touches and Quality Check
As the wood cell phone case nears completion, attention to final touches and a comprehensive quality check is essential to ensure that the finished product meets high standards of craftsmanship and functionality.
Begin by meticulously inspecting the case for any imperfections or irregularities. Address any rough edges, blemishes, or inconsistencies in the finish to achieve a professional and polished appearance. Pay close attention to the overall fit and finish of the case, ensuring that it aligns with the original design specifications.
Consider incorporating personalized embellishments or engravings to add a unique and distinctive touch to the case. Whether it’s a custom design, a meaningful inscription, or decorative accents, these final touches can elevate the visual appeal of the case and imbue it with personal significance.
Conduct a thorough quality check to assess the structural integrity and functionality of the case. Verify that the phone fits securely within the case, the button cutouts align accurately, and the ports are easily accessible. Test the phone holder for stability and ease of use, ensuring that it provides a secure grip without impeding the phone’s functionality.
Inspect the finish for uniformity, smoothness, and durability. Address any areas that may require additional touch-ups or refinements to achieve a flawless and resilient surface. Consider applying a final coat of protective finish to enhance the longevity and visual appeal of the case.
Finally, evaluate the overall user experience by testing the functionality and ergonomics of the completed wood cell phone case. Ensure that it not only provides reliable protection for the phone but also aligns with the user’s preferences in terms of aesthetics, comfort, and practicality.
By focusing on final touches and conducting a comprehensive quality check, you elevate the wood cell phone case to a refined and professional standard, ensuring that it embodies superior craftsmanship, functionality, and visual appeal.