Materials Needed
Creating a pressed flower phone case is a delightful and creative way to adorn your phone with the beauty of nature. Before embarking on this craft, you will need to gather a few essential materials to ensure a smooth and enjoyable crafting process.
- A variety of fresh flowers: Choose an assortment of vibrant, small blooms such as daisies, pansies, or forget-me-nots. Opt for flowers with flat profiles to facilitate the pressing process.
- Heavy books: Select a few weighty tomes, such as dictionaries or encyclopedias, to press the flowers effectively.
- Narrow phone case: Acquire a clear, slim phone case that fits your specific phone model. A transparent case will allow the pressed flowers to be prominently displayed.
- Parchment paper: This will be used to protect the pages of the books and the delicate flowers during the pressing process.
- Tweezers: A pair of fine-tipped tweezers will aid in handling the delicate pressed flowers during the arrangement phase.
- Clear-drying adhesive: Opt for a high-quality adhesive that dries transparently to affix the pressed flowers to the phone case securely.
- Clear sealant spray: Once the flowers are arranged on the phone case, a clear sealant spray will help preserve their vibrant colors and protect them from moisture and fading.
By gathering these materials, you will be well-prepared to embark on the enchanting journey of creating your very own pressed flower phone case.
Step 1: Gather Your Flowers
Embark on a leisurely stroll through gardens, meadows, or parks to seek out an array of charming blooms for your pressed flower phone case. Look for flowers with petite and delicate petals, as these will press more effectively and create an enchanting visual effect on your phone case.
When selecting your flowers, opt for a diverse assortment of hues and shapes to add visual interest to your design. Consider incorporating blossoms in varying sizes to create a captivating and balanced composition on your phone case.
It’s essential to gather the flowers when they are at their peak, ideally in the late morning after the dew has evaporated. Carefully pluck the blooms, ensuring that their stems remain intact. Avoid choosing flowers that show any signs of wilting or browning, as these may not press well or retain their natural beauty.
Exercise caution and respect for the natural environment by gathering flowers responsibly. Refrain from picking protected or endangered species, and always seek permission before collecting blooms from private gardens or public spaces.
Once you have gathered an assortment of delightful flowers, it’s time to move on to the next step: pressing these natural treasures to preserve their beauty for your artistic creation.
Step 2: Press Your Flowers
Pressing your gathered flowers is a crucial step in preparing them for adorning your phone case. This process will preserve the flowers’ delicate beauty and vibrant colors, ensuring that they remain visually stunning for an extended period.
To begin, carefully lay out a piece of parchment paper on a flat surface. Place the flowers onto the parchment paper, ensuring that they are not overlapping. It’s essential to handle the flowers gently to prevent damage to their delicate petals and stems.
Once the flowers are arranged on the parchment paper, cover them with another layer of parchment paper. This will safeguard the flowers from direct contact with the weight that will be applied during the pressing process.
Next, open a heavy book and place the parchment paper with the flowers inside. Select a book that is substantial and weighty, as this will facilitate effective pressing. You may choose to stack several books on top of one another to apply additional pressure for optimal results.
Allow the flowers to remain pressed between the pages of the books for approximately one to two weeks. During this time, check on the flowers periodically to ensure that they are drying evenly and not developing mold. If any signs of mold appear, gently remove the affected flowers and replace the parchment paper before continuing the pressing process.
After the designated period has elapsed, carefully remove the pressed flowers from the books. You will be greeted by beautifully flattened blooms that are ready to be arranged on your phone case, adding a touch of natural elegance to your everyday accessory.
Step 3: Prepare Your Phone Case
Before adorning your phone case with the pressed flowers, it’s essential to prepare the surface to ensure optimal adhesion and longevity of your botanical design. Begin by thoroughly cleaning the phone case with a gentle, non-abrasive cleanser to remove any dust, oils, or debris that may hinder the adhesive’s effectiveness.
Once the phone case is clean and dry, carefully position it on a flat and stable surface in preparation for arranging the pressed flowers. Take a moment to envision the desired placement of the flowers on the case, considering factors such as color distribution, size variation, and overall composition. This visualization will guide you as you begin to arrange the delicate blooms.
It’s important to approach this step with patience and precision, as the positioning of the flowers will contribute to the overall aesthetic appeal of the finished phone case. Consider experimenting with different arrangements before committing to a final design, ensuring that the composition is visually pleasing and harmonious.
As you prepare to affix the pressed flowers to the phone case, gather the clear-drying adhesive and fine-tipped tweezers to aid in the delicate placement of the blooms. The adhesive should be applied sparingly to the back of each flower using the tweezers, ensuring that the petals and stems are lightly coated to facilitate secure attachment.
With the phone case meticulously prepared and the pressed flowers arranged in a visually captivating composition, you are now ready to proceed to the next step: affixing the flowers to the case with precision and care.
Step 4: Arrange and Glue the Flowers
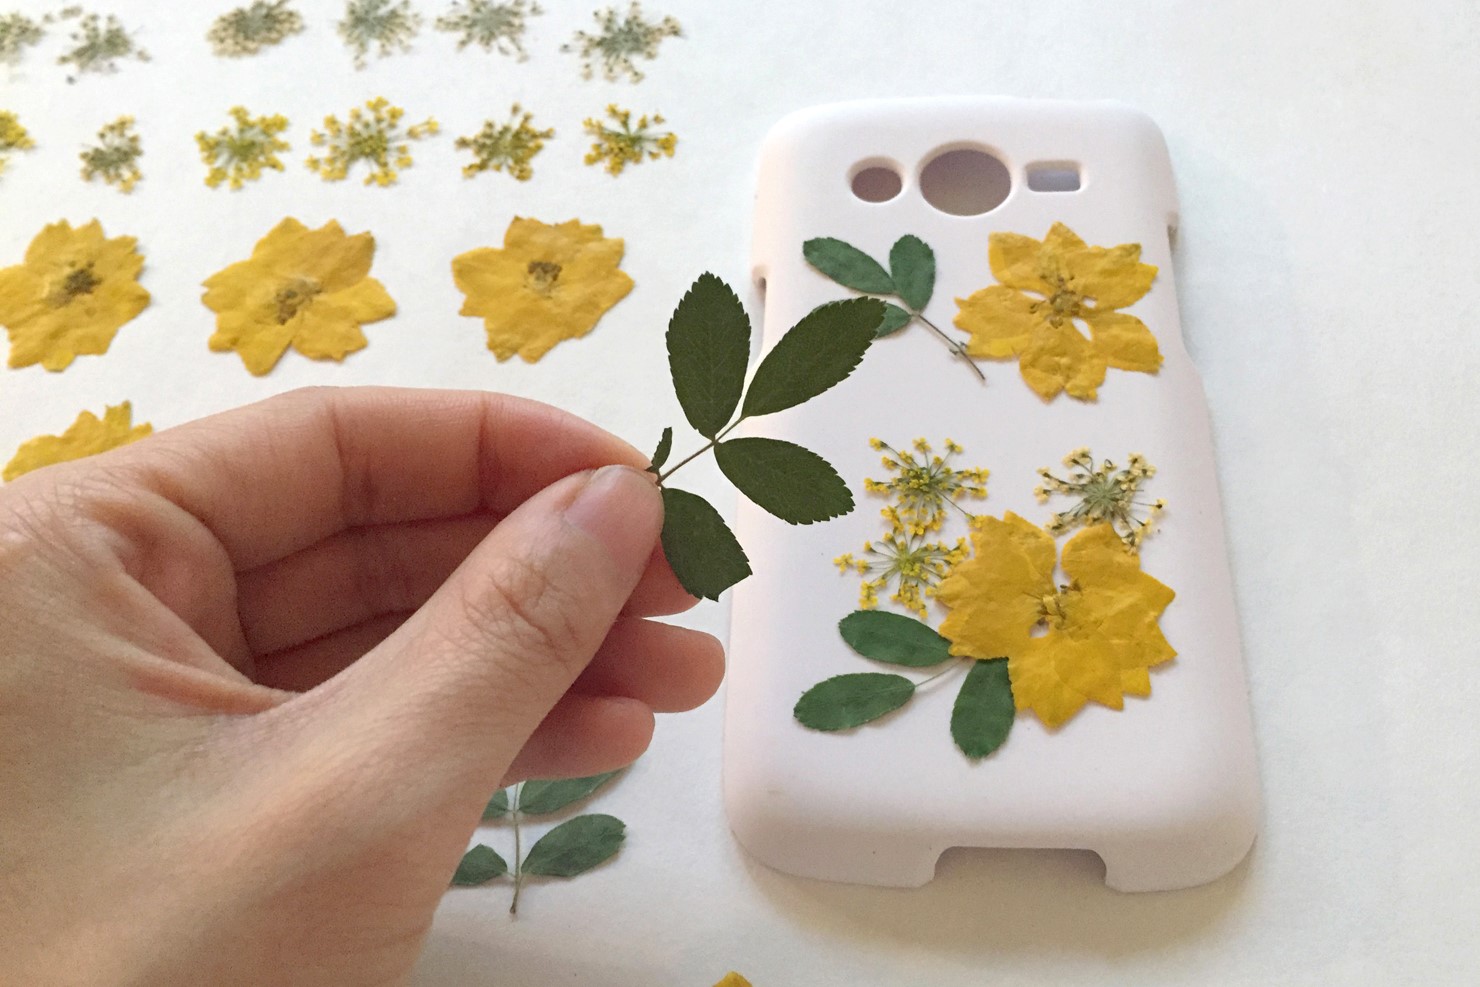
Arranging and gluing the pressed flowers onto your phone case is a delicate and creative process that requires attention to detail and a gentle touch. Begin by carefully lifting each pressed flower with the fine-tipped tweezers, taking care to handle them with the utmost delicacy to preserve their exquisite form.
As you lift each flower, consider its placement within the envisioned composition. Experiment with different arrangements, overlapping petals, and varying sizes to create a visually captivating design on the phone case. Take your time to ensure that the arrangement is harmonious and visually appealing.
Once you are satisfied with the placement of the flowers, proceed to affix them to the phone case using the clear-drying adhesive. Apply a small amount of adhesive to the back of each flower, using the tweezers to control the precise application and minimize excess glue. Gently press each flower onto the phone case, taking care to maintain the desired arrangement.
Throughout this process, it’s important to work methodically and patiently, allowing the design to unfold organically. Embrace the creative freedom to experiment with different layouts and orientations, ensuring that the final arrangement reflects your artistic vision and showcases the natural beauty of the pressed flowers.
As you complete the delicate task of arranging and gluing the flowers, take a moment to admire the evolving masterpiece taking shape on your phone case. The intricate details and vibrant colors of the pressed blooms will infuse your phone with a touch of natural elegance, transforming it into a unique and personalized work of art.
With the flowers securely affixed to the phone case, you are now ready to proceed to the final step: sealing and protecting the delicate botanical design to ensure its longevity and resilience.
Step 5: Seal and Protect the Flowers
After the meticulous process of arranging and affixing the pressed flowers to your phone case, it’s essential to take measures to seal and protect the delicate botanical design. This final step will ensure the longevity and resilience of the pressed flowers, preserving their vibrant colors and natural beauty for an extended period.
Begin by selecting a high-quality clear sealant spray designed for use on delicate materials such as flowers. Choose a well-ventilated area for this step, and lay down a protective covering to shield the surrounding environment from overspray.
Hold the sealant spray at a suitable distance from the phone case, following the manufacturer’s instructions for optimal application. Apply a light, even coat of the sealant over the entire surface of the phone case, taking care to cover the pressed flowers thoroughly. This protective sealant will shield the delicate blooms from moisture, UV exposure, and environmental elements, ensuring their enduring beauty.
Allow the sealant to dry completely according to the manufacturer’s recommendations. Once dry, inspect the phone case to ensure that the flowers are adequately protected and that the sealant has been evenly distributed across the surface.
With the pressed flowers now securely sealed and protected, your unique and enchanting phone case is ready to adorn your device with a touch of natural elegance. Embrace the beauty of nature encapsulated within this personalized creation, and take pride in showcasing your artistic ingenuity and appreciation for the delicate splendor of pressed flowers.
As you admire the finished phone case, revel in the knowledge that you have skillfully crafted a one-of-a-kind accessory that harmoniously blends the artistry of floral preservation with the functionality of modern technology. Your phone case now stands as a testament to your creativity and reverence for the timeless allure of nature’s botanical treasures.