
Types of Headset Bearings
When it comes to headset bearings, there are primarily two types: loose ball bearings and cartridge bearings. Each type has its own unique characteristics and installation requirements.
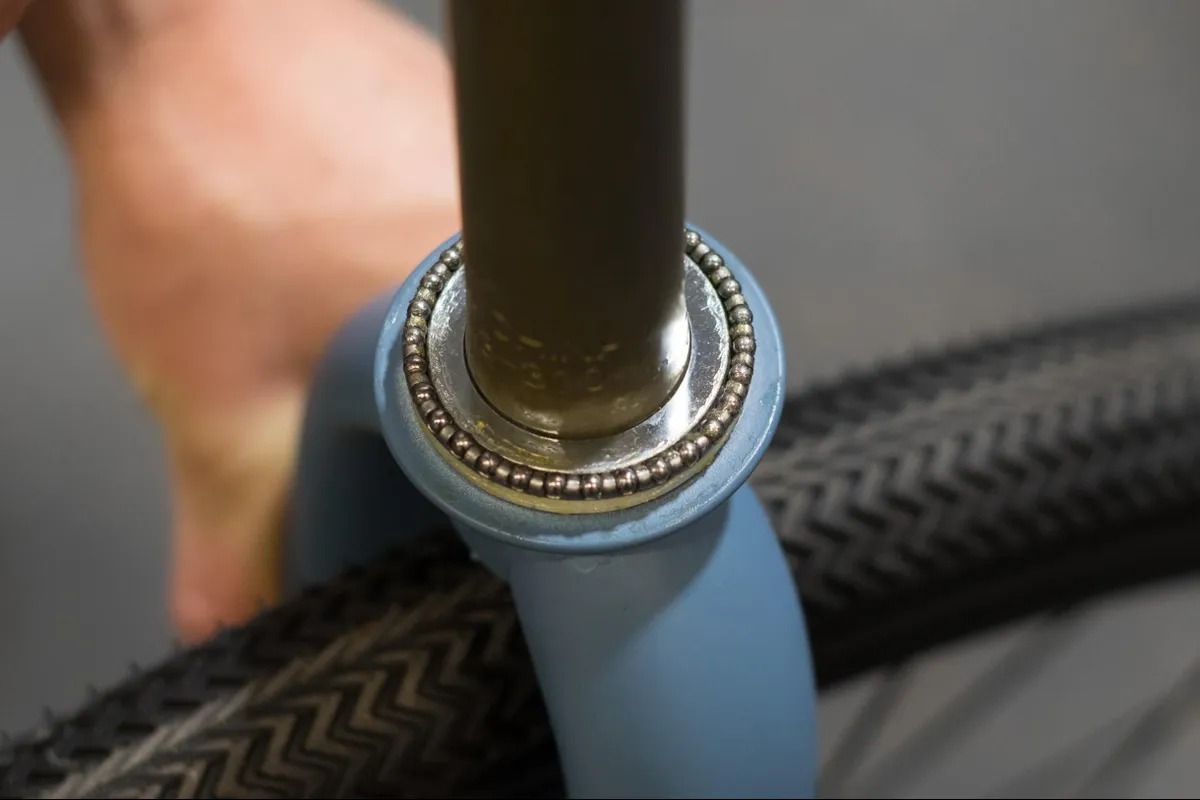
Loose Ball Bearings
Loose ball bearings consist of individual ball bearings housed within a race. These bearings are commonly found in traditional, non-integrated headset designs. Installing loose ball bearings requires careful attention to detail, as each ball must be correctly seated within the races. While these bearings may require more frequent maintenance due to their exposed nature, they allow for greater customization and adjustment.
Cartridge Bearings
Cartridge bearings, on the other hand, are self-contained units that are pre-assembled and sealed within a cartridge. This type of bearing is often found in integrated headset designs and is known for its durability and ease of installation. Cartridge bearings are designed to minimize maintenance requirements and provide smooth, consistent performance over an extended period.
Understanding the differences between loose ball bearings and cartridge bearings is essential for determining the appropriate installation method for your headset. Whether you prefer the adjustability of loose ball bearings or the convenience of cartridge bearings, selecting the right type is crucial for ensuring optimal headset function and longevity.
By familiarizing yourself with these two types of headset bearings, you can make an informed decision based on your specific cycling needs and maintenance preferences.
Tools and Materials Needed
Before embarking on the process of correctly placing headset bearings, it’s essential to gather the necessary tools and materials to ensure a smooth and efficient installation. The following items are indispensable for this task:
Tools:
- Headset press or appropriate installation tool
- Soft mallet or rubber hammer
- Flathead screwdriver
- Grease or lubricant
- Clean rags or paper towels
- Allen keys or wrenches for removing the stem and crown race
Materials:
- New headset bearings (loose ball or cartridge, depending on your preference)
- Degreaser for cleaning the headset components
- High-quality bearing grease
By ensuring that you have the appropriate tools and materials readily available, you can streamline the process of placing headset bearings with precision and confidence. Additionally, having these items at hand will help prevent any delays or interruptions during the installation, allowing you to focus on achieving optimal performance and longevity for your headset bearings.
Removing Old Bearings
Before installing new headset bearings, it is crucial to properly remove the old bearings and clean the headset components to ensure a seamless transition. The following steps outline the process of removing old bearings:
Step 1: Disassemble the Headset
Begin by removing the stem and spacers from the steerer tube to gain access to the headset bearings. Depending on the type of headset, you may need to use Allen keys or wrenches to loosen and remove the stem and associated components.
Step 2: Extract the Old Bearings
Once the headset is disassembled, carefully extract the old bearings from the headset cups using a flathead screwdriver or a dedicated bearing removal tool. Take care to avoid damaging the headset cups during this process, as they will be reused for the new bearings.
Step 3: Clean the Headset Components
After removing the old bearings, thoroughly clean the headset cups, crown race, and other related components using a suitable degreaser. Ensure that all residual grease and debris are removed to provide a clean surface for the new bearings to be installed.
Step 4: Inspect for Wear and Damage
While the headset components are exposed, take the opportunity to inspect them for any signs of wear or damage. Look for pitting, corrosion, or uneven surfaces that may affect the performance of the new bearings. Address any issues as needed before proceeding with the installation.
By carefully following these steps to remove the old bearings and prepare the headset components, you can set the stage for a successful installation of new bearings. This thorough process helps maintain the integrity of the headset and promotes optimal functionality for the new bearings.
Cleaning and Preparing the Headset
Proper cleaning and preparation of the headset components are essential for ensuring the longevity and smooth operation of the new bearings. Follow these steps to clean and prepare the headset:
Step 1: Degrease the Components
Using a suitable degreaser, meticulously clean the headset cups, crown race, and any other associated parts to remove all traces of old grease, dirt, and debris. Thoroughly rinse the components with water and allow them to dry completely before proceeding.
Step 2: Apply High-Quality Bearing Grease
Once the components are clean and dry, apply a generous amount of high-quality bearing grease to the inside of the headset cups and the crown race. Ensure that the surfaces are evenly coated with grease to facilitate smooth movement and reduce friction once the new bearings are installed.
Step 3: Inspect for Proper Fit
Prior to installing the new bearings, carefully inspect the headset cups and crown race to confirm that they are free from damage and provide a proper fit for the new bearings. Any irregularities or imperfections should be addressed before proceeding with the installation.
Step 4: Align and Seat the Bearings
Align the new bearings with the headset cups and gently seat them into position using a headset press or an appropriate installation tool. Take care to ensure that the bearings are seated squarely and evenly to prevent misalignment or uneven loading once the headset is reassembled.
By meticulously cleaning and preparing the headset components and applying the appropriate lubrication, you can optimize the performance and lifespan of the new bearings. This meticulous approach sets the stage for a successful installation and ensures that the headset operates smoothly and reliably for miles to come.
Installing New Bearings
Installing new bearings is a critical step in maintaining the functionality and longevity of your headset. Proper installation ensures smooth operation and minimizes the risk of premature wear. Follow these steps to install new bearings:
Step 1: Apply Grease to the Bearings
Prior to installation, apply a thin, even layer of high-quality bearing grease to the outer surfaces of the new bearings. This lubrication promotes smooth movement and helps protect the bearings from corrosion and excessive wear.
Step 2: Seat the Bearings
Align the greased bearings with the headset cups and gently seat them into position using a headset press or an appropriate installation tool. Ensure that the bearings are seated evenly and squarely to maintain proper alignment and prevent potential issues during reassembly.
Step 3: Install the Crown Race
If your headset design includes a separate crown race, carefully install it onto the fork steerer tube, ensuring that it sits flush and securely in place. Apply a thin layer of grease to the interface between the crown race and the steerer tube to facilitate smooth movement.
Step 4: Reassemble the Headset
Once the new bearings and crown race are in place, reassemble the headset by carefully sliding the fork steerer tube through the head tube and aligning the bearings with the headset cups. Ensure that all components fit together snugly and securely without binding or misalignment.
Step 5: Adjust and Tighten
Using the appropriate tools, adjust and tighten the headset according to the manufacturer’s specifications. This may involve adjusting the preload to achieve the proper bearing tension, as well as securing the stem and associated components to ensure stability and smooth steering operation.
By meticulously following these steps to install new bearings, you can maintain the integrity and performance of your headset, promoting a smooth and reliable riding experience. Proper installation is essential for maximizing the lifespan of the bearings and ensuring the overall functionality of the headset.
Adjusting and Tightening Bearings
After installing new bearings, it is crucial to properly adjust and tighten them to ensure optimal headset function and rider safety. Follow these steps to adjust and tighten the bearings:
Step 1: Set the Preload
Begin by setting the preload, which is the amount of force exerted on the bearings to eliminate play while allowing smooth rotation. Depending on the headset type, this may involve adjusting a top cap, compression ring, or preload bolt to achieve the desired bearing tension. Refer to the manufacturer’s specifications for the recommended preload setting.
Step 2: Test for Smooth Rotation
Once the preload is set, test the headset for smooth rotation by gently turning the handlebars from side to side. The movement should be fluid, without any binding or rough spots. If any irregularities are detected, reevaluate the preload and bearing adjustment to ensure proper function.
Step 3: Secure the Stem and Components
With the headset properly adjusted, secure the stem and associated components according to the manufacturer’s torque specifications. This typically involves tightening the stem bolts to the recommended torque to ensure stability and safety while riding. Over-tightening can lead to premature bearing wear, while under-tightening may result in instability and compromised steering control.
Step 4: Check for Play and Binding
After securing the stem, check for any play or binding in the headset by gently rocking the bike back and forth while applying the front brake. Any perceptible movement or resistance indicates a need for further adjustment. Revisit the preload and bearing tension to achieve the optimal balance between smooth rotation and minimal play.
By meticulously adjusting and tightening the bearings, you can optimize the performance and longevity of your headset while ensuring a safe and reliable riding experience. Proper adjustment is essential for maintaining steering precision and stability, ultimately enhancing the overall quality of your cycling endeavors.
Testing the Headset
After completing the installation and adjustment of new bearings, it is essential to conduct thorough testing to ensure the functionality and safety of the headset. Proper testing helps identify any potential issues and allows for necessary adjustments before hitting the road. Follow these steps to test the headset:
Step 1: Steering Movement Test
Begin by performing a steering movement test to assess the smoothness and responsiveness of the headset. Stand in front of the bike and gently turn the handlebars from side to side, observing the fluidity of the movement. The steering should be free from binding, notchiness, or excessive resistance, indicating proper bearing function.
Step 2: Brake Check
Test the headset while applying the front brake to detect any irregularities in the steering or headset function. Gently rock the bike back and forth while applying the brake, paying attention to any play or knocking sensations that may indicate issues with the headset adjustment or bearing preload.
Step 3: Stability Assessment
Ride the bike at a slow speed and pay close attention to the stability and handling characteristics. The bike should track straight and true, with no wobbling or instability in the steering. If any instability is detected, revisit the headset adjustment and bearing tension to address the issue before continuing to ride.
Step 4: Road Test
Take the bike for a short test ride, focusing on the handling and steering responsiveness in various riding conditions. Pay attention to how the bike responds to turns, bumps, and changes in terrain. Any abnormal handling characteristics may indicate the need for further adjustment or evaluation of the headset components.
By diligently testing the headset after installing and adjusting new bearings, you can ensure the safety, performance, and reliability of the entire system. Thorough testing provides the opportunity to address any potential issues before they escalate, ultimately contributing to a smooth and enjoyable riding experience.