
Checking Your PC’s Audio Jack
Before connecting your single-jack headset with a mic to your PC, it’s essential to ensure that your computer has the necessary audio jack for this type of headset. Most PCs typically have two types of audio jacks: the traditional separate headphone and microphone jacks, or a combined single-jack that supports both audio output and microphone input.
If your PC has separate jacks, look for two separate ports, usually colored green and pink. The green port is for the headphones, while the pink port is for the microphone. On the other hand, if your PC features a single combined audio jack, it will be designed to accept both audio and microphone input through a single port. This is commonly referred to as a TRRS (Tip-Ring-Ring-Sleeve) jack.
To visually inspect your PC’s audio jacks, locate the audio input/output panel on your computer tower or the side of your laptop. If you’re unsure about the type of audio jack your PC has, refer to the user manual or manufacturer’s website for detailed specifications.
It’s important to verify the type of audio jack your PC has to determine the appropriate method for connecting your single-jack headset with a mic. Understanding your PC’s audio jack configuration will ensure a seamless and successful connection, allowing you to enjoy an enhanced audio experience while communicating or engaging in multimedia activities.
Understanding Single-Jack Headsets
Single-jack headsets with built-in microphones have become increasingly popular due to their convenience and streamlined design. These headsets feature a single connector that combines both the headphone and microphone signals, allowing for a simpler and more efficient connection to compatible devices.
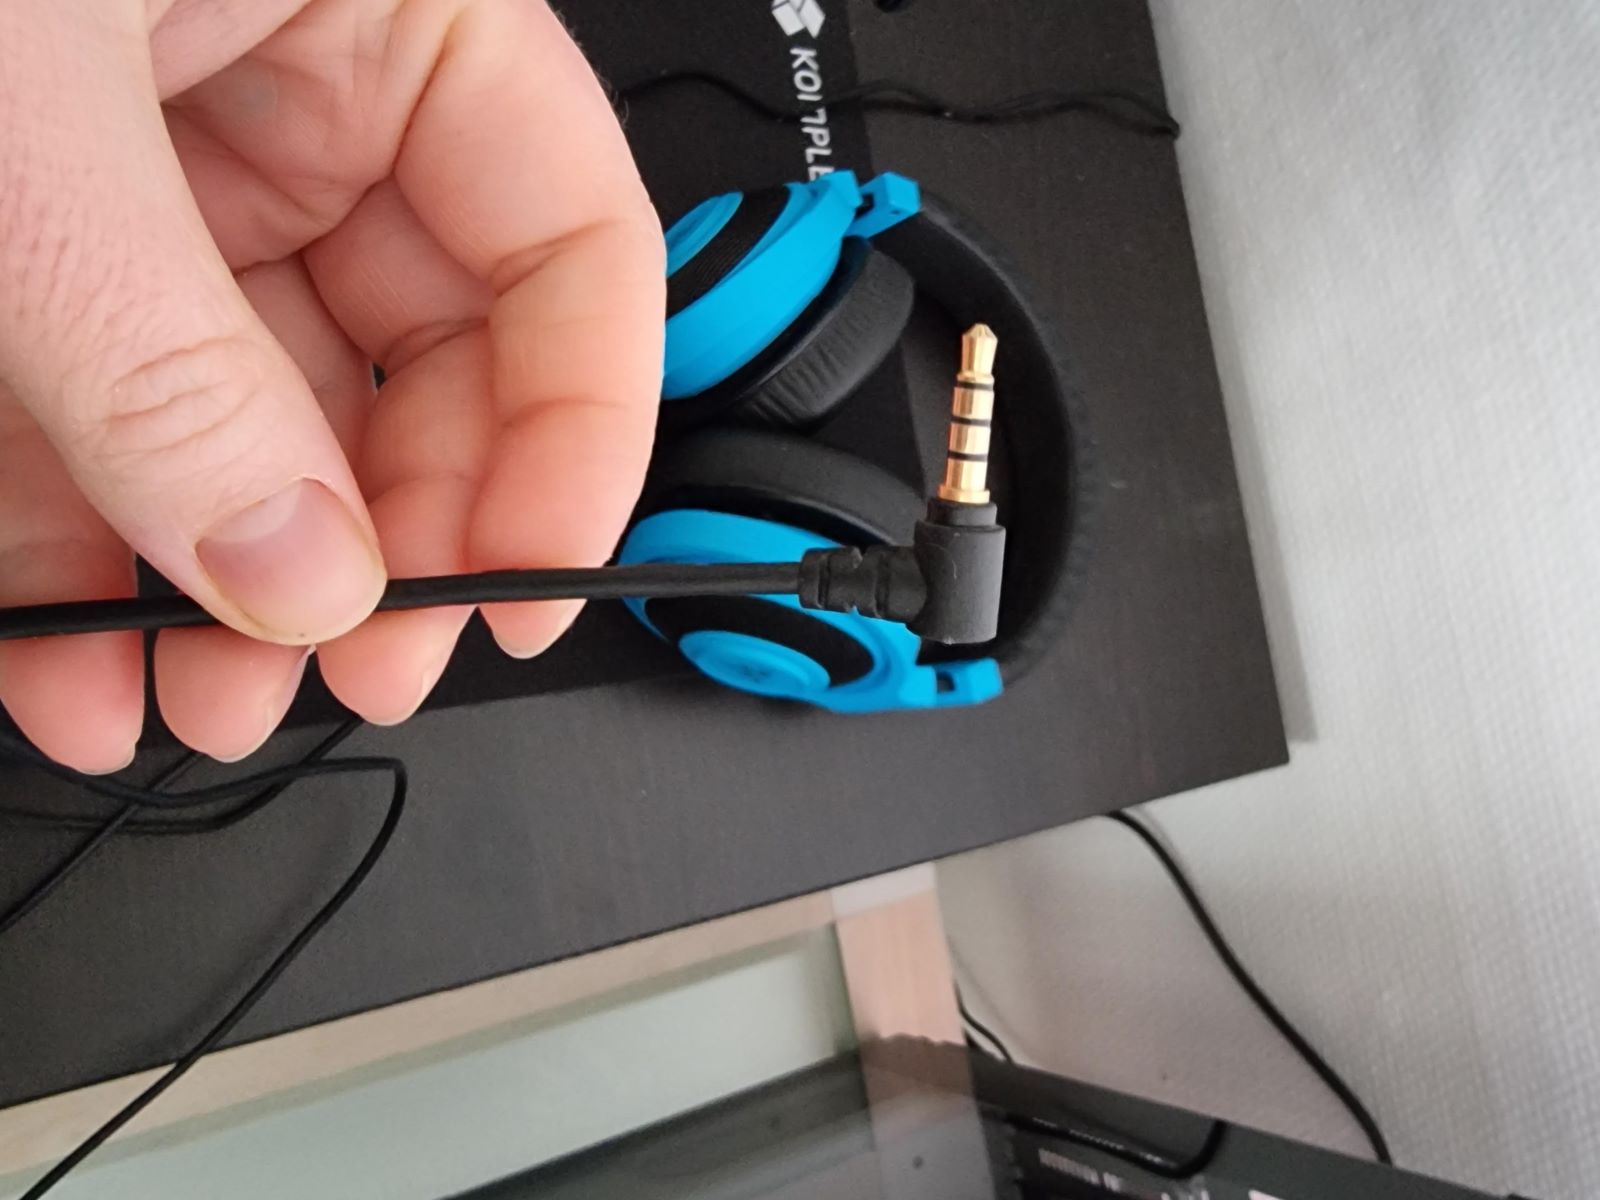
Typically, single-jack headsets utilize a TRRS (Tip-Ring-Ring-Sleeve) connector, which integrates the audio output and microphone input into a single plug. The TRRS connector is identifiable by its three black rings encircling the metallic sleeve, distinguishing it from the standard TRS (Tip-Ring-Sleeve) connector used for traditional headphones.
When using a single-jack headset, it’s crucial to understand the compatibility of the device with the audio jack on your PC. Ensure that your PC’s audio jack supports TRRS connections, as this will determine whether you can directly connect your single-jack headset with a mic without the need for additional adapters or splitters.
Single-jack headsets are commonly used with smartphones, tablets, and newer laptops that feature combined audio jacks. However, when connecting to a PC with separate headphone and microphone jacks, additional accessories may be required to adapt the single-jack headset to the PC’s audio input and output configuration.
By understanding the functionality and design of single-jack headsets, you can make informed decisions when connecting them to various devices, ensuring compatibility and optimal performance. Whether for gaming, teleconferencing, or multimedia consumption, the versatility of single-jack headsets provides a convenient audio solution for a wide range of applications.
Using a Splitter for Separate Audio and Mic Inputs
When connecting a single-jack headset with a built-in microphone to a PC that features separate audio input and output jacks, a splitter can be used to adapt the headset to the individual ports. A splitter, also known as an adapter or Y-cable, effectively separates the combined audio and microphone signals from the single-jack headset into distinct connections for the headphone and microphone inputs on the PC.
The splitter is designed with a TRRS female jack on one end, into which the single-jack headset is plugged, and two separate TRS male plugs on the other end. The TRRS female jack receives the combined audio and microphone signals from the headset, while the TRS male plugs are connected to the corresponding headphone and microphone jacks on the PC. This configuration effectively splits the signals, allowing the single-jack headset to function seamlessly with the separate audio input and output ports on the PC.
When using a splitter, it’s important to ensure that the connectors are securely inserted into the respective jacks to establish a reliable connection. Additionally, some splitters may feature color-coded connectors or labels to distinguish between the headphone and microphone plugs, simplifying the setup process.
By utilizing a splitter, users can leverage the convenience of single-jack headsets while adapting them to PCs with traditional separate audio input and output jacks. This solution provides a practical way to integrate single-jack headsets into existing PC setups, enabling users to enjoy high-quality audio output and microphone input for various applications, including gaming, voice communication, and multimedia content creation.
Using an Adapter for Single-Jack Headsets
When connecting a single-jack headset with a built-in microphone to a PC that features separate headphone and microphone jacks, an adapter can be employed to facilitate the integration of the headset with the individual ports. The adapter, also known as a TRRS to dual TRS adapter, serves as a bridge between the combined audio and microphone signals of the single-jack headset and the distinct audio input and output jacks on the PC.
The adapter is equipped with a TRRS male plug on one end, which is inserted into the single-jack headset, and two separate TRS female jacks on the other end. The TRRS male plug consolidates the headphone and microphone signals from the headset, while the TRS female jacks provide separate connections for the headphone and microphone inputs on the PC. This configuration enables the single-jack headset to function seamlessly with the traditional separate audio input and output ports on the PC.
When using an adapter, it is essential to ensure that the connections are securely established, allowing for reliable audio output and microphone input. Some adapters may feature color-coded connectors or labels to differentiate between the headphone and microphone ports, simplifying the setup process for users.
By employing an adapter, individuals can leverage the convenience of single-jack headsets while adapting them to PCs with traditional separate headphone and microphone jacks. This solution offers a practical approach to integrating single-jack headsets into existing PC configurations, enabling users to experience high-quality audio output and microphone input for a wide range of activities, including gaming, teleconferencing, and content creation.
Configuring Audio Settings on Your PC
Once you have connected your single-jack headset with a built-in microphone to your PC, it is essential to configure the audio settings to ensure optimal performance and functionality. Properly configuring the audio settings can enhance the audio output quality, enable microphone input, and ensure seamless communication and multimedia experiences.
Begin by accessing the audio settings on your PC, which can typically be found in the system settings or control panel. Look for the “Sound” or “Audio” settings, where you can manage the input and output devices, adjust volume levels, and configure microphone settings.
When using a splitter or adapter to connect a single-jack headset to separate audio input and output jacks, ensure that the correct input and output devices are selected in the audio settings. Identify the headset as the default audio output device to channel the sound through the headphones, and select the headset’s microphone as the default input device to enable microphone functionality.
Adjust the volume levels for the headset to achieve the desired audio output, and test the microphone input to ensure that it is capturing sound accurately. Some PCs may offer additional settings for microphone enhancements, noise suppression, and echo cancellation, allowing you to customize the microphone performance based on your preferences and requirements.
Furthermore, if your PC supports audio enhancement features or equalizer settings, you can fine-tune the audio output to suit your listening preferences. Experiment with the equalizer presets or manually adjust the sound frequencies to optimize the audio quality for music, gaming, or other multimedia content.
It is also advisable to test the headset’s functionality by playing audio and conducting a voice recording to confirm that the audio output and microphone input are functioning as intended. Make any necessary adjustments in the audio settings to achieve the desired audio balance and microphone performance.
By configuring the audio settings on your PC to accommodate the single-jack headset, you can ensure a seamless and immersive audio experience, whether you are engaging in gaming, communication, or multimedia consumption. Properly optimized audio settings contribute to enhanced audio quality and reliable microphone performance, enriching your overall audiovisual interactions on the PC.