
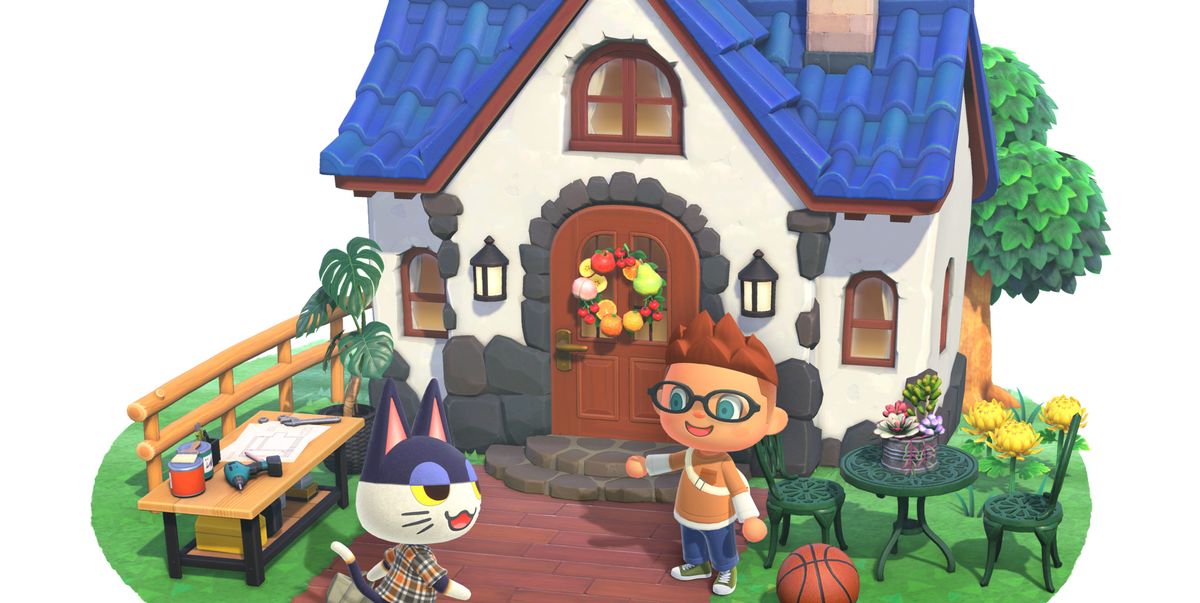
How to Move Your House in Animal Crossing
Moving your house in Animal Crossing can be an exciting and rewarding experience. It allows you to change the layout of your island and customize your living space to better suit your style. Here’s a step-by-step guide on how to move your house in Animal Crossing:
1. Visit Tom Nook: The first step is to talk to Tom Nook, the raccoon who oversees island development. Let him know that you’re interested in moving your house, and he will guide you through the process.
2. Choose a new location: Once you’ve expressed your desire to move, Tom Nook will show you a map of your island and available house locations. Take your time to explore the options and choose a spot that suits your preferences.
3. Pay the moving fee: Moving your house comes with a cost, and Tom Nook will inform you of the amount you need to pay. This fee typically depends on the size of your house and the distance of the move.
4. Prepare your house for moving: Before the actual move takes place, you’ll need to ensure that your house is ready. This includes removing any items and decorations that you’ve placed both inside and outside your house.
5. Confirm the move: Once you’ve made the necessary preparations, let Tom Nook know that you’re ready to proceed with the move. He will give you a timeline for when the relocation will be completed.
6. Patience is key: Moving your house takes time in Animal Crossing. You will need to be patient as the game progresses through the relocation process. During this time, your house will be packed up and temporarily unavailable.
7. Enjoy your new location: Once the move is complete, you can start settling into your new location. Take some time to decorate and personalize your new surroundings to make it feel like home.
Remember, moving your house is a significant decision in Animal Crossing, so be sure to carefully consider your options and plan accordingly. Keep in mind that once your house is moved, the previous spot will be vacant, allowing you to use it creatively for other purposes.
Enjoy the excitement and possibilities that come with moving your house in Animal Crossing!
What You Need to Move Your House in Animal Crossing
Moving your house in Animal Crossing requires a few things to ensure a smooth and successful relocation. Here’s a breakdown of what you need to move your house:
1. Bell Currency: Like many transactions in Animal Crossing, moving your house comes at a cost. You will need a certain amount of Bells, the in-game currency, to cover the moving fee. The exact amount varies depending on factors such as the size of your house and the distance of the move. Make sure you have enough Bells saved up or consider selling items or participating in island activities to earn the necessary funds.
2. Communication with Tom Nook: Tom Nook is the key character who oversees and manages island development in Animal Crossing. You will need to communicate with him to express your desire to move your house. Visit his office or residential service center to initiate the process and discuss the available house locations and fees associated with the move.
3. A Suitable New Location: One of the most crucial aspects of moving your house is selecting a new location on your island. Take a look at the map provided by Tom Nook and explore the available spots. Consider factors such as proximity to other key areas, aesthetic appeal, and availability of space for expansion. Choose a location that aligns with your preferences and enhances your island’s overall design.
4. Preparation and Patience: Moving your house requires some preparation on your part. This involves removing all items and decorations from inside and outside your house to ensure a smooth transition. Pack up your belongings before confirming the move with Tom Nook. Additionally, be prepared to exercise patience throughout the moving process, as it takes time for the relocation to be completed.
By having the necessary Bells, communicating with Tom Nook, selecting a suitable location, and preparing for the move, you’ll be well-equipped to move your house in Animal Crossing. Keep in mind that this process can be an investment of both time and resources, so plan accordingly and consider the long-term benefits of altering your island’s layout and personalizing your living space.
Selecting a New Location for Your House in Animal Crossing
Choosing the perfect location for your house in Animal Crossing is an important decision that can greatly impact the overall look and feel of your island. Here are some key factors to consider when selecting a new location for your house:
1. Proximity to Key Areas: Think about what areas of your island you frequently visit or would like to showcase. Consider placing your house near important locations such as the town square, resident services building, shops, or popular attractions. This will make it more convenient for you to access these areas and create a centralized hub for your island activities.
2. Aesthetic Appeal: Pay attention to the visual aesthetics of your island and how your house can complement the existing landscape. You may want to place your house near a scenic beach, alongside a river, or nestled in a peaceful forest. Take a tour around your island to identify areas that are visually pleasing and align with the atmosphere you want to create.
3. Space and Expansion: Consider the size of the plot where you plan to relocate your house. Ensure there is enough space to accommodate your desired house size and any future expansions you might want to make. The ability to add additional rooms or facilities can enhance the functionality and overall design of your island.
4. Accessibility: Think about accessibility not only for yourself but also for your villagers and visitors. Placing your house in an easy-to-reach location will make it more convenient for villagers to interact with you and for friends to visit your island. Additionally, consider the placement of bridges and inclines to ensure easy navigation throughout your island.
5. Personal Preference: Ultimately, your new house location should reflect your personal style and preferences. Let your creativity shine by selecting a location that resonates with you and showcases your unique vision for your island. Whether you want a cozy cottage in a hidden nook or a grand mansion overlooking the cliffs, choose a spot that brings you joy every time you see it.
When selecting a new location for your house, take the time to explore your options and envision how it will fit into your overall island design. Remember, you can always change the location again in the future if you decide to switch things up. Enjoy the process of creating a personalized haven and watch your island come to life with your carefully chosen house placement.
How to Prepare Your House for Moving in Animal Crossing
Before you can move your house in Animal Crossing, it’s important to properly prepare it for the relocation process. Here are some steps to follow in order to ensure a smooth transition:
1. Remove Interior Items: Start by removing all the furniture, decorations, and belongings from inside your house. This includes everything from tables and chairs to rugs and wallpaper. Use your inventory or storage to safely store these items until your house is situated in its new location.
2. Clear Exterior Decorations: Take a walk around the outside of your house and remove any outdoor decorations or items you have placed, such as fences, flowers, or paths. Store these items in your inventory or storage as well.
3. Access Your Storage: If you haven’t already, make sure to familiarize yourself with your storage capacity. Your storage is a valuable resource where you can safely keep large quantities of items. Consider organizing it beforehand so you can easily access and retrieve your belongings after the move.
4. Secure Special Items: If you have any valuable or sentimental items that you don’t want to risk losing during the move, consider mailing them to a trusted friend or storing them at a friend’s island until your house relocation is complete.
5. Plan for Nook’s Cranny: If your house relocation involves moving near Nook’s Cranny, ensure that there is enough distance between your house and the shop to allow for tree growth and item placement.
6. Save Your Custom Designs: If you’ve created any custom designs that you’ve used for walls or floors in your house, take a moment to save those designs to your Custom Designs app on your NookPhone. This way, you can easily reapply them in your new home once the move is complete.
By following these steps, you’ll be well-prepared to move your house in Animal Crossing. Taking the time to properly prepare your house for the relocation process will help ensure that your furniture, decorations, and items are safely stored and ready to be redecorated in your new location. Enjoy the process of creating a fresh start for your house and making your island even more personalized.
The Cost of Moving Your House in Animal Crossing
Moving your house in Animal Crossing is an exciting process, but it does come with a cost. Tom Nook will inform you of the moving fee associated with the relocation. Here’s what you need to know about the cost of moving your house:
1. Variable Expenses: The cost of moving your house can vary depending on a few factors. One of the primary factors is the size of your house. The bigger your house, the higher the moving fee will be. Additionally, the distance of the move plays a role in determining the cost. If you’re moving just a few spaces away, the fee might be lower compared to relocating to a distant part of your island.
2. Paying with Bells: The moving fee is paid in Bells, the in-game currency of Animal Crossing. You will need to have enough Bells in your savings to cover the cost of the move. If you don’t have enough Bells, you may need to spend some time earning and saving them before proceeding with the relocation. This can be done through activities such as fishing, bug catching, selling items, or participating in island events.
3. Additional Costs: In certain cases, there may be additional costs in addition to the standard moving fee. For example, if you have outstanding loans from previous home upgrades, you may need to pay off those balances before moving your house. It’s important to check with Tom Nook to understand the complete financial implications of the move.
4. Cost-Benefit Analysis: Before deciding to move your house, it’s essential to consider the benefits and personal satisfaction it will bring compared to the financial investment. Evaluate how the new location will enhance your island and if the cost aligns with your long-term goals for your virtual home.
Remember, the cost of moving your house is a one-time expense, and once the move is complete, you can enjoy the benefits of a fresh location and a revamped island layout. So, plan ahead, save up your Bells, and make an informed decision about moving your house in Animal Crossing.
Tips for Moving Your House Efficiently in Animal Crossing
Moving your house in Animal Crossing can be a thrilling experience, but it’s important to do it efficiently to minimize disruptions and make the process as smooth as possible. Here are some tips to help you move your house efficiently:
1. Plan Ahead: Before initiating the house relocation process, take the time to plan your new house location. Consider factors such as accessibility, proximity to key areas, and how it will fit into your overall island design. By planning ahead, you can save time and eliminate the need to move your house again in the future.
2. Save Up Bells: The moving fee for your house is paid in Bells, so make sure you have enough funds saved up before starting the relocation process. Engage in money-making activities like fishing, catching bugs, selling items, or participating in island events to accumulate the necessary Bells. Having enough funds readily available will prevent any delays in moving your house.
3. Clear Out Your House: Before the actual move takes place, ensure that you remove all items, furniture, and decorations from inside your house. This will make the packing and unpacking process more efficient. Use your storage or inventory to store these items temporarily until your house is situated in its new location.
4. Communicate with Villagers: Let your villagers know about the upcoming move. They will understand that your house is going through changes and may have temporary limitations. Use this as an opportunity to gather opinions or suggestions from your villagers regarding the new location.
5. Utilize Time Traveling: If you’re comfortable with time traveling in the game, adjusting your in-game clock can help speed up the moving process. Keep in mind that this is a personal choice, but it can allow you to complete the move without waiting for extended periods of time. Just remember to adjust your clock back to the current date afterward, if desired.
6. Collaborate with Friends: If you have friends who play Animal Crossing, consider coordinating house moves together. This way, you can help each other out by sharing tips, resources, or even hiring friends to speed up the process. It can be a fun and collaborative way to navigate the house moving experience.
By following these tips, you’ll be able to move your house efficiently in Animal Crossing. Remember to plan ahead, save up Bells, clear out your house, and utilize any available assistance from friends or villagers. Enjoy the process and make the most of your new house location within your vibrant Animal Crossing community.
What Happens to Your House and Items During the Move in Animal Crossing
Moving your house in Animal Crossing is an exciting venture, but you may wonder what happens to your house and items during the relocation process. Here’s what you can expect:
1. House Packing: Once you have confirmed the move with Tom Nook, the process of moving your house will begin. During this time, your house will be packed up and inaccessible. You will not be able to enter or make any changes to the interior or exterior of your house until the move is complete.
2. Temporary Storage: All of your furniture, decorations, and items will be safely stored in a temporary location. They will remain intact and ready to be placed back into your house once the move is finished. You don’t have to worry about losing any of your cherished belongings during the relocation process.
3. Items in Storage: In addition to your house items, any items you had in storage will also remain safely stored during the move. This means you will still be able to access and use items that were previously stored in your storage, even when your house is being relocated.
4. Timeframe for the Move: The actual duration of the relocation process varies, but it typically takes one day in real-time. This means that you will have to wait patiently while your house is being moved. You can continue to explore and enjoy your island while you wait for your house to be ready in its new location.
5. Unpacking and Placing Items: Once the move is complete, you can finally access your house again. All of your packed items will be available to unpack and place back into your house. Take this opportunity to redecorate and design your new space according to your preferences.
Rest assured, your house and items are not lost during the move in Animal Crossing. The game ensures that everything remains safe and intact throughout the entire relocation process. Take advantage of this time to explore other aspects of your island, interact with your villagers, and plan the exciting redecoration of your new home.
How Long Does It Take to Move Your House in Animal Crossing
The time it takes to move your house in Animal Crossing can vary depending on a few factors. Here’s what you need to know about the duration of the house relocation process:
1. Real-Time Progression: Animal Crossing operates in real-time, meaning that the game progresses at the same pace as the real world. When you initiate the house relocation process, the move is not instant. You will need to wait for a specific timeframe for the move to be completed.
2. Typically One Day: In most cases, moving your house takes one day to complete. This means that you will have to wait patiently for your house to be fully relocated. During this time, your house will be packed up and inaccessible to you. You won’t be able to enter or make any changes to the interior or exterior until the move is finished.
3. Game Progression: It’s important to note that the time it takes for the move to be completed is based on the in-game clock. This means that if you’re playing Animal Crossing during the evening, for example, the move won’t be finished until the next day in the game. Plan accordingly and be patient as time progresses in the game.
4. Personal Preference and Time Traveling: If you’re comfortable with time traveling in the game, you have the option to adjust your in-game clock to speed up the house relocation process. However, keep in mind that this is a personal choice and may affect other aspects of the game. Remember to adjust your clock back to the current date and time if desired.
While waiting for your house to be relocated, you can utilize this time to explore other aspects of your island, engage with villagers, or work on beautifying your island in other ways. This includes activities like fishing, bug catching, fossil hunting, or participating in various island events.
Understanding the time it takes to move your house in Animal Crossing allows you to plan ahead and make the most of your gameplay. Embrace the anticipation of the move and enjoy the process as your house finds a new and exciting location on your island.
How to Customize Your New House Location in Animal Crossing
Once you’ve successfully moved your house in Animal Crossing, you have the opportunity to customize its location and make it your own. Here are some steps to follow to personalize your new house location:
1. Assess the Surroundings: Take a moment to observe the area surrounding your new house location. Consider the terrain, nearby landmarks, and natural features of the environment. Take note of any opportunities for landscaping or incorporating elements that enhance the overall aesthetic of your house.
2. Pathways and Outdoor Decor: Create pathways leading up to your house using stepping stones, brick paths, or custom designs. These pathways can add charm and a sense of cohesion to your house placement. Consider placing outdoor decorations such as fences, flower beds, or benches to further enhance the customization of your new surroundings.
3. Plant Trees and Flowers: Utilize the space around your house to plant trees and flowers. This not only adds visual appeal but can also serve functional purposes, such as fruit-bearing or providing shade. Experiment with different tree and flower placements to create a harmonious and inviting atmosphere around your house.
4. Design Exterior Decor: Use various items and furniture to decorate the exterior of your house. Place potted plants, lanterns, or outdoor seating areas to showcase your personal style. Play around with different themes or a specific color palette to create a cohesive and visually appealing design.
5. Create Outdoor Activity Areas: Consider incorporating interactive elements around your house. These could include areas for outdoor games, BBQ parties, or relaxation spots. Adding elements like hammocks, picnic tables, or volleyball nets can provide a cozy and inviting setting for outdoor activities.
6. Seasonal Themes: Embrace the changing seasons in Animal Crossing by updating your house’s exterior with seasonal decorations and designs. Use custom designs or purchase seasonal items from Nook’s Cranny to showcase the festivities of each season and make your house truly stand out.
7. Experiment and Evolve: Don’t be afraid to experiment with different ideas, styles, and layouts for your house surroundings. Animal Crossing allows you to constantly evolve and modify your island, so feel free to adjust and refine your new house location until you are satisfied with the final result.
By following these tips, you can customize your new house location in Animal Crossing and create a unique and personalized space that reflects your style and vision. Enjoy the creative process and make your house a true reflection of your island paradise.
Things to Consider Before Moving Your House in Animal Crossing
Moving your house in Animal Crossing is an exciting endeavor, but it’s important to consider a few factors before making the decision. Here are some things to keep in mind:
1. Layout and Design: Take a close look at your current island layout and the placement of your house. Consider whether moving your house will enhance the overall aesthetics of your island and create a better flow. Plan how the new location will fit into the existing landscape and complement other key areas.
2. Cost and Resources: Moving your house comes with a cost, as you will need to pay a moving fee in Bells. Ensure that you have enough funds saved up or plan money-making activities to cover the expense. Additionally, consider the potential impact on your island’s resources, such as availability of trees, rocks, and other natural features.
3. Villagers’ Locations: Take into account the current placement of villagers’ houses and how it may be affected by the move. Consider if moving your house will disrupt the flow or arrangement of villagers on your island. Communication with your villagers about the upcoming move can help ensure a smooth transition.
4. Long-Term Vision: Think about your long-term vision for your island. Consider whether moving your house aligns with your overall plan and if the new location supports future expansion or development plans. Taking the time to carefully evaluate your options can prevent the need for further house moves in the future.
5. Accessibility and Convenience: Reflect on the accessibility and convenience of your new location. Consider proximity to important areas such as the town square, resident services building, shops, and key attractions. A central location can make it more convenient for you to navigate and interact with different features of the island.
6. Social Interaction: Moving your house may also impact social interactions with friends and other players. Consider whether the new location will affect your friends’ ability to visit your island or participate in island activities. Planning ahead and discussing your decision with others can help minimize any potential disruptions.
By considering these factors before moving your house in Animal Crossing, you can make an informed decision that aligns with your vision for your island. Take into account the layout, cost, resources, villagers’ locations, long-term plans, accessibility, and social interactions. Remember, moving your house is an opportunity to enhance your island and create a personalized space that reflects your style and creativity.
The Benefits of Moving Your House in Animal Crossing
Moving your house in Animal Crossing can bring a variety of benefits and open up new opportunities for island customization. Here are some of the advantages of moving your house:
1. Island Redesign: Moving your house allows you to completely redesign your island’s layout. By strategically placing your house in a new location, you can create a more aesthetically pleasing island with improved flow and organization. This gives you the opportunity to create a more cohesive and visually appealing environment.
2. Personalization: Moving your house lets you start fresh and personalize your living space once again. You can experiment with new furniture arrangements, decorations, and themes to truly make your house your own. Enjoy the creative process of designing and decorating your new home in a way that reflects your unique style and personality.
3. Island Expansion: Moving your house can create space for island expansion. By carefully selecting the new location, you can free up land for other projects such as additional villager houses, shops, recreational areas, or natural features like waterfalls or orchards. This allows you to further develop your island and make it a thriving and dynamic community.
4. Improved Accessibility: Changing the location of your house can improve accessibility to key areas of your island. You can strategically position your house closer to amenities such as the resident services building, shops, or public spaces, making it more convenient to access and interact with these areas. This can save you time and make your island experience more efficient.
5. Fresh Perspectives: Moving your house offers a fresh perspective on your island. It allows you to experience your surroundings from a new angle, uncovering hidden details and appreciating the beauty of different areas. This change of scenery can reinvigorate your enjoyment of the game and open up new possibilities for exploration and creativity.
6. Social Interaction: Moving your house can also have a positive impact on social interaction with friends and visitors. A new house location may provide opportunities for unique photo spots, tour routes, or gathering areas for friends on your island. It can inspire collaborative island projects and foster shared experiences with other players.
By moving your house in Animal Crossing, you can enjoy the benefits of island redesign, personalization, expanded possibilities, improved accessibility, fresh perspectives, and enhanced social interaction. Embrace the excitement of creating a customized living space that perfectly complements your dream island vision.
Frequently Asked Questions about Moving Your House in Animal Crossing
Moving your house in Animal Crossing can bring up a lot of questions. Here are some frequently asked questions and their answers to help clarify the process:
1. Can I move my house multiple times?
Yes, you have the ability to move your house multiple times. However, each move comes with a cost, so it’s important to consider the financial implications and plan your moves strategically.
2. Do I need to pack up my items before moving?
Yes, before moving your house, you need to remove all furniture, decorations, and items from inside and outside your house. Pack them up in your inventory or storage so that they can be easily placed back once the move is complete.
3. Can I choose any location for my new house?
Tom Nook will provide you with a selection of available house locations on your island. You can choose from these options, taking into account factors such as proximity to key areas, aesthetic appeal, and desired expansion space.
4. Can I move other buildings on my island?
Currently, in Animal Crossing: New Horizons, you cannot move other buildings aside from your own house. However, you can demolish and rebuild structures like the resident services building or moveable structures like bridges and inclines.
5. How long does the house-moving process take?
Moving your house typically takes one day to complete. During this time, your house will be packed up, and you won’t have access to it. Once the move is done, you can start unpacking and decorating in your new location.
6. Do I need to pay off any outstanding loans before moving?
If you have any outstanding loans from previous house upgrades, you may need to pay them off before moving your house. Talk to Tom Nook to get a clear understanding of any additional financial obligations.
7. What happens to my exterior design after moving?
When you move your house, your exterior design, including any custom designs, will be preserved. You can easily reapply those designs to the new exterior of your house once the move is complete.
8. Will my reactions, DIY recipes, and catalog reset after moving?
No, moving your house does not affect your reactions, DIY recipes, or catalog. All your progress and unlocked items will remain intact.
9. Can I time travel to speed up the move process?
If you’re comfortable with time traveling, adjusting your in-game clock can speed up the house relocation process. However, keep in mind that time traveling can have implications on other game mechanics and events.
10. Can I change my mind after moving my house?
Unfortunately, once you confirm the move, you cannot change your decision. Be sure to carefully consider your new house location before proceeding.
These are some common questions players have when it comes to moving their house in Animal Crossing. If you still have any specific concerns, it’s always a good idea to reach out to Tom Nook or consult with fellow players for more information.