
Understanding the Sightmark Magnifier
Understanding the Sightmark Magnifier
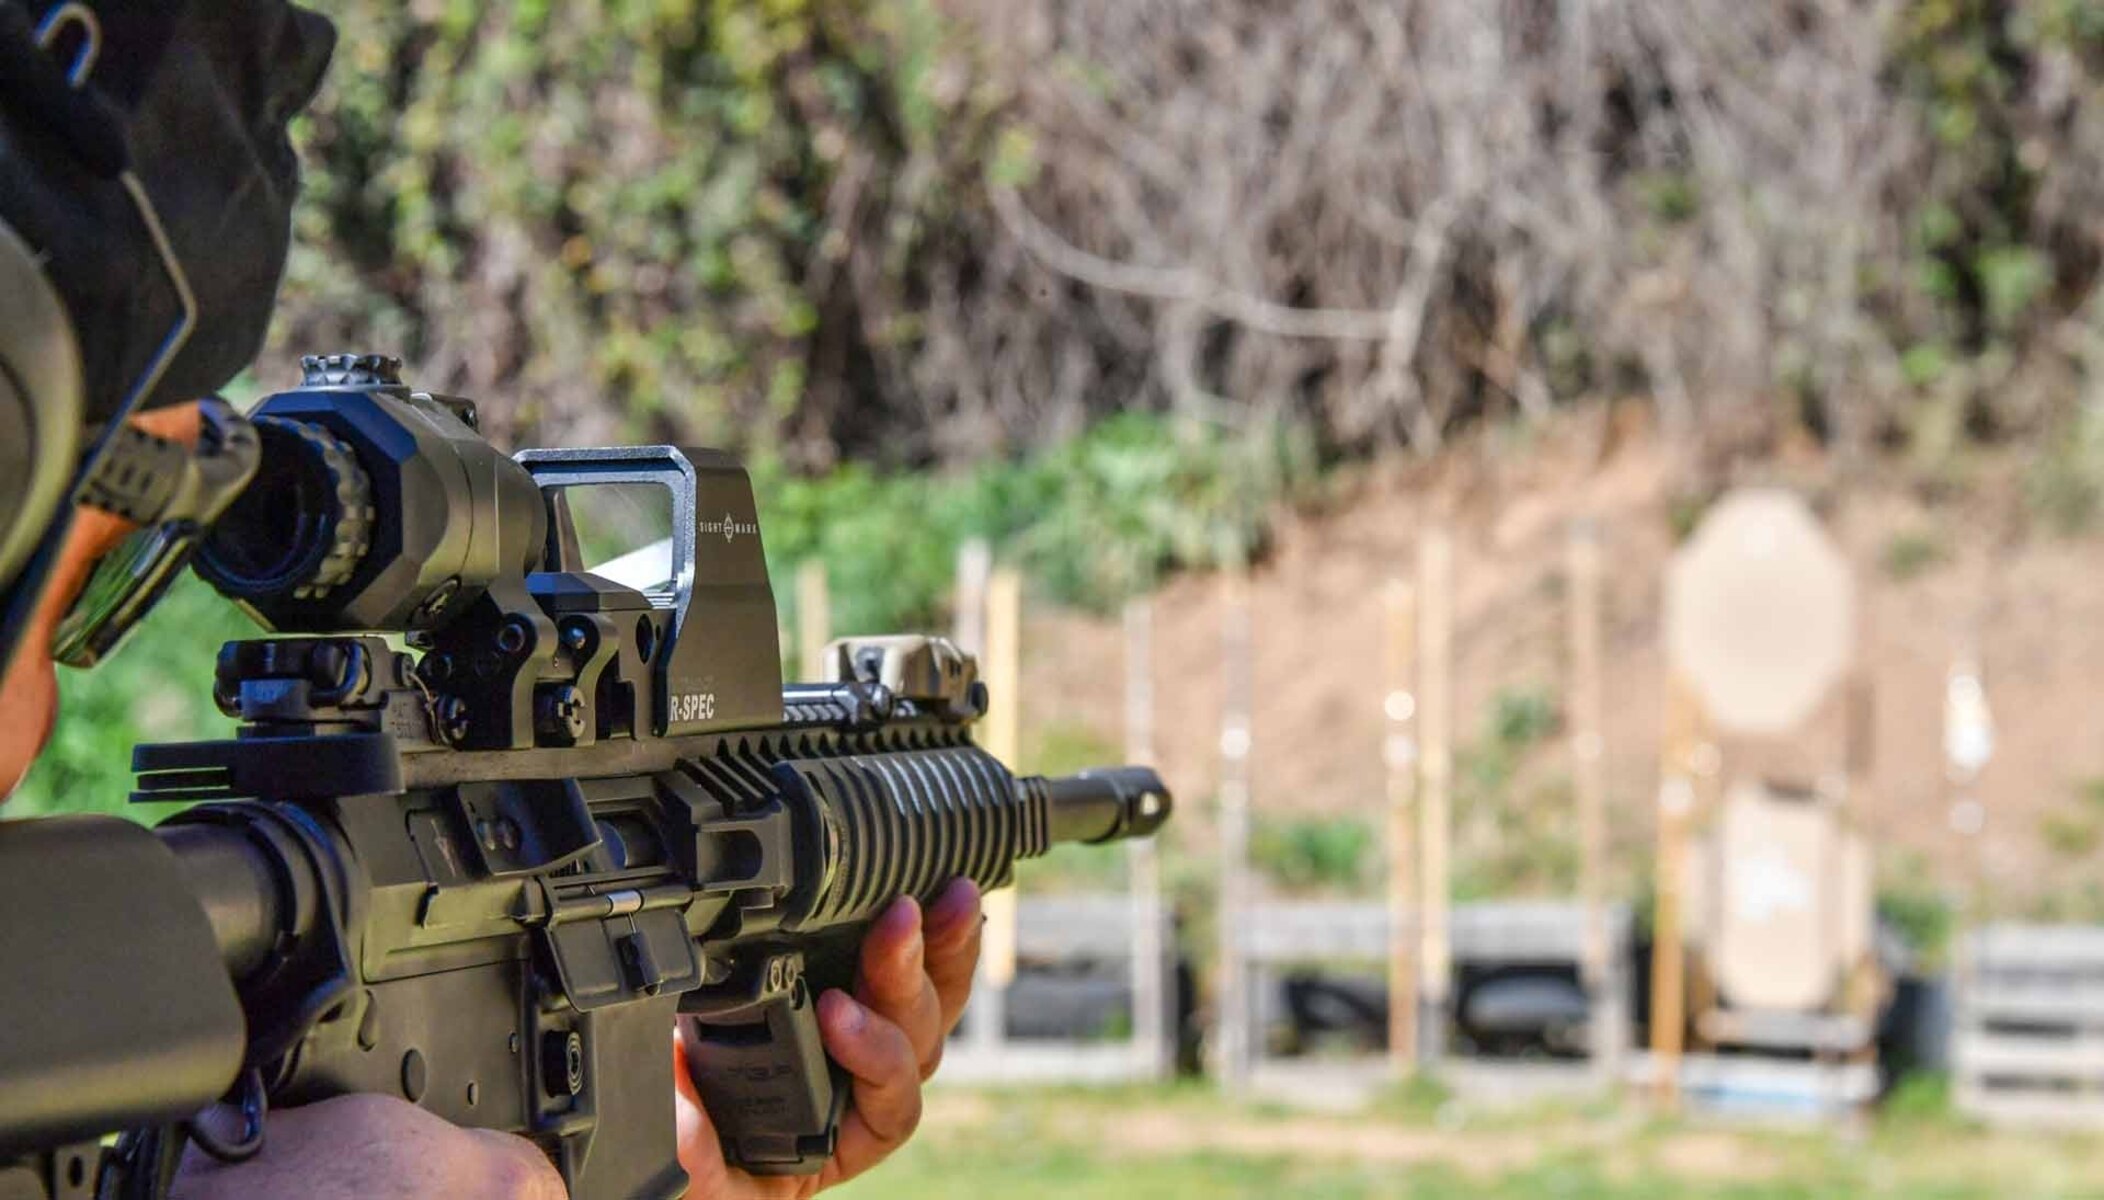
The Sightmark Magnifier is an exceptional optical accessory designed to enhance the accuracy and precision of your firearm. This magnifier is engineered to provide a 3x magnification, allowing shooters to acquire targets at extended ranges with improved clarity. It is commonly used in conjunction with red dot or holographic sights to amplify the sight picture, making it an invaluable tool for both recreational and tactical shooting.
The magnifier is constructed with high-quality materials, ensuring durability and reliability in various environmental conditions. Its compact and lightweight design makes it convenient to mount and use alongside compatible sights, providing shooters with versatility and adaptability in different shooting scenarios.
One of the key features of the Sightmark Magnifier is its flip-to-side mount, which enables quick transition between magnified and non-magnified views. This functionality is especially beneficial in dynamic shooting situations, where rapid target acquisition and engagement are essential.
Furthermore, the magnifier is equipped with multi-coated optics, which contribute to enhanced light transmission and image clarity. This optical system minimizes glare and distortion, delivering a crisp and vivid sight picture for improved aiming and shooting precision.
Overall, the Sightmark Magnifier stands out as a valuable asset for shooters seeking to extend their effective range and optimize their shooting performance. Its robust construction, user-friendly design, and optical excellence make it a reliable companion for both recreational and professional shooters, elevating the shooting experience to new levels of accuracy and confidence.
Preparing for Zeroing
Before zeroing the Sightmark Magnifier, it is essential to ensure that the firearm and associated optics are properly prepared for the zeroing process. Here are the key steps to consider:
- Secure Mounting: Verify that the magnifier and the accompanying sight are securely mounted on the firearm. Any loose fittings or misalignments can significantly impact the zeroing process and compromise the accuracy of the sight picture.
- Functional Check: Conduct a functional check of the firearm and the magnifier to confirm that all components are in working order. This includes inspecting the mounting hardware, adjusting the eye relief, and verifying the functionality of the magnification mechanism.
- Stable Shooting Platform: Choose a stable shooting platform, such as a shooting bench or a supported prone position, to minimize external factors that could affect the zeroing process. A stable shooting platform facilitates consistent and precise adjustments to the sight alignment.
- Environmental Considerations: Take into account environmental factors such as wind, lighting conditions, and ambient temperature, as these variables can influence the bullet trajectory and impact point. Adjust the zeroing process accordingly to compensate for environmental influences.
- Clear Sight Picture: Ensure that the sight picture through the magnifier is clear and free from obstructions. Clean the optics if necessary and adjust the focus to achieve a sharp and well-defined sight picture before commencing the zeroing procedure.
By meticulously preparing the firearm and optics for zeroing, shooters can establish a solid foundation for the zeroing process, setting the stage for precise adjustments and accurate calibration of the Sightmark Magnifier.
Setting Up the Target
Properly setting up the target is a crucial aspect of zeroing a Sightmark Magnifier to achieve accurate and consistent results. Consider the following steps when preparing the target for zeroing:
- Target Distance: Select an appropriate distance for zeroing the magnifier. The distance will depend on the intended use of the firearm and the magnifier, with common distances ranging from 25 to 100 yards for rifles. Ensure that the chosen distance aligns with the typical engagement range for the specific shooting application.
- Stable Target Mounting: Secure the target on a stable and robust mounting system to prevent excessive movement or instability during the zeroing process. A stable target setup contributes to consistent and reliable feedback on shot placement, aiding in precise adjustments to the sight alignment.
- Target Size and Type: Use a target that provides clear aiming points and distinct markings to facilitate precise adjustments. Consider utilizing targets with grid patterns, bullseye designs, or reference points that allow for accurate assessment of shot placement and sight alignment.
- Environmental Considerations: Account for environmental conditions when setting up the target. Ensure that the target area is well-lit for optimal visibility, and take into consideration factors such as wind direction and speed, which can affect bullet trajectory and impact point.
- Backstop and Safety Measures: Establish a secure backstop to safely capture and contain the projectiles. Prioritize safety by ensuring that the chosen shooting location provides a clear and safe firing zone, minimizing the risk of errant shots or ricochets.
By meticulously setting up the target in accordance with these considerations, shooters can create an environment conducive to precise zeroing of the Sightmark Magnifier, enabling effective adjustments to the sight alignment and ensuring consistent, accurate shot placement.
Making Adjustments
When zeroing a Sightmark Magnifier, the process of making adjustments to the sight alignment is critical for achieving precise and consistent shot placement. Here’s a detailed guide on making effective adjustments:
- Initial Shot Grouping: Begin by firing a series of shots at the target to establish a clear grouping pattern. This initial grouping provides valuable insight into the point of impact and allows for a baseline assessment of the sight alignment’s deviation from the desired zero point.
- Assessing Point of Impact: Analyze the point of impact in relation to the intended point of aim. Determine the direction and magnitude of the necessary adjustments based on the observed shot placement, noting any consistent deviations from the desired zero point.
- Adjustment Tools: Utilize the appropriate adjustment tools provided with the magnifier or the associated sight to make precise adjustments to the sight alignment. Common adjustment mechanisms include windage and elevation turrets, which allow for incremental corrections in horizontal and vertical planes, respectively.
- Incremental Corrections: Implement incremental corrections to the sight alignment based on the observed shot grouping and point of impact. Make deliberate and measured adjustments to minimize overcorrection and facilitate fine-tuning of the sight alignment for optimal zeroing.
- Consistent Shot Placement: Continuously assess the shot placement after each adjustment, ensuring a consistent and methodical approach to refining the sight alignment. Strive for tight shot groupings that progressively converge towards the desired zero point, indicating the effective calibration of the magnifier.
By methodically making adjustments in response to the observed shot placement, shooters can iteratively refine the sight alignment and zero the Sightmark Magnifier with precision, ultimately achieving consistent and accurate shot placement at the designated distance.
Confirming Zero
After making adjustments to zero the Sightmark Magnifier, it is imperative to confirm the zero by conducting a series of validation steps to ensure the accuracy and consistency of the sight alignment. The following measures are essential for confirming zero:
- Validation Shots: Fire a series of validation shots at the target to assess the consistency of the point of impact. Analyze the shot placement to determine if the adjustments have effectively aligned the magnifier with the intended zero point.
- Shot Grouping Analysis: Evaluate the shot groupings to ascertain their proximity to the desired zero point. Consistent and tightly clustered shot groupings indicate that the magnifier is accurately zeroed and capable of delivering precise shot placement at the designated distance.
- Verification at Different Distances: Validate the zero by testing the magnifier’s performance at varying distances within the intended engagement range. Confirm that the sight alignment maintains its accuracy and consistency across different distances, ensuring its reliability in diverse shooting scenarios.
- Environmental Variability: Consider environmental factors such as wind, lighting conditions, and temperature variations during the validation process. Assess the magnifier’s performance under different environmental conditions to verify its resilience and consistent zeroing capabilities.
- Reticle Alignment Check: Verify the alignment of the reticle within the magnifier’s field of view to ensure that it remains centered and parallel to the firearm’s bore axis. A properly aligned reticle is indicative of a well-zeroed magnifier, contributing to accurate target acquisition and engagement.
By meticulously confirming the zero through comprehensive validation measures, shooters can instill confidence in the accuracy and reliability of the Sightmark Magnifier, ensuring that it is optimally zeroed and capable of delivering consistent and precise shot placement in various shooting conditions.
Final Thoughts
Zeroing a Sightmark Magnifier is a meticulous process that demands attention to detail, patience, and a methodical approach. By understanding the intricacies of the magnifier and following a systematic zeroing procedure, shooters can elevate their shooting performance and maximize the effectiveness of this optical enhancement tool.
Throughout the zeroing process, it is essential to prioritize safety and adherence to proper firearms handling practices. Maintaining a safe and controlled shooting environment is paramount, ensuring that the zeroing process is conducted responsibly and without compromising the well-being of individuals or property.
Additionally, the zeroing process serves as an opportunity for shooters to familiarize themselves with the performance characteristics of the Sightmark Magnifier and its seamless integration with compatible sights. This familiarity fosters confidence in utilizing the magnifier to its full potential, empowering shooters to engage targets with precision and clarity across varying distances and shooting scenarios.
Furthermore, the discipline and precision required for zeroing the magnifier translate into enhanced marksmanship skills and a deeper understanding of ballistic principles. By honing the zeroing process, shooters can refine their ability to make accurate adjustments, interpret shot placement data, and adapt to changing environmental conditions, ultimately honing their proficiency as skilled marksmen.